This article is translated by @jcasman from the original here. The author is Kohji Ue (@ueue).
INTRODUCTION
Hello! I’m @ueue of Ricoh. As a member of RICOH THETA Plug-in Developer Community [JAPANESE] I will be providing technical information for THETA plug-ins.

In this article, I will explain, step-by-step, how to switch THETA to Developer Mode. By switching to Developer Mode, it is possible to debug and install your own plug-ins. This article is written for Mac users, but the steps are about the same for Window users.
For people wondering “What are THETA plug-ins?” here is a simple explanation.
RICOH THETA V has an Android based OS. Therefore, functionality can be added by installing apps. These apps are called THETA plug-ins.
For a more detailed explanation, please see the information at the link below. RICOH Blog Post: “Theta Plug-in Partner Program Begins”
OK, I’ll dig into the explanation of switching THETA to Developer Mode.
MAIN STEPS
- Purchase a RICOH THETA V
- Register for the RICOH THETA Plug-in Program
- Install the RICOH THETA desktop app
- Upgrade THETA firmware to the latest version
- Switch Developer Mode to ON
- Confirm the connection with adb
PURCHASE A RICOH THEATA V
Since you are reading this, I’m sure you already have a THETA. In order to develop plug-ins, you must have a RICOH THETA V.
I repeat, you must have a THETA V. 
As of now (July 2, 2018), the only model capable of plug-in installation, with an Android based OS, is the latest model, the RICOH THETA V. These previous models listed below are not capable of installing or developing plug-ins. Please be very careful.
- RICOH THETA (2013)
- RICOH THETA m15
- RICOH THETA S
- RICOH THETA SC
From here on out, in this article “THETA” means RICOH THETA V.
REGISTER FOR THE RICOH THETA PLUG-IN PROGRAM
In order to switch a THETA to Developer Mode, you need to register for the RICOH THETA Plug-in Partner Program (Referred to as “partner program” from here on.)
The registration form is here.
Here is how the partner program registration works:
- Register your email address using the registration form
- A URL and password for the registration site will be sent to the registered email address
- Fill out the necessary information for the registration site and complete the registration
- Confirmation that it has been received will be sent by email
- The registration confirmation email will be send within five business days
In Step 3, you need to enter the serial number for the THETA you will be using.
In Step 5, please note that you can only switch on the Developer Mode after you receive the registration confirmation email.
Please be aware that the registered THETA will no longer be eligible for standard end-user support.
INSTALL THE RICOH THETA DESKTOP APP
At this time (July 2018), you need to have a desktop machine to switch your THETA to Developer Mode. You cannot do it with a smartphone.
Please download the basic desktop application from here.
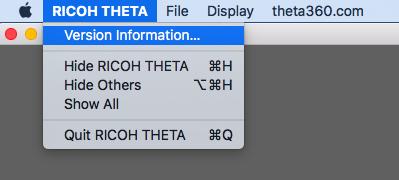
If you have already installed the basic desktop app, the latest version will be installed automatically. Just to make sure, please check the app’s version and confirm it is Version 3.5.0 or later, by checking the upper left menu [RICOH THETA] → [Version Information…].
UPGRADE THETA FIRMWARE TO THE LATEST VERSION
The desktop app is used to confirm your THETA firmware version and to update it. Please use a USB cable to connect your THETA to your desktop machine.
For the full procedure, please see Updating the Camera Firmware Using a Computer.
SWITCH DEVELOPER MODE TO ON
Please follow the procedures here after your partner program registration is complete. If you are not done with registration, please wait!
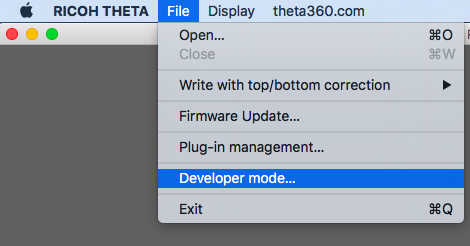
When your registration is complete, connect your THETA to your desktop machine using a USB cable. Start up the desktop app and select [File] → [Developer mode…].
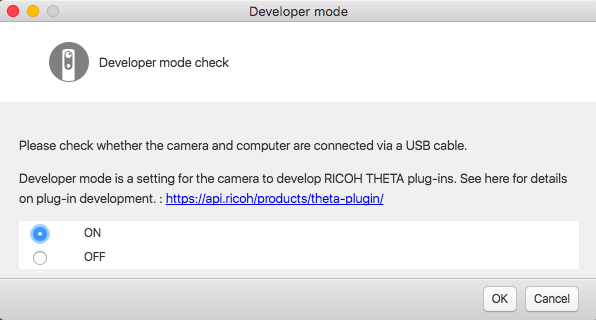
As in the screenshot here, select ON and press OK.
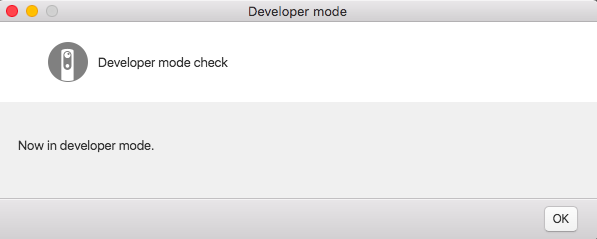
If you see the message “Now in Developer mode” then you’re all set!
CONFIRM THE CONNECTION WITH adb
THETA should now be in Developer Mode, but to be sure you can confirm it using the Android Debug Bridge (adb) command. By switching on Developer Mode, adb use is possible, and you can use multiple adb commands, like installing an app and debugging.
Please check this link if you want to know more about adb.
In this segment, adb commands related to Android Studio are used. If you have not installed Android Studio, please check here and install it. To use adb, Android Studio is not necessary. However, for plug-in development, you have to import the RICOH THETA Plug-in SDK to Android Studio to proceed with development. So, if you have not installed Android Studio, please do so.
After Android Studio is installed and started up, adb can be used. Please run the following command.
$HOME/Library/Android/sdk/platform-tools/adb devices -l
If the serial number of your THETA V will be displayed in the list of devices, as show below, then Developer Mode has successfully implemented.
CONCLUSION
I have explained how to switch RICOH THETA V to Developer Mode. In the next article in the RICOH THETA Plug-in Developer Community, we are planning to explain how to import the RICOH THETA Plug-in SDK into Android Studio and install the sample app onto your THETA.
If you are interested in THETA plug-in development, please register for the partner program!
Please be aware that the THETA with its serial number registered with the program will no longer be eligible for standard end-user support.
For detailed information regarding partner program please see here.
The registration form is here.