The first nighttime virtualforest.io image is up. Let’s hope I can fight the cold of this way.
Koen, is it just for keeping the camera warm? I guess the images are black, correct? How often do you think you need to take pictures to keep the heat in the enclosure warm enough?
–Jesse
It’s looks like the same USB API is available with the THETA V.
From RICOH THETA V and RICOH THETA S firmware v01.42, camera control such as shooting over USB connection is available.
2 Likes
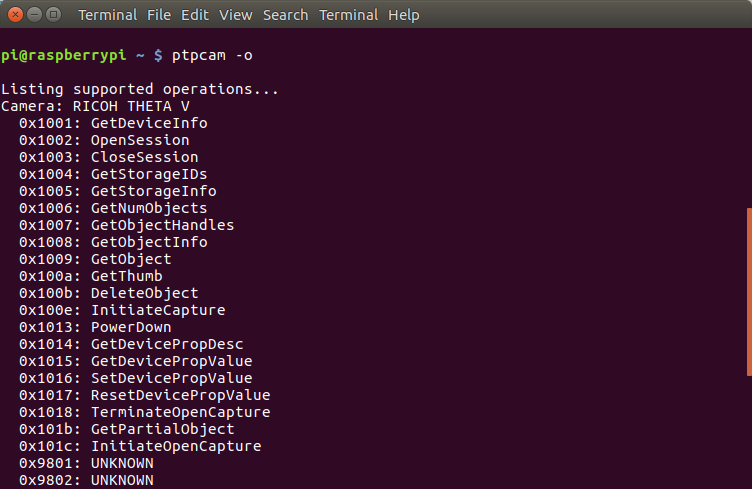
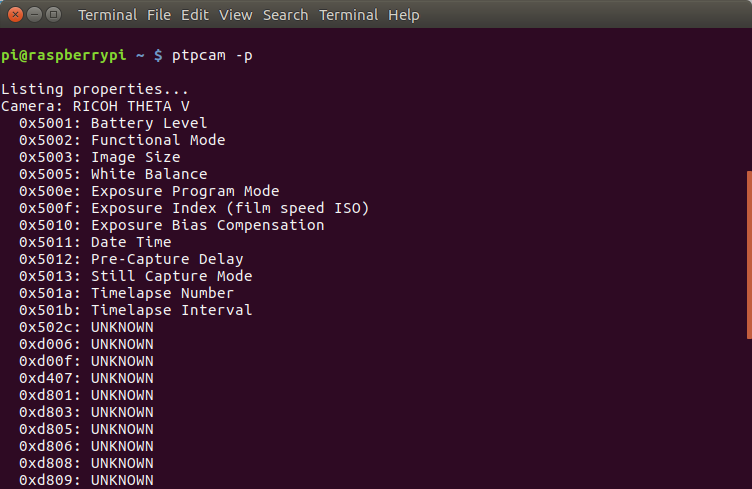
THETA V and USB API Usage
Hardware and Software
- Raspberry Pi 2
- Raspian Jessie

Not returning capture status, but no problem. It takes several seconds to stitch the picture.
Verify picture was taken. It was.
Download to Raspberry Pi

Change to Video Mode

Start Video Capture

Stop Video Capture

Verify video files were taken

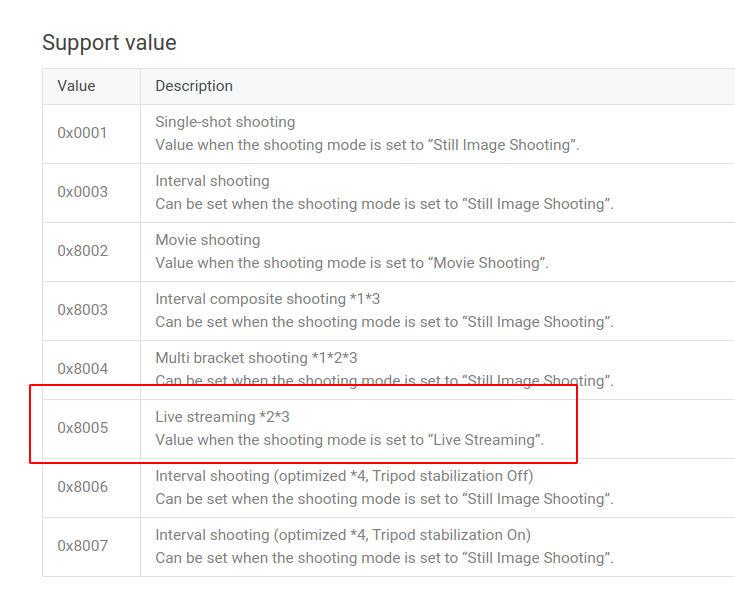
Set To Live Streaming Mode
NOTE: Live streaming can’t be received on a Raspberry Pi due to lack of Linux kernel support of UVC 1.5.
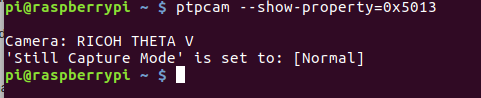
pi@raspberrypi ~/Pictures $ ptpcam --set-property=0x5013 --val=0x8005

Camera: RICOH THETA V
'Still Capture Mode' is set to: [Normal]
Changing property value to 0x8005 [(null)] succeeded.
Set back to still image mode
pi@raspberrypi ~/Pictures $ ptpcam --set-property=0x5013 --val=0x0001

Camera: RICOH THETA V
'Still Capture Mode' is set to: 0x8005 (-32763)
Changing property value to 0x0001 [(null)] succeeded.
Community Usage: Continuous shooting in still image mode
API: InitiateOpenCapture
I heard from a community member that they were able to use InitiateOpenCapture by specifying the first two parameters as 0 and a third parameter, which was set to 1.
Example
ptpcam -R 0x101c,0,0,1.
Hardware and software:
- Raspbian Jessie
- kernel version 4.9.51-v7+
- libptp2-1.2.0
- Raspberry Pi 3.
1 Like
Install Instructions for ptpcam
I just did a clean install of ptpcam on a Raspberry Pi Zero. Everything worked great.
Requirements
- Raspberry Pi (tested on Raspberry Pi 2, Raspberry Pi 3 and Raspberry Pi Zero)
- Raspbian Jessie
- THETA V, THETA S, or THETA SC. Device must be powered on
- USB cable to connect THETA to Rpi
- libptp2-1.2.0 source files (download)
- libusb-1.0.21 source files (download)
- libudev-dev Raspian package
- basic developer tools such as make, gcc, and associated libraries
Note: Linux on x86 has been reported to work, but we have not documented it as extensively
Instructions
-
install libudev-dev with
sudo apt-get install libudev-dev -
build and install libusb from source
./configure
make
sudo make install -
build and install libptp from source
-
ptpcam will be in
/usr/local/bin. Add this to yourPATHexport PATH=$PATH:/usr/local/bin
-
libptp2 will be in
/usr/local/lib. Add this to yourLD_LIBRARY_PATHexport LD_LIBRARY_PATH=$LD_LIBRARY_PATH:/usr/local/lib
-
add the two lines for PATH and LD_LIBRARY_PATH to your
.bashrcfile or/etc/environment -
Use ptpcam as root
 $ sudo bash
 # ptpcam -i
1 Like
Full Install Guide From Raspbian to libptp - Step by Step
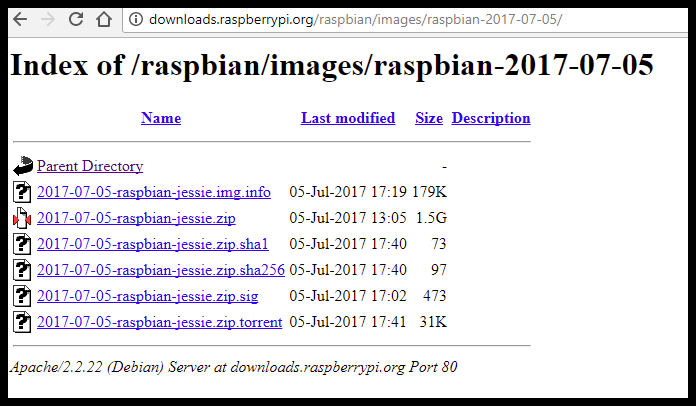
Download Raspbian jessie
Available from the official raspberrypi.org image archive.
I’m using raspian-2017-07-05
Burn image to microSD card
Download Etcher. Follow onscreen directions

Connect Raspberry Pi to Workstation
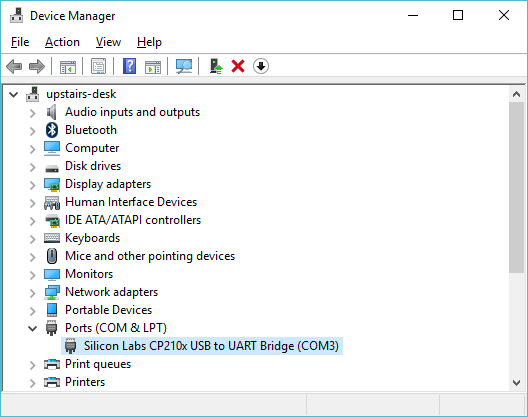
In my case, I’m using a CP210x USB to UART Bridge. This is a $5 device that allows the Raspberry Pi to be powered directly from the GPIO pins and allows connection to my Windows 10 workstation via USB.
The picture below shows the full setup I use to program the Pi. To deploy the Pi, disconnect the wires connected to the GPIO pins and attach a power source to the Pi, either USB or header (the GPIO group) pins.
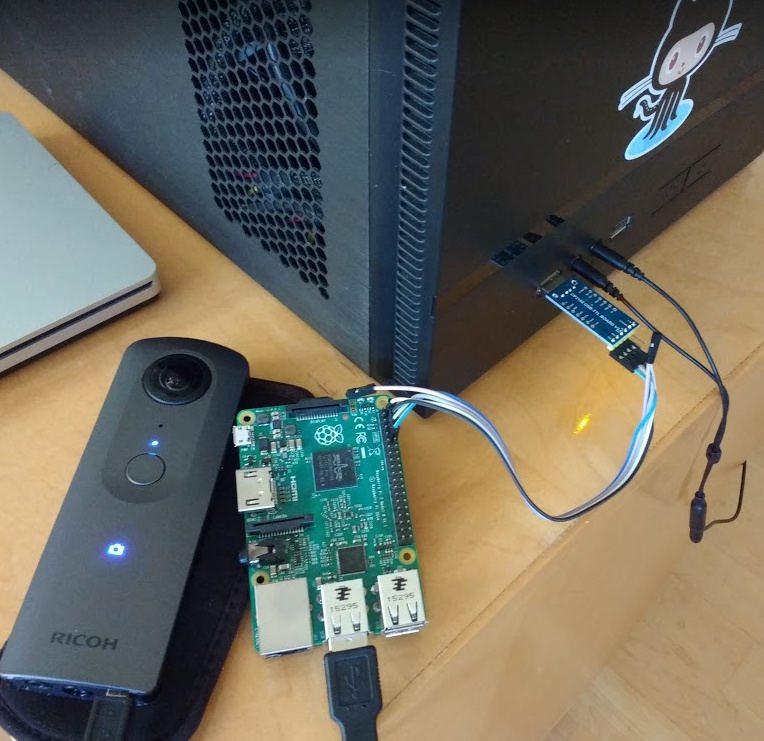
Most people will probably connect to the Raspberry Pi with Ethernet or WiFi and ssh.
If you use a USB cable to connect to the Raspberry Pi, here are the pins on the Pi.
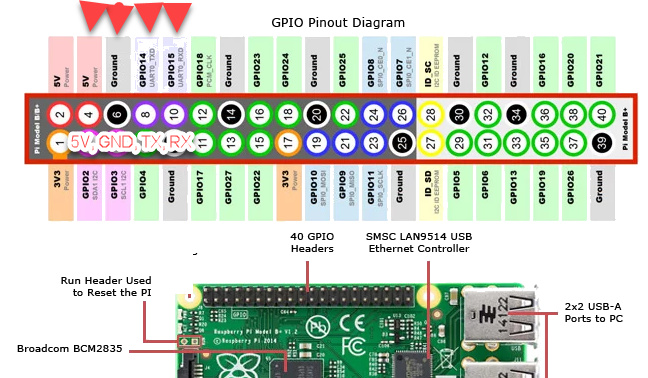
Match the RX and TX pins on the Pi to the RX and TX pins to your USB to TTL bridge.
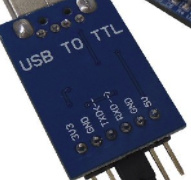
If you want to power the Pi from the USB to TTL connector, then also plug in the 5V and GND.
You may need to mount the microSD card of the Raspberry Pi on your workstation and edit the file /boot/config.txt and add enable_uart= to the bottom of the file.
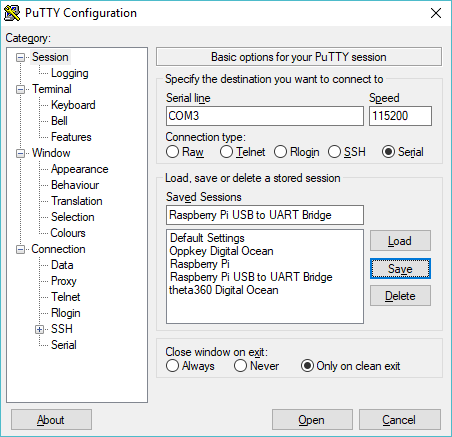
I can now log into the Raspberry Pi from Windows without knowing the IP address or having configure Windows to serve up an IP address.
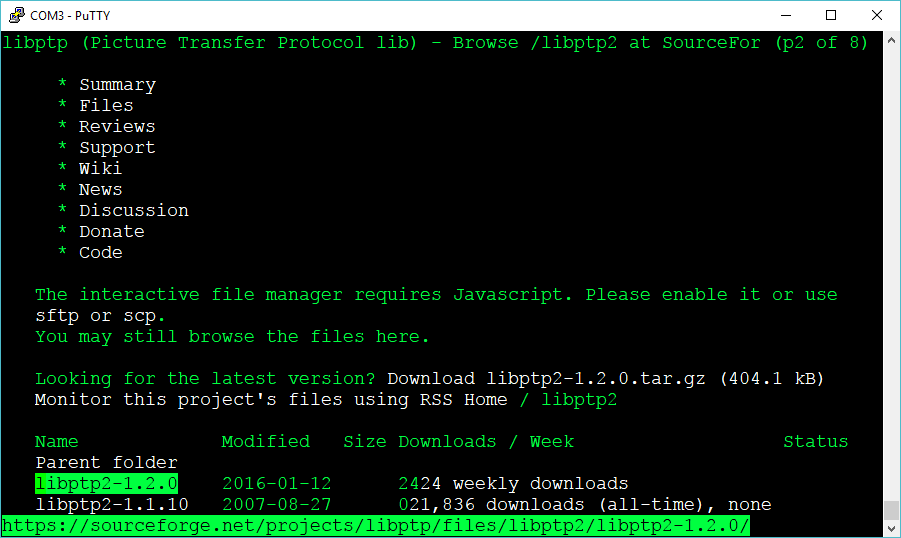
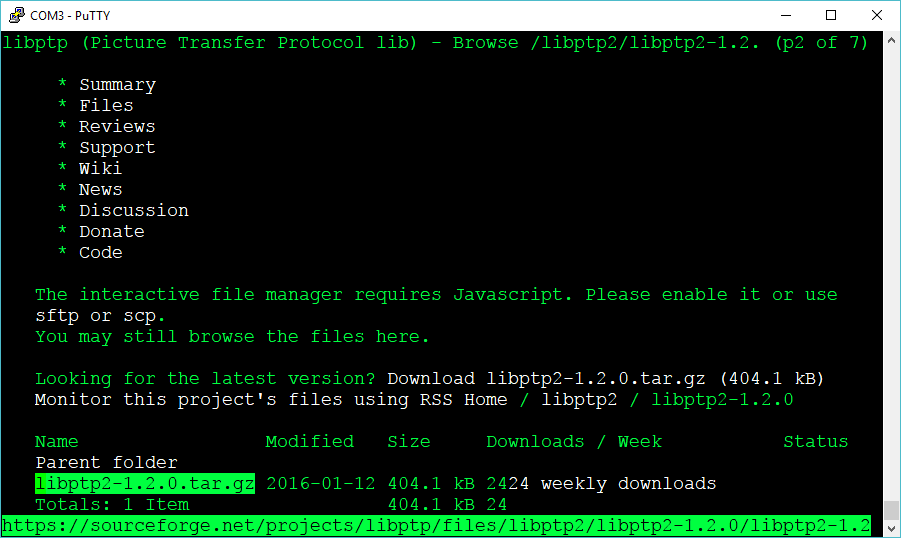
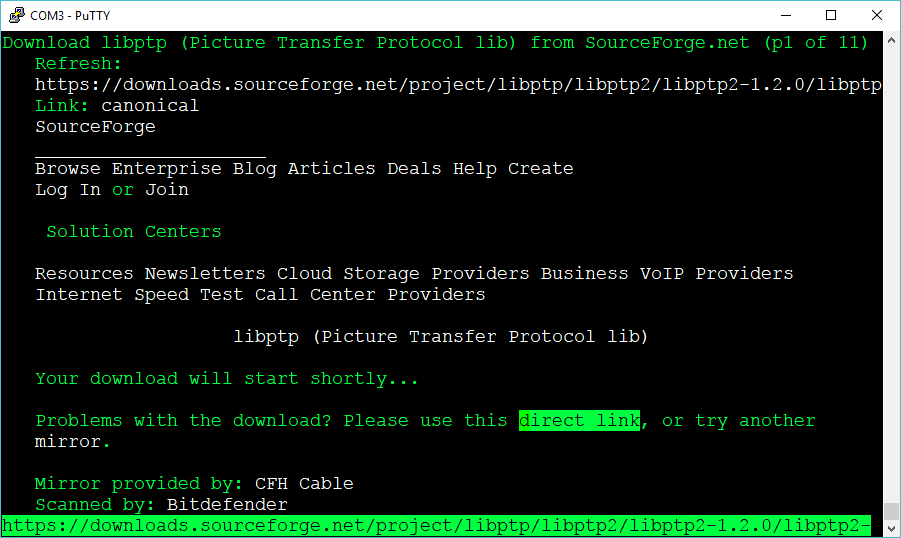
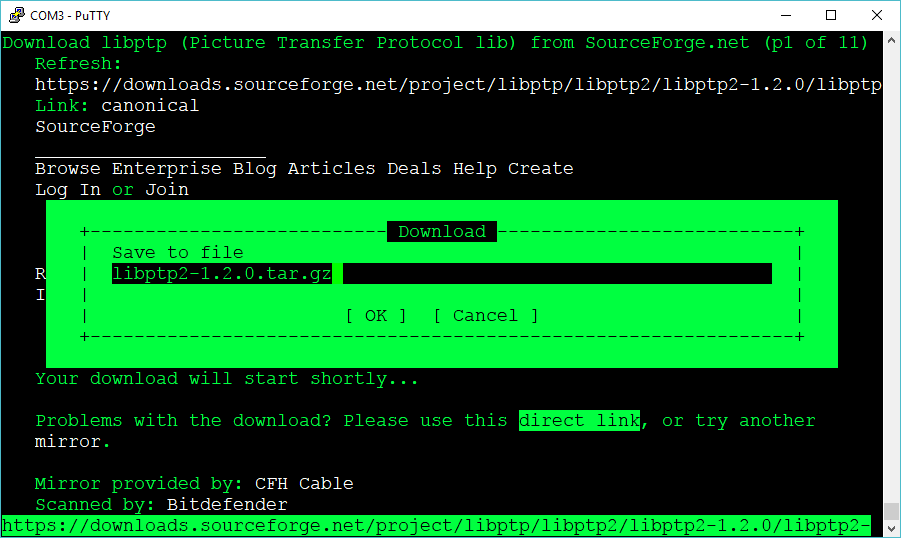
Download libptp2 from Sourceforge
I have Ethernet connected and my Raspberry Pi is connected to the Internet.
I’m using the text browser links to download libptp2
  pi@raspberrypi:~$ sudo apt-get install links

  pi@raspberrypi:~$ links https://sourceforge.net/projects/libptp/files/libptp2/

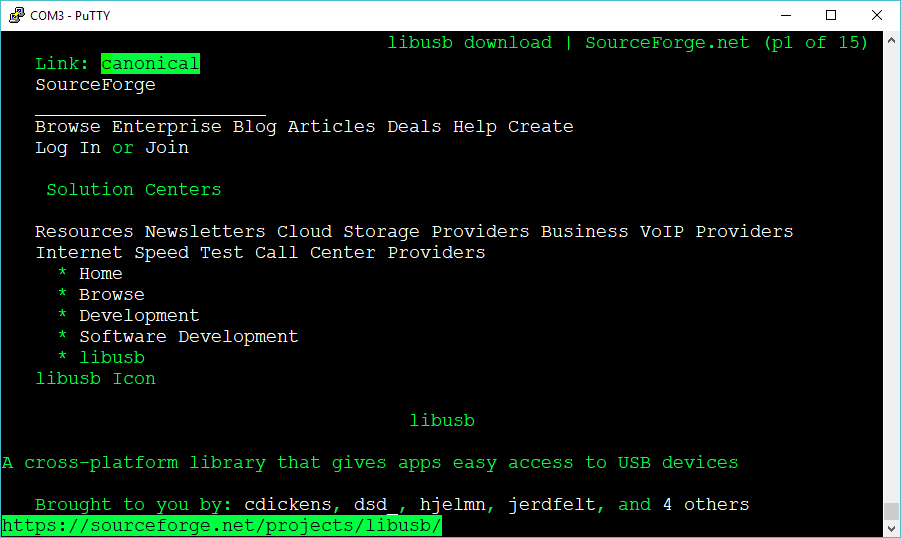
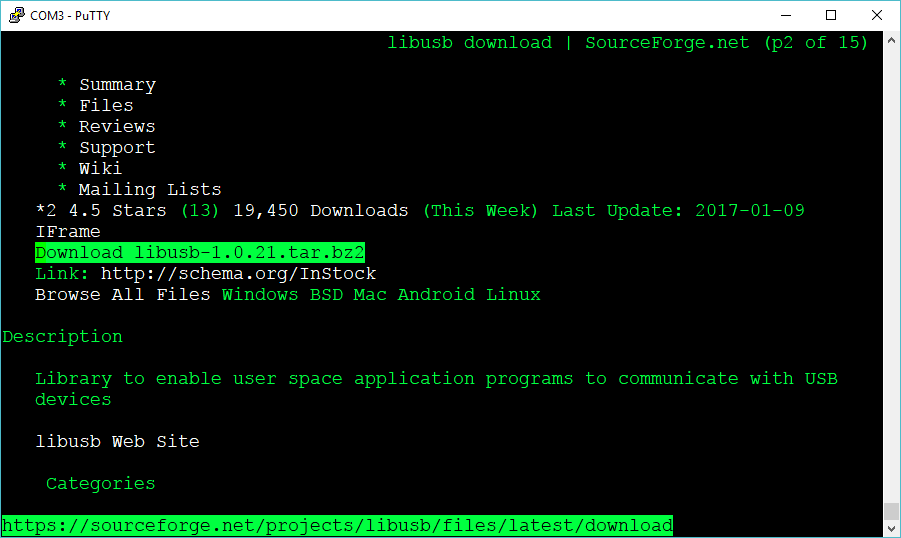
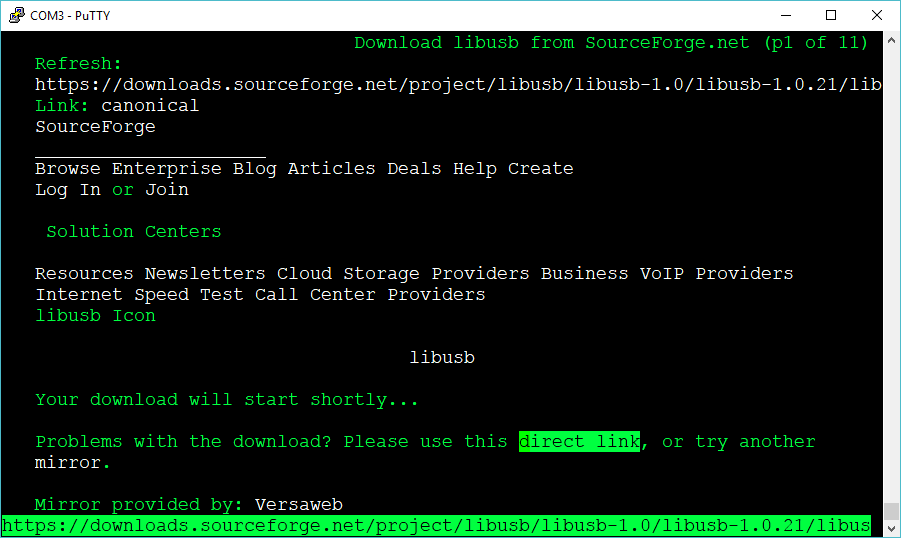
Download libusb from Sourceforge

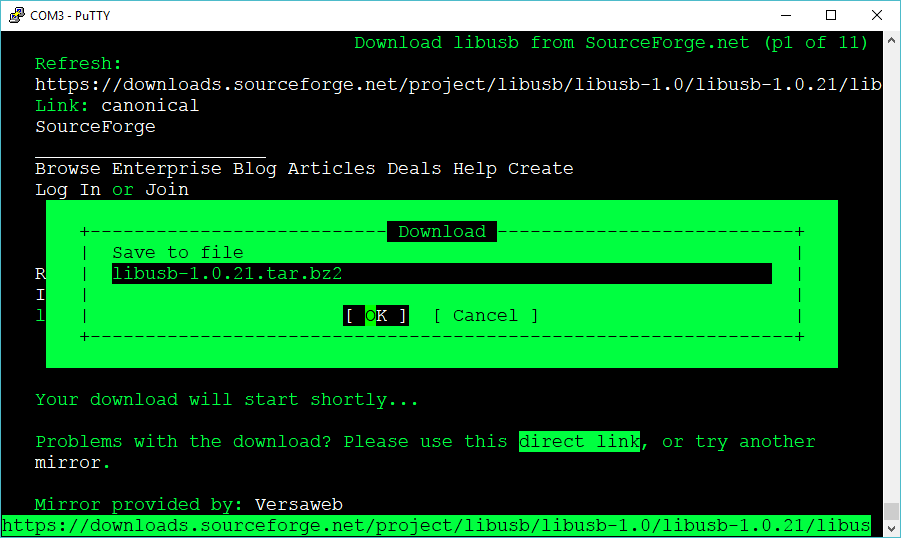
Verify and Extract Files
pi@raspberrypi:~/Development$ ls -l
total 992
-rw-r--r-- 1 pi pi 404105 Oct  4 04:11 libptp2-1.2.0.tar.gz
-rw-r--r-- 1 pi pi 607417 Oct  4 04:14 libusb-1.0.21.tar.bz2
pi@raspberrypi:~/Development$

pi@raspberrypi:~/Development$ tar xvf libusb-1.0.21.tar.bz2
libusb-1.0.21/
libusb-1.0.21/aclocal.m4

pi@raspberrypi:~/Development$ cd libusb-1.0.21/
pi@raspberrypi:~/Development/libusb-1.0.21$ ls
aclocal.m4  config.guess  COPYING   install-sh        Makefile.am  PORTING
android     config.h.in   depcomp   libusb            Makefile.in  README
AUTHORS     config.sub    doc       libusb-1.0.pc.in  missing      tests
ChangeLog   configure     examples  ltmain.sh         msvc         TODO
compile     configure.ac  INSTALL   m4                NEWS         Xcode
pi@raspberrypi:~/Development/libusb-1.0.21$
install libudev-dev
Running ./configure for libusb generated this error.
checking libudev.h usability... no
checking libudev.h presence... no
checking for libudev.h... no
configure: error: "udev support requested but libudev not installed"
pi@raspberrypi:~/Development/libusb-1.0.21$
Install libudev-dev
$ sudo apt-get install libudev-dev
Reading package lists... Done
Building dependency tree
Run configure again.
Then run make.
$ make
make  all-recursive
make[1]: Entering directory '/home/pi/Development/libusb-1.0.21'
Making all in libusb
make[2]: Entering directory '/home/pi/Development/libusb-1.0.21/libusb'
  CC       libusb_1_0_la-core.lo
  CC       libusb_1_0_la-descriptor.lo
....
make[2]: Leaving directory '/home/pi/Development/libusb-1.0.21/libusb'
Making all in doc
make[2]: Entering directory '/home/pi/Development/libusb-1.0.21/doc'
make[2]: Nothing to be done for 'all'.
make[2]: Leaving directory '/home/pi/Development/libusb-1.0.21/doc'
make[2]: Entering directory '/home/pi/Development/libusb-1.0.21'
make[2]: Leaving directory '/home/pi/Development/libusb-1.0.21'
make[1]: Leaving directory '/home/pi/Development/libusb-1.0.21'
pi@raspberrypi:~/Development/libusb-1.0.21$
make install
Libraries have been installed in:
   /usr/local/lib

If you ever happen to want to link against installed libraries
in a given directory, LIBDIR, you must either use libtool, and
specify the full pathname of the library, or use the `-LLIBDIR'
flag during linking and do at least one of the following:
   - add LIBDIR to the `LD_LIBRARY_PATH' environment variable
     during execution
   - add LIBDIR to the `LD_RUN_PATH' environment variable
     during linking
   - use the `-Wl,-rpath -Wl,LIBDIR' linker flag
   - have your system administrator add LIBDIR to `/etc/ld.so.conf'
Check to make sure libusb is in /usr/local/lib
$ ls /usr/local/lib
libusb-1.0.a   libusb-1.0.so    libusb-1.0.so.0.1.0  pypy2.7    python3.4
libusb-1.0.la  libusb-1.0.so.0  pkgconfig            python2.7
Add /usr/local/lib to linker path
$ export LDFLAGS='-L/usr/local/lib/'
install libptp
Follow the same process of extract, configure, make, and sudo make install.
Extract
$ tar xvf libptp2-1.2.0.tar.gz
libptp2-1.2.0/
libptp2-1.2.0/m4/
make
 ....
cal/lib/ /home/pi/Development/libptp2-1.2.0/src/.libs/libptp2.so -L/usr/local/lib /usr/local/lib/libusb.so
make[2]: Leaving directory '/home/pi/Development/libptp2-1.2.0/src'
make[2]: Entering directory '/home/pi/Development/libptp2-1.2.0'
make[2]: Leaving directory '/home/pi/Development/libptp2-1.2.0'
make[1]: Leaving directory '/home/pi/Development/libptp2-1.2.0'
Test
root@raspberrypi:/home/pi/Development# export LD_LIBRARY_PATH=$LD_LIBRARY_PATH:/usr/local/lib
root@raspberrypi:/home/pi/Development# ptpcam -i
Camera information
==================
Model: RICOH THETA V
manufacturer: Ricoh Company, Ltd.
serial number: '00101082'
device version: 1.00.2
extension ID: 0x00000006
extension description: (null)
extension version: 0x006e
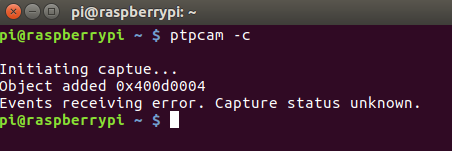
root@raspberrypi:/home/pi/Development# ptpcam -c
Initiating captue...
Object added 0x400d0004
Events receiving error. Capture status unknown.
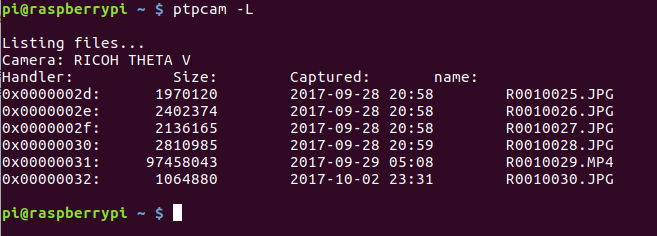
root@raspberrypi:/home/pi/Development# ptpcam -L
Listing files...
Camera: RICOH THETA V
Handler: Size: Captured: name:
0x0000002d: 1970120 2017-09-28 12:58 R0010025.JPG
0x0000002e: 2402374 2017-09-28 12:58 R0010026.JPG
0x0000002f: 2136165 2017-09-28 12:58 R0010027.JPG
0x00000030: 2810985 2017-09-28 12:59 R0010028.JPG
0x00000031: 97458043 2017-09-28 21:08 R0010029.MP4
0x00000032: 1064880 2017-10-02 15:31 R0010030.JPG
0x00000033: 722622498 2017-10-02 15:53 R0010031.MP4
0x00000034: 131377941 2017-10-02 15:57 R0010032.MP4
0x00000035: 1040761 2017-10-02 16:02 R0010033.JPG
0x00000039: 1295975 2017-10-03 22:00 R0010034.JPG
root@raspberrypi:/home/pi/Development#
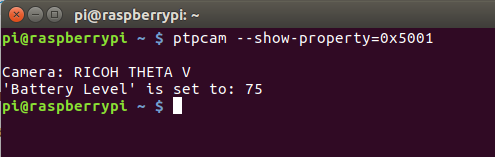
Check battery level
# ptpcam --show-property=0x5001

Camera: RICOH THETA V
'Battery Level' is set to: 70
root@raspberrypi:/home/pi/Development#
Set to video mode
# ptpcam --set-property=0x5013 --val=0x8002

Camera: RICOH THETA V
'Still Capture Mode' is set to: [Normal]
Changing property value to 0x8002 [(null)] succeeded.
root@raspberrypi:/home/pi/Development#
Note on old libusb
Depending on the configuration, ai needed to install an old libusb-0.1.12 to build libptp2.
# ls -l
total 1388
drwxr-xr-x  4 pi pi   4096 Oct  4 04:54 libptp2-1.2.0
-rw-r--r--  1 pi pi 404105 Oct  4 04:11 libptp2-1.2.0.tar.gz
drwxr-xr-x  7 pi pi   4096 Oct  4 04:52 libusb-0.1.12
-rw-r--r--  1 pi pi 389343 Oct  4 04:50 libusb-0.1.12.tar.gz
drwxr-xr-x 10 pi pi   4096 Oct  4 04:20 libusb-1.0.21
-rw-r--r--  1 pi pi 607417 Oct  4 04:14 libusb-1.0.21.tar.bz2
root@raspberrypi:/home/pi/Development#
Troubleshooting
Problem: libptp2.so.1: cannot open shared object file
pi@raspberrypi:~$ ptpcam -L
ptpcam: error while loading shared libraries: libptp2.so.1: cannot open shared object file: No such file or directory
Solution:
export LD_LIBRARY_PATH=$LD_LIBRARY_PATH:/usr/local/lib
Problem: ERROR: Could not open session!
pi@raspberrypi:~$ ptpcam -L

Listing files...
ERROR: Could not open session!
Solution:
change to root with sudo or sudo bash.
Problem: not working after reboot
Solution
add export LD_LIBRARY_PATH=$LD_LIBRARY_PATH:/usr/local/lib to your .bashrc file, both to your default user and to your home directory when you are logged in as root.
Problem: libptp build is failing
Solution
Try installing an older version of libusb such as libusb-0.1.12 to build libptp2.
Question Regarding Windows IoT Core
Has anyone attempted to use Windows IoT Core with the RICOH THETA V? One of the reasons I’m asking is because of the lack of full support for UVC 1.5 in the Linux kernel. This is preventing the Raspberry Pi with Raspbian from being used as a platform for live streaming with the THETA V.
I’m wondering if a Raspberry Pi with Windows IoT Core can display the THETA V video stream. Has anyone tried this?
I was planning to take a look at this:
https://developer.microsoft.com/en-us/windows/iot/samples/webcamapp
and this
The device needs to support UVC 1.5. The Linux kernel supports UVC 1.1 and can detect UVC 1.5, but can’t handle the video compression with UVC 1.5, thus making it unusable by mere mortals with the THETA V.
has anyone tried this?
Though, this thread doesn’t sound promising. From Aug 24, 2017, seems like lack of hardware graphics acceleration…
Oh, please, if MS is working on an updated Windows BSP for Raspberry Pi, please, please, add hardware graphics acceleration, audio through HDMI (and possibly OpenGL) so that RPi can become a useful platform in making it stream and play A/V, and do things like video face recognition for app security without having to resort to using Raspian.
Thursday, August 24, 2017 6:02 AM
In case anyone is trying to get the live stream on a Raspberry Pi, there’s been some success on Android and it’s theoretically possible to get it to work on the Rasbperry Pi. If you have an example, please post it.
Hey, so im trying to get a live stream over USB to an Android device on the THETA V. The app mentioned in this post in no longer on the play store THETA V 4K Live Mobile Streaming - Free App. Do you know what the current status is for USB streaming to Android? Thanks
You can use your mobile phone as a hotspot and stream to a RTMP server like Facebook or YouTube with the plug-in below:
http://theta360.guide/plugin-user-guide/wireless-stream/
You can get the 4K stream onto something like Oculus Go with webRTC.
I do not know of any public application that allows a USB cable to stream to an Android device.
I know people have successfully done this for their own work projects (source code not released).
2 Likes
Super great work you are all doing here! I have a project that I am doing right now in Panama where I am trying to make 360 Camera trap prototypes. We got the first up and going with the MADV camera because it was easy to control with two pins they had broken out that you can just short to turn the camera on and take photos, etc
https://www.instagram.com/p/B2DgYfBlqic/?utm_source=ig_web_copy_link
But now i am trying to make one with the Theta V, but running into much more difficulties.
The basics we need are to:
- Turn on the camera (and at least be able to turn it off) given a response from an autonomous Arduino
- Trigger it to take a photo or record a video
- turn itself back off (at least to sleep mode)
I asked Theta support and they told me it couldn’t be done.
But after some hacking, i have some promising findings.
A) If i connect an arduino via an OTG cable set up as a Human Interface Device (HID), and send it a key stroke, it will wake up from sleep
B) If i run the HID plugin on the Theta V, i can completely control the shooting with an Arduino emulating a keyboard (It’s great!). BUT the camera will not automatically start up in Plugin Mode
C) if i connect the CA-3 remote shutter, it can make the camera take photos without any plugin over the USB, BUT the CA-3 cannot wake the camera up.
So I am able to do all the actions i need, but not all with the same device.
Does anyone know
A) how to send the USB Api triggers from an Arduino? (Teensy has USB serial support)
B) How to start up the camera in plugin mode?
or
C) What the CA-3 is sending to trigger the photo?
1 Like
Another question will be:
is it possible to supply power TO the Theta over the USB while also sending messages?
I know that it is possible to draw power from the Theta to run my Teensy attached to just the USB for example, but i don’t know if i can send power the other way?
You can power the THETA over USB and send USB API commands to it. It will work indefinitely. I need to review the rest of your questions in more detail. Breakfast is on the table. Have to run.
Modification to ptp.h needed
ptpcam and programs using libptp2-1.2 may not work properly without a small modification to the line 77. Change the PTP_USB_INT_PACKET_LEN to 28


to install in /usr/local/lib and usr/local/bin run
$ make clean
$ make
$ sudo make install
In your ~/.profile, add this line:
export LD_LIBRARY_PATH=/lib:/usr/lib:/usr/local/lib
run
source ~/.profile
Alternately, you can add the library path to a file in /etc/ld.so.conf.d and run
$ sudo ldconfig
craig@jetson:/etc/ld.so.conf.d$ cat libc.conf
# libc default configuration
/usr/local/lib
craig@jetson:/etc/ld.so.conf.d$
WpdMtp for RICOH THETA
Library for operating MTP devices from C# and operating cameras such as the RICOH THETA.
Usage
- create an instance of MtpCommand
- Get a list of RICOH THETA device IDs connected to the PC with GetDeviceIds() of MtpCommand.
- Use the Open() method of MtpCommand to connect to the RICOH THETA
- Execute() will send and run an MTP command on the RICOH THETA
- Close() will disconnect from the THETA
Warning
- Unexpected errors may occur in various places. Use it systematically and carefully.
- OpenSession and CloseSession seem to be done automatically by Windows (unconfirmed)
Reference
- https://blogs.msdn.microsoft.com/dimeby8/tag/wpd/
- Japanese article by soundkonchan
With ptpcam -R, it can send a raw generic PTP request with parameters. The returned result could be reformated to shutter speed settings of Theta S. First read properties available, 0x1014 for reading device property description and 0xd00f for shutter speed. In the returned values, all the possible shutter speed is listed. For example, 01 00 00 00 a0 0f 00 are two 4-bype integers, 01 00 00 00 is 1 and a0 0f 00 00 is actually 0f a0 which is 6400.
$ ptpcam -R 0x1014,0xd00f,0,0,0,r
Camera: RICOH THETA S
Sending generic request: reqCode=0x1014, params=[0x0000d00f,0x00000000,0x00000000,0x00000000,0x00000000]
0f d0 08 00 01 00 00 00 00 00 00 00 00 01 00 00 - ................
00 3c 00 00 00 02 37 00 01 00 00 00 00 19 00 00 - .<....7.........
01 00 00 00 88 13 00 00 01 00 00 00 a0 0f 00 00 - ................
01 00 00 00 80 0c 00 00 01 00 00 00 c4 09 00 00 - ................
01 00 00 00 d0 07 00 00 01 00 00 00 40 06 00 00 - ............@...
...........
To get current setting of a property, 0x1015 for get property and 0xd00f for shutter speed:
$ptpcam -R 0x1015,0xd00f,0,0,0,r

Camera: RICOH THETA S
Sending generic request: reqCode=0x1015, params=[0x0000d00f,0x00000000,0x00000000,0x00000000,0x00000000]
01 00 00 00 3c 00 00 00 00 00 00 00 - ....<.......
PTP: response OK
The result 01 00 00 00 3c 00 00 00 could be read as (01)/(3c) = 1/60
To set shutter speed, could send binary data with ptpcam -R. To send 1/8, use 0x1016 for set property:
echo -e -n '\x01\x00\x00\x00\x08\x00\x00\x00' > shutter.bin
ptpcam -R 0x1016,0x00f,0,0,0,0,shuuter.binThere’s a new Linux streaming driver that allows streaming over a USB cable to a Linux computer. I’ve seen it working a NVIDIA Jetson with the livestream controlled by the USB API.
https://theta360.guide/special/linuxstreaming/
https://api.ricoh/docs/theta-usb-api/property/still_capture_mode/
Update Aug 28, 2020
I just sent out full libptp build and usage information for Jetson Nano with JetPack 4.4 (Ubuntu 18.04) to the Linux 360 Live Streaming Online Meetup Registrants.
https://theta360developers.github.io/linux-streaming-meetup/
1 Like
I tried to run “ptpcam -R 0x101c” but I got an error and could not start video recording with Theta V.
Camera: RICOH THETA V
Sending generic request: reqCode=0x101c, params=[0x00000000,0x00000000,0x00000000,0x00000000,0x00000000]
PTP: Invalid Parameter
PTP: ERROR: response 0x201d
According to the past thread, it seems to work on Ubuntu 14.xx, but I want to use ROS Kinetic, so I can’t change the version down.
I hope you can somehow make it possible to record video.
Also, there are a number of other commands that can’t be executed for something else.
Is this an error for the same reason?
I’ve written a version of the elements that might be necessary for a smooth resolution.
I’ll keep adding to it as requested.
The version of each element
| OS Ubuntu | 16.04 LTS | |
| kernel | 4.4.0-187-GE | |
| machine | Inspiron 7520 | |
| packages | ||
| . | build-essential | 12.1ubuntu2 |
| . | libtool | 2.4.6-0.1 |
| . | automake | 1:1.15-4ubuntu1 |
| . | pkg-config | 0.29.1-0ubuntu1 |
| . | subversion | 1.9.3-2ubuntu1.3 |
| . | libusb-dev | 2:0.1.12-28 |
| . | libptp2 | 1.2.0 |
| Theta V’s FW | 3.40.1 |
I’m Japanese, so it would be helpful if you could write in simple English, which is easy to translate.
This sentence has been translated at DeepL
start capture to save video to file
ptpcam -R 0x101c,0,0,1
1 Like
wow!
Thank you so much, craig!
What an easy, simple, startling, brilliant answer! I can’t believe that adding just “,0,0,1” to the bottom works perfectly!
My less than 4 hours(?) So much trouble and time spent searching can be solved with just one post!
That’s the power of community! That’s fantastic!
I knew from the specs to add “,0,0”.
But where is the information on the last “,1”?
I thought I did my best to look into it, as mentioned above, but I couldn’t find a way to do so.
Maybe I just missed it.
But still, thank you so much.
1 Like