[Originally posted December 17, 2016, by jcasman]
hecomi recently wrote an interesting blog post using Unity to view realtime 360 degree video streaming. I personally have very little experience with Unity, but the content and pictures were useful, so I translated the blog post for others to use. This is not an exact translation, but it should be much more clear than doing Google translate.
I noticed GOROman ([@GOROman](https://twitter.com/GOROman)) tweeting about the info below, so I decided to try it myself right then and there.
@GOROman tweet: You should be able to easily build a live VR stream from this. Stitching might be an issue… For the time being, it might be fine to just connect the sphere to the UV texture.
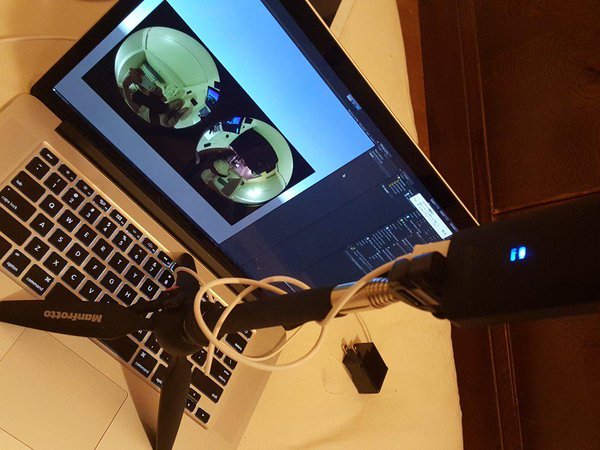
The THETA S is a 360 degree camera that will be going on sale October 23rd, and it includes features that were not included in the m15 like Dual-Eye Fisheye streaming over USB (1280x720 15fps) and HDMI streaming (1920x1080 30fps). In order to view this using Unity, I made a an appropriately UV developed sphere and a shader appropriate to AlphaBlend border. Ultimately, for the purpose of making a full sphere with the THETA S, it would be much higher quality and more convenient (can use Skybox too!) to use the fragment shader, made by Nora (@Stereoarts, which directly writes Equirectangular onto a plane.
@Stereoarts tweet: I’ve released a Theta Shader Pack. A shader for converting THETA / THETA S full sphere video to Enquirectangular in Unity and supporting scripts. stereoarts.jp/ThetaShaderPack_20150926.zip
For this article, I wanted to jot down my techniques as well.
Sample
ThetaS_LiveView_Sample.unitypackage @ Dropbox
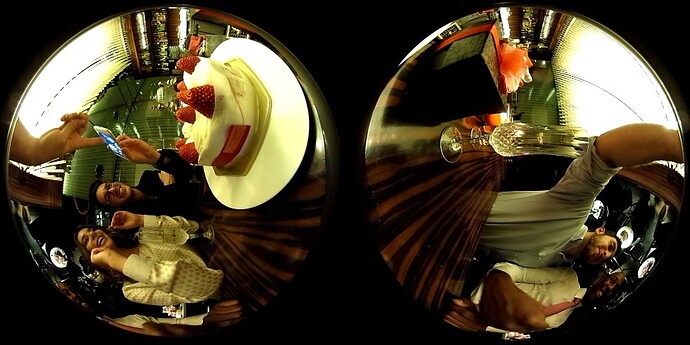
Example of taking a video with THETA
When taking a video with m15, the circles overlapped. The THETA S gives beautifully separated spheres. The angle covered in one sphere is slightly larger than 180 degrees.
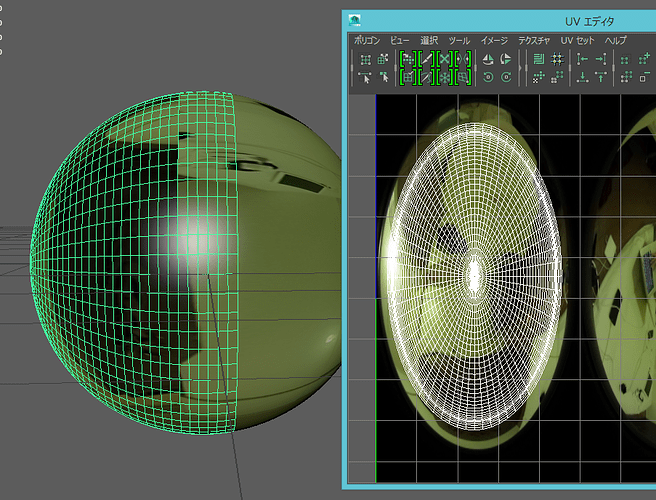
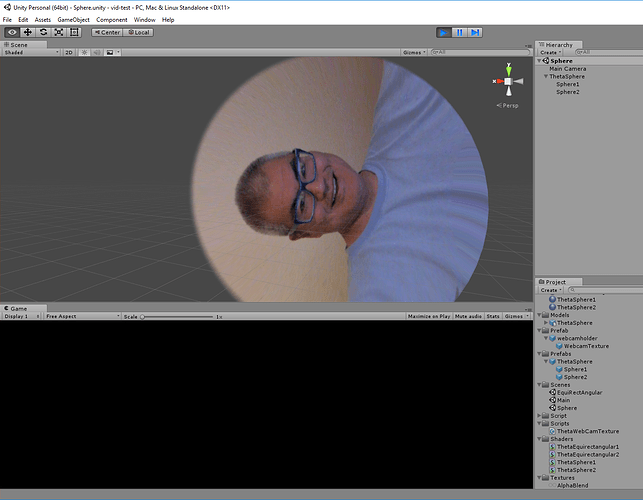
In doing this, I’ve made an adjustment using sample texture, which Goroman filmed using WebCamTexture.
Making a sphere with good UV setting
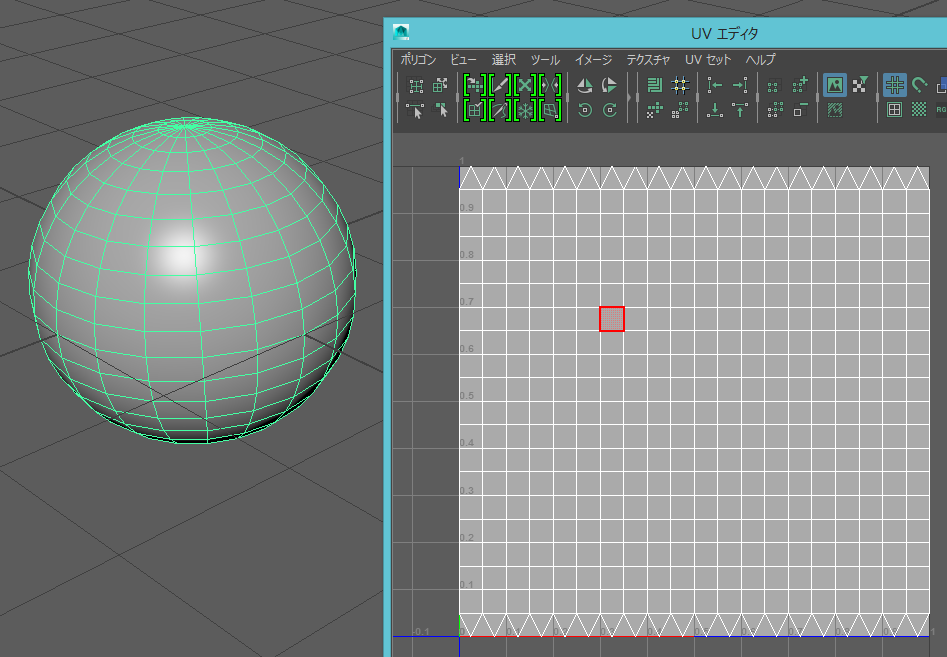
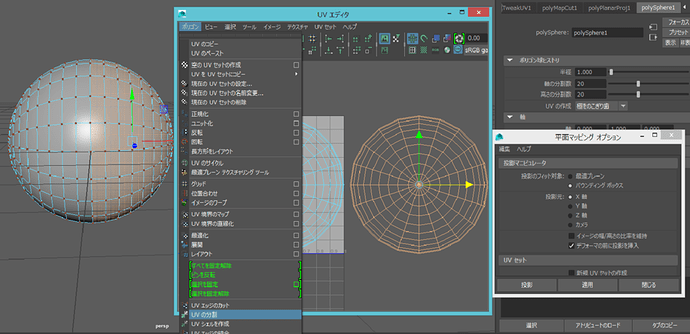
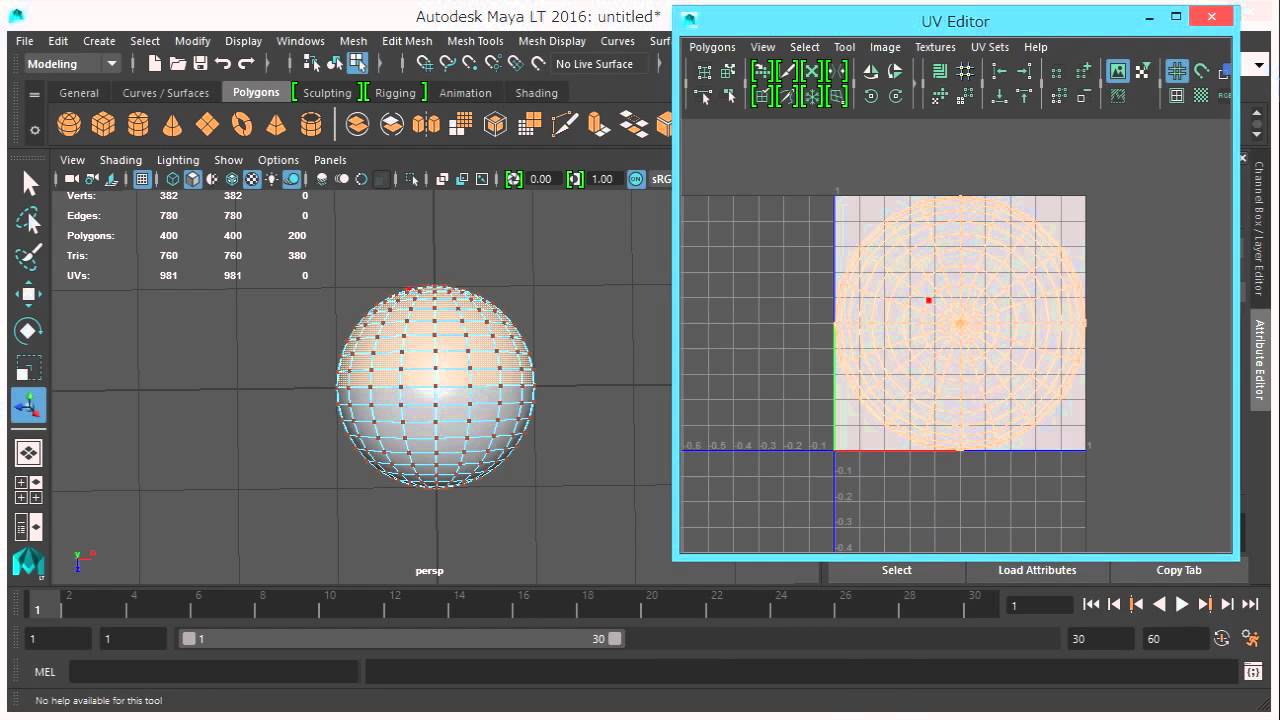
Working with Maya LT, the UV comes out like this, if you make a normal sphere.
It would look like below, if you make a plane with the UV.
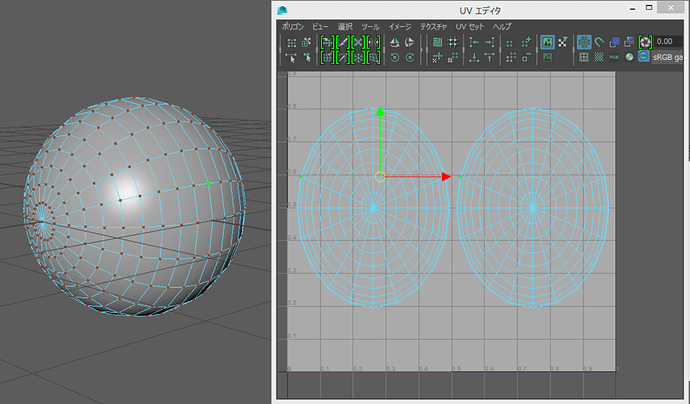
All it needs is to be cut in half and be moved appropriately.
It looks like this. (I did not adjust it, so it might be slightly off.)
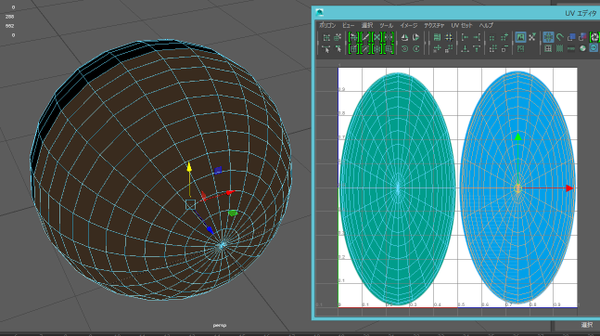
Actually, I wanted to use alphablend for the border, so I used 2 overlapping half spheres instead of one sphere. The UV border is adequately stretched manually.
Incidentally, surface is set to face inward, by reversing all normal vectors. UV position and size are fine to adjust later with shader.
Setting with Unity
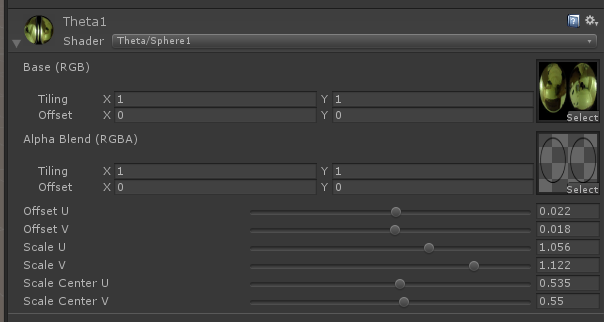
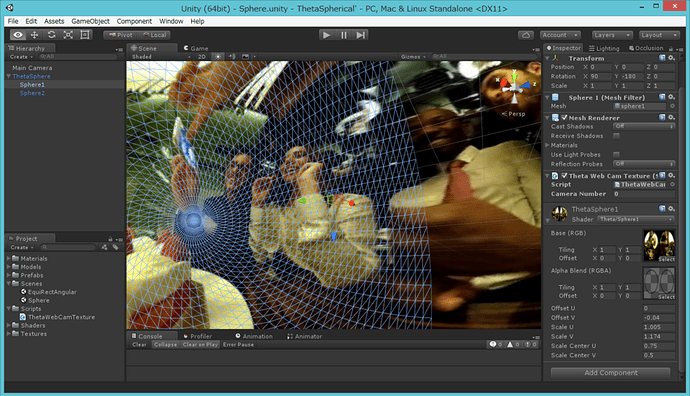
Import the Maya LT built model with Unity, and put the camera in the center. Write a shader, so the model’s UV position can be adjusted or can alphablend. In order to control the drawing order and to prevent the border from changing at certain orientations, each half sphere has a different shader.
Shader "Theta/Sphere1" {
    Properties {
        _MainTex ("Base (RGB)", 2D) = "white" {}
        _AlphaBlendTex ("Alpha Blend (RGBA)", 2D) = "white" {}
        _OffsetU ("Offset U", Range(-0.5, 0.5)) = 0
        _OffsetV ("Offset V", Range(-0.5, 0.5)) = 0
        _ScaleU ("Scale U", Range(0.8, 1.2)) = 1
        _ScaleV ("Scale V", Range(0.8, 1.2)) = 1
        _ScaleCenterU ("Scale Center U", Range(0.0, 1.0)) = 0
        _ScaleCenterV ("Scale Center V", Range(0.0, 1.0)) = 0
    }
    SubShader {
        Tags { "RenderType" = "Transparent" "Queue" = "Background" }
        Pass {
            Name "BASE"

            Blend SrcAlpha OneMinusSrcAlpha
            Lighting Off
            ZWrite Off

            CGPROGRAM
            #pragma vertex vert_img
            #pragma fragment frag

            #include "UnityCG.cginc"

            uniform sampler2D _MainTex;
            uniform sampler2D _AlphaBlendTex;
            uniform float _OffsetU;
            uniform float _OffsetV;
            uniform float _ScaleU;
            uniform float _ScaleV;
            uniform float _ScaleCenterU;
            uniform float _ScaleCenterV;

            float4 frag(v2f_img i) : COLOR {
                // 中心位置や大きさを微調整
                float2 uvCenter = float2(_ScaleCenterU, _ScaleCenterV);
                float2 uvOffset = float2(_OffsetU, _OffsetV);
                float2 uvScale = float2(_ScaleU, _ScaleV);
                float2 uv =  (i.uv - uvCenter) * uvScale + uvCenter + uvOffset;
                // アルファブレンド用のテクスチャを参照してアルファを調整
                float4 tex = tex2D(_MainTex, uv);
                tex.a *= pow(1.0 - tex2D(_AlphaBlendTex, i.uv).a, 2);
                return tex;
            }
            ENDCG
        }
    }
}
Here’s a second section of code.
	Shader "Theta/Sphere2" {
	    Properties {
	        _MainTex ("Base (RGB)", 2D) = "white" {}
	        _AlphaBlendTex ("Alpha Blend (RGBA)", 2D) = "white" {}
	        _OffsetU ("Offset U", Range(-0.5, 0.5)) = 0
	        _OffsetV ("Offset V", Range(-0.5, 0.5)) = 0
	        _ScaleU ("Scale U", Range(0.8, 1.2)) = 1
	        _ScaleV ("Scale V", Range(0.8, 1.2)) = 1
	        _ScaleCenterU ("Scale Center U", Range(0.0, 1.0)) = 0
	        _ScaleCenterV ("Scale Center V", Range(0.0, 1.0)) = 0
	    }
	    SubShader {
	        Tags { "RenderType" = "Transparent" "Queue" = "Background+1" }
	        UsePass "Theta/Sphere1/BASE"
	    }
	}
As below, for alphablend, have a texture made, that is alpha adjusted to UV. I made adjustment for perfectly fit, by exporting UV with postscript and reading with illustrator (white circle inside is alpha=1; around the circle, from inside to outside, changes from 1 to 0; outside will not be used so whatever fits.)
Then, adjust the parameters and you’ve got a whole sphere.
Changing into Equirectangular
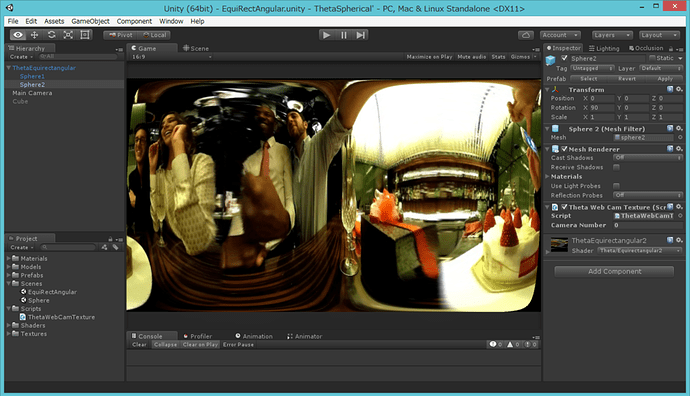
I tried it with a modified vertex shader.
Shader "Theta/Equirectangular1" {
    Properties {
        _MainTex ("Base (RGB)", 2D) = "white" {}
        _AlphaBlendTex ("Alpha Blend (RGBA)", 2D) = "white" {}
        _OffsetU ("Offset U", Range(-0.5, 0.5)) = 0
        _OffsetV ("Offset V", Range(-0.5, 0.5)) = 0
        _ScaleU ("Scale U", Range(0.8, 1.2)) = 1
        _ScaleV ("Scale V", Range(0.8, 1.2)) = 1
        _ScaleCenterU ("Scale Center U", Range(0.0, 1.0)) = 0
        _ScaleCenterV ("Scale Center V", Range(0.0, 1.0)) = 0
        _Aspect ("Aspect", Float) = 1.777777777
    }
    SubShader {
        Tags { "RenderType" = "Transparent" "Queue" = "Background" }
        Pass {
            Name "BASE"

            Blend SrcAlpha OneMinusSrcAlpha
            Lighting Off
            ZWrite Off

            CGPROGRAM
            #pragma vertex vert
            #pragma fragment frag
            #define PI 3.1415925358979

            #include "UnityCG.cginc"

            uniform sampler2D _MainTex;
            uniform sampler2D _AlphaBlendTex;
            uniform float _OffsetU;
            uniform float _OffsetV;
            uniform float _ScaleU;
            uniform float _ScaleV;
            uniform float _ScaleCenterU;
            uniform float _ScaleCenterV;
            uniform float _Aspect;

            struct v2f {
                float4 position : SV_POSITION;
                float2 uv       : TEXCOORD0;
            };

            v2f vert(appdata_base v) {
                float4 modelBase = mul(_Object2World, float4(0, 0, 0, 1));
                float4 modelVert = mul(_Object2World, v.vertex);

                float x = modelVert.x;
                float y = modelVert.y;
                float z = modelVert.z;

                float r = sqrt(x*x + y*y + z*z);
                x /= 2 * r;
                y /= 2 * r;
                z /= 2 * r;

                float latitude  = atan2(0.5, -y);
                float longitude = atan2(x, z);

                float ex = longitude / (2 * PI);
                float ey = (latitude - PI / 2) / PI * 2;
                float ez = 0;

                ex *= _Aspect;

                modelVert = float4(float3(ex, ey, ez) * 2 * r, 1);

                v2f o;
                o.position = mul(UNITY_MATRIX_VP, modelVert);
                o.uv       = MultiplyUV(UNITY_MATRIX_TEXTURE0, v.texcoord);
                return o;
            }

            float4 frag(v2f i) : COLOR {
                float2 uvCenter = float2(_ScaleCenterU, _ScaleCenterV);
                float2 uvOffset = float2(_OffsetU, _OffsetV);
                float2 uvScale = float2(_ScaleU, _ScaleV);
                float2 uv =  (i.uv - uvCenter) * uvScale + uvCenter + uvOffset;
                float4 tex = tex2D(_MainTex, uv);
                tex.a *= pow(1.0 - tex2D(_AlphaBlendTex, i.uv).a, 2);
                return tex;
            }
            ENDCG
        }
    }
}
Here’s a second section of code.
Shader "Theta/Equirectangular2" {
    Properties {
        _MainTex ("Base (RGB)", 2D) = "white" {}
        _AlphaBlendTex ("Alpha Blend (RGBA)", 2D) = "white" {}
        _OffsetU ("Offset U", Range(-0.5, 0.5)) = 0
        _OffsetV ("Offset V", Range(-0.5, 0.5)) = 0
        _ScaleU ("Scale U", Range(0.8, 1.2)) = 1
        _ScaleV ("Scale V", Range(0.8, 1.2)) = 1
        _ScaleCenterU ("Scale Center U", Range(0.0, 1.0)) = 0
        _ScaleCenterV ("Scale Center V", Range(0.0, 1.0)) = 0
        _Aspect ("Aspect", Float) = 1.777777777
    }
    SubShader {
        Tags { "RenderType" = "Transparent" "Queue" = "Background+1" }
        UsePass "Theta/Equirectangular1/BASE"
    }
}
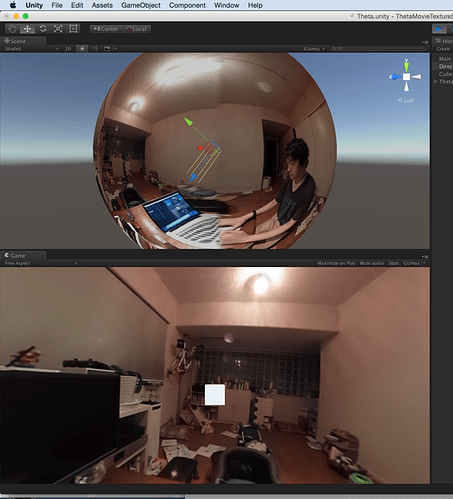
When taking a look at the mesh, it moves around like this.
Because polygon did not fit, there is a blank space in the corner. This could have been avoided if we have used a direct fragment shader like Nora.
Conclusion
It looks like there’s the possibility of multiple fun topics here like spherical AR and Stabilization. After the THETA S goes on sale, I would love to play with it more.
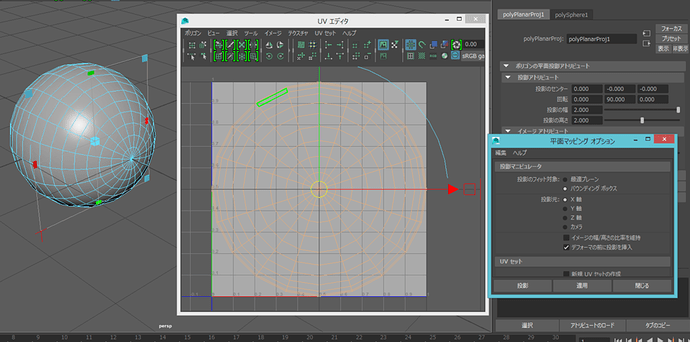
Maya Planar UV Mapping Instruction
Update March 9, 2016
Thanks to @hecomi for providing this video that shows how to tweak the UV mapping. He produced it to help Flex van Geuns who was trying to use the UV mapping with webgl.
If you’re interested in more projects with Unity or live streaming, take a look at global illumination with THETA and Unity, this tutorial about THETA live streaming on YouTube, this post about THETA 360 video from a drone, and this demo of WiFi streaming with THETA and Unity
