Create High Quality HDRI for VFX using RICOH THETA Z1

Although it is a Japanese article, I wrote an article about creating HDRI for VFX using THETA Z1.
It also introduces the method of creating only with free software.
It is possible to download all sample data including darktable template, Hugin template data, and RAW.

http://site.cgslab.info/archives/576

1 Like

Thanks for this great article. I’m planning to translate it into English and of course provide you with attribution. Please contact me if you’d like to discuss. I’m planning to post the translation in this forum.

1 Like

Thank you! There is no problem with posting the translation.

1 Like

Create High Quality HDRI for VFX Using RICOH THETA Z1 and Free Software (Part 1)

This article was originally written in Japanese by KorematsuNaoki of CGSLAB. This is part 1 of the article, created with machine translation and community editing.

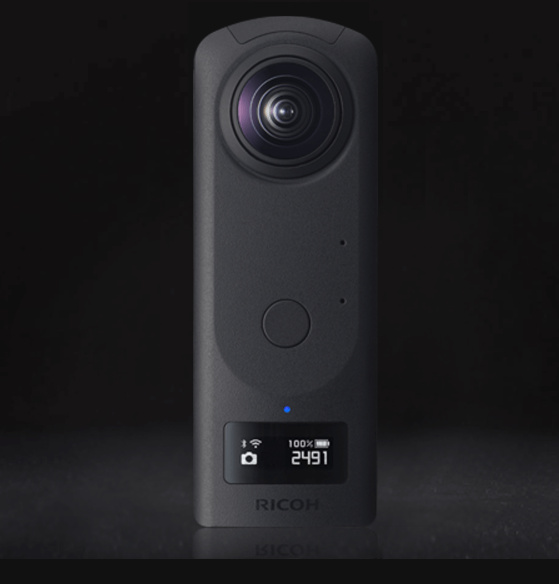
RICOH THETA Z1 is now available for RAW shooting!

All HDR and HDRI in this article indicate HDR as a data image for CG lighting and IBL (Image Based Lighting).


Link to Z1 Site

The RICOH THETA Z1 released in May 2019 is now a 1.0-type sensor, and is equipped with a new RAW shooting function and aperture, making it possible to improve the quality of simple HDRI creation.

Although it is a high-end model that costs about $1,000, I think that it is a device with excellent cost performance that can be used to easily create high-quality HDRI.

Product | RICOH THETA Z1

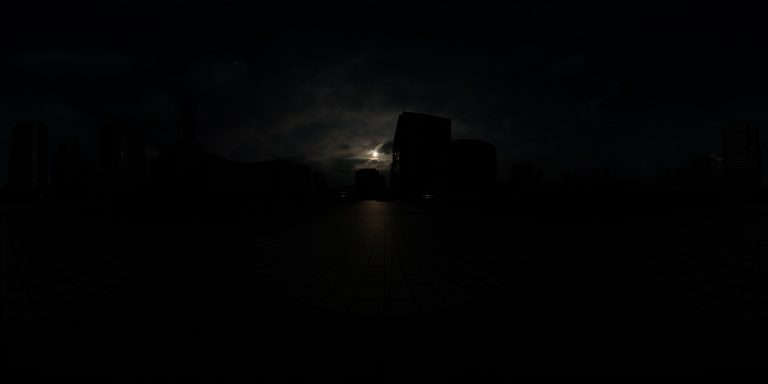
With an aperture and 1/25000 second shutter speed, it is possible to create HDRI with a quality close to that using ordinary single-lens reflex lenses and fish-eye lenses even outdoors.

Since the resolution is about 7K, I think that a high-resolution HDRI image of 16k or more using a single lens reflex camera is still necessary as a reflection map for high reflection objects in cars.


JPG taken out when shooting with the most “under” (Editor note: Maybe means lowest setting?)

Can plug-ins be used?

THETA V and THETA Z1 have a plug-in function, and in the plug-in store, there is a plug-in called Authydra, which automatically installs bracket shooting to EXR HDRI composition by installing it. There is a similar plug-in called HDR2EXR, but this is the same author and the old version that only supports THETA V. (Editor note: Authydra also has a web interface to control the camera and also allows the download of the EXR file from the camera with the web interface. I suggest people use Authydra instead of HDR2EXR to take advantage of the improved workflow)

In addition, the behavior was unstable when it was just tested for Z1. (Editor Note: The Z1 support is early alpha and will be improved over time.) The number of shots for JPEG shooting has increased. To take one HDR, it requires 3 minutes or more if you include the time taken to process the HDR conversion. In addition, if denoise is enabled, the shooting time will be considerably longer because bracket shooting is performed for denoising. For example, if there are 3 denoising images for 9 brackets with 2EV, it will be 27 images even with just shooting.

If you want to create HDRI with models below V, it has been compiled by individual blogs in the past. (Editor Note: blog is in Japanese). HDRI creation is possible with the standard bracket function and purchase of the application (the blog information is old) like HDRI with RICOH THETA. However, creating outdoor HDRI is tough.

Create high-quality HDRI using Z1 RAW data

Since Z1 can shoot in RAW, we want to perform important color management, denoising, and HDR in order to create high-quality HDRI. It is assumed that post-processing is done on a PC. However, because we want to shoot at high speed, we are investigating whether a plug-in that can perform high-speed bracket shooting of only RAW is possible, but it turns out that it is currently difficult to speed up shooting with only the standard API It will be inside. Since it seems that it is possible to shoot by selecting a preset number of brackets, we are currently considering it.

So, for the time being, the shooting was summarized using the THETA standard application to convert the bracketed data to HDRI that can be used for CG writing.

Shooting settings

So this time we will use the standard shooting app to shoot brackets.

*Editor Note: Screenshot below is in Japanese. We will replace it with an English app screenshot in the future. This is using the official RICOH THETA mobile app. You can match up the menus if you’re eager to get started *

Change the file format from RAW to RAW and switch the shooting mode to multi bracket shooting.

The bracket settings from 01 to 06 in the image are just reference values, but it is possible to shoot almost any scene (19.9EV to 5EV) under illumination in 6EV 3EV steps.

Since it is a general-purpose setting, it is sufficient to shoot four images from 01 to 04 when the weather is sunny. Add a dark environment such as night time as appropriate.

  • It is better not to change the aperture for HDRI photography with a regular single-lens reflex camera, but in the case of THETA there is almost no effect, so the aperture value is also changed to shorten the shooting speed as much as possible.

My Settings

You can save settings to the main unit with My Settings. Only one setting can be saved, but once saved, bracket shooting can be performed with the set value only on the main unit by switching from mode switching to MY (My Settings) on the main unit. In addition, since settings can be recalled from the main unit, settings can be recalled immediately on your smartphone or tablet when you carry around with multiple people.

Since it is basically a bracket shooting, the THETA does not move during shooting and is fixed on a tripod and so on. The height is basically about the height of the center of the CG to be synthesized. Is it about 1m to 1.5m for general purpose?

In the case of sunlight, flare and halation can be suppressed by making the lens and the sun face each other, and stitching can be done beautifully.

Since the shooting time is about 5 seconds, it takes about 30 seconds for each of the above 6 brackets.

In addition, if there is a composite with a live-action plate, it is also necessary to take a separate color chart. This is OK if you can shoot only one RAW with full auto shooting.

Note: In this flow, even if only the HDR merge process is skipped and the stitch process is performed, the color will not be misaligned, so the chart can be used for color adjustment if the chart is not even out of focus. If you do not mess with development, it is easier to follow the white balance.

Capture and development

Connect to a PC and import DNG data. I used darktable for development. Please note that Adobe Lightroom is not suitable for HDRI due to internal color processing. The reason for selecting darktable is that DNG can be developed, denoising can be done properly, and some neutral colors can be exported, and the best compatibility with THETA RAW.

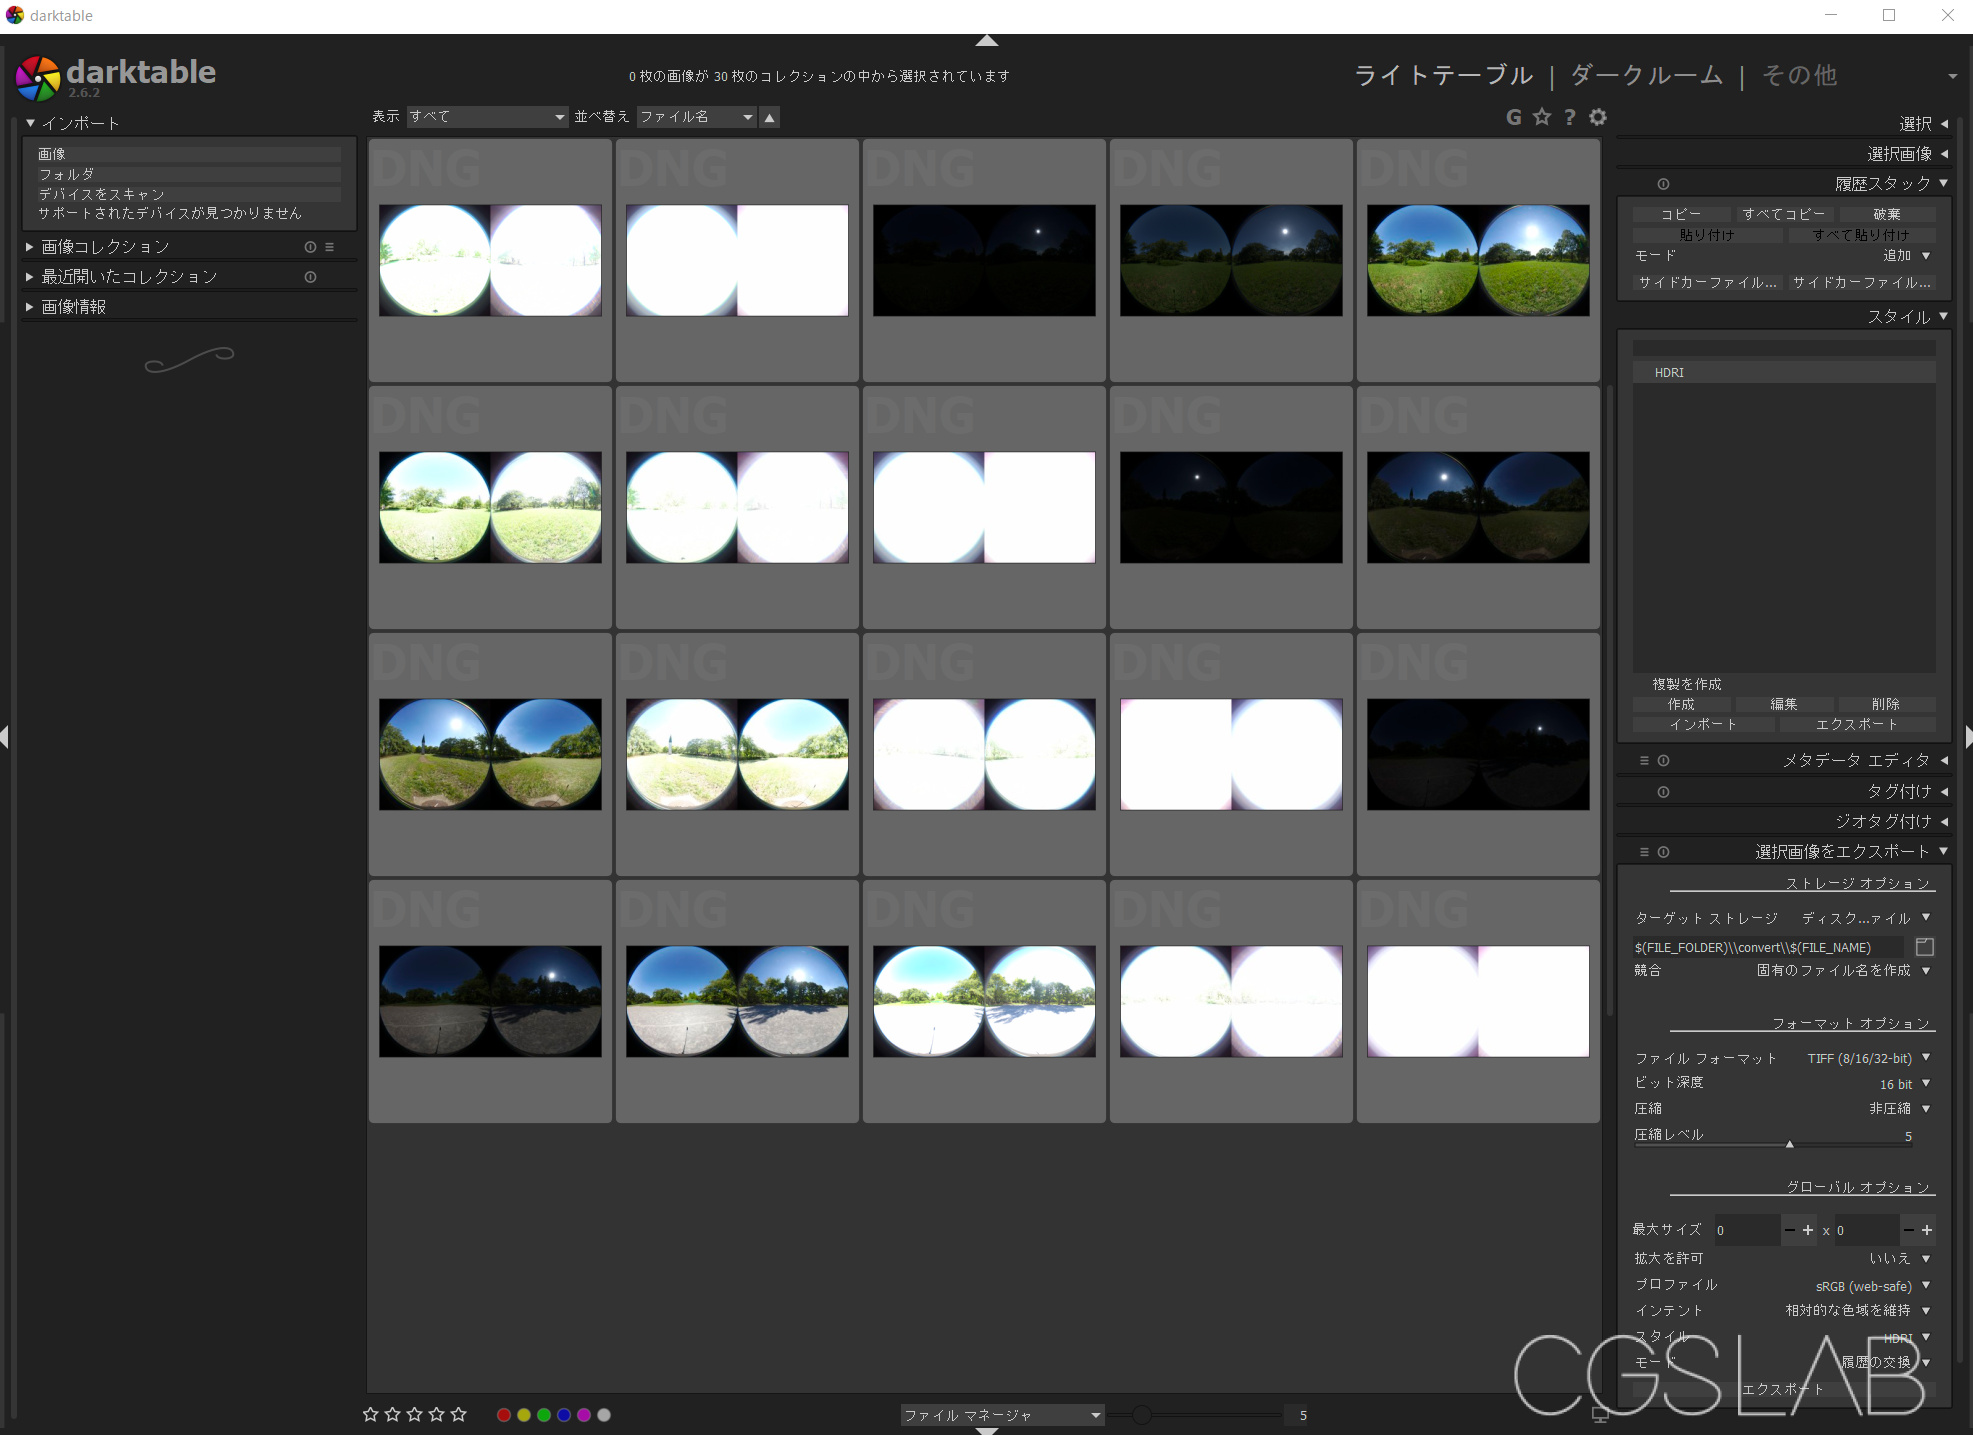
Although it is not complicated, the explanation of development settings is cumbersome, so we will distribute development settings preset = style.

Image Style Template Download

After downloading the style, import it from the style.

Next, set the export of the selected image. If necessary, set directory, file format> TIFF16bit, profile> sRGB, intent> maintain relative color gamut, select style> THETA_Z1_HDRI.

  • There is Iinear Rec2020 in the profile setting, and if this is used, HDRI with a high color gamut can be created. This time, we will proceed with the explanation in sRGB. This style does not include any processing such as camera profiles and IDT (Input Device Transform).

  • EXR can be selected from the file format, but it cannot be used in later processes because there is no metadata. Please select TIFF.

  • The denoise value is set a little stronger so that the sky noise disappears. As a result, details may be crushed.

After that, import the selected image, select and export, and development is complete. Since styles are applied from the export settings, style adjustment and development settings are not required for individual images.

This is end of part 1 of the community translation of the CGSLAB article by Korematsu Naoki. The original full-length article including the sections below is availabe in Japanese on the CGSLAB site.

Next Sections

  • Stitch processing / HDR conversion PTGui
  • Stitch processing / HDR conversion Free software
  • Sample data
  • Additional sample data
  • Example Using Blender
  • Image with linear Rect202
  • Using the RICOH THETA Stitcher
  • Using Nuke to Stitch
  • Using Natron(Nuke) to Stitch
  • Using GIMP for Image Correction
1 Like

Stitch processing / HDR conversion PTGui

With PTGui Pro (paid), DNG data can be read as it is, from stitch processing to HDRI creation, but color management and denoising cannot be performed. I think that it is better to keep the development flow to a minimum.

PTGui Pro (11 and later) automatically recognizes THETA data from metadata, so it is quite easy to create HDRI using the Project Assistant. Processing is also fast.

As PTGui Pro is commercial software, I will now explain how to use free software only. The time and processing time will increase.

Stitch processing / HDR conversion Free software

HDR
First, HDR-Merge published by HDRI Haven is used to merge images for HDR conversion.

Official blog post on how to create HDRI including tool history> How To Create High Quality HDR Environments

This uses RawTherapee for development, but the basics are the same. There is no color difference in neutral color development.

Please download Blender2.79 and Luminance HDR v2.4.0 separately as described in GitHub usage.

Set up as described, execute hdr_brackets.exe, select the developed TIFF folder path, execute with Create HDRs and wait for the process to finish.

If there are multiple brackets in the same folder, they will be batch processed with automatic recognition.

image

In the background, the exposure setting is calculated based on the metadata, the image is merged with Blender, and the preview JPG for tone map adaptation is written out with Luminance HDR after processing.

image

When the end sound is heard and the process is completed, you can see that the merged HDRI is created by creating exr and jpg folders in a folder called Merged.

The data bracket_sample.blend is also written in the exr folder, but it can be deleted if there is no problem with merging because it is Blender data of merge processing.

Check merged_000.exr and if there is no problem in the process, it will be merged properly.

Misalignment correction and ghost processing such as moving people and clouds are not performed, but they are merged fairly finely because they are minimal blend processing.

Stitch Processing

Use the free software Hugin – Panorama photo stitcher for stitching.

First, download and install Hugin.

Next is how to stitch, but since it is difficult to write the process, a template will be distributed. It is unclear how far THETA Z1 has individual differences, but it should be usable as it is because it has been calibrated to a good feeling.

Download Template

HDRI_000.pto is a template for merged_000.exr and HDRI_000_preview.pto is for merged_000.jpg. If you don’t need JPG stitches, you don’t need this.

Since it is a relative path, place HDRI_000.pto in the same folder as merged_000.exr and HDRI_000_preview.pto in the same folder as merged_000.jpg.

When performing batch processing and the merge file name is merged_001, open .pto in text and rewrite the file name to match.

image

.pto can be opened normally with Hugin – Panorama editor and stitches can be done, but I want to batch process,

Note: The image is the window when the Interface setting is switched to Expert. If you export from Simple Interface panorama export immediately after installation, the settings will not be appropriate.

PTBatcherGUI – Launch Batch processor, add HDRI_000.pto, HDRI_000_preview.pto by drag and drop, and batch process.

If there is no problem after checking the data after stitching, the process is complete.

It is necessary to adjust exposure and white balance as necessary.

Since it is not possible to completely shoot the sun light source, use the light source correction or add or replace the sun light on the CG software.

If there is an effect from reflection, remove tripods and tripod shadows.

  • If THETA is tilted during shooting, adjust the level on the editor as necessary.

  • The template export resolution is 7200 x 3600. This value is used because a processing error occurs when the resolution is increased in the verification environment.

  • Hugin can export stitched JPG at the same time, but the exposure was not appropriate. In the case of Hugin, jpg and HDR export are only run twice in the end, so this time we are processing individually using images already out of HDR-Merge. When the HDR-converted EXR is re-processed with Luminance HDR, the stitching process will not be misaligned.

  • Since Hugin’s EXR export is 16bit float, there is some data degradation, but there is no problem for lighting use. PTgui can be switched to 32bit by setting.

  • Since the sample image is the calibration source, it is stitches that emphasize distant view. When used in a small room, foreground stitches will be greatly displaced.

  • In rare cases, Enblend, which is used for merge processing, does not process cleanly, and negative values ​​may occur. Changing the blend to built-in reduces the accuracy of the merge, but it can be avoided.

Although the process and effort have increased compared to using PTGui, all command line control is possible, so if you make it a single tool, I think that batch processing after image capture is possible.

Reference tutorial for stitching from scratch with Hugin


This is end of part 2 of the community translation of the CGSLAB article by Korematsu Naoki. The original full-length article including the sections below is available in Japanese on the CGSLAB site (Japanese). If anyone goes through this tutorial and wants to contribute English screenshots, please reply here and I will incorporate them into the translation.

Upcoming Sections

  • Sample data
  • Additional sample data
  • Example Using Blender
  • Image with linear Rect202
  • Using the RICOH THETA Stitcher
  • Using Nuke to Stitch
  • Using Natron(Nuke) to Stitch
  • Using GIMP for Image Correction
1 Like

Create High Quality HDRI for VFX using RICOH THETA Z1 (Part 3/3)

Sample data

Original data including RAW data used in this explanation

DNG, TIFF, each process data download - Size 1GB

Other sample HDRI
Both are based on sRGB development. Compliant with current flow without light source correction.

License CC0

Sample Download

image

Example of use in Blender

A free addon called HDRI Sun Aligner is useful for aligning the sun on Blender.

Development with Iinear Rec2020

When developed in darktable with Iinear Rec2020, the image is TIFF, but the gamma is exported as an Iinear image. If this is the case, HDR-Merge will be read as sRBG (gamma2.2) in Blender when HDRI is combined, and processing will not be performed properly.

Therefore,

HDR-Merge-master \ build \ blender \ blender_merge.py

Open with text

img = bpy.data.images.load (img_path) .colorspace_settings.name = ‘Linear’

If is described, the image can be forcibly loaded as Iinear and can be processed appropriately.

There is no information on how much color gamut the actual Z1 has as a sensor, and we have not verified it. Since it is HDRI of Rec2020 color space, it is necessary to match the color space read by CG software. It might be easier to use Nuke etc. to convert to ACEScg etc.

Note: RawTherapee has many color profiles such as ACES, and the gamma can be changed arbitrarily.

Bonus ①Stitch with RICOH THETA Stitcher

RICOH official RICOH THETA Stitcher is released as a plug-in for Adobe Lightroom Classic.

The initial settings are difficult to understand, and you can set it so that you can start it from Lightroom by looking at the manual in the installation folder.

I’m thankful if you start it alone, but I can’t. However, you can use it by dragging and dropping TIFF data to RICOH THETA Stitcher.exe with Lightroom running.

The original DNG file is required on the same level. Pressing OK will overwrite the TIFF with the stitched data. 16bitTIFF can also be processed.

The stitches are the cleanest because the official lens correction values ​​are used. However, since numerical values ​​are also automatically input from the image metadata every time, it is necessary to manually correct the images one by one and align the brackets, which is not practical.

Bonus ② Stitch with Nuke

Stitch using Nuke’s Spherical Transform. Spherical Transform doesn’t process BBox, so you can’t blend the joints. This is enough for lighting.

Also, although it has not been verified, it seems to be able to stitch using Cara VR of a paid plug-in (it seems to be integrated with NukeX12). High cost.

Crop of lens> Corrected because the center of the lens is slightly shifted> 190 °, so adjust the scale so that the angle of view is 180 °> Deformation from fisheye lens> Merge

Nukepedia’s free plug-in for Nuke called J_Ops has an HDR tool called HDR merging that can be completed only with Nuke after development, but unfortunately there is no update after Nuke8 support and the latest version Cannot be used with Nuke. There is no similar plug-in like Gizmo.

Naturally HDRI Haven’s HDR-Merge can be assembled by Nuke or Natron as if it were processed by Blender’s composite node in the back.

Especially in THETA, the shooting rules are difficult to shift, so there is no need to pull the value from the metadata every time, so it is easy to create a template.

Bonus ③ Stitch with Natron (Nuke)

I’ve done so far with free software, so I wondered if Natron could manage it. However, there is no node equivalent to Spherical Transform as Nuke.

So STMap can’t be used. You can use either Nuke or Natron.

Original STMap> Read STmap with Hugin and apply only deformation> Adapt STMap with Natron

Of course, the merge process is only blurred with a mask, so image merge processing like Hugin is not done. However, you can get a pretty good result by adjusting the exposure with a little mask.

Although it is not universal, once it is made into a template, the processing is the fastest and becomes 32bit processing, so the drawback of becoming Hugin’s 16bit processing can be solved. The resolution is 7200 x 3600 combined with Hugin.

I feel good with this. That’s why I distribute this data. STMapA, B, Mask, Naron data

THETA Z1 STMap Download

Bonus ④ Correction by Gimp.

The color temperature adjustment in Gimp’s color adjustment was introduced because it was convenient.

It is convenient that you can change the color temperature from any color (during development) to the specified color temperature.

In addition, clone brush and correction brush can be used for both 16bit float and 32bit float, so it is convenient when there is something you want to erase.

1 Like

Hi, if we of the HDRI created in the developing flow of Rec2020, it was found to be able to maintain the color gamut equivalent to DCI-P3.
This is important for use with VFX.
The performance of Z1 can be pulled out to the maximum!

1 Like

Thanks for the update and all your great work. Look forward to more awesome content from you. :slight_smile: :theta::thetadev:

This is a Japanese magazine for the CG and video industry, and I’m writing an article on creating HDRI, which is an update to my blog post.
Describes how to create higher quality HDRIs for scene-linear workflow/ACES using IDT (Input Device Transform).
It is possible to match the color of the backplate with the color of the shot taken with a major cinema camera such as Alexa with IDT.
After the release date, IDT and other data introduced in this magazine will be available for download at “cgworld.jp”.

THETA Z1 is also used for the cover and the feature cover.

3 Likes

Sample data is available at cgworld.jp.
A chapter on comparing renderings, which appears in this magazine, is also included.
Unfortunately, the use of the sample data needs to be seen in this magazine. However, it will also be posted on the web in about a month or two.
Please note that all of them are written in Japanese.

The WEB version is now available.


2 Likes

Bracket shooting plug-in released.
Burst-IBL-Shooter

Although there is some camera shake, it is possible to create a handheld HDRI in a crowded place like the scramble crossing in Tokyo Shibuya!

2 Likes

Hi, can anyone share workflow for creating vfx HDRI using Theta X? Authydra doesnt seem compatible with it ( not visible in theta X plugin store)

This thread has some additional information.

This article has more info.

https://medium.com/@samwinkler/shoot-360-hdrs-for-vfx-with-a-ricoh-theta-5c23fc92a74e

I am only an amateur hobbyist. My settings may not be good. However, you can see use with Luminance HDR (free)

More info from older cameras.

The THETA X is not suitable for creating high-quality HDRIs because it cannot shoot RAW. The Z1 is positioned above the X.
Therefore, our Burst-IBL-Shooter plugin will not support the THETA X.
Another thing is that the API “burst mode” is not available for the X, so similar high speed bracketing is currently not possible.

It is possible to create HDRIs using standard bracketing in JPEG, but JPEG is not suitable for high quality HDRI creation due to the tone mapping applied to JPEG.
Nevertheless, there may be a plug-in in the future to create HDRIs from JPEGs. X has just been released.

Sorry CGSLAB, but “THETA X is not suitable for creating high-quality HDRIs because it cannot shoot RAW” incorrect sentence.

With Theta X harder to create high-quality HDRIs because Theta X only shooting in JPEGs with tonemapped applied. But this only back us to early 2000s when first digital cameras start selling.
That days we also only had jpegs.
Definitely JPEGs are limiting users but biggest issue is not tonemaping but jpegs artifacts and in-camera stitiching (API allow save dual fisheye JPGs but not firmware).
Tonemapping is reversable, and original HDRI papers show how to reverse engineer responsive curve (linearize).
Professional software like PTGui Pro still have option to recompute responsive curve for similar cases.
So sRGB with EOTF can be reversed to linear sRGB and later can be merged to correct HDRIs.

THETA X way more suitable and comfortable to capture HDRIs than slow but bigger sensor Theta X.
CGSLAB burst plugin actually unusable for proper HDRI capture because use automatic exposure control and only limited to 9 brackets.
When Theta X natively support burst capture and can allow 13x exposure brackets. That allow setup 1.3EV distance to capture from 1/16000 to 15sec.
For daytime captures not Theta X nor Theta Z1 is not suitable to capture sunny scenes without ND filters.

And here some examples of high quality HDRIs and Image based renderers made from them.
Dynamc range about 27EV, capture time about 30sec (two captures without and with ND filter)


Or nightime HDRI also around 24EV

Theta X more suitable to capture indoor or night HDRIs due to 1/16000 fastest speed.

I just wish Theta Z2 will have same resolution and speed as X and same 1inch sensor and shutter speeds as Theta Z1.
Than this will made Theta dream machine to capture high quality HDRIs including spectral correct results.

4 Likes

Thanks for posting this information about using the X. There’s another VFX professional that has both the X and the Z1 and uses the X in certain circumstances as well. There’s more information on his workflow below. The reasons he uses the X are similar to your reasons. It’s really fascinating to see the real-world workflow of people building VFX HDR files on set professionally and learn about the reasons for their choices. Thanks.

2 Likes

Great post :wink:

I share with you some observations that I made during my tests…

What I like about the X:

  • the speed
  • the screen
  • the resolution
  • removable batteries

What I don’t like:

  • jpeg only (no RAW)
  • the images produced have a lot of noise (this is particularly visible in real size)
  • presence of chromatic aberrations…

For VFX my preference goes for the Z1 for the following reasons:

  • RAW shoot (no loss of information)
  • quality and size of the sensor (1 inch)
  • possibility to shoot with an aperture of 5.6
  • larger shutter speed range (1/25000 to 60 vs 1/16000 to 60 for the Theta X)

A great link: The Definitive Weta Digital Guide to IBL – fxguide

2 Likes

Thank you for posting the verification.

First of all, since there seems to be a discrepancy between our definition and yours, Our definition of ”High quality” is that the background plate taken by the cinema camera and the CG rendered by HDRI match. This includes matching light source colors, exposure balance, etc. If the HDRI is properly created, the color chart shot with the background plate will match the color chart rendered with the HDRI.

This is made more reliable when used in conjunction with Logoscope’s IDTs.


From left to right: 5D3 rendering results, 5D3 shooting images, THETA Z1 rendering results, THETA Z1 shooting images

All workflows including these IDTs are available free of charge on CGW.jp, although only in Japanese.

Now, let me tell you about the problem of using X.
When using JPEGs, it is not possible to accurately reversible tone mapping first. This is due to factors such as 8-bit tonality, JPG compression, and Gamut compression.
In addition, JPEG images contain some color correction by the camera manufacturer along with tone mapping, which cannot be simply corrected.
Of course, as has been said, it is possible to correct this to some extent by correcting the camera response curve. However, I am also aware that the HDRIs created with this method do not reach the high quality results that were initially shown.
I apologize in advance for the speculation, but it seems to me that your rendering of the CG is actually misaligned when combined with the background plate.

Of course, HDRIs created using these JPEGs can be used for lighting, so there should be no problem in checking the assets or using them in full CG productions.
However, for live-action VFX, it is important to match the plates that were photographed, and this can cause problems.

There seems to be a misunderstanding about this.
Burst-IBL-Shooter is based on automatic compensation and first includes an offset of -5EV that can be set by the API. Based on this, it takes 7 shots bracketed in +/- 3EV steps, so it can properly bracket the range required for HDRI, which is possible under Z1 specifications.

While Z1 specifications do not allow it to capture sunlight and other light sources, it can be used in most of the shooting and studio lighting environments used on many VFX shoots without any real problems.
This has also been confirmed by many VFX production companies.

The THETA X has not yet been released in Japan, and we have yet to see it in action, but we are hoping that an update will allow us to shoot in RAW, or that the next model after the Z1 will allow us to shoot even better.

3 Likes

Burst-IBL-Shooter has been updated to allow the use of a self-timer
Please see the plugin page for details.

3 Likes