Stitch processing / HDR conversion PTGui
With PTGui Pro (paid), DNG data can be read as it is, from stitch processing to HDRI creation, but color management and denoising cannot be performed. I think that it is better to keep the development flow to a minimum.
PTGui Pro (11 and later) automatically recognizes THETA data from metadata, so it is quite easy to create HDRI using the Project Assistant. Processing is also fast.
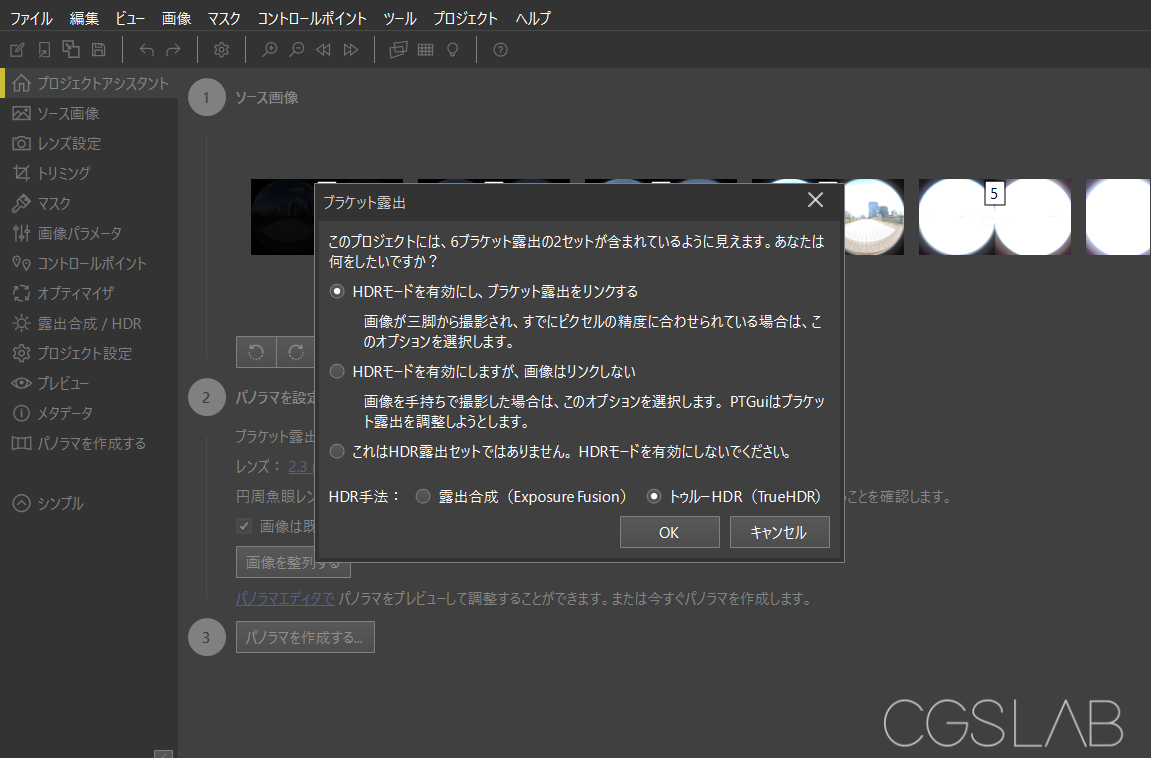
As PTGui Pro is commercial software, I will now explain how to use free software only. The time and processing time will increase.
Stitch processing / HDR conversion Free software
HDR
First, HDR-Merge published by HDRI Haven is used to merge images for HDR conversion.
Official blog post on how to create HDRI including tool history> How To Create High Quality HDR Environments
This uses RawTherapee for development, but the basics are the same. There is no color difference in neutral color development.
Please download Blender2.79 and Luminance HDR v2.4.0 separately as described in GitHub usage.
Set up as described, execute hdr_brackets.exe, select the developed TIFF folder path, execute with Create HDRs and wait for the process to finish.
If there are multiple brackets in the same folder, they will be batch processed with automatic recognition.
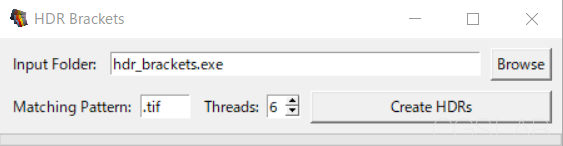
In the background, the exposure setting is calculated based on the metadata, the image is merged with Blender, and the preview JPG for tone map adaptation is written out with Luminance HDR after processing.

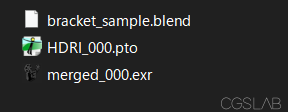
When the end sound is heard and the process is completed, you can see that the merged HDRI is created by creating exr and jpg folders in a folder called Merged.
The data bracket_sample.blend is also written in the exr folder, but it can be deleted if there is no problem with merging because it is Blender data of merge processing.

Check merged_000.exr and if there is no problem in the process, it will be merged properly.
Misalignment correction and ghost processing such as moving people and clouds are not performed, but they are merged fairly finely because they are minimal blend processing.
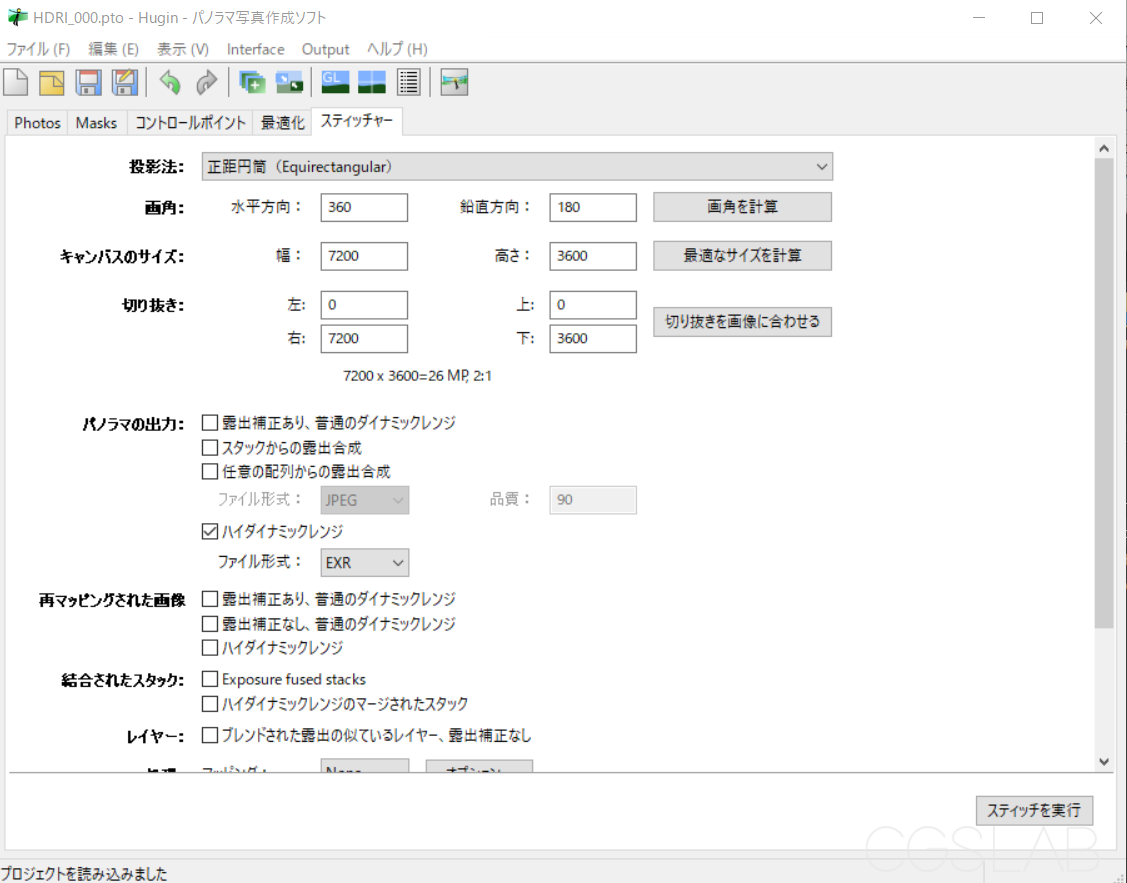
Stitch Processing
Use the free software Hugin – Panorama photo stitcher for stitching.
First, download and install Hugin.
Next is how to stitch, but since it is difficult to write the process, a template will be distributed. It is unclear how far THETA Z1 has individual differences, but it should be usable as it is because it has been calibrated to a good feeling.
Download Template
HDRI_000.pto is a template for merged_000.exr and HDRI_000_preview.pto is for merged_000.jpg. If you don’t need JPG stitches, you don’t need this.
Since it is a relative path, place HDRI_000.pto in the same folder as merged_000.exr and HDRI_000_preview.pto in the same folder as merged_000.jpg.
When performing batch processing and the merge file name is merged_001, open .pto in text and rewrite the file name to match.
.pto can be opened normally with Hugin – Panorama editor and stitches can be done, but I want to batch process,
Note: The image is the window when the Interface setting is switched to Expert. If you export from Simple Interface panorama export immediately after installation, the settings will not be appropriate.
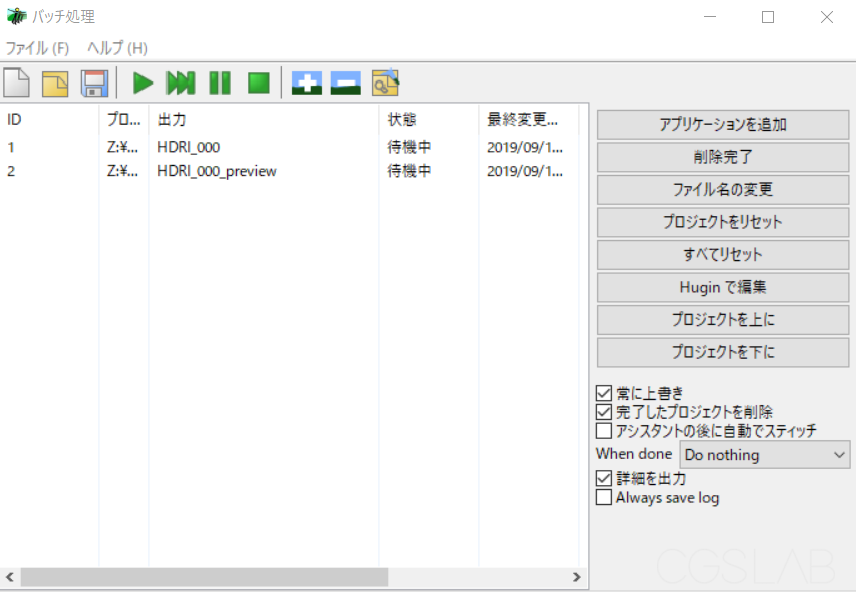
PTBatcherGUI – Launch Batch processor, add HDRI_000.pto, HDRI_000_preview.pto by drag and drop, and batch process.
If there is no problem after checking the data after stitching, the process is complete.
It is necessary to adjust exposure and white balance as necessary.
Since it is not possible to completely shoot the sun light source, use the light source correction or add or replace the sun light on the CG software.
If there is an effect from reflection, remove tripods and tripod shadows.

-
If THETA is tilted during shooting, adjust the level on the editor as necessary.
-
The template export resolution is 7200 x 3600. This value is used because a processing error occurs when the resolution is increased in the verification environment.
-
Hugin can export stitched JPG at the same time, but the exposure was not appropriate. In the case of Hugin, jpg and HDR export are only run twice in the end, so this time we are processing individually using images already out of HDR-Merge. When the HDR-converted EXR is re-processed with Luminance HDR, the stitching process will not be misaligned.
-
Since Hugin’s EXR export is 16bit float, there is some data degradation, but there is no problem for lighting use. PTgui can be switched to 32bit by setting.
-
Since the sample image is the calibration source, it is stitches that emphasize distant view. When used in a small room, foreground stitches will be greatly displaced.
-
In rare cases, Enblend, which is used for merge processing, does not process cleanly, and negative values may occur. Changing the blend to built-in reduces the accuracy of the merge, but it can be avoided.
Although the process and effort have increased compared to using PTGui, all command line control is possible, so if you make it a single tool, I think that batch processing after image capture is possible.
Reference tutorial for stitching from scratch with Hugin

This is end of part 2 of the community translation of the CGSLAB article by Korematsu Naoki. The original full-length article including the sections below is available in Japanese on the CGSLAB site (Japanese). If anyone goes through this tutorial and wants to contribute English screenshots, please reply here and I will incorporate them into the translation.
Upcoming Sections
- Sample data
- Additional sample data
- Example Using Blender
- Image with linear Rect202
- Using the RICOH THETA Stitcher
- Using Nuke to Stitch
- Using Natron(Nuke) to Stitch
- Using GIMP for Image Correction