Create High Quality HDRI for VFX using RICOH THETA Z1 (Part 3/3)
Sample data
Original data including RAW data used in this explanation
DNG, TIFF, each process data download - Size 1GB
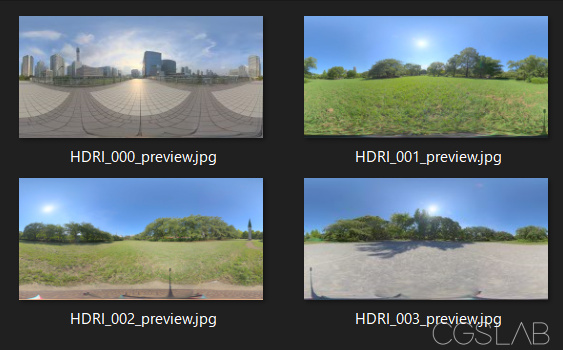
Other sample HDRI
Both are based on sRGB development. Compliant with current flow without light source correction.
License CC0
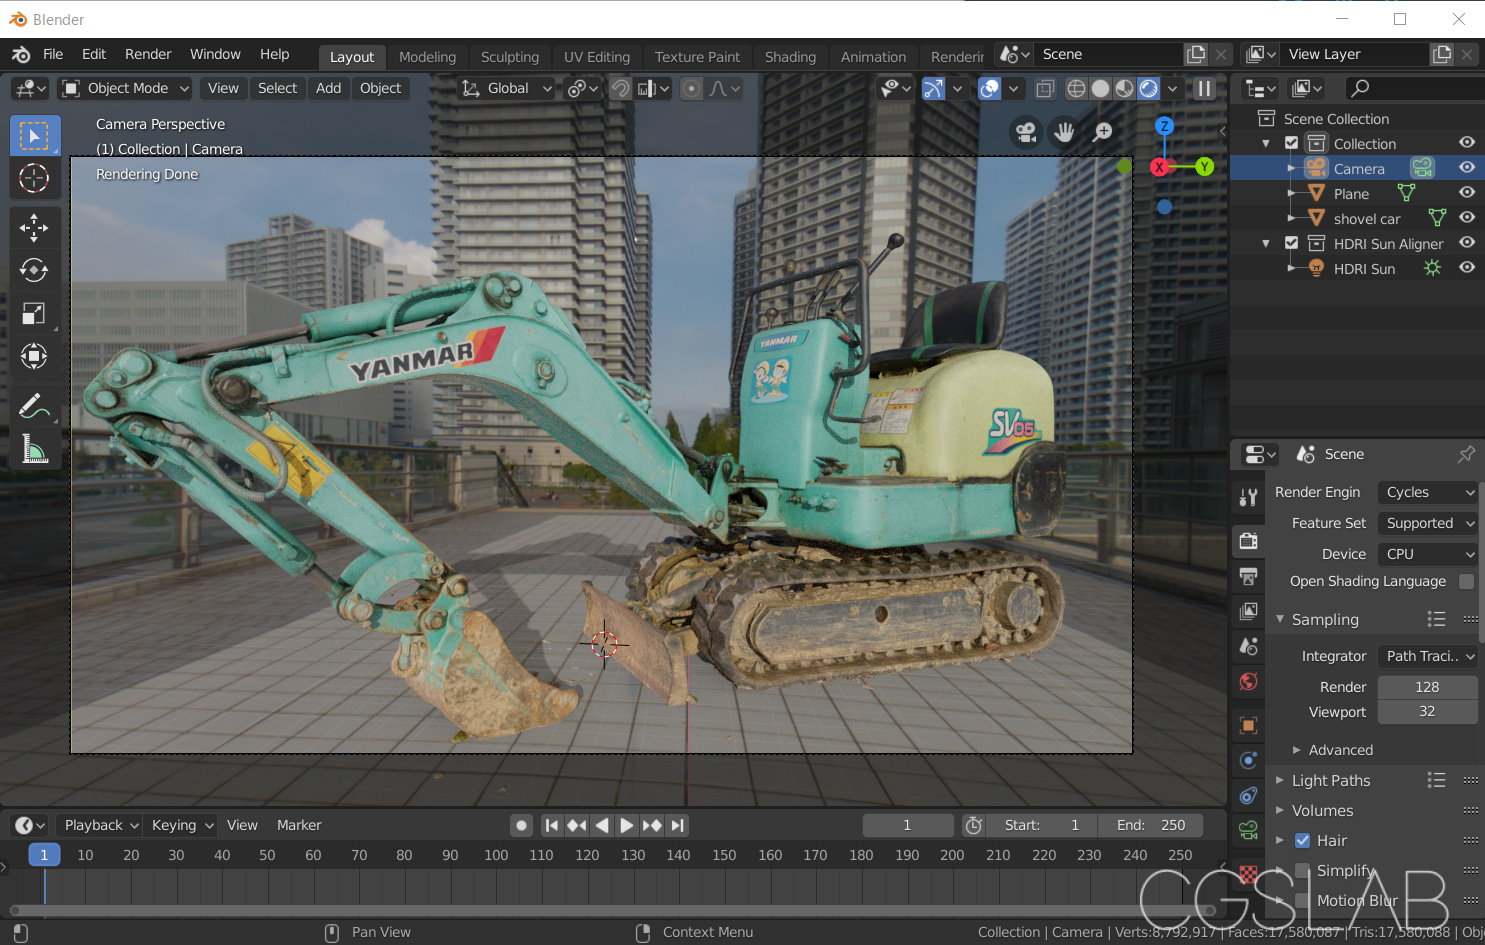
Example of use in Blender
A free addon called HDRI Sun Aligner is useful for aligning the sun on Blender.
Development with Iinear Rec2020
When developed in darktable with Iinear Rec2020, the image is TIFF, but the gamma is exported as an Iinear image. If this is the case, HDR-Merge will be read as sRBG (gamma2.2) in Blender when HDRI is combined, and processing will not be performed properly.
Therefore,
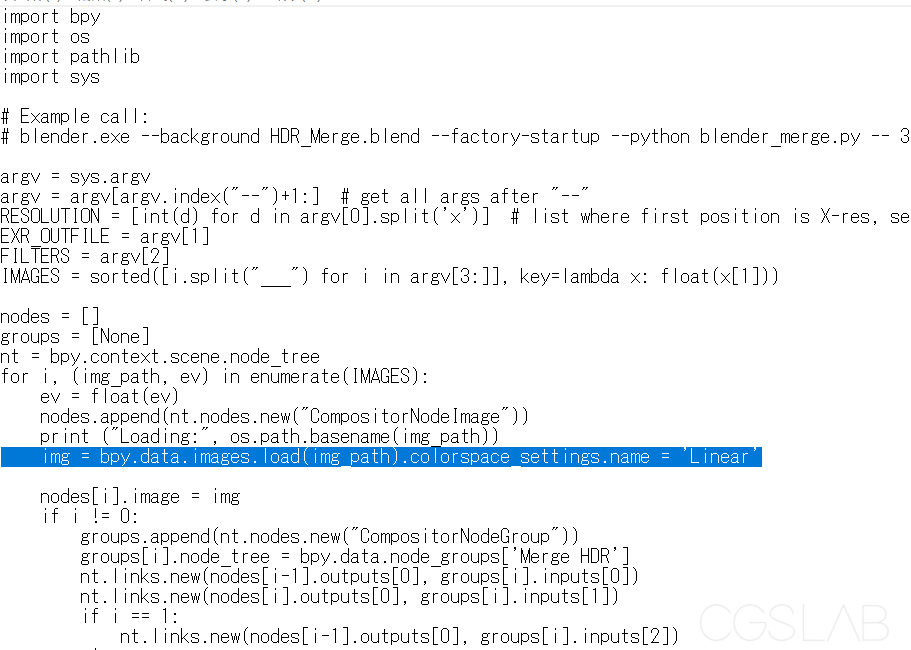
HDR-Merge-master \ build \ blender \ blender_merge.py
Open with text
img = bpy.data.images.load (img_path) .colorspace_settings.name = ‘Linear’
If is described, the image can be forcibly loaded as Iinear and can be processed appropriately.
There is no information on how much color gamut the actual Z1 has as a sensor, and we have not verified it. Since it is HDRI of Rec2020 color space, it is necessary to match the color space read by CG software. It might be easier to use Nuke etc. to convert to ACEScg etc.
Note: RawTherapee has many color profiles such as ACES, and the gamma can be changed arbitrarily.
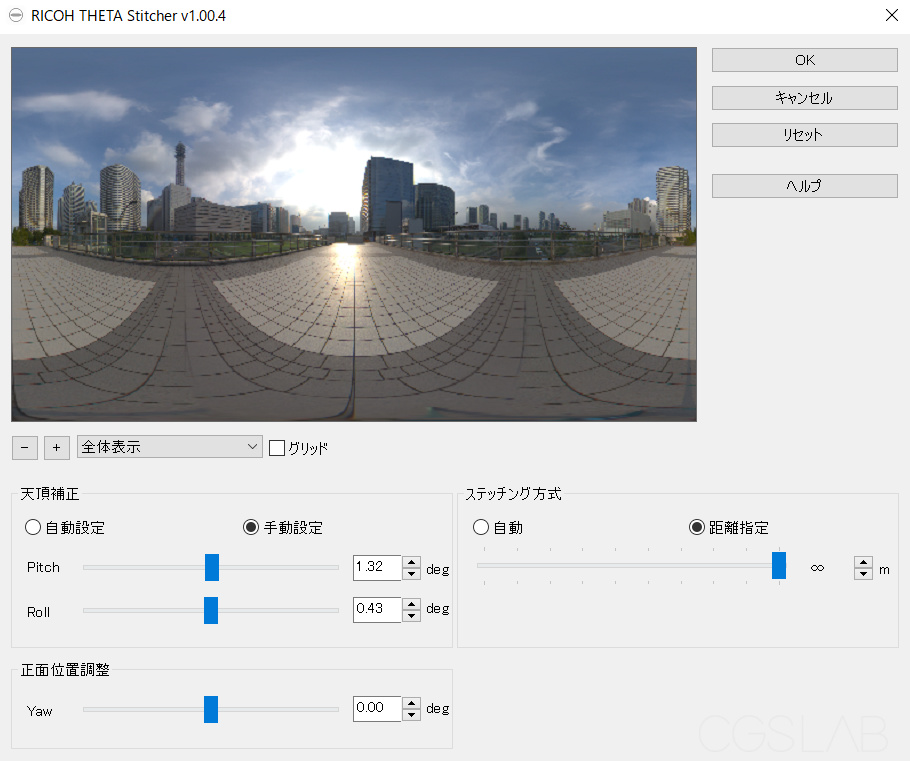
Bonus ①Stitch with RICOH THETA Stitcher
RICOH official RICOH THETA Stitcher is released as a plug-in for Adobe Lightroom Classic.
The initial settings are difficult to understand, and you can set it so that you can start it from Lightroom by looking at the manual in the installation folder.
I’m thankful if you start it alone, but I can’t. However, you can use it by dragging and dropping TIFF data to RICOH THETA Stitcher.exe with Lightroom running.
The original DNG file is required on the same level. Pressing OK will overwrite the TIFF with the stitched data. 16bitTIFF can also be processed.
The stitches are the cleanest because the official lens correction values are used. However, since numerical values are also automatically input from the image metadata every time, it is necessary to manually correct the images one by one and align the brackets, which is not practical.
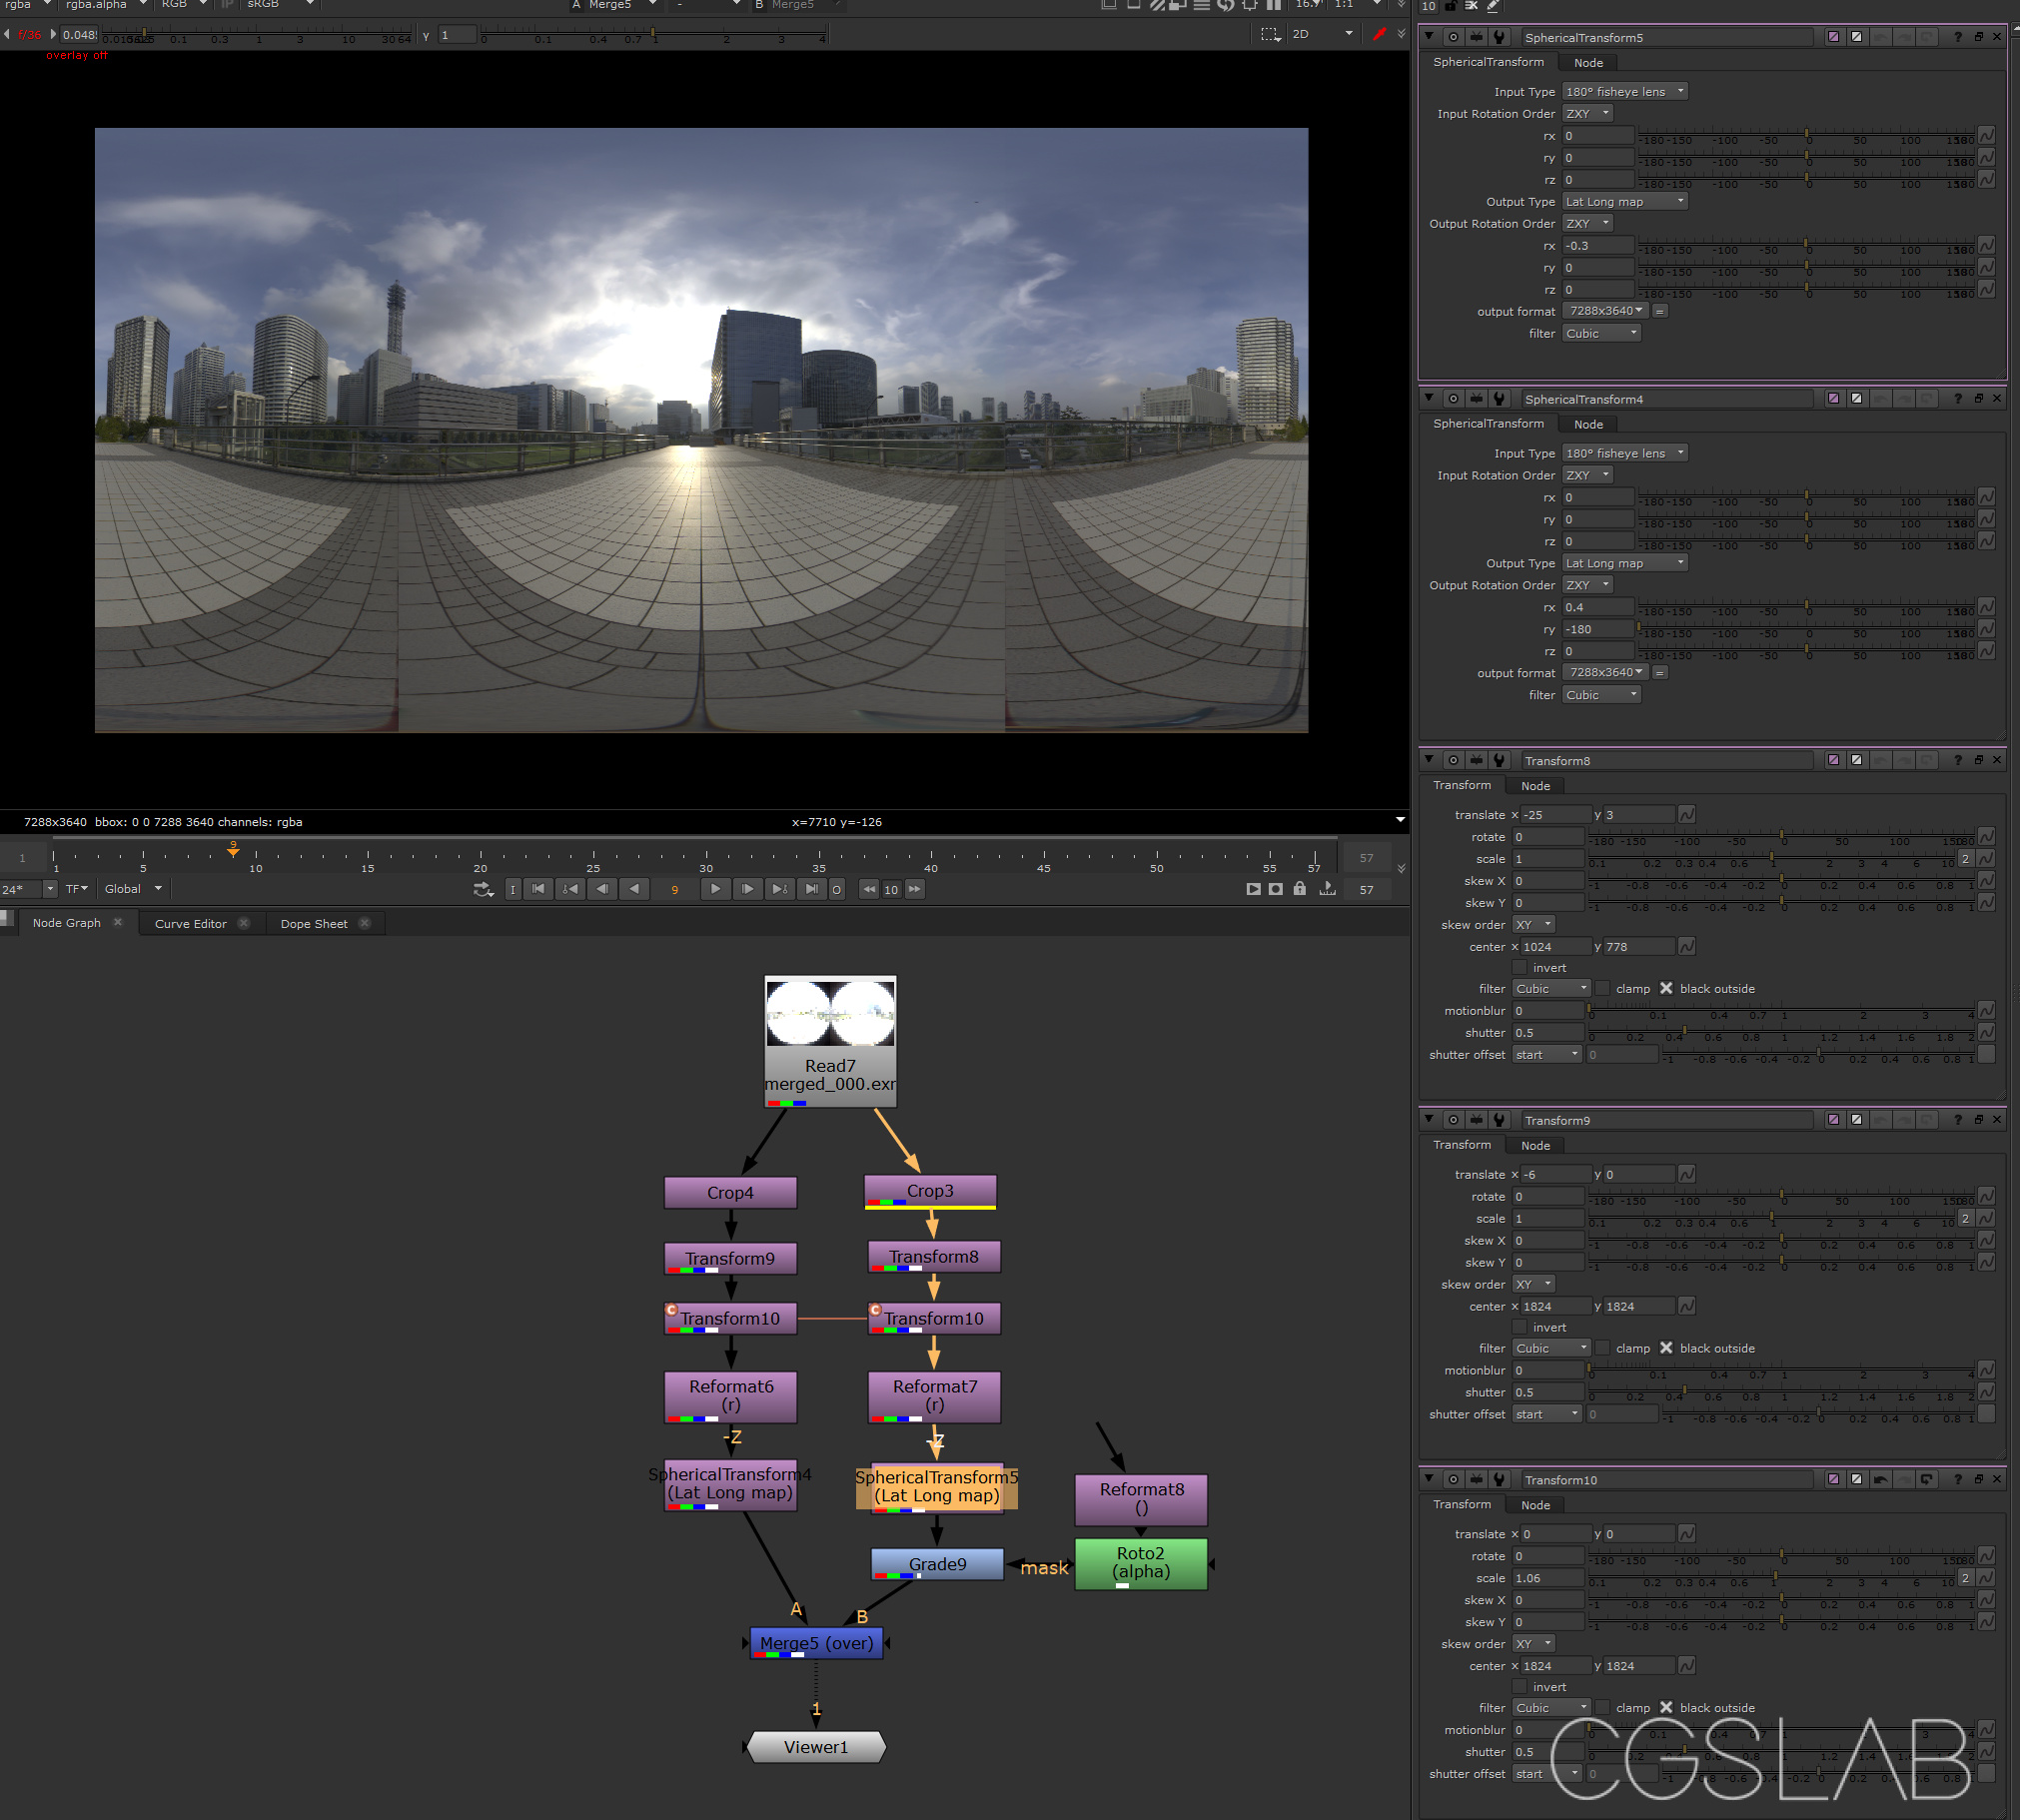
Bonus ② Stitch with Nuke
Stitch using Nuke’s Spherical Transform. Spherical Transform doesn’t process BBox, so you can’t blend the joints. This is enough for lighting.
Also, although it has not been verified, it seems to be able to stitch using Cara VR of a paid plug-in (it seems to be integrated with NukeX12). High cost.
Crop of lens> Corrected because the center of the lens is slightly shifted> 190 °, so adjust the scale so that the angle of view is 180 °> Deformation from fisheye lens> Merge
Nukepedia’s free plug-in for Nuke called J_Ops has an HDR tool called HDR merging that can be completed only with Nuke after development, but unfortunately there is no update after Nuke8 support and the latest version Cannot be used with Nuke. There is no similar plug-in like Gizmo.

Naturally HDRI Haven’s HDR-Merge can be assembled by Nuke or Natron as if it were processed by Blender’s composite node in the back.
Especially in THETA, the shooting rules are difficult to shift, so there is no need to pull the value from the metadata every time, so it is easy to create a template.
Bonus ③ Stitch with Natron (Nuke)
I’ve done so far with free software, so I wondered if Natron could manage it. However, there is no node equivalent to Spherical Transform as Nuke.
So STMap can’t be used. You can use either Nuke or Natron.
Original STMap> Read STmap with Hugin and apply only deformation> Adapt STMap with Natron

Of course, the merge process is only blurred with a mask, so image merge processing like Hugin is not done. However, you can get a pretty good result by adjusting the exposure with a little mask.
Although it is not universal, once it is made into a template, the processing is the fastest and becomes 32bit processing, so the drawback of becoming Hugin’s 16bit processing can be solved. The resolution is 7200 x 3600 combined with Hugin.
I feel good with this. That’s why I distribute this data. STMapA, B, Mask, Naron data
Bonus ④ Correction by Gimp.
The color temperature adjustment in Gimp’s color adjustment was introduced because it was convenient.
It is convenient that you can change the color temperature from any color (during development) to the specified color temperature.
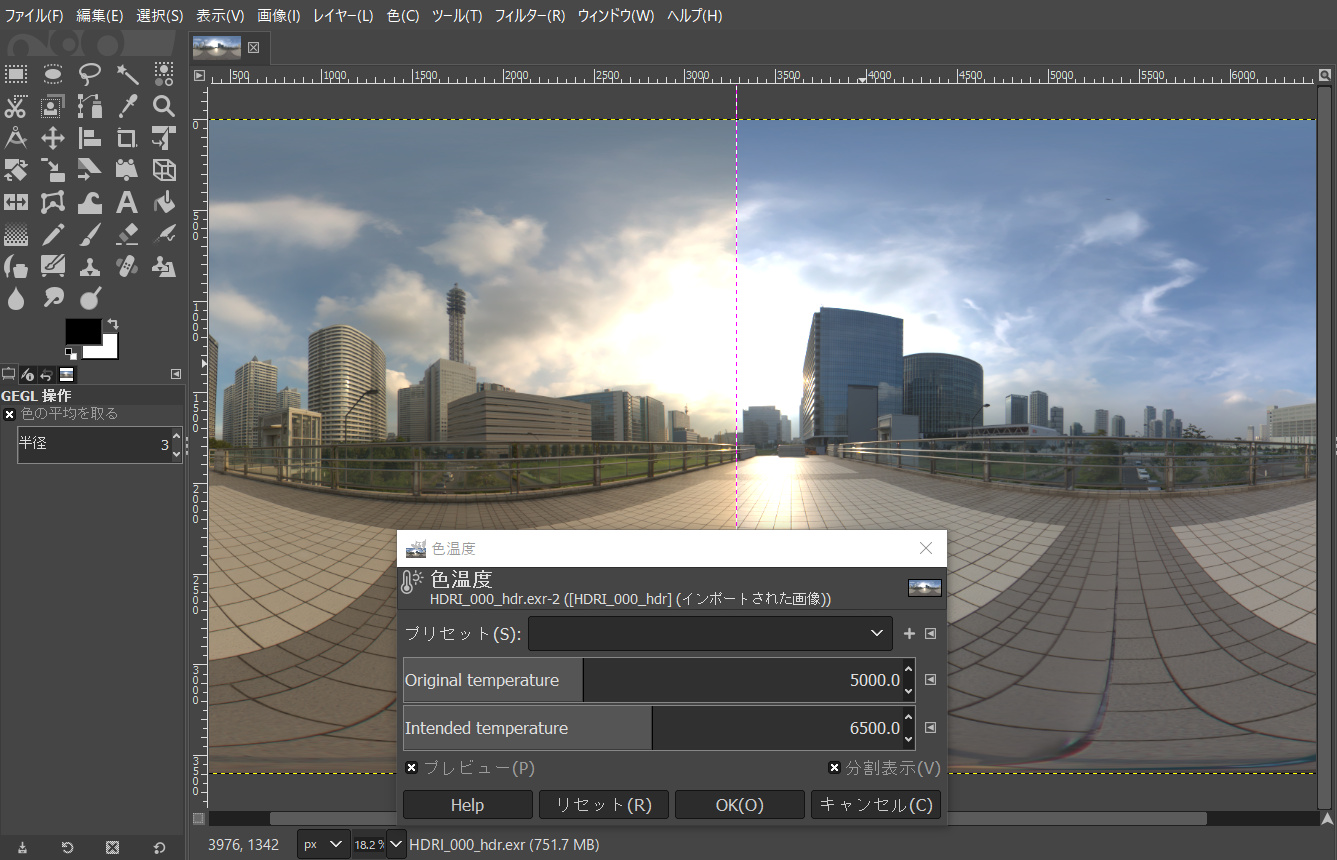
In addition, clone brush and correction brush can be used for both 16bit float and 32bit float, so it is convenient when there is something you want to erase.