This is a concept to control timelapse from a paraglider or other 360 action situation.
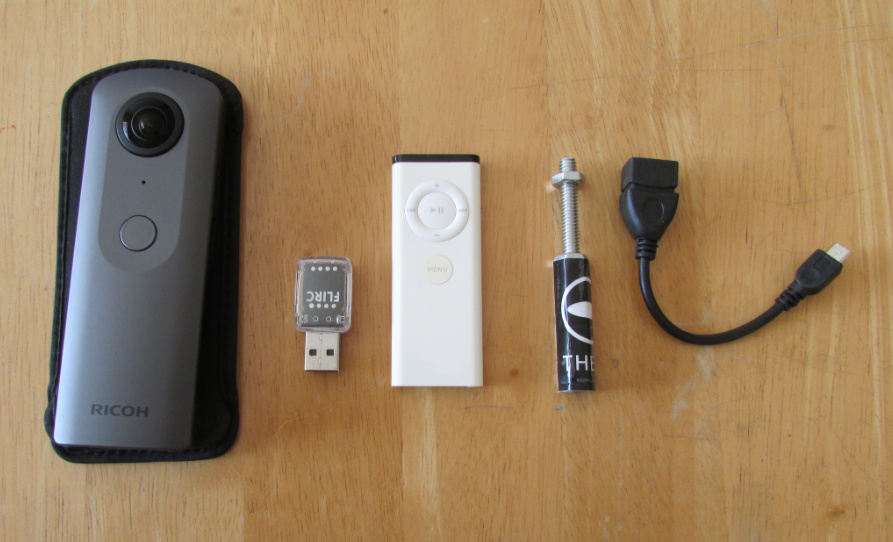
Components
- FLIRC IR receiver $22
- USB OTG adapter (maybe $7 on eBay if user does not already have one?)
- Existing IR remote you have around the house
- 1/4" by 20 tpi stud and nut to attach to bracket on paraglider
Assembly
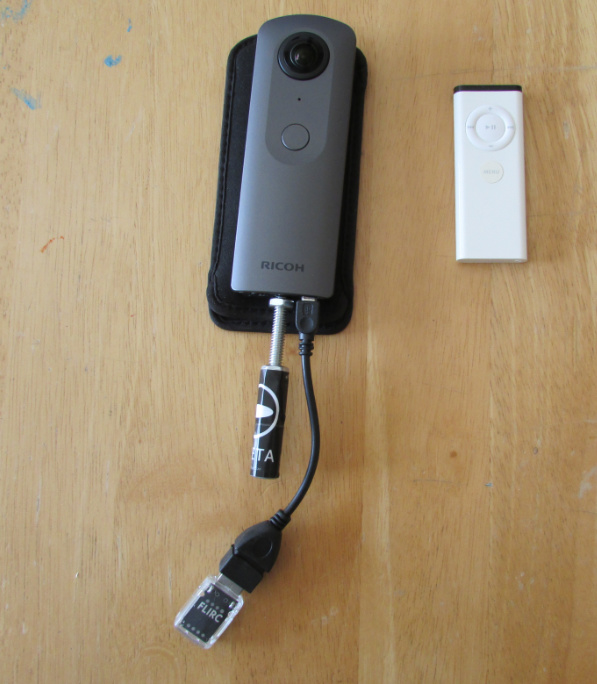
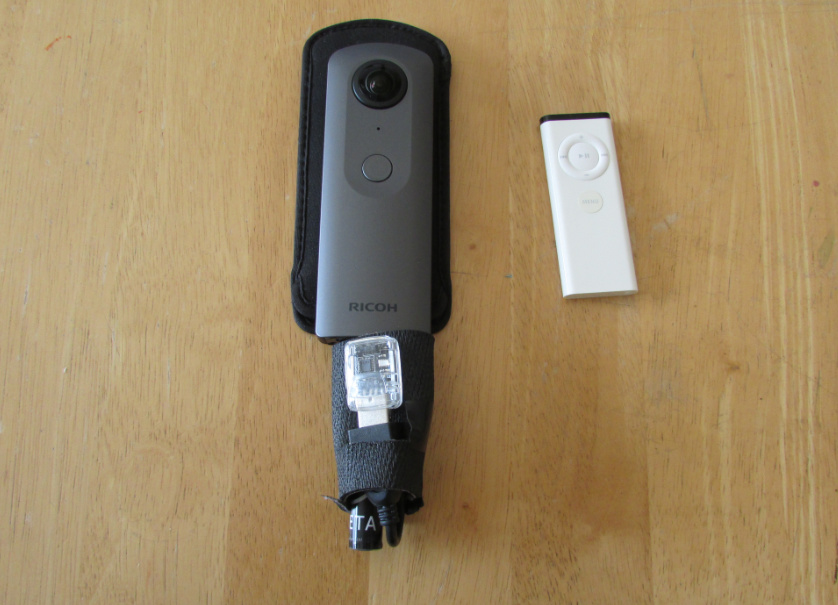
Prototype Case
This is a prototype neoprene case that holds the components against the stud. Case objectives:
- prevent IR receiver from moving in the wind or through action sport movement
- secure components to solid base to prevent accidental detachment and loss while in-flight
- easy removal from camera with velcro tabs
Mounting
The accessory can be mounted on any standard 1/4" tripod mount or bracket.
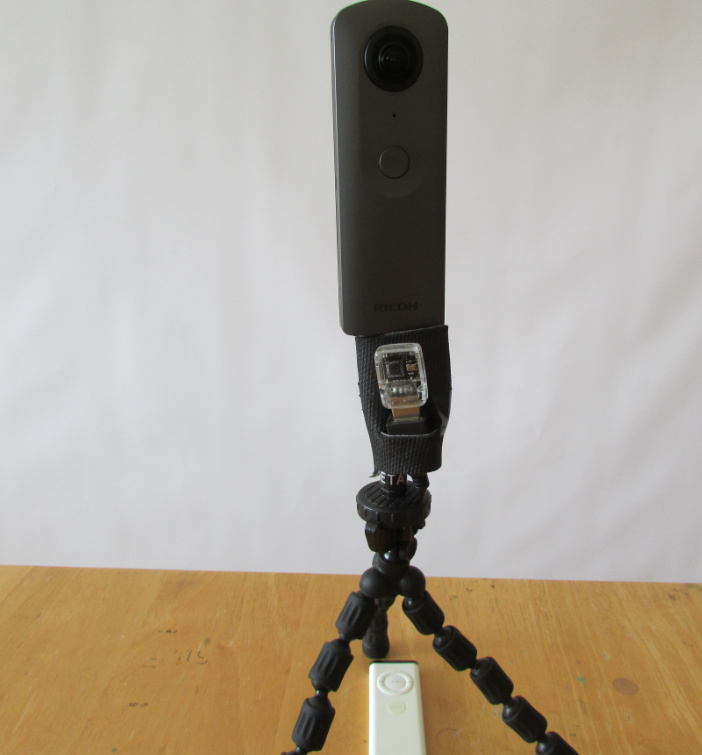
Mounting the base of the accessory to the bracket will attach both the camera and IR receiver with a solid metal bolt.
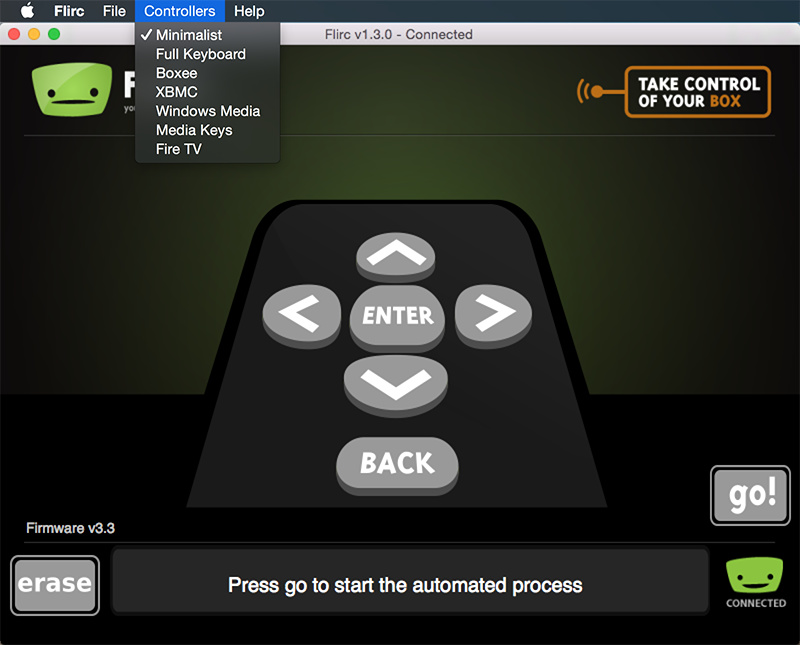
Configuring IR Controller
The FLIRC desktop software is used one-time to map the buttons on the IR controller to Android keycodes. The mapping is saved to FLIRC and is retained when power is off.

Configuring Camera
As the camera only has basic LEDs to display output, I suggest saving settings ahead of time into the camera with a mobile phone. With the mobile phone or desktop computer, the user can save three different timelapse configurations to the camera prior to the shoot.
Example Operation
Assuming we keep the operation simple and use only two buttons on the IR controller:
Use
- press play once to start timelapse
- flash WiFi LED in magenta to indicate operation. Rate of blinking indicates delay
- press play again to stop timelapse
- turn off LED
On-site configuration
- press right arrow to move from default timelapse to longer delay
- LED blink rate indicates current delay
- press right arrow again to move to next preset delay, making the delay longer
- press right arrow again to cycle back to default timelapse delay
Code (Not Implemented)
This is only a concept. I have not attempted to build the plug-in.
IR Remote Button Press
The first step is to modify the KEYCODE_CAMERA below to a key from Android using this reference:
For example, changing it to KEYCODE_T and checking to see if it can take the keyCode from the IR. I’d like to first plug a normal USB computer keyboard into the THETA with USB OTG and see if I can trigger the shutter by pressing T. Then, I can try the remote.
public void onKeyDown(int keyCode, KeyEvent event) {
                if (keyCode == KeyReceiver.KEYCODE_CAMERA) {
                    customShutter(m_is_bracket);
                    if(m_is_bracket){
                        notificationLedBlink(LedTarget.LED3, LedColor.MAGENTA, 300);
Taking Picture
We can use the standard RICOH SDK code to take the picture. We just need to set up a variable delay between pictures.
    intent = new Intent("com.theta360.plugin.ACTION_AUDIO_SHUTTER");
    sendBroadcast(intent);
    mCamera.takePicture(null,null, null, pictureListener);
LED Indicator
We can use the standard RICOH code to control the feedback from the LED
notificationLedBlink(LedTarget.LED3, LedColor.MAGENTA, 300);
Next Steps
- It would be great if @jcasman put this concept up on the THETA V Plug-in Development Community Guide concept section.
- Maybe someone can test the key press with a normal keyboard and USB OTG
- Test IR controller with normal picture to just test IR capability first
- Implement single delay only
- Developer builds configuration application for delays
- Developer or community writes end-user setup guide (mounting the camera similar to the example above)
- Developer puts plug-in on THETA store