This article was written by Andre Hernandez
VR-based monitoring system that allow miners (or other workers) to have 360° visibility and maneuverability. Built with the RICOH THETA V.
Story
Currently and historically, in the mining industry we encounter a high level of injuries and accidents for distractions during mining activities. In the worst situation people who perform this activities lose their lives.
One example is the sinister that occured in the Czech Republic in December 21, 2018. An explosion killed 13 workers. Or the one in a mine in China with a roof collapse that killed 19 workers.
Recurring accidents like Methane and coal dust Blasting accidents kill 12, 000 people a year. According to the International Labour Organisation (ILO), while mining employs around 1% of the global labour force, it generates 8% of fatal accidents.
China has the world’s largest mining industry, producing up to three billion tonnes of coal each year and already is introducing new safety laws to enhance miners security.
This kind of news are terrorific and tragedies like this can be avoided, the two key factors are effective communication and good information visibility.
Introduction:
We are going to build a complete monitoring system that allow the miners to have 360° visibility. The main point of all this is that the miner would NOT have to be present in the area as everything will be done remotely via robotic arm and using VR.
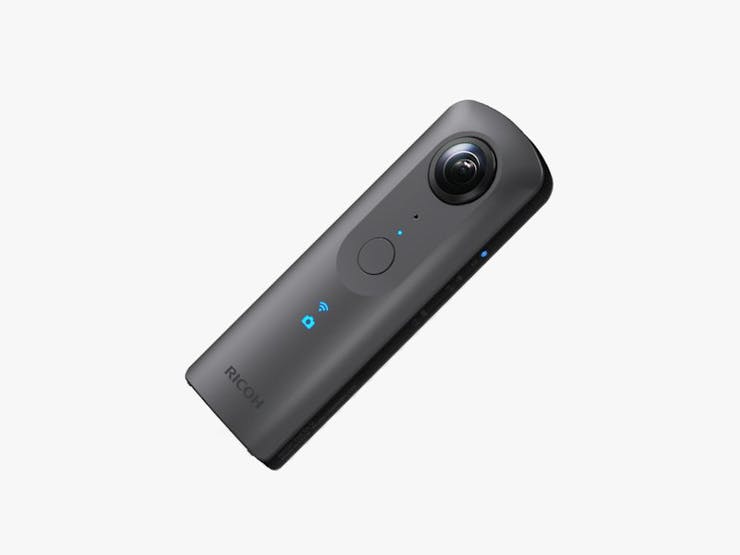
Our development will connect the RICOH THETA 360° camera. This in order to remotely move a robotic arm via VR that will serve as a PoC for later developments.
Current Solutions:
- Epiroc offers machinery that can be operated remotely using directional camera to minimize risk and accidents when dig caves to set explosives.
- Komatsu bring large arms placed in truck to dig holes using a mechanical way with a safety range area to operate.
- Minemaster bring an auxiliary digger that bring the operator physical view and wide range to manually operate the dig arm.
These suppliers are recognized in the market but much of them use manual technology and require people in the place to perform their activities.
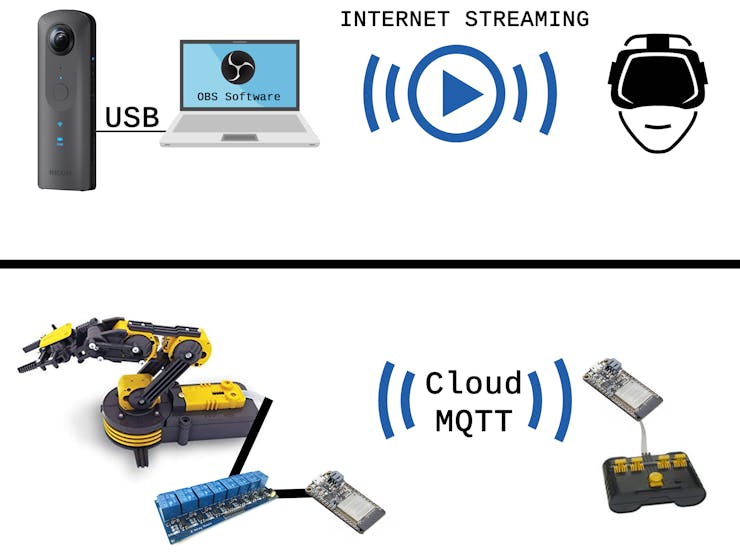
Connection Diagram:
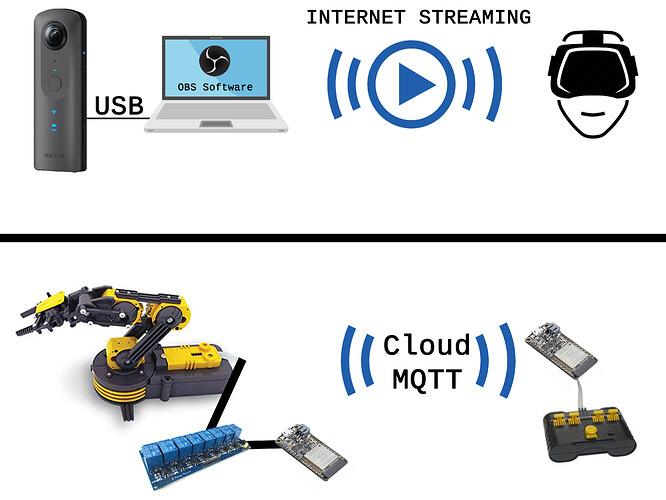
This is the connection diagram of the system:
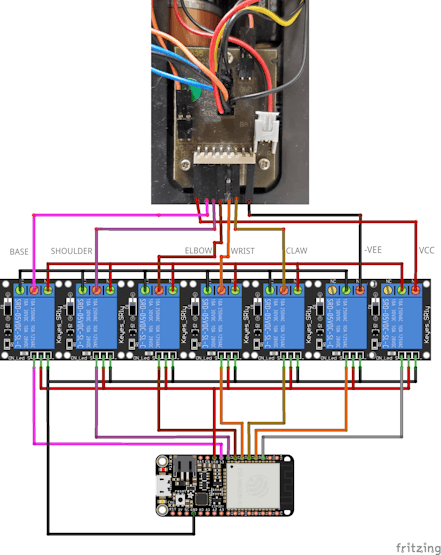
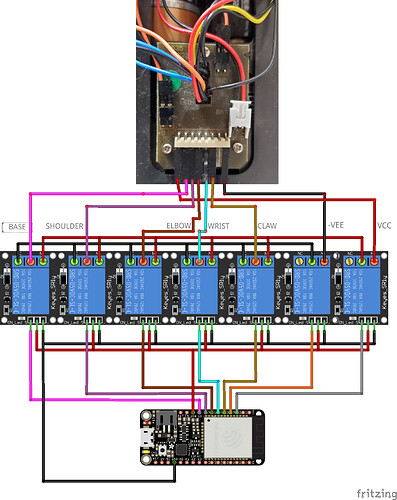
This the ARM Relay Diagram:
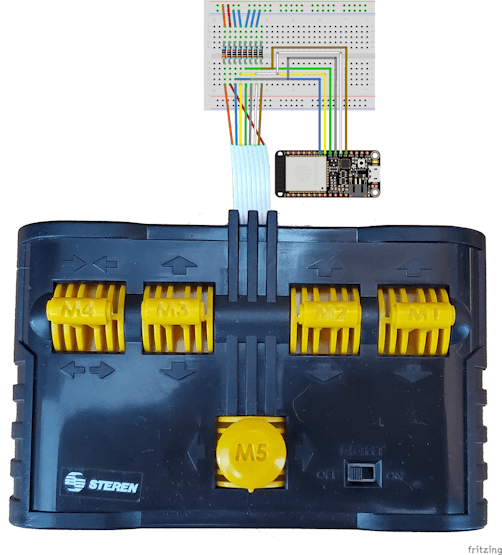
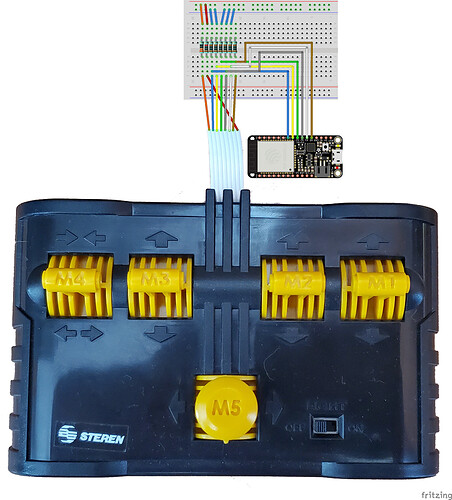
This is the ARM Control Diagram:
Theta and Streaming Setup:
Connect the Camera to the PC and put it in Live node.
- Press the mode button until the word Live appears, this mode is only accessible when the camera is connected to a computer.
You must configure the camera to perform live streaming:
Install the following software on your computer:
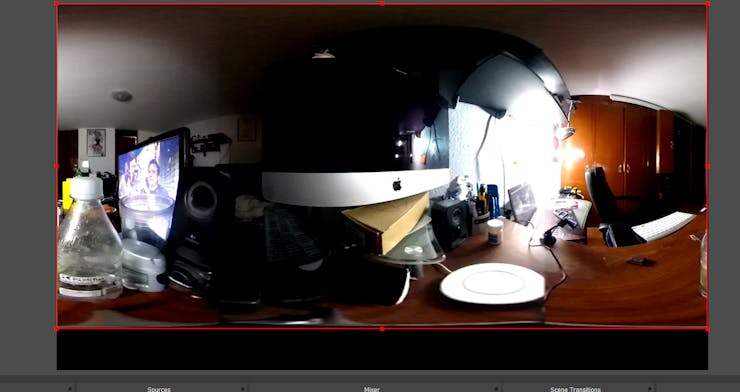
Connect the camera to the PC and configure the OBS to check that we have an image:
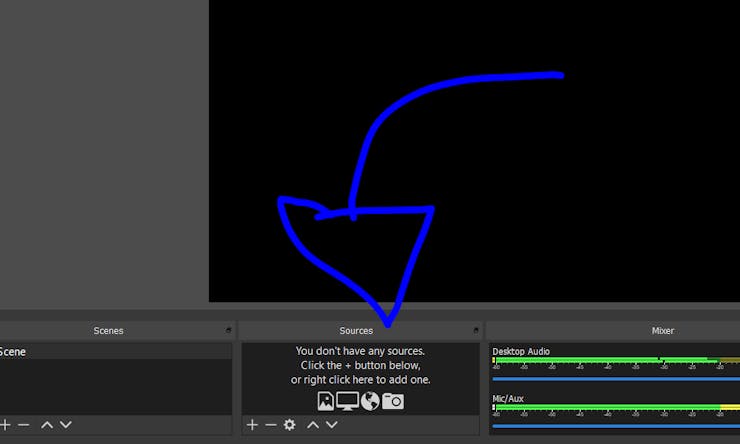
- Open OBS and add Source.
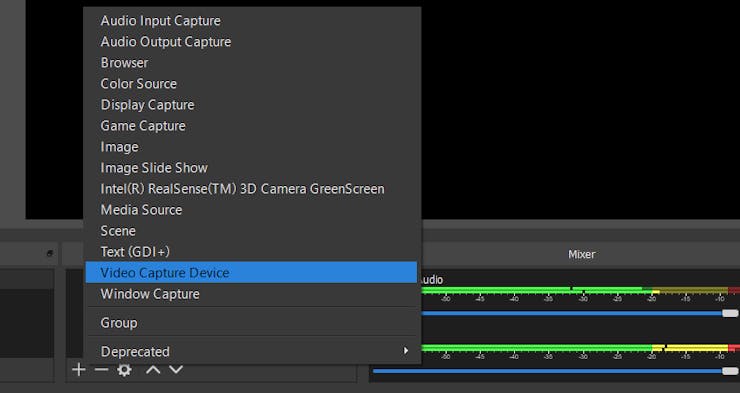
- Add Video Capture Device.
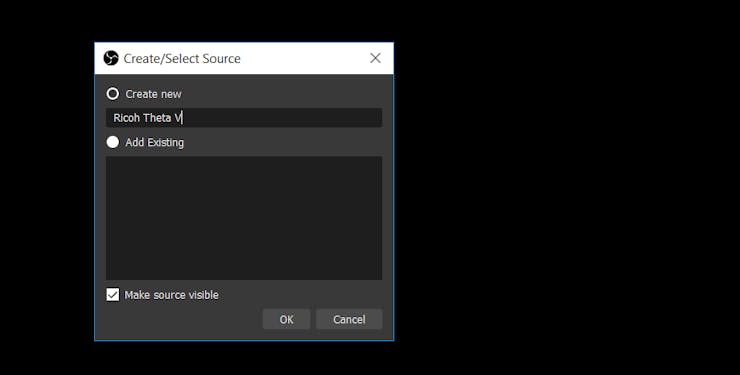
- Add the device name (any name).
- Add the device name (any name).
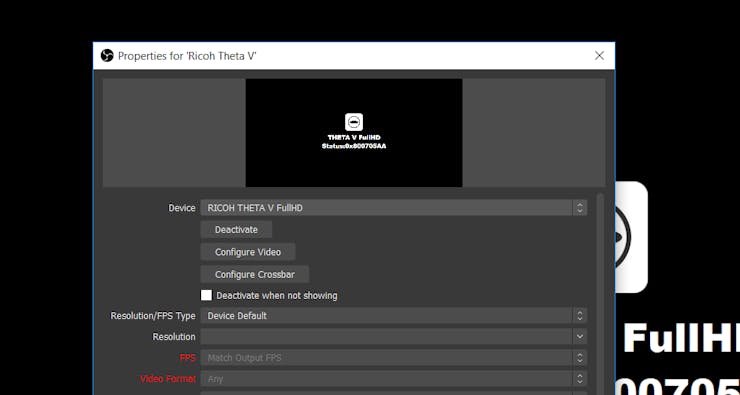
- Select “Ricoh Theta V FullHD or 4k”.
- If everything works fine, we should see the image of the camera in the OBS.
Configure Streaming on Youtube:
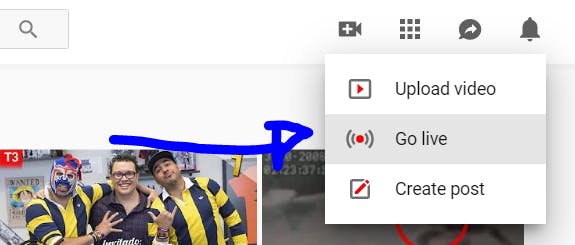
- Go to the YouTube page and go to the “go live” tab.
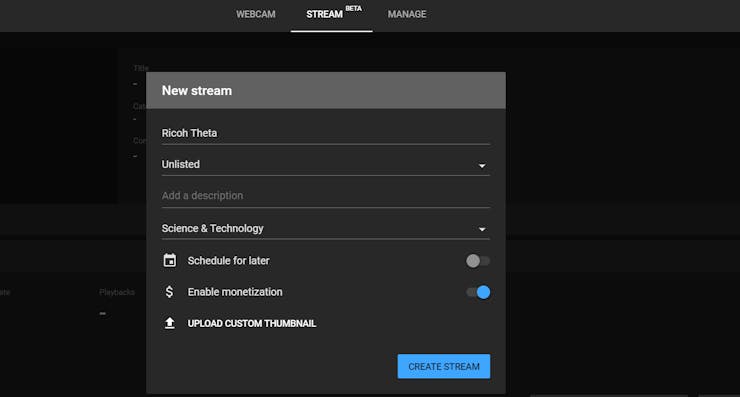
- Create your new streaming service, I recommend unlisted so that your stream is not made public.
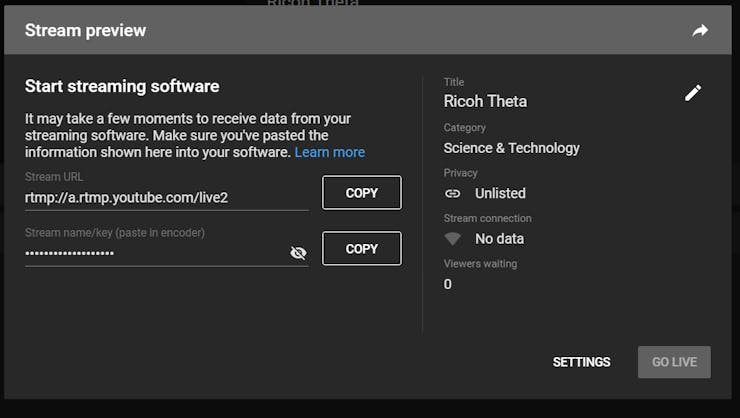
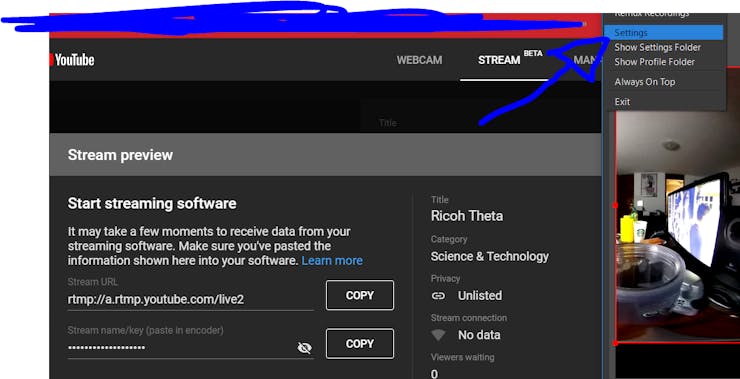
- Once the stream is created go to “settings”.
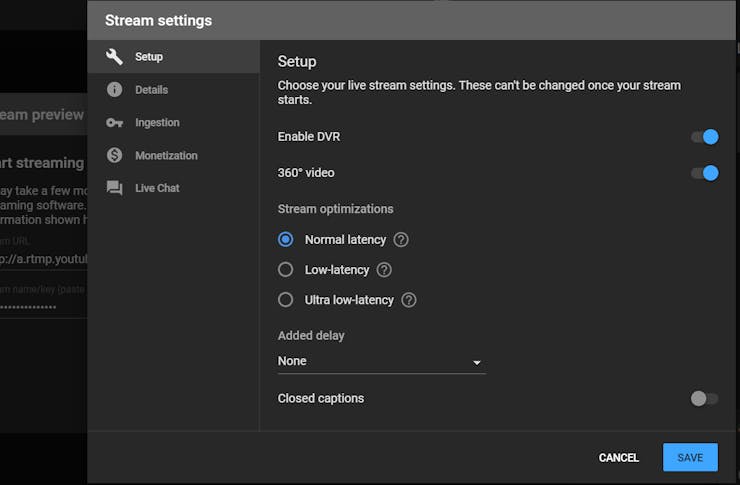
- Activate the 360 transmission.
- Go to OBS Settings.
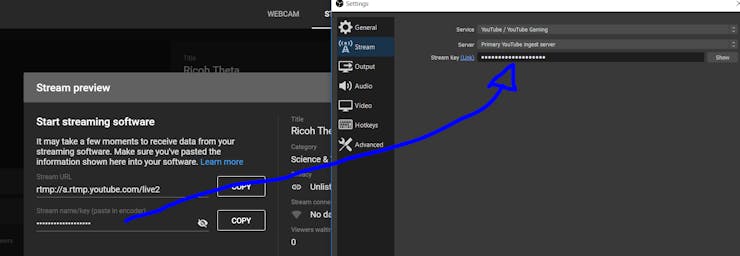
- In the “stream” tab, set the values exactly as the image and paste your key in OBS.
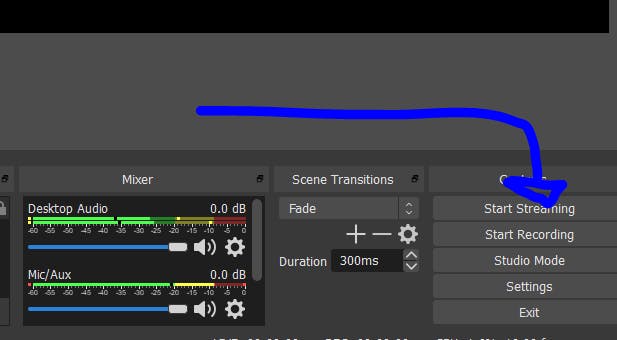
- Start the transmission.
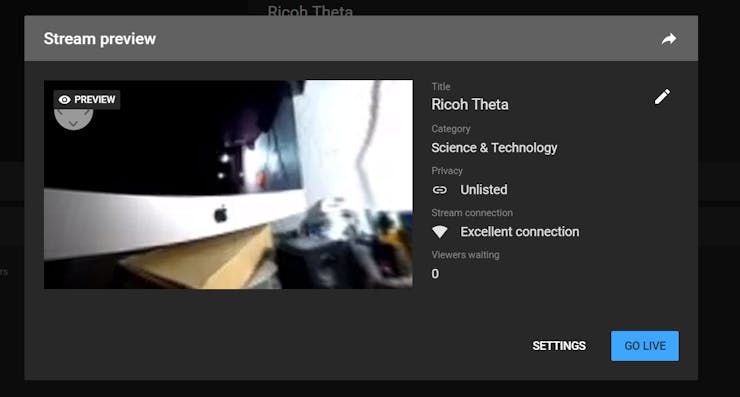
- If everything goes well you should see a preview of what the camera sees.
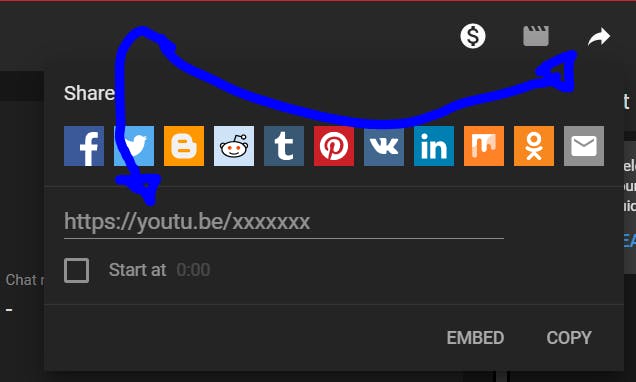
- Since you have the link, you can open it in any VR viewer (Even a Cardboard one!).
MQTT Setup:
For MQTT you can use any MQTT service available in the market, IBM, AWS, Google IoT, CloudMQTT, etc…
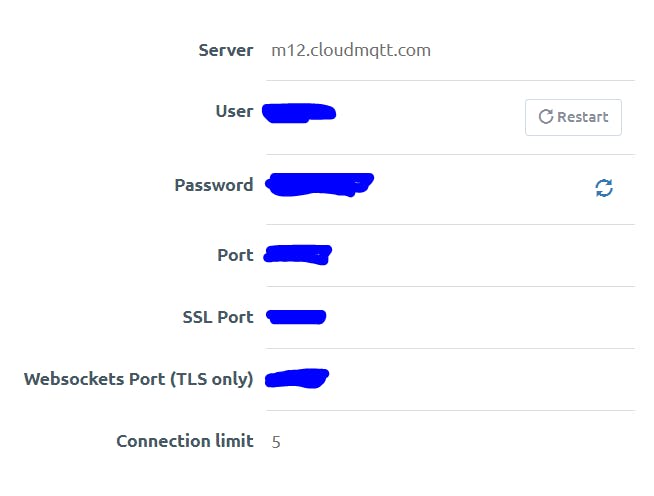
- We will use CloudMQTT because of its ease of use. Create a free account and continue with the tutorial. Link: https://www.cloudmqtt.com/
- We will need the MQTT Cloud credentials for the MQTT configuration in the next step. So, mind them.
ESP32 Setup:
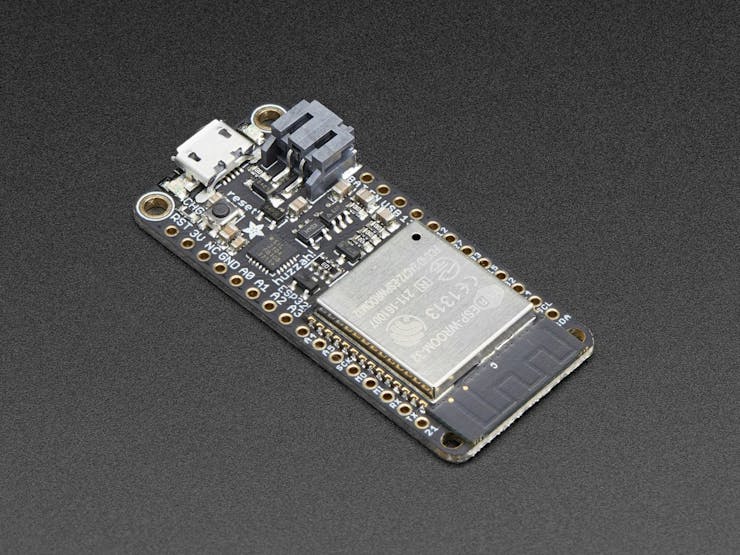
Download the files from the “Arduino Files” folder at the bottom of this article. We will have to configure two ESP32 boards, one for the arm and one for the control. For both we will have to configure the WiFi and CloudMQTT credentials.
 const char* ssid = "YOUR_SSID";
  const char* password =  "PASSWORD";
  const char* mqttServer = "m12.cloudmqtt.com";
  const int mqttPort = YOURPORT;
  const char* mqttUser = "YOURUSER";
  const char* mqttPassword = "YOURPASSWORD";
  bool sw = false;
For each ESP32, change the name with which it will connect to CloudMQTT.
First ESP32:
 if (client.connect("ESP32Client1", mqttUser, mqttPassword )) {
  Serial.println("connected");
  }
Second ESP32:
 if (client.connect("ESP32Client2", mqttUser, mqttPassword )) {
  Serial.println("connected");
  }
After that, the modules should work without problems.
The Final Product:
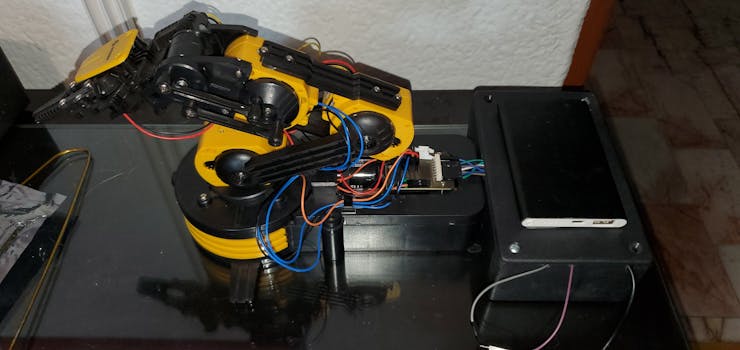
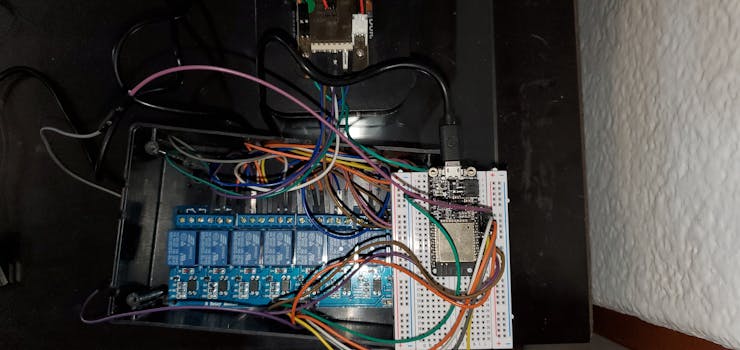
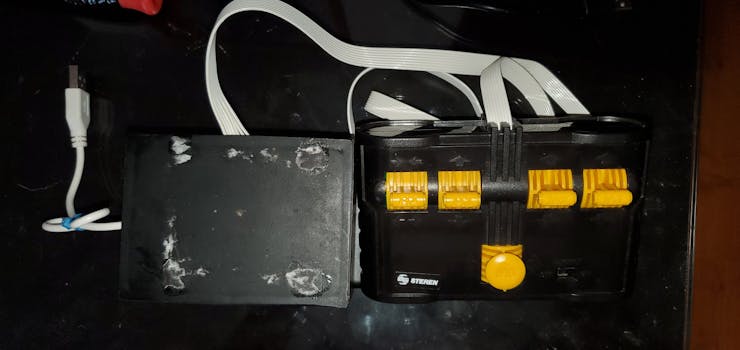
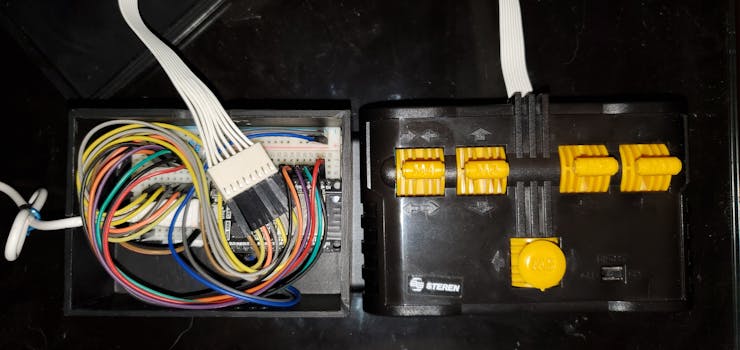
Here are some pictures of the product assembled.
Robot Arm Driver, Final Assembly:
Robot Arm Driver, Internal:
Robot Arm Control, Final Assembly:
Robot Arm Control, Internal:
Now its time to test everything!
Our Epic Video:
Important Note:
During the development process, I tried to develop the video streaming and image processing through Android Studio in a plugin, however the algorithms did not work. So it was decided to make an extra plugin for the contest in addition to the project.
Installation process:
- Connect your RICOH THETA camera to your computer.
- Enter in the plugin store. (https://pluginstore.theta360.com/)
- Select any plugin what you want.
Our plugin store link: PENDING…
Our github apk link: Theta-MagicSoundBox/Theta-MagicSoundBox.apk at master · JorgeAndre12/Theta-MagicSoundBox · GitHub
Note: I recommend that in addition to installing the plugin, check out the GitHub project, it is very interesting to see how the plugins were programmed! ![]()
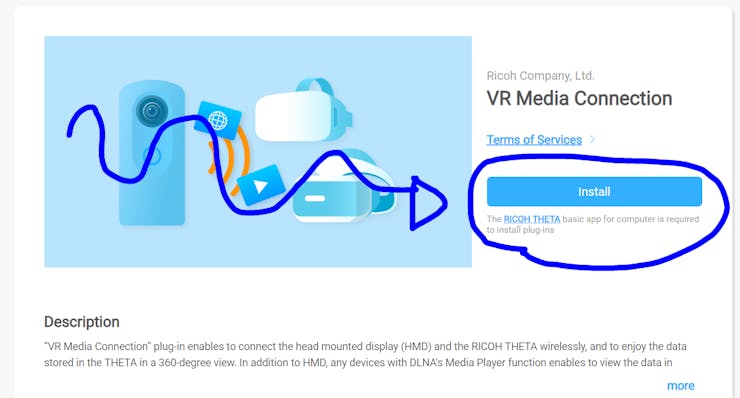
Yeah…the big blue button.
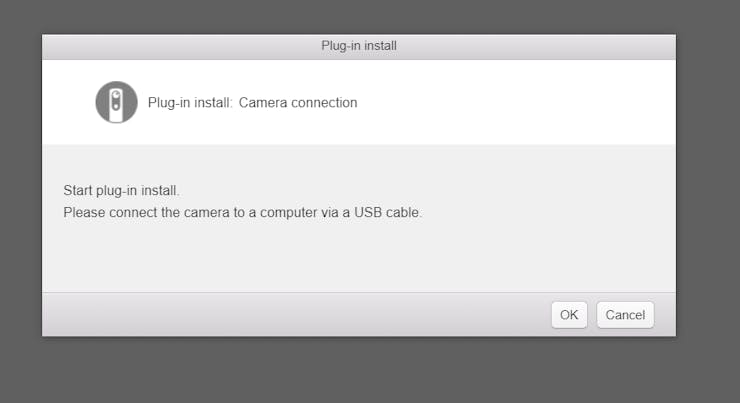
It will immediately open the official RICOH THETA desktop software, press “OK” to install the plugin.
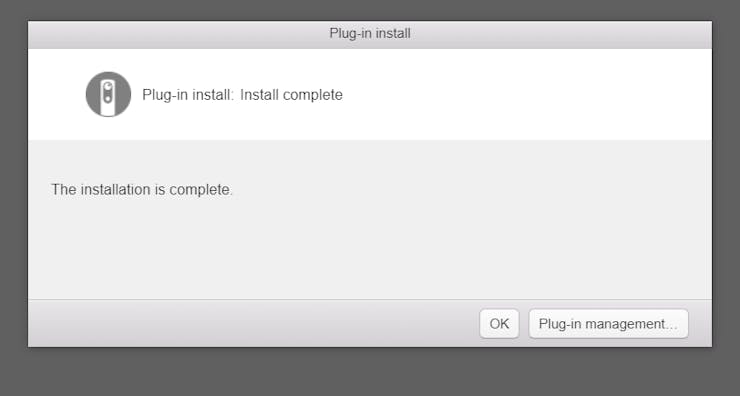
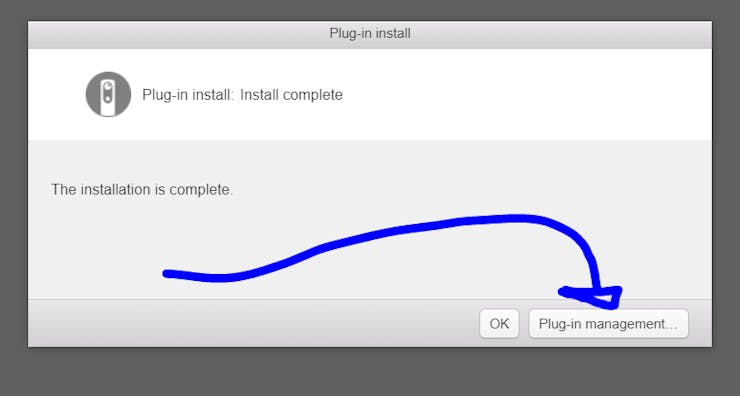
If everything worked fine, you will see the following message.
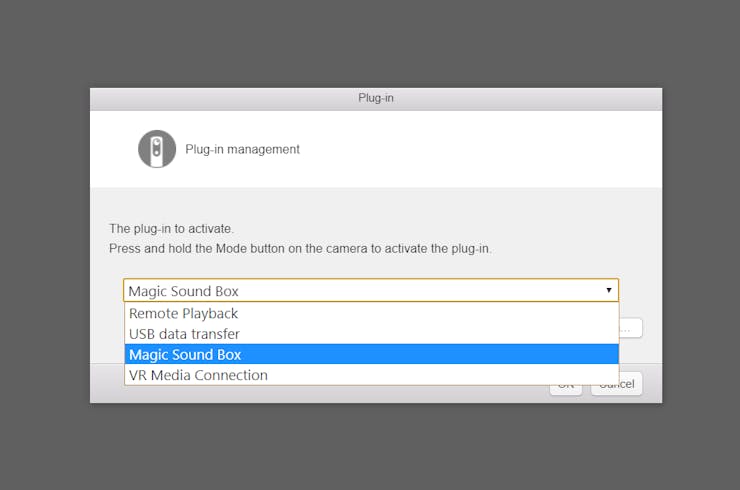
After that go to “Plug-in management”, since we will have to select the new plugin that shows up whenever you turn on the camera.
Select the plugin and press “OK”.
And ready, you have already configured the plugin, you can easily activate it by pressing and holding the “mode” button for a few seconds.
Idea:
Create a plugin with the ability to make sounds for any occasion, such as comedy, drama situations or whatever is required.
How it Works:
This plugin allows the camera to work like a sound box for all occasions. Depending on the position of the camera and the button pressed, it plays a different sound. The plugin has the following sound files loaded:
- More than 9000.
- The Marcels - Blue Moon.
- Kill Bill Ironside Siren Sound.
- Trololo.
- Ding.
- Hello darkness my old friend.
But since we do not want to eliminate the functionality of the camera, if you press the shutter button for a long time, it will take a normal picture.
Code:
Checking the position:
if(current_azimuth>0 && current_pitch<0 && current_roll<0)
  {
      position=0;
  }
  else if(current_azimuth<0 && current_pitch<0 && current_roll>0)
  {
      position=1;
  }
  else if(current_azimuth<0 && current_pitch>0 && current_roll>0)
  {
      position=2;
  }
  else if(current_azimuth>0 && current_pitch>0 && current_roll<0)
  {
      position=3;
  }
  else if(current_azimuth<0 && current_pitch>0 && current_roll<0)
  {
      position=4;
  }
  else if(current_azimuth<0 && current_pitch<0 && current_roll<0)
  {
      position=5;
  }
Depending on the positionof the camera, it will mark the variable “position” with a different number. In the next part of the code we can see that according to the button that is pressed and the position, it will reproduce a different sound. All sounds are stored in the raw folder of our app.
if (keyCode == KeyReceiver.KEYCODE_CAMERA) {
     if (position==0 || position==1) {
         startPlayer(hd);
     }
     else if (position==2 || position==3) {
         startPlayer(trolo);
     }
     else if (position==4 || position==5) {
         startPlayer(ding);
     }
  }
  if (keyCode == KeyReceiver.KEYCODE_MEDIA_RECORD) {
     if (position==0 || position==1) {
         startPlayer(lol);
     }
     else if (position==2 || position==3) {
         startPlayer(o9000);
     }
     else if (position==4 || position==5) {
         startPlayer(kill);
     }
  }
  if (keyCode == KeyReceiver.KEYCODE_WLAN_ON_OFF) {
     if (position==0 || position==1) {
         startPlayer(td);
     }
     else if (position==2 || position==3) {
         startPlayer(bm);
     }
     else if (position==4 || position==5) {
         startPlayer(sus);
     }
  }
Next Steps and the future
The project came about great, one geat advantage was that we didn’t have to develop in unity or other kind of platforms to create the VR feed. So it can be used with any other VR headset including cardboard.
For its future rollout we would like even to perform the same idea on several other applications, perhaps with much more complex and intricate robotics systems. And of course it would be time to experiment also with other wireless communication technologies such as LoRa, Sigfox and Cellular. Thanks for reading, and thanks to the RICOH THETA team and Oppkey for the support.
Code
The code also contains THETA Magic Sound Box

