yes, I agree that part is bothersome. If it consistently went off after a certain amount of time, I’d feel better about us narrowing in the problem. It seems like the original idea of the power amperage could be the source of the problem.
Is it possible that the camera is dropping WiFi signal with the controller (maybe your laptop)? If the WiFi signal dropped, then the sleepDelay would kick in after 20 minutes (I think this is the default). If you’re having WiFi issues, you can try and rotate the WiFi channel of the camera with _wlanChannel. For the test, you can also put the laptop right next to the THETA S (like a foot away).
I would also try to use a Raspberry Pi with the USB API. I realize that you need to buy that part first and it’s not as clean of a physical solution, but the transfer speed over USB is great and you can power the THETA over the same USB cable.
Maybe in the best scenario, you get both working and have a few options for the people taking pictures. I’ve heard of people using both WiFi and USB APIs for timelapse over a few days.
There was still plenty of space on the SD card and I believe battery left. I had it on 14s interval. Also, I disconnected the WiFi almost immediately after starting the interval.
I’m going to try a test powered off a Pi USB port and report back. I also have not tried disabling the offDelay and sleepDelay yet, but will soon.
sorry to hear about the failed test with the WiFi. If you have the option of using the USB cable, that might be good to start with. More people have it working with the USB API.
Maybe try and copy the exact configuration for photosphere since Koen has it working for months.
The only thing that isn’t in his README.md is the version of Raspbian he’s using. I think he’s using Raspian Wheezy
At least you know that other people are using the camera in similar applications.
Have you tested different physical cameras and USB cables? I’m wondering if the USB cable or the connector might be a little loose.
In my initial tests with the USB API, I had a problem with the camera not responding to the API after anywhere from a couple of hours to 6 or 8 hours. The disconnect was apparently random. After several days, I isolated an intermittent problem with my USB cable. It worked sometimes, but sometimes did not. I suspect that the cable was borderline usable. Once I changed the cable, I had a stable time lapse system that could take thousands of pictures.
Hopefully, if each person contributes their own experiences, it will eventually help you trace the problem.
Thanks! It’s great to see that others have had success. I have a lot of variables to tease out… camera, usb cable, battery packs, Pi powered / controlled. When I get it working I’ll post all the details, but it will take me a bit since the tests are 8 hours.
I am trying to build a 24/7 sky monitor using the theta S and a raspberry Pi 3. However, I have had no luck yet. The camera is connected via USB and I use ptpcam to change settings like shutter speed and iso. gphoto2 is used to take pictures, download and erase them directly after each shot.
However, after a few hours the Theta freezes and becomes unresponsive with the power button flashing red. In this case the camera has to be disconnected and rebooted, in order to become responsive again.
Does anyone know, why the camera freezes and becomes unresponsive? has anyone encountered the same problem?
I encountered a problem when my USB cable was a little loose. Try a different cable. Is the air temperature where the THETA is located below freezing? Koen had a problem with the battery freezing.
Most people are using ptpcam to take pictures with the USB. Did you have problems with ptpcam?
When I used gphoto2, I had to remove the gvfs virtual filesystem. There’s a backend process that mounts gvfs, breaking the communication with the camera.
pi@raspberrypi ~ $ sudo apt remove gvfs-backends
Reading package lists... Done
Building dependency tree
Reading state information... Done
The following packages will be REMOVED:
  gvfs-backends
Suggest you try and use one the solutions below for Raspberry Pi. Once you get it working, then move to your custom solution.
Thanks for the response, I have already tried a different cable. I am currently just testing on my desk, where the temperature is pretty much constantly about 20°C.
As far as I can tell,I did not have any problems with ptpcam.
I have also removed the gvfs stuff.
I only running into problems, after shooting for a few hours. Sometimes after 6 hours, sometimes after 2 days the camera turns unresponsive. I have also tried a different computer.
Have you or someone else tried taking pictures continuously for more than two days straight?
Correct, my issues are cold related not heat related. My setup runs reliable at nominal temperatures (not and extremes I fear - yet to experience heat in summer).
Thanks for all this input and real-world experience. You’ve got the coolest long-term application use of the THETA. Also appreciate that you generously made your project open source.
Well it ain’t rocket science putting this together. Maintaining it is an other story. Might have a cold weather fix in today (keep taking pictures during the night to keep it warm ! ).
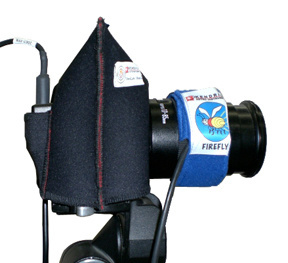
The picture below made me think about using the neoprene sleeve of the THETA as a form of thermal insulation. It might help retain the heat from the battery. You’d need to cut the sleeve.
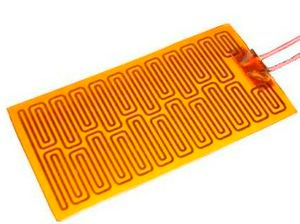
Another solution would be to insert a small, flat, heater like this:
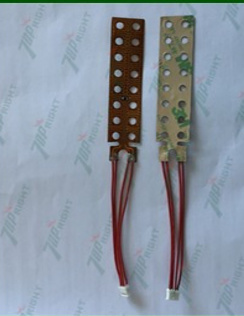
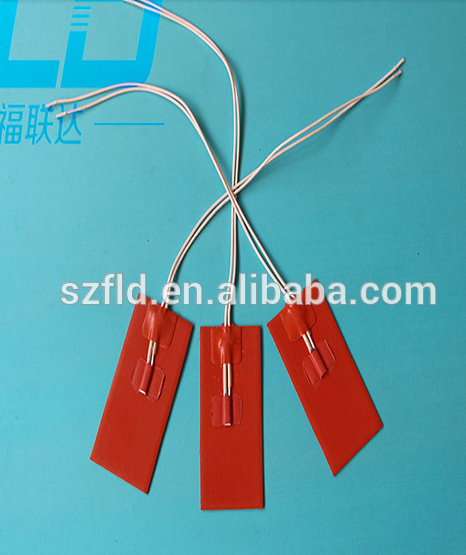
I don’t know anything about this area of hardware hacking, but there’s a bunch of stuff here:
The cold might be a common problem for equipment used in agriculture. There might be a off-the-shelf heater to heat something like irrigation control units.
The neoprene sleeve idea is wonderful, didn’t think of the sleeve outside the context of protection. In general the resistive heating pads require a lot of power (which I’m short on). So harnessing and retaining heat seems the way to go. Or doing away with the battery all together (but that requires hacking which I will do after the start of the growing season.
Koen, is it just for keeping the camera warm? I guess the images are black, correct? How often do you think you need to take pictures to keep the heat in the enclosure warm enough?
–Jesse
NOTE: Live streaming can’t be received on a Raspberry Pi due to lack of Linux kernel support of UVC 1.5.
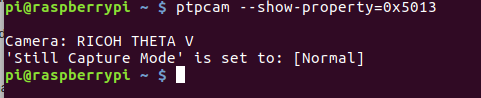
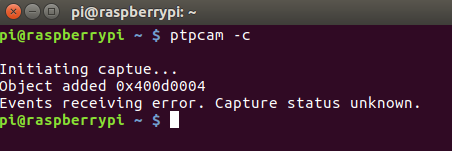
pi@raspberrypi ~/Pictures $ ptpcam --set-property=0x5013 --val=0x8005

Camera: RICOH THETA V
'Still Capture Mode' is set to: [Normal]
Changing property value to 0x8005 [(null)] succeeded.
Set back to still image mode
pi@raspberrypi ~/Pictures $ ptpcam --set-property=0x5013 --val=0x0001

Camera: RICOH THETA V
'Still Capture Mode' is set to: 0x8005 (-32763)
Changing property value to 0x0001 [(null)] succeeded.
Community Usage: Continuous shooting in still image mode
I heard from a community member that they were able to use InitiateOpenCapture by specifying the first two parameters as 0 and a third parameter, which was set to 1.