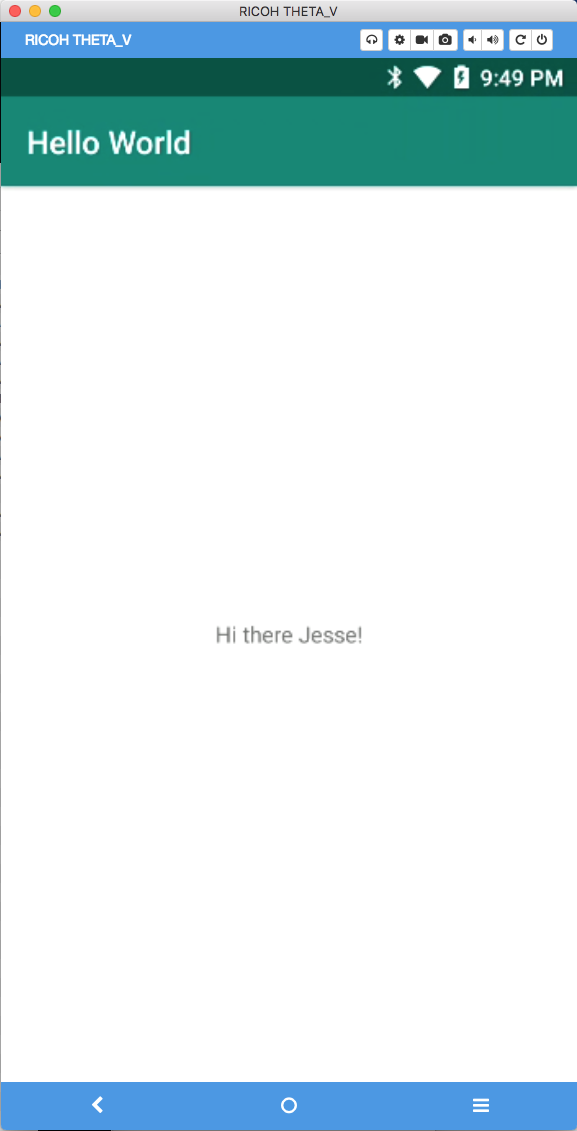
Yesterday, I wrote about an example from @shrhdk (Shiro) of using Kotlin to write a minimal plug-in. As Kotlin is new and I’m still learning Java, I decided to build an example in Java starting from a new empty activity, not from the plug-in SDK. This is like a “Hello, World” example for the plug-in that just takes a picture.
ExecutorService
Unfortunately, I wasn’t able to add a simple theta.takePicture() command into
KeyCallback.onKeyDown and be finished with the example. Sadly, I needed to use ExecutorService.
private ExecutorService executor = Executors.newSingleThreadExecutor();
In onKeyDown, I needed to do this:
   @Override
    public void onKeyDown(int keyCode, KeyEvent keyEvent) {
        if (keyCode == KeyReceiver.KEYCODE_CAMERA) {
            // use lambda expression with Java 1.8
            executor.submit(() -> {
                Log.d("THETA", "take picture");
                try {
                    theta.takePicture();
                } catch (IOException e) {
                    e.printStackTrace();
                }
            });
The above snippet was a little intimidating for me at first because I didn’t know what this line meant.
executor.submit(() -> {
I skimmed this article on Lambda expressions and was able to figure out that it’s a shortcut for a Runnable in this case.
The only new concept is to put theta.takePicture() on a new thread. Wish it could be easier and just dump the entire KeyCallBack into onCreate or onResume, but that’s how it is.
Getting the pluginlibrary and theta4j libraries
As I started from a new empty Activity and not from the Plug-in SDK, I also needed to get the libraries with the gradle config files.
In build.gradle project
allprojects {
    repositories {
        google()
        jcenter()
        maven { url 'https://github.com/ricohapi/theta-plugin-library/raw/master/repository' }
    }
}
In build.gradle app
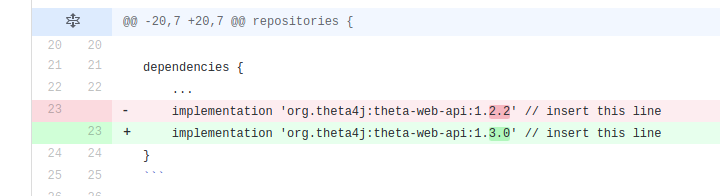
dependencies {
     implementation 'com.theta360:pluginlibrary:2.0.0'
    implementation 'org.theta4j:theta-web-api:1.2.2'
}
I also added this:
android {
    compileOptions {
        sourceCompatibility 1.8
        targetCompatibility 1.8
    }
}
Getting the Response
Shiro provides an example to get the response. I added it in a branch.
import org.theta4j.osc.CommandResponse;
import org.theta4j.osc.CommandState;
import org.theta4j.webapi.TakePicture;
...
CommandResponse<TakePicture.Result> response = theta.takePicture();
while(response.getState() != CommandState.DONE) {
    response = theta.commandStatus(response);
    Thread.sleep(100);
}
System.out.println("fileUrl: " + response.getResults().getFileUrl());
Setting Options
I have another branch to set the camera options. I received help from the developer of theta4j and I can now set CAPTURE_MODE, EXPOSURE_COMPENSATION, ISO, and EXPOSURE_PROGRAM.
The main section is listed below. It’s easy to set the options.
            theta.setOption(CAPTURE_MODE, CaptureMode.IMAGE);
            CaptureMode captureMode = theta.getOption(CAPTURE_MODE);
            Log.d(TAG, captureMode.toString());

            theta.setOption(EXPOSURE_COMPENSATION, ExposureCompensation.MINUS_1_0);
            ExposureCompensation exposureCompensation = theta.getOption(EXPOSURE_COMPENSATION);
            Log.d(TAG, exposureCompensation.toString());

            // make sure CaptureMode is set to IMAGE
            // https://developers.theta360.com/en/docs/v2.1/api_reference/options/exposure_program.html

            theta.setOption(EXPOSURE_PROGRAM, ExposureProgram.MANUAL);
            theta.setOption(ISO, _200);
            Log.d(TAG, "ISO Speed Changed: " + theta.getOption(ISO).toString());
Summary
For people like like to start with an empty activity, the bare minimal code, theta4j provides a good structure to access the THETA webAPI from inside the camera. The only funky part for some people will be the need to use a separate thread. Once you get by that hurdle, accessing the rest of the API looks straightforward.