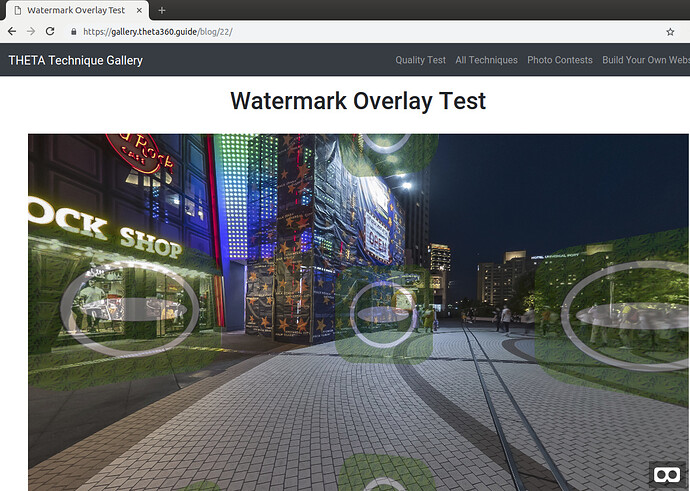
Watermark Overlay and EXIF Extraction Tests
Live site. Image by @Juantonto of IKOMA360. Taken with Z1.
Overlay file used in this test.
Command Line Technique Using ImageMagick
- create watermark mask at 40% transparency. Make the mask the same size as the original image 7168x3584
- make a composite image with the watermark using ImageMagick.
Example
$ composite theta_logo.png toyo-hardrock.jpg new-image.jpg
Explanation
- composite is the name of the ImageMagick command
- theta_logo.png is the name of the watermark overlay
- toyo-hardrock.jpg is the name of the original image
- new-image.jpg is the name of the output image
Technique Using Django on the Server
from django.shortcuts import render
from subprocess import Popen, PIPE, STDOUT


def watermark(request):
    # pass in file name after upload for production
    image_file_name = "/home/craig/Pictures/theta/2019/watermark/toyo-hardrock.jpg"
    logo_file_name = "/home/craig/Pictures/theta/2019/watermark/theta_logo.png"
    output_file = "/home/craig/Development/django/shell/shell/media/new-image.jpg"
    # composite is part of imagemagick package
    Popen(['composite', '-geometry', '+3000+1600', logo_file_name,
        image_file_name, output_file], stdout=PIPE, stderr=STDOUT)

    return render(request, 'watermark.html', {"output": output_file.split('/')[-1]})
Explanation
- Popen allows you to run any shell command from inside of Python. You can even run a full Bash script. In this case,
compositeis the name of the command - the command and arguments are passed on a list
- composite handles all the file I/O. In this simple test, I’m just using the file that was saved to disk. In production, you will want to set up checks.
- stdout is piped back to Python
Screenshots
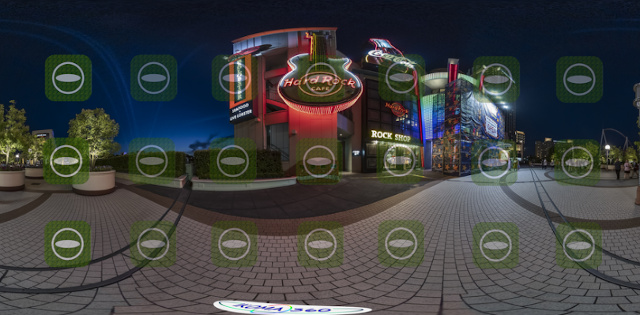
Equirectangular view
Mask
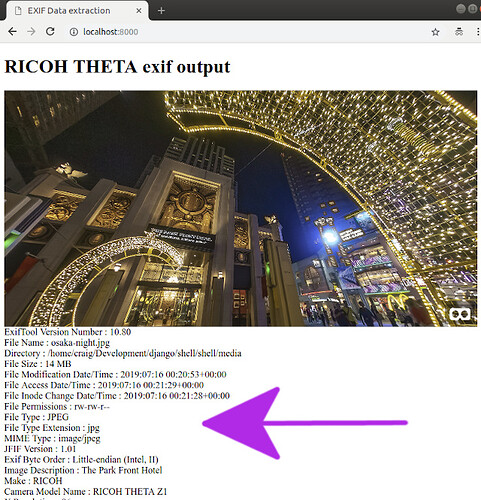
Metadata using exiftool
Command Line
$ exiftool filename.jpg
Django Python Example
from django.shortcuts import render
from subprocess import Popen, PIPE, STDOUT


def homepage(request):
    # pass in file name after upload for production
    image_file_name = "/home/craig/Development/django/shell/shell/media/osaka-night.jpg"
    process = Popen(['exiftool', image_file_name], stdout=PIPE, stderr=STDOUT)
    output_byte = process.stdout.read()
    output_list = str(output_byte)[2:-1].strip().split('\\n')
    return render(request, 'home.html', {"output": output_list, "filename": image_file_name.split('/')[-1]})
HTML
Note the use of the for loop to print out each line of the EXIF data.
<!DOCTYPE html>
<html lang="en">
<head>
<meta charset="UTF-8">
<meta name="viewport" content="width=device-width, initial-scale=1.0">
<meta http-equiv="X-UA-Compatible" content="ie=edge">
<script src="https://cdnjs.cloudflare.com/ajax/libs/aframe/0.7.1/aframe.min.js" integrity="sha256-SNDsmWBFQwJAjxLymQu5Fqh6rW4RKLJXUQboy3O0BUA=" crossorigin="anonymous"></script>
<style>
a-scene {
height: 400px;
width: 100%;
}

</style>
<title>EXIF Data extraction</title>
</head>
<body>
<h1>RICOH THETA exif output</h1>
  <a-scene embedded>
     <a-sky src="/media/{{filename}}" rotation="0 -130 0"></a-sky>
  </a-scene>

{% for line in output %}
    {{ line }}
    <br >
{% endfor %}

</body>
</html>


