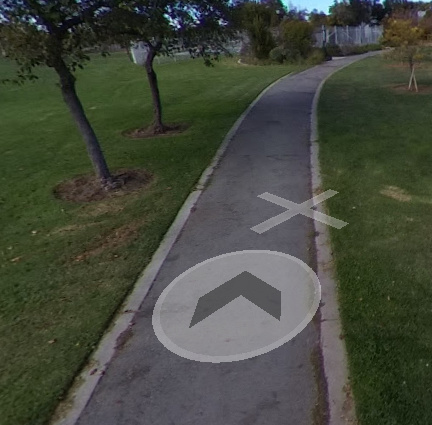
Just using the Google Maps link that you posted I was able to walk around and find the corkboard stands that have all the images up. Pretty cool.  Gives me a good feel for the area.
1 Like
@Juantonto, great work with the tour of RICOH Imaging Square in Osaka.
I like your Street View tours more than the tiny planet images on display. I wonder if RICOH Imaging can display more community images as Street View tour style instead of tiny planets?
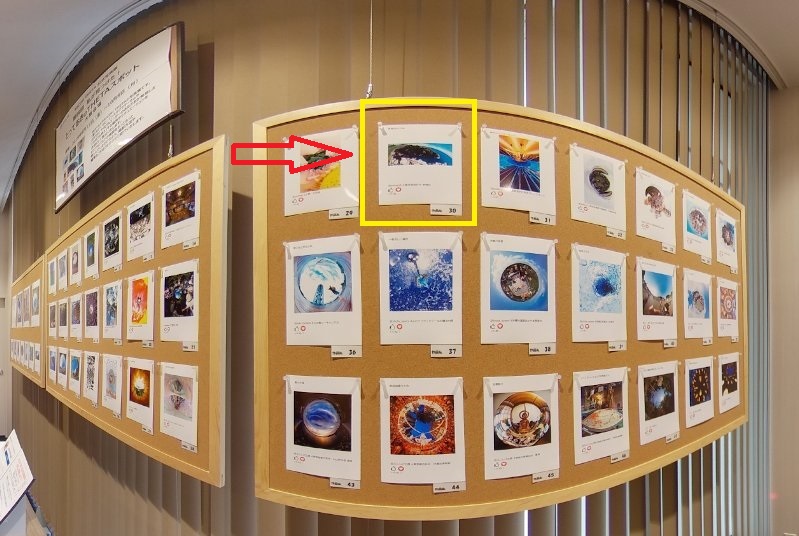
I absolutely agree with you. Facebook friend of mine, a great SV photographer(potaro67) is also invited in this exhibition. I am very proud of his works.
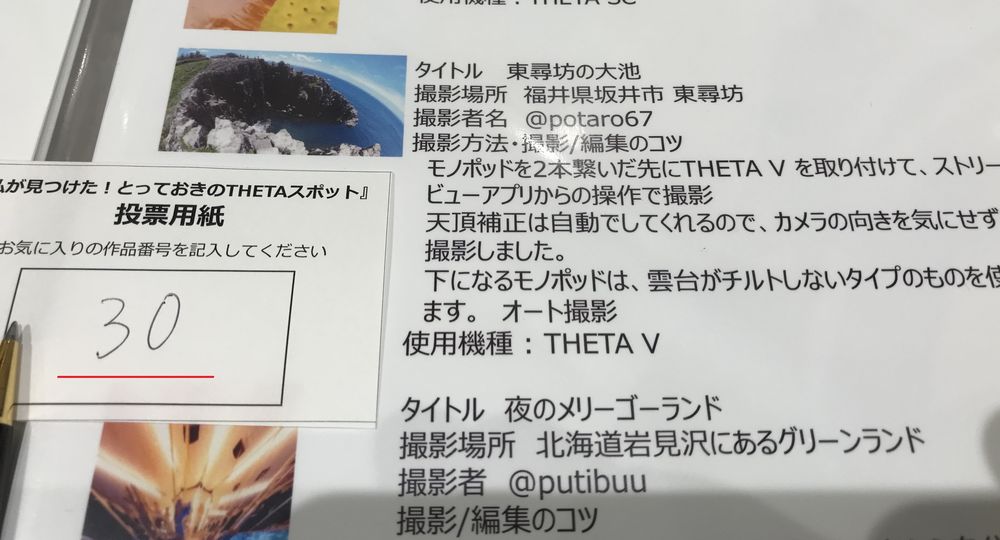
Of course, I voted No.30.
東尋坊; Tojinbo, one of the most famous sight-seeing spots in Japan.
Too small to find out! Where is potaro67’s work?
Yeah, I also hate tiny planets. His work is always huge and massive Theta images.
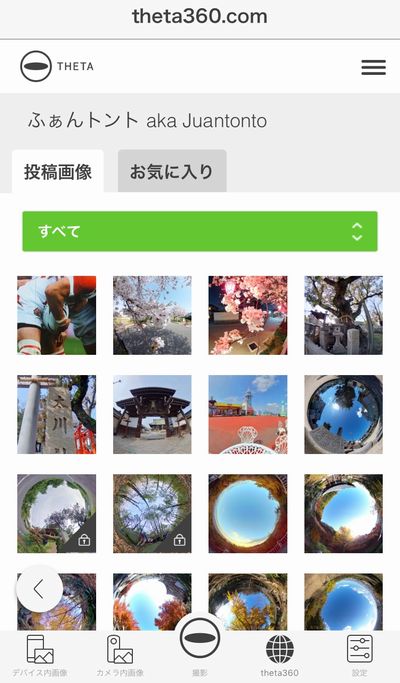
I tell you a kind of scecret I’ve found. See the screenshot above. If you upload a Theta image to theta360.com without GPano, you can do the same.
Throw them away!
Toyo
3 Likes
so I think there is no official way to turn off image stitching, I found a plugin by Ichi (http://theta360.guide/plugin-guide/fisheye/) Sample Command is (mParameters.set("RIC_PROC_STITCHING_TYPE", "RicNonStitching");) , so is there a way we can use this plugin to get unstitched image same time wifi transfer to PC?
Thanks
Note that the dual-fisheye plug-in is now in the store.
https://pluginstore.theta360.com/plugins/com.hirota41.dualfisheye_plugin/
There is no example to transfer it to a PC or mobile phone with Wi-Fi. It’s technically possible to do this, but no one has finished a plug-in yet.
Someone on this site finished a modification of Facial Blur to download the file.
It’s a straightforward modification. You may want to take the picture with the CameraAPI and from within the Plug-in, use the WebAPI (you can access it from inside the plug-in) to transfer the image. This might be easier to implement.
If you finish the plug-in, please submit it to the plug-in store. @jcasman can help you with the submission. We’re trying to get more community plug-ins in the store by the end of the year.
@jasondaywalker, in addition to the information above, I know that @jcasman is working on an article that profiles H3D and the work that @BrianKitchen10 is doing.
Brian successfully built a dual-fisheye plug-in that automatically moves the image over to another computer for processing using the USB cable. I believe the USB cable also powers the THETA.
As you may be working on your own solution right now, thought I would share with the clever and creative technique from Brian.
- user puts THETA into plug-in mode
- Plug-in runs as an infinite loop and constantly checks if there is a picture in the storage folder
- If no picture is present, then another picture is taken
- He uses ptpcam and libptp on a separate computer to move the picture over
- The control program (the one using ptpcam) deletes all the pictures in the THETA V storage area, causing Brian’s plug-in to take a new picture
- The control program then transfers the new picture over.
Cool! I hope that Brian is able to release this plug-in through the THETA Store. It’s a cool idea.
There is a long through on using the USB API here:
If you download the image to a mobile app. You can use the API here:
https://developers.theta360.com/en/docs/v2.1/api_reference/commands/camera.list_files.html
I have not tried this, but I believe you can boot the plug-in with this API
https://developers.theta360.com/en/docs/v2.1/api_reference/commands/camera._plugin_control.html
Thanks for sharing, Thats a good idea, lets see how it goes
1 Like
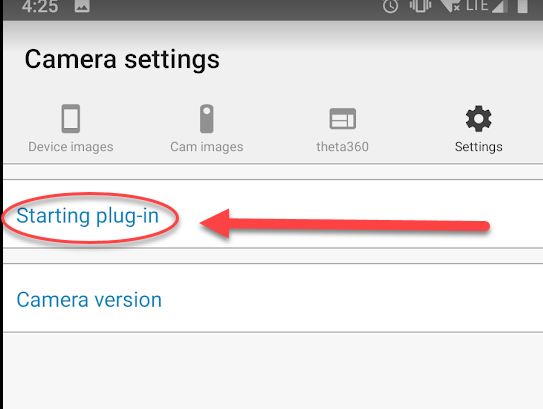
I asked a guy I know at Ricoh about the API and I verified that it does work to start a plug-in over Wi-Fi.
https://developers.theta360.com/en/docs/v2.1/api_reference/commands/camera._plugin_control.html
You still need to press a button to start the camera. However, once the camera is started, you do not need to press the lower mode button to put it into plug-in mode. This is the process:
- start camera by pressing power button (top button on side)
- Connect camera to Wi-Fi either in AP or Client mode
- connect device (like mobile phone) to camera either directly with camera as hotspot or through the same Wi-Fi router
- Send camera_plugin_control to camera
- camera will now change into plug-in mode and launch the plug-in that is set to launch
Test With Ricoh Mobile App
Camera is NOT in Plug-in Mode

Command From Phone Switches Camera into Plug-in Mode
Camera Now in Plug-in Mode
- LED above shutter turns white
- Camera switches to Client Mode
1 Like
Hi Craig,
Did you make any progress on the feature request for raw image capture in your meeting with the Theta product manager?
I’m working on a project for which the Theta would be ideal, if only I could access the raw captures. I’m using another 360 camera at the moment which does support raw output but which is not as capable in other ways. Its raw images are higher quality than the Theta’s JPEG outputs.
Cheers,
Daniel
Daniel, thank you for the update on your project and for checking in.
There is no update on RAW image support. At the current time, the RICOH THETA does not support RAW images and there is no information from RICOH to indicate that RAW images will be supported in the future. Sorry. I would like RAW images too in order to experiment with image noise reduction.
1 Like
Thanks – I appreciate your efforts on the RAW feature request.
1 Like
Beautiful work and beautiful scenery!
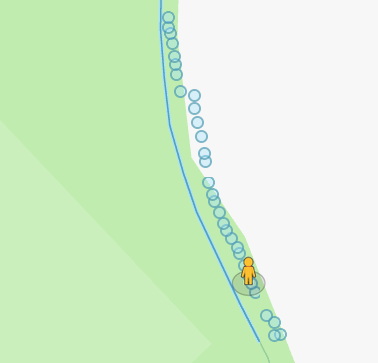
I was about to ask how to manually create spheres that are close together, but then I found these guidelines on the google site.
- Make sure your phone is fully charged and has enough memory to store your photos.
- Stabilize the camera at 1.20 - 1.80 m / 4 - 6 ft. You can do this by attaching the camera to a monopod, a tripod, or helmet.
- Monopod : Keep the monopod steady above your head and keep your head down when taking photos.
- Tripod : Step out of the way before taking photos.
- Helmet : Make sure to keep your head still and steady when taking photos.
- Space the photos about two small steps apart (1 m / 3 ft) when indoors and five steps apart (3 m / 10 ft) when outdoors.
- Follow natural paths and walkways so that there is a clear line of sight between the photos.
- Start taking photos from the street and keep taking them until you’re inside the place.
- When taking photos indoors, limit your collection to 100 photos.
Hi, @codetricity
Guideline is just a guideline.
Aligning panos and shooting places may depend on your creativity & imagination. I always think, “What do people want to see?”
Example @Boze Is.;
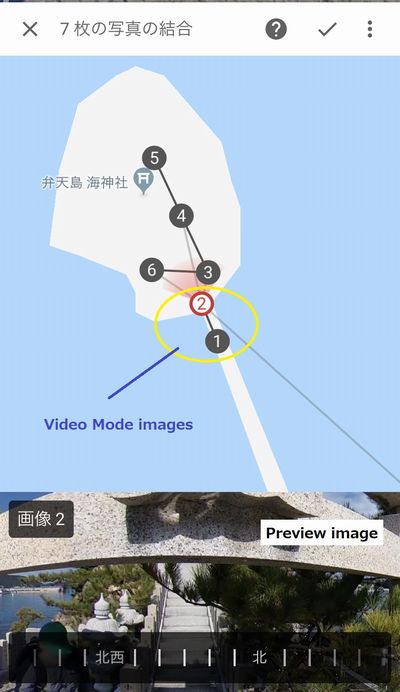
Caption; No.3 - No.6 images/Dual Fisheye Plugin
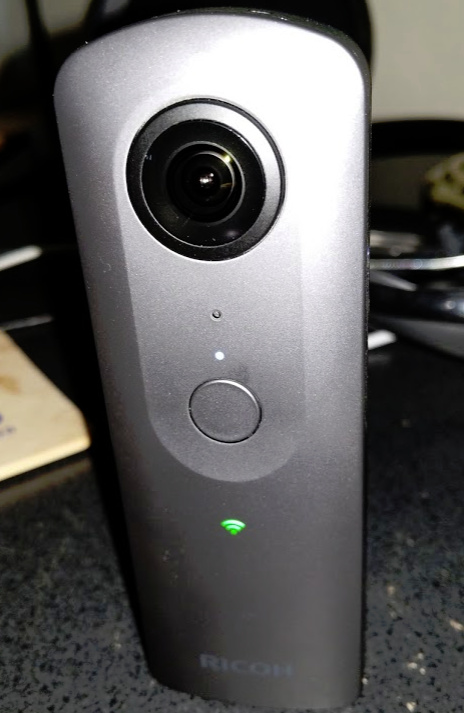
I started recording Video Mode from the Naza port. And I walked on the red bridge of the Umi Shrine(弁天島 海神社). As you see in YouTube,I stopped recording in front of the gate(鳥居). Why?
We Japanese believe inside of the gate is the holy place. The holy place should be taken 360 photos with the special methods.
Yes!, That’s Dual Fisheye Image plugin.
The first image inside the gate was shot at the bottom of the stone stairs.And then, I read the commentary of the stone plate during the second shooting. I was so excited and very interested in the legend “じんこんさん(神権伝説)”
So, I decided to skip shooting on the middle of the stone stairs.
This is じんこんさん(Jin kon san). People around the islands trust and respect the legend. We must do so.
This is my story and imagination.
How do you think?
Toyo
2 Likes
I think these are wonderful. The StreetView interface is providing photographers like you with a great tool for visual storytelling that is interactive. You’re an artist mastering a new way of telling visual stories. It’s quite cool to observe this. I also enjoy experience your stories in this way. thank you for sharing it.
As I am a novice, I am still learning the basics of how to “hold the brush”. I am making progress slowly.
2 Likes
This is pretty neat. The weather and lighting is fantastic, which makes the photos quite nice. I agree that “What do people what to see?” should be the priority. 360 works really well in this case since I (the viewer) may want to spend time looking around, down in the water, over at the boats… in whatever direction I’m curious about.
2 Likes
If you watch the YouTube video he made and then look at the Street View images, you can really understand the story he’s crafting.
boat -> walk on street -> bridge -> stairs -> temple
The temple/shrine has some special meaning in the story. It’s a cool concept.
1 Like
Kind of fun seeing the Google photographer filming while @Juantonto is filming!
1 Like
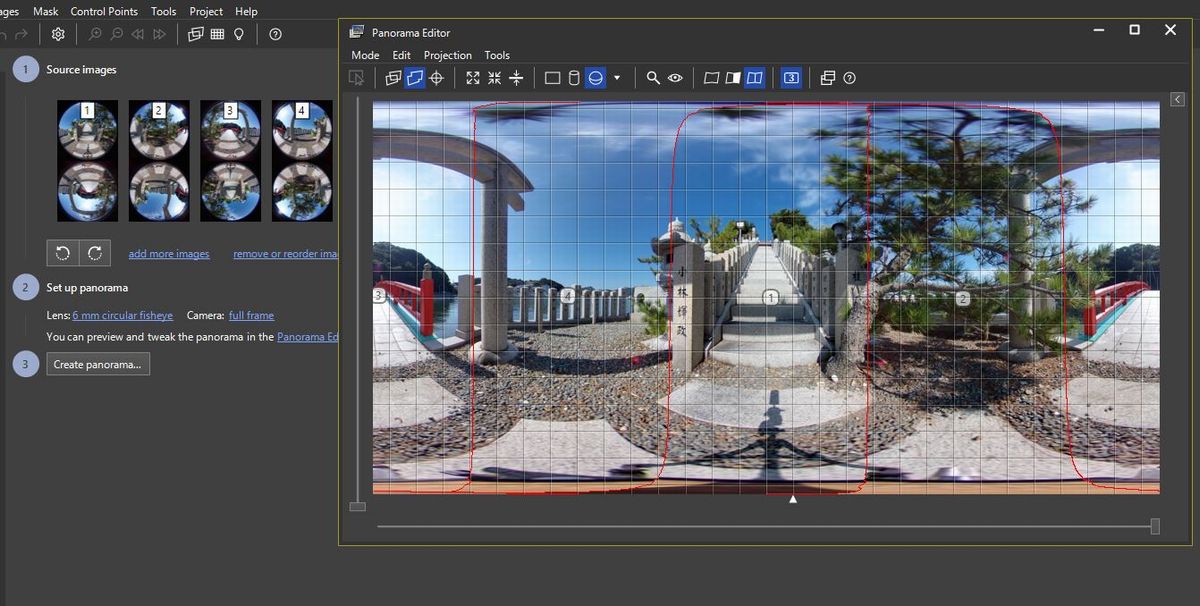
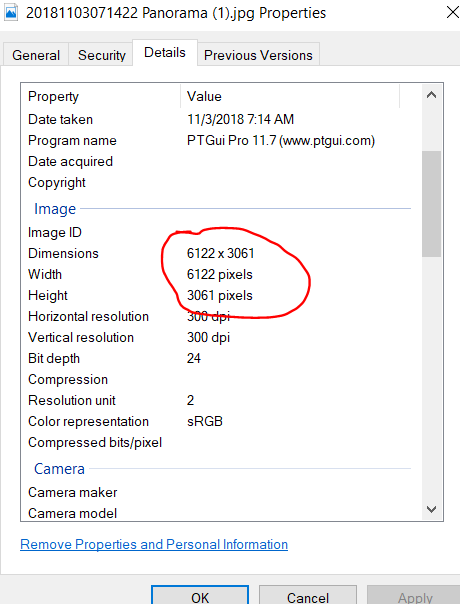
https://www.ptgui.com/versionhistory.html
PTGui pro ver.11.7 supports Dual Fisheye Image of Ricoh Theta V.
1 Like
Thanks for this update. It will make things easier for a lot of people using the dual-fisheye plug-in.
NOTE: As of Nov 4, 2018, I am still having problems with the automatic template to stitch the images. Please download the trial version and test PTGui yourself prior to making a purchase. The developer is very responsive and wants to make sure the template works. If we can help him with feedback and test results, let’s do it. You can post results here, and I can send it to him.
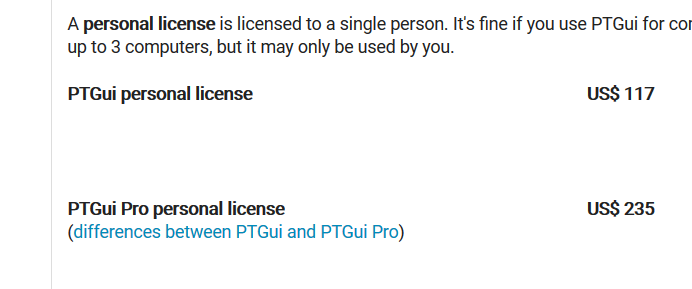
I verified with the developer that the template should work with both PTGui Pro and PTGui Personal.
Actually you can use the standard version, it supports templates and can
handle 360 panoramic cameras.The differences between standard and pro are listed here:
Features of PTGui and PTGui Pro - PTGui Stitching SoftwareEven after purchasin the standard version it’s possible to upgrade to
PTGui Pro by paying the price difference here:
PTGui - PTGui Stitching SoftwareKind regards,
Joost Nieuwenhuijse
www.ptgui.com
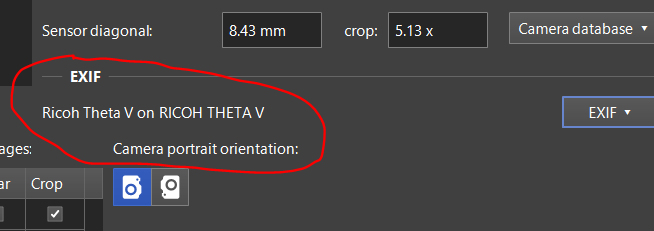
automatic detection from exif info
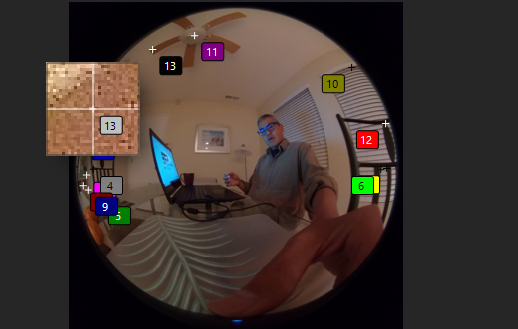
Alignment of Control Points
I was not able to get good stitching with the auto-generated control points
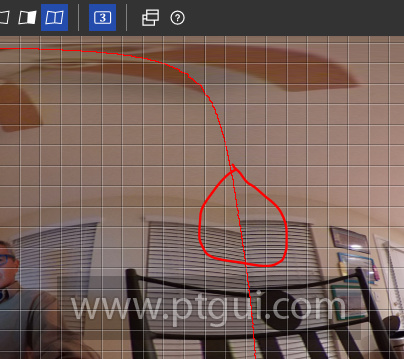
using the Control Point Tool, I was able to improve the stitching result.
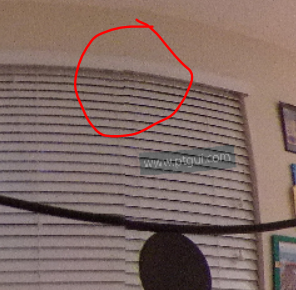
I think I can improve it further by adjusting the control points.
I sent a note to Joost Nieuwenhuijse of PTGui to see if he has advice. I know that @Juantonto is getting a perfect stitch, so it’s definitely possible. I think novice people like me may need some additional advice.
update 2018 Nov 4
I received this note from Joost Nieuwenhuijse.
You should create a template once for each camera. It’s explained in 6.43:
Support / FAQ - PTGui Stitching SoftwareThanks for sharing!
Kind regards,
Joost Nieuwenhuijse
www.ptgui.com
Image Size
The image PTGui produces is bigger than a standard THETA image.
1 Like