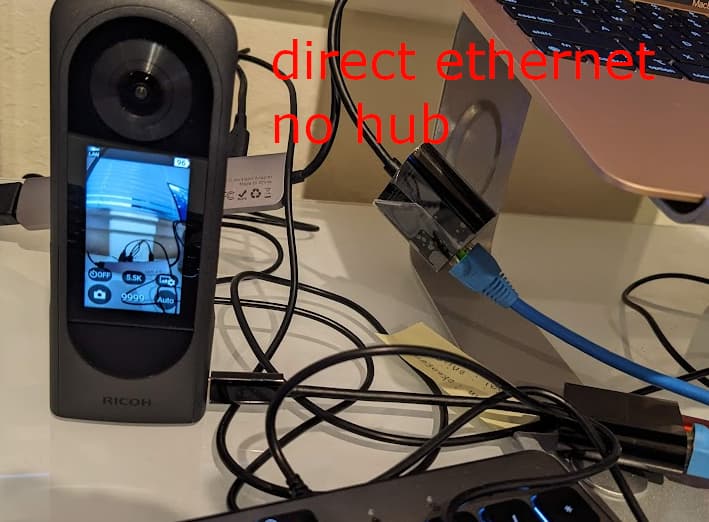
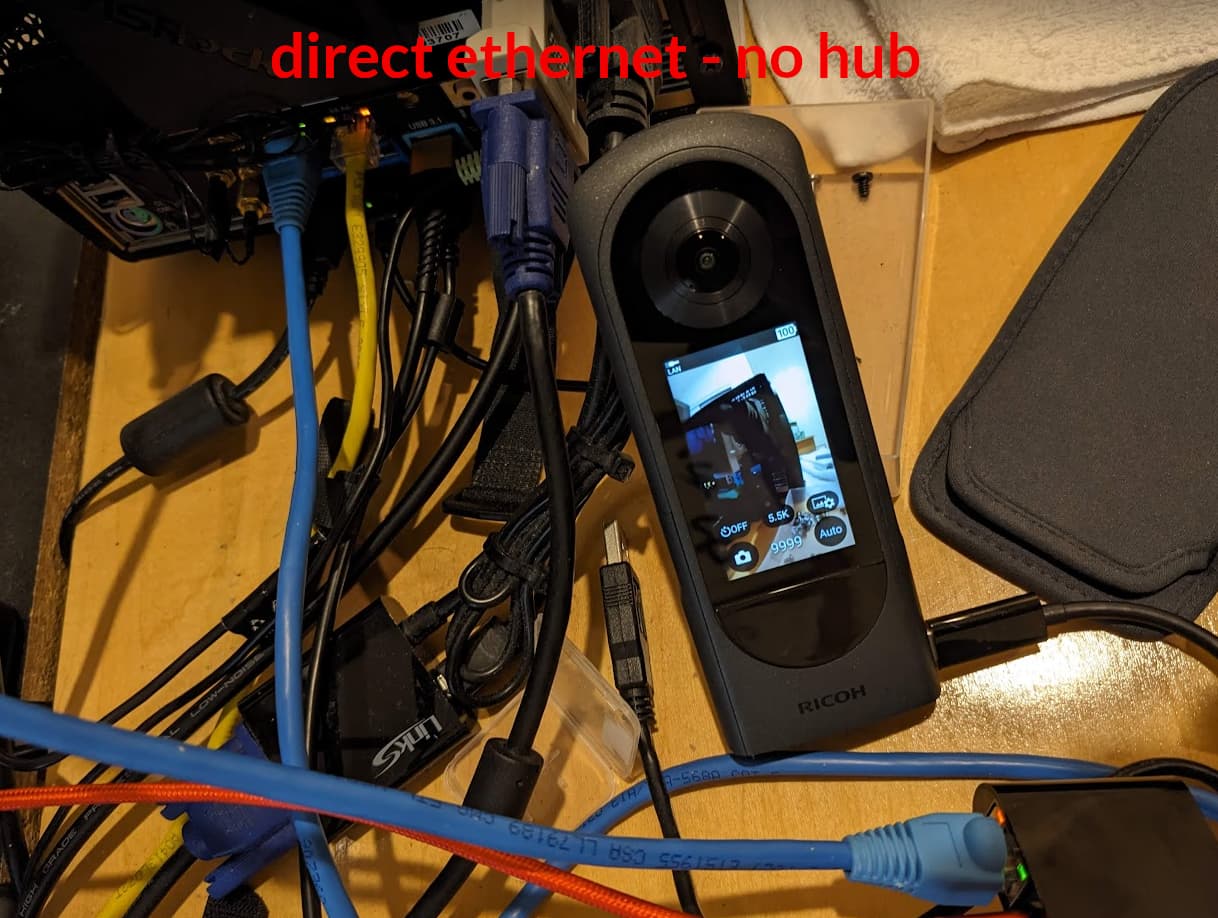
You can connect the THETA X directly to a computer using an Ethernet cable without a hub. This article shows two techniques:
- macOS Internet sharing
- Linux with free ISC DHCP software
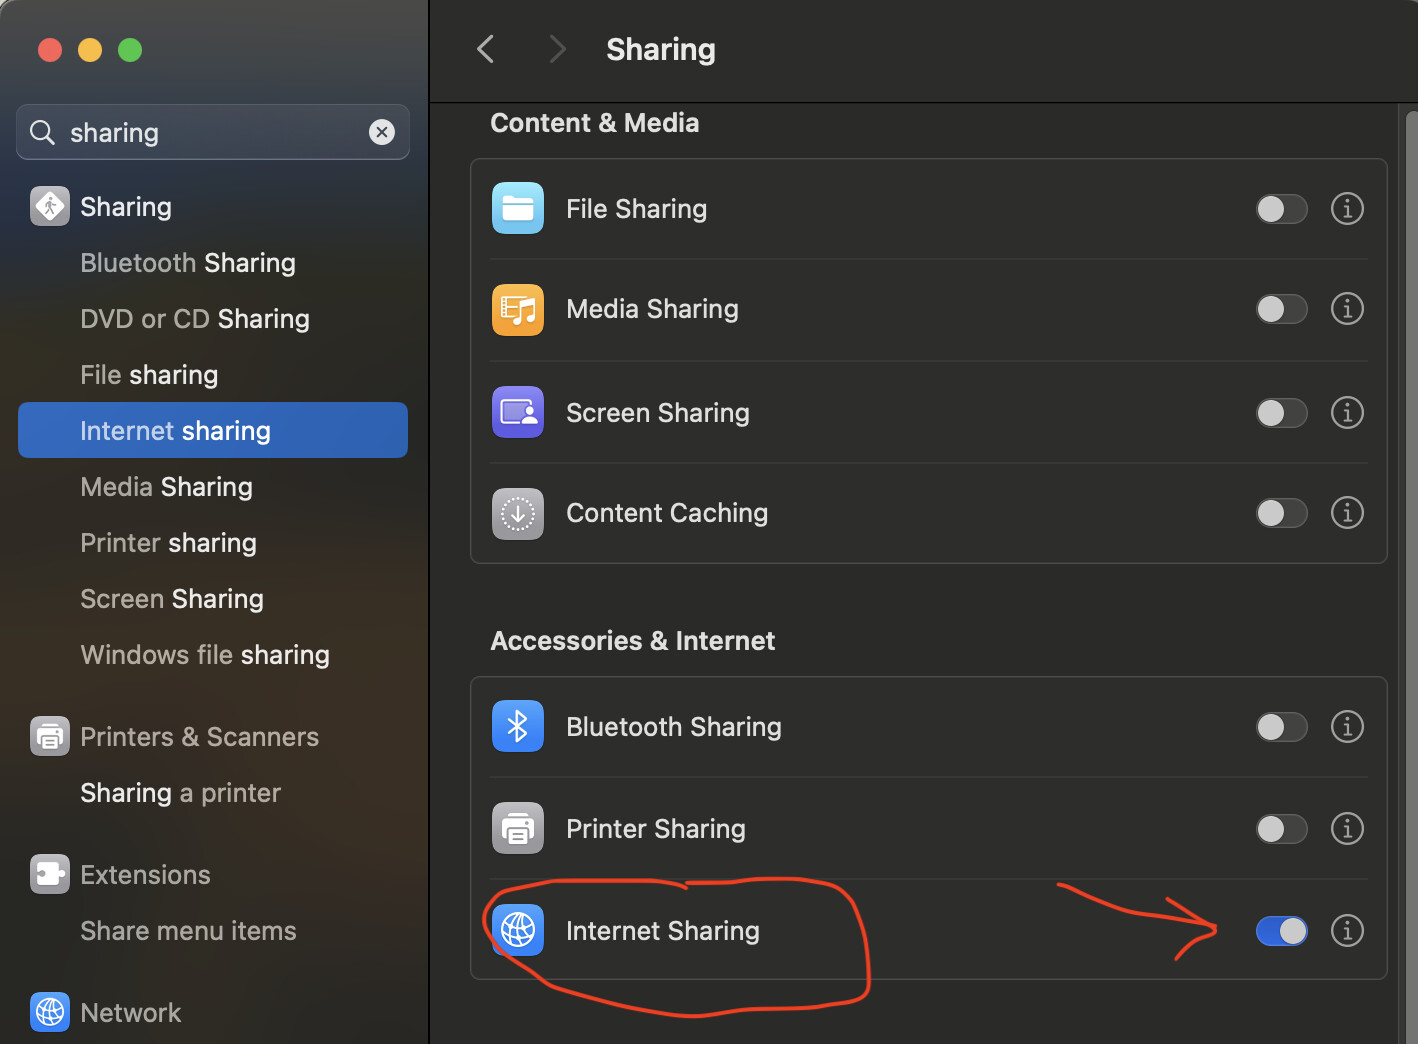
macOS Internet Sharing
In the system settings, search for Internet sharing. press the i icon.
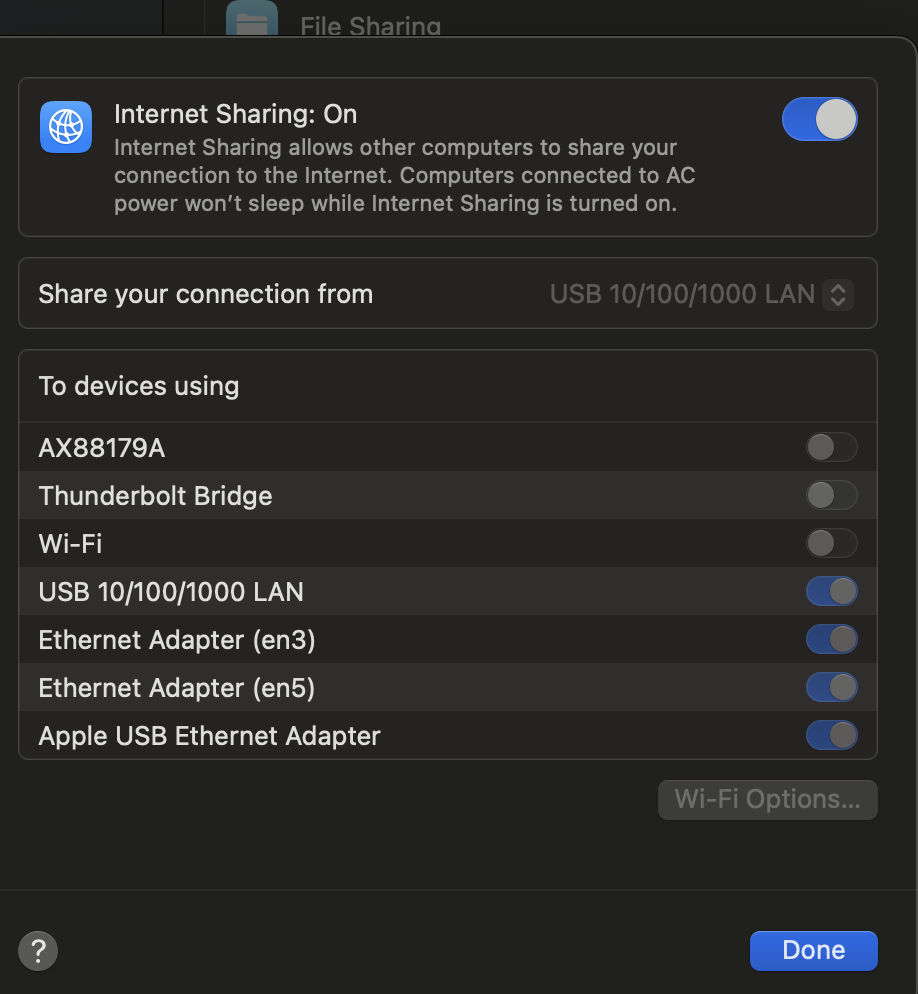
On the next next screen, select the Ethernet adapter you would like to share. In my my case, the Ethernet is USB 10/100/1000 LAN
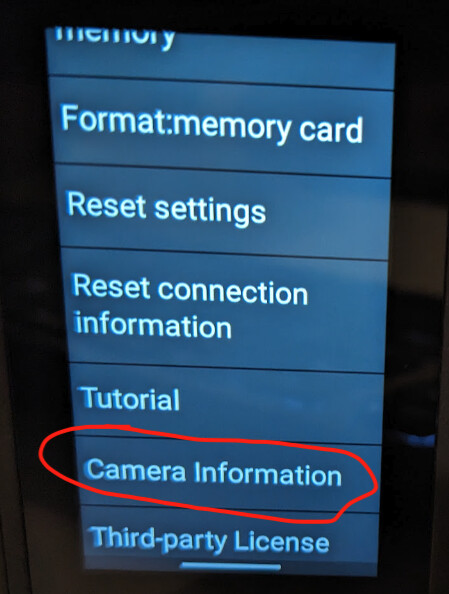
Get IP Address of RICOH THETA X
The IP address is assigned from your computer.
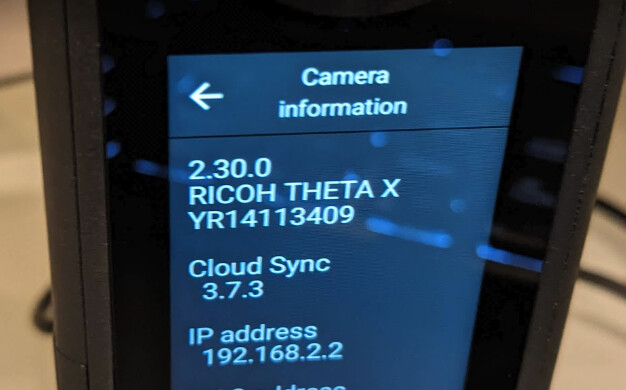
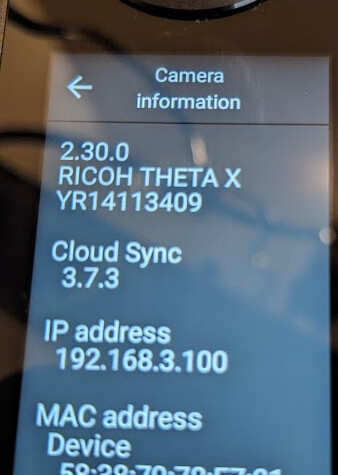
To find the IP address, you can use DNS discovery or go to body of the camera. Swipe down from the top and then scroll down till you see Camera information
In the next screen, scroll down until you see IP address.
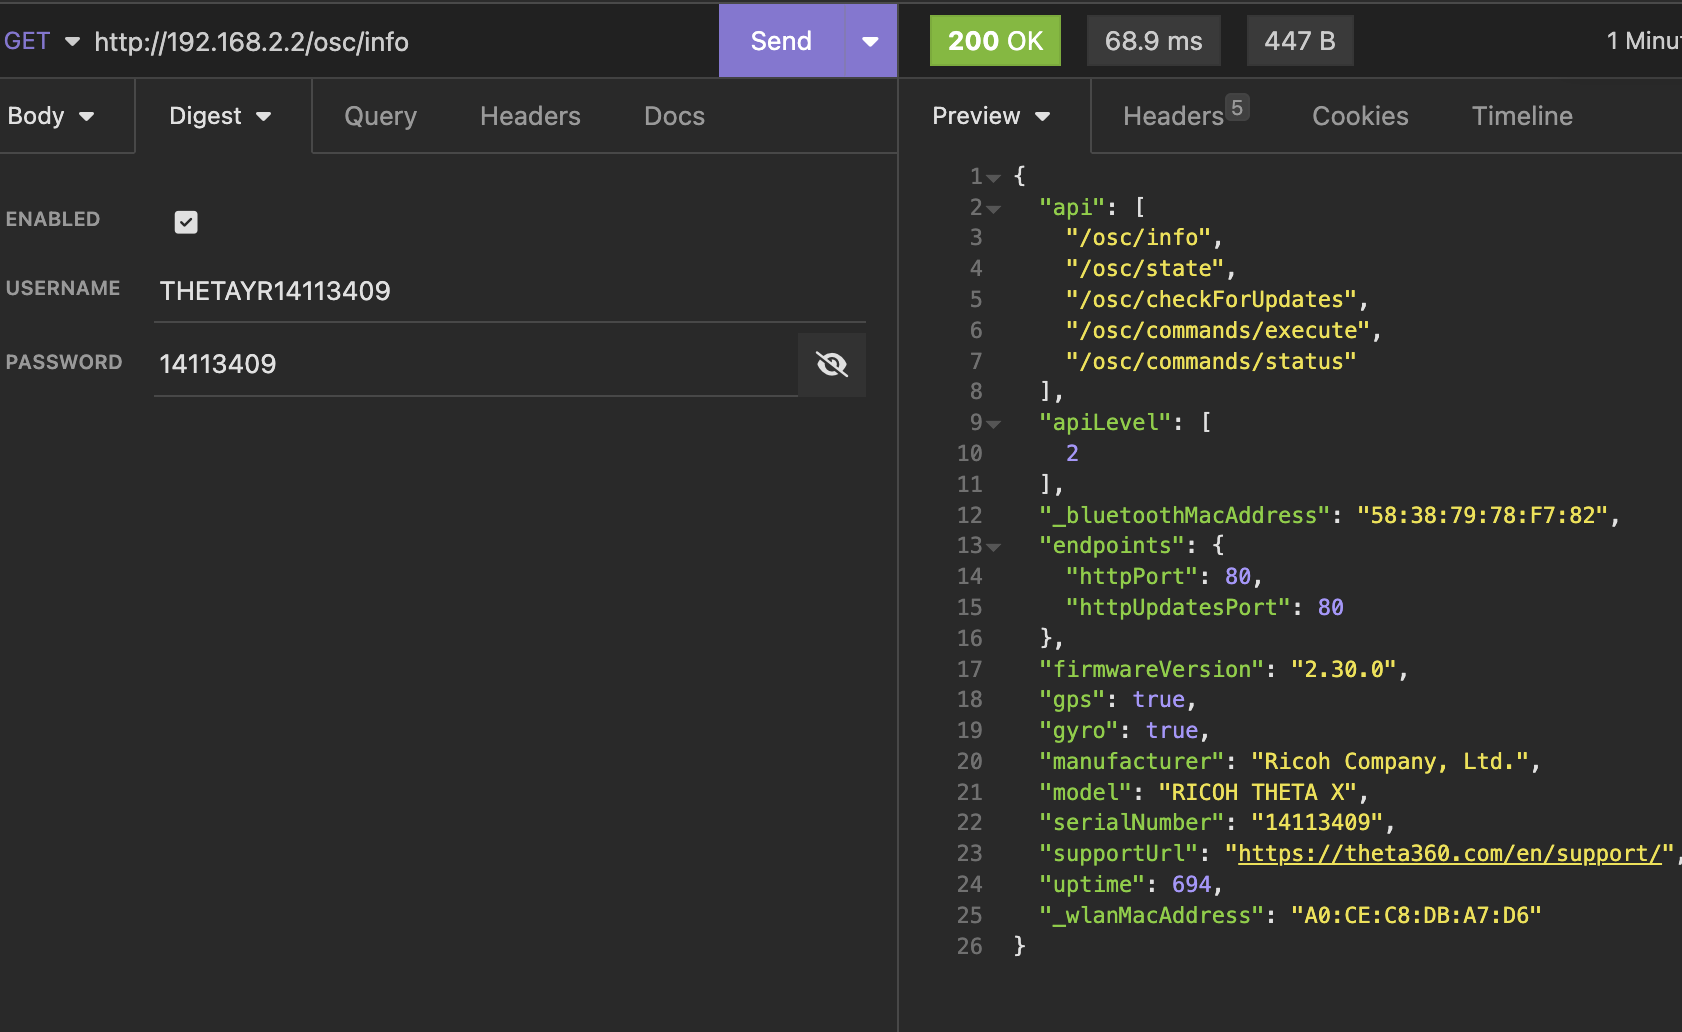
Testing API commands
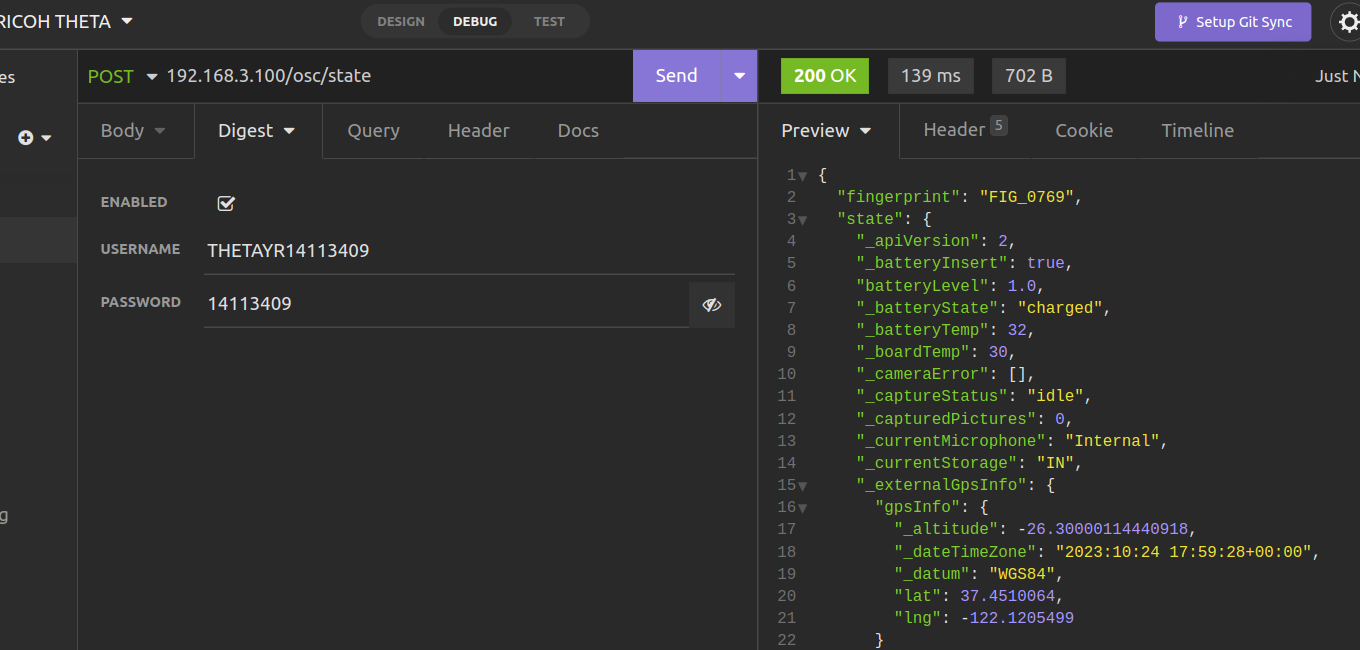
You must use Digest Authentication. In the example below, I am using the free software Insomnia to save my API tests. For my specific camera, the username is THETAYR14113409. The password is 14113409.
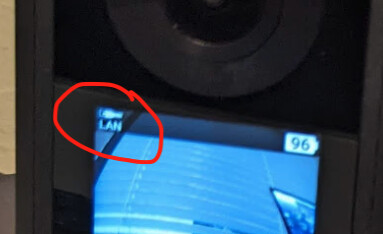
tips
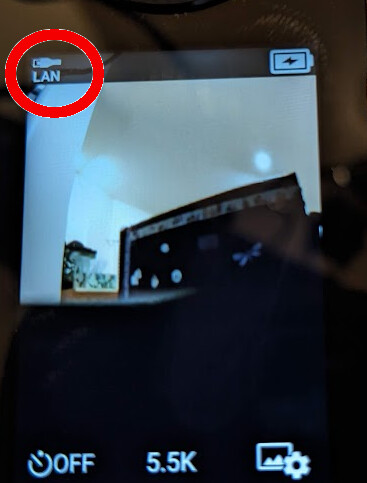
Make sure the LAN icon is displayed on the body of the camera.
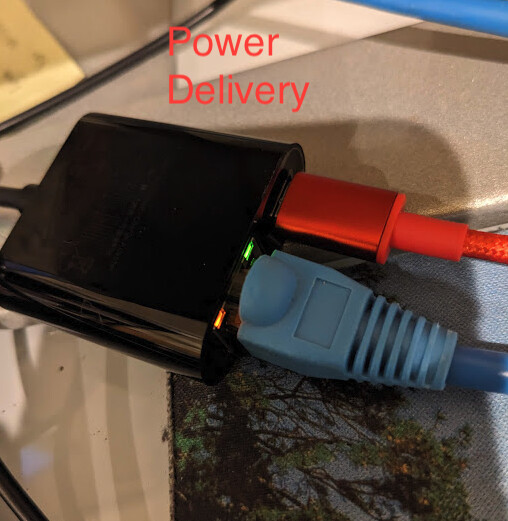
Use Ethernet Adapter with passthrough power delivery
Power Delivery or PD will delivery more current. The MacBook power adapter works in my tests to keep the camera continuously operational.
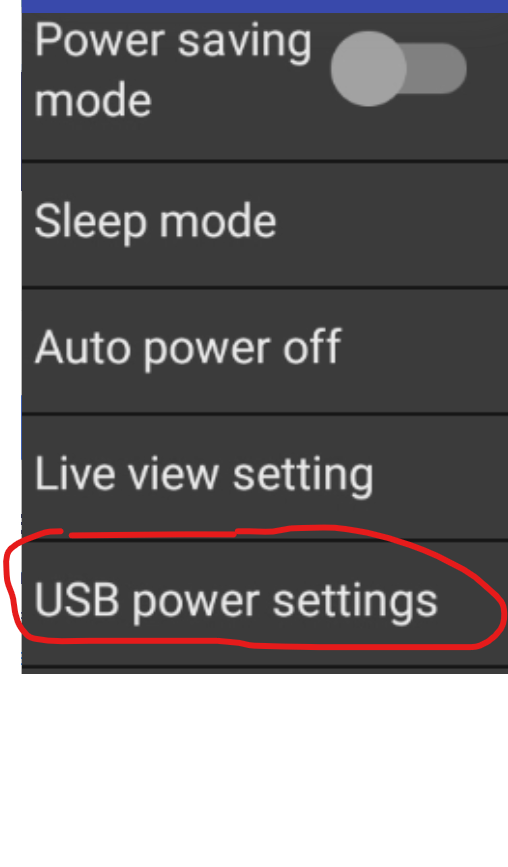
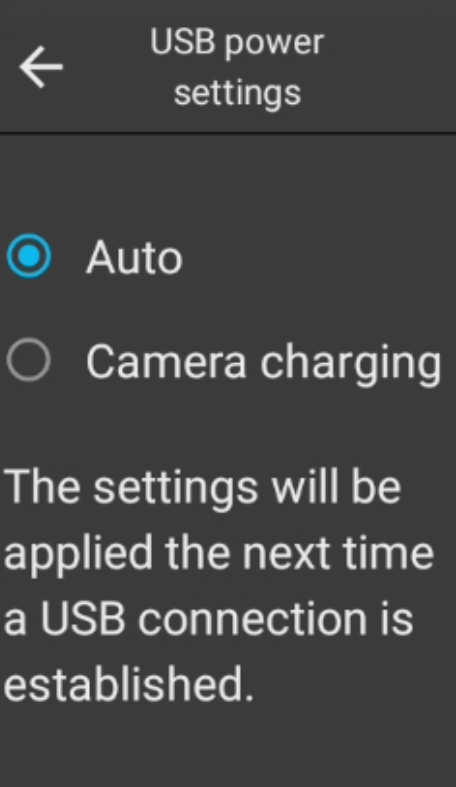
Set THETA X USB Power Settings to Auto
Linux
network interface
install isc-dhcp-server
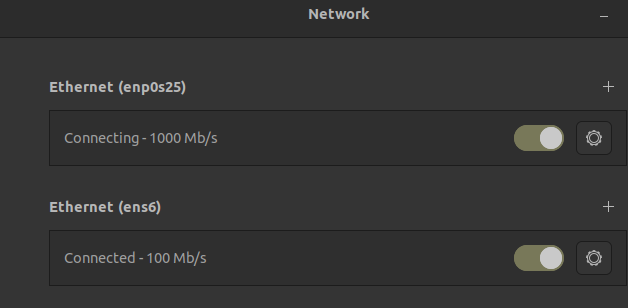
My secondary Ethernet adapter is enp0s25. This is the adapter that the THETA X is attached to.
sudo apt install isc-dhcp-server -y
/etc/default/isc-dhcp-server
INTERFACESv4="enp0s25"
/etc/dhcp/dhcpd.conf
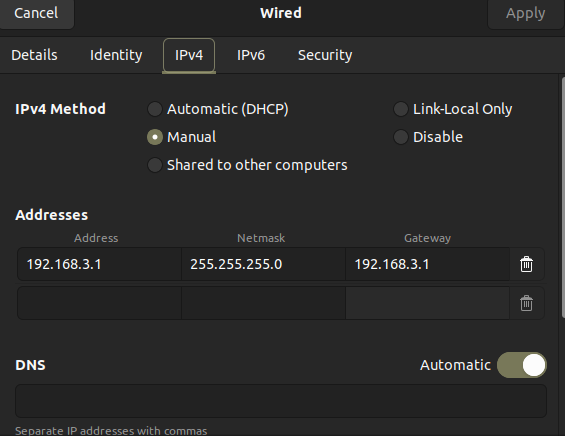
uncomment authoritative and add the network information. My Ethernet adapter has a static IP of 192.168.3.1.
authoritative;
subnet 192.168.3.0 netmask 255.255.255.0 {
        option subnet-mask      255.255.255.0;
        range 192.168.3.100     192.168.3.200;
        option routers 192.168.3.1;
}
checking status of dhcp server
sudo systemctl status isc-dhcp-server
● isc-dhcp-server.service - ISC DHCP IPv4 server
     Loaded: loaded (/lib/systemd/system/isc-dhcp-server.service; enabled; vendor preset: enabled)
     Active: active (running) since Mon 2023-11-06 19:15:34 PST; 25s ago
       Docs: man:dhcpd(8)
   Main PID: 25850 (dhcpd)
      Tasks: 4 (limit: 38316)
     Memory: 4.5M
        CPU: 12ms
     CGroup: /system.slice/isc-dhcp-server.service
             └─25850 dhcpd -user dhcpd -group dhcpd -f -4 -pf /run/dhcp-server/dhcpd.pid -cf /etc/dhcp/dhcpd.co>

Nov 06 19:15:34 craig-desktop dhcpd[25850]: PID file: /run/dhcp-server/dhcpd.pid
Nov 06 19:15:34 craig-desktop dhcpd[25850]: Wrote 0 leases to leases file.
Nov 06 19:15:34 craig-desktop sh[25850]: Wrote 0 leases to leases file.
Nov 06 19:15:34 craig-desktop dhcpd[25850]: Listening on LPF/enp0s25/d0:50:99:8e:3a:76/192.168.3.0/24
Nov 06 19:15:34 craig-desktop sh[25850]: Listening on LPF/enp0s25/d0:50:99:8e:3a:76/192.168.3.0/24
Nov 06 19:15:34 craig-desktop sh[25850]: Sending on   LPF/enp0s25/d0:50:99:8e:3a:76/192.168.3.0/24
Nov 06 19:15:34 craig-desktop sh[25850]: Sending on   Socket/fallback/fallback-net
Nov 06 19:15:34 craig-desktop dhcpd[25850]: Sending on   LPF/enp0s25/d0:50:99:8e:3a:76/192.168.3.0/24
Nov 06 19:15:34 craig-desktop dhcpd[25850]: Sending on   Socket/fallback/fallback-net
Nov 06 19:15:34 craig-desktop dhcpd[25850]: Server starting service.
checking camera information
The camera is assigned the IP address per the range configured in the dhcp server.
checking lan icon
checking API
Note that the IP address is 192.168.3.100
Linux Tips
For a while, I was having problems with my Ubuntu 22.04 Ethernet settings not showing up. I found the article below and now have my Ethernet settings available.
I used this tutorial as a reference.