How to use the camera._getLivePreview API for Ricoh Theta S ? Im using Python only and my Laptop is connected to the Ricoh Theta S using the wireless or wifi method … and I need to apply image processing or live preview frame processing, because the project is to apply a object recognition using OpenCV on a 360 degree camera … can someone help please ?? Thank you in advance …
Hello,
I post some code related to camera._getLivePreview and python code, search in this forum. I don’t have a Theta S, I only use Theta V. I think theta V is better choice for your project (good stability compared to Theta Z1 and better capabilities compared to Theta S). Getting a mjpeg equirectangular stream shoud by available in a day of work if you are familiar with python and http request. I hope you will achieved your goal and , for my point of view, the hard work is to use OpenCV not to get frames from a Theta Camera.
Best regards,
Hugues
Do you have to use a wireless connection ?
If you connect the camera to you computer in usb by following steps one and two here https://support.theta360.com/fr/manual/s/content/streaming/streaming_01.html you can acquire the image with opencv using the function cv2.videoCapture(video_input)
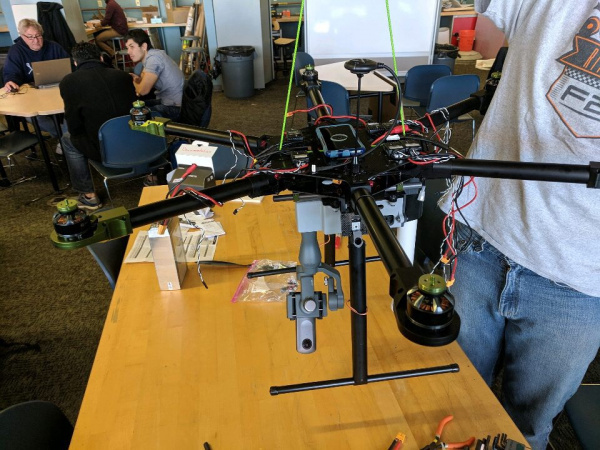
Yes Sir. Dbraun, I need to have to use wireless connection, because the project i’m doing is using 360 degree object recognition mounted to a Drone for Aerial monitoring of travelling vehicles. since it is attached to a drone, it cannot be connected via usb port. Thank you for your help and suggestion also sir. Dbraun. I’ll check the link also …
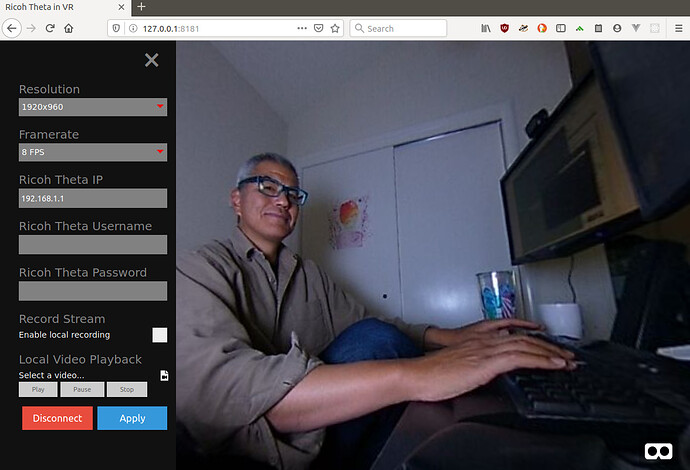
Thank you Sir. Hugues for your help, I’ll check that python code to posted. I’ll also think about using Theta V since you have suggested it, thank you for the suggestion sir. And yes, I am familiar with python and http requests, so far I am only able to do camera.takePicture using python and requests library. I just don’t know how to use the camera._getLivePreview then use it as input to OpenCV. Thank you again Sir. Hugues.
If you’re trying to get the stream into OpenCV,
POST request
string url = "Enter HTTP path of THETA here";
var request = HttpWebRequest.Create (url);
HttpWebResponse response = null;
request.Method = "POST";
request.Timeout = (int) (30 * 10000f); // to ensure  no timeout
request.ContentType = "application/json; charset = utf-8";

byte [] postBytes = Encoding.Default.GetBytes ( "Put the JSON data here");
request.ContentLength = postBytes.Length;
Get byte data
// The start of transmission of the post data
Stream reqStream = request.GetRequestStream ();
reqStream.Write (postBytes, 0, postBytes.Length) ;
reqStream.Close ();
stream = request.GetResponse () .GetResponseStream ();

BinaryReader reader = new BinaryReader (new BufferedStream (stream), new System.Text.ASCIIEncoding ());
Get the start and stop of the frames
...(http)
0xFF 0xD8      --|
[jpeg data]      |--1 frame of MotionJPEG
0xFF 0xD9      --|
...(http)
0xFF 0xD8      --|
[jpeg data]      |--1 frame of MotionJPEG
0xFF 0xD9      --|
...(http)
The starting 2 bytes are 0xFF, 0xD8 . The end bye is 0xD9
List<byte> imageBytes = new List<byte> ();
bool isLoadStart = false; // Binary flag taken at head of image
byte oldByte = 0; // Stores one previous byte of data
while( true ) {
    byte byteData = reader.ReadByte ();

if (!isLoadStart) {
    if (oldByte == 0xFF){
        // First binary image
       imageBytes.Add(0xFF);
    }
    if (byteData == 0xD8){
       // Second binary image
       imageBytes.Add(0xD8);

       // I took the head of the image up to the end binary
       isLoadStart = true;
    }
} else {
    // Put the image binaries into an array
    imageBytes.Add(byteData);

        // if the byte was the end byte
        // 0xFF -> 0xD9 case、end byte
        if(oldByte == 0xFF && byteData == 0xD9){
            // As this is the end byte
            // we'll generate the image from the data and can create the texture
            // imageBytes are used to reflect the texture
            // imageBytes are left empty
            // the loop returns the binary image head
            isLoadStart = false;
        }
    }
    oldByte = byteData;
}
import cv2
import urllib
import numpy as np

    stream=urllib.urlopen('http://localhost:8080/frame.mjpg')
    bytes=''
    while True:
        bytes+=stream.read(1024)
        a = bytes.find('\xff\xd8')
        b = bytes.find('\xff\xd9')
        if a!=-1 and b!=-1:
            jpg = bytes[a:b+2]
            bytes= bytes[b+2:]
            i = cv2.imdecode(np.fromstring(jpg, dtype=np.uint8),cv2.CV_LOAD_IMAGE_COLOR)
            cv2.imshow('i',i)
            if cv2.waitKey(1) ==27:
                exit(0)
This is from this outdated guide:
Thank you very much sir Craig for all of the references you have provide, I’m really sorry for the late reply sir. … I’m still reading the links you posted and trying to understand the code at the bottom … I’ll update here my progress once i implemented the codes and guides you have provided, thank you again very much for your help sir …
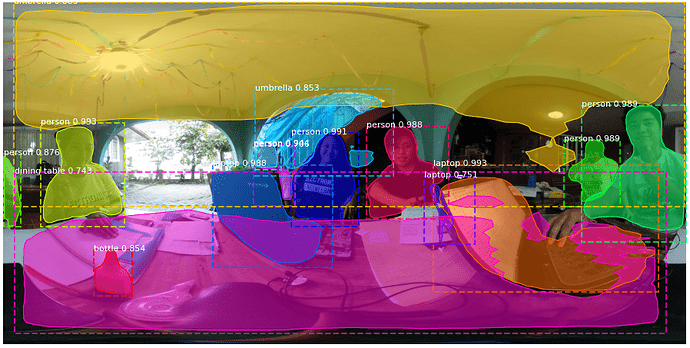
Finally I have managed to apply Mask R-CNN on this 360-image, this is what I wanted to do except it must running real time … I am able to use the live preview to get the frames … But, running both at the same time is very slow… like 2 fps and the delay is getting longer the longer it is running … like 10 seconds delay of movement … I’ll post a sample video in just a moment…
Wow, it looks like you’ve made some real progress!
I found this implementation by Matterpost using Mask R-CNN:
I notice that they are using Feature Pyramid Network (FPN) and a ResNet101 backbone to help with performance. I know nothing about these technologies, but it appears that speed is a regular issue.
If you’re already looked at this repo, please just ignore. I added the link here because I spent some time reading through it, and think it sounds related. But I really do not know specifically.


