Build Plug-ins with No-Camera
Sample app for Dream and Build contest participants without a camera. The app reduces RICOH THETA image size from 10.7MB to 0.12MB for transmission over unstable networks. The original image file is preserved in the camera. The idea is to set up a timelapse to take 1,000 pictures, one image every 5 minutes and transmit the small files automatically. A person can look at the small image and decide if they want the larger image.
This app was developed with an Android Studio AVD and uses actual RICOH THETA images stored in the app. The virtual shutter button will save the image to the virtual SD card of your AVD.
To use the app with a physical device RICOH THETA V, uncomment the code at the beginning of MainActivity.java. With a physical device, you can use the shutter button on the camera
to take a picture. The shutter button also triggers the automatic processing of the image.
Download No-Camera Template Now
Simulating Picture Taking Without a Camera
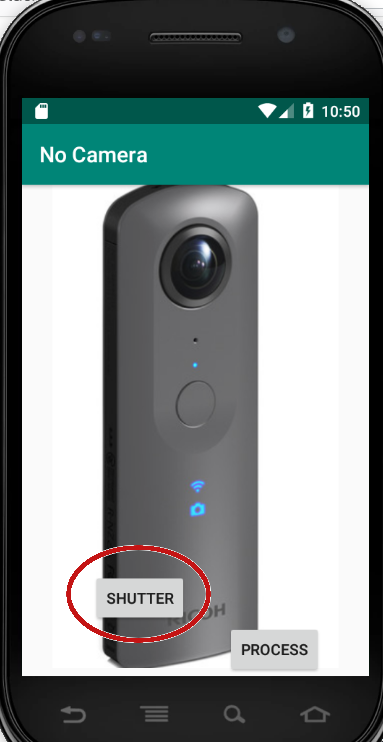
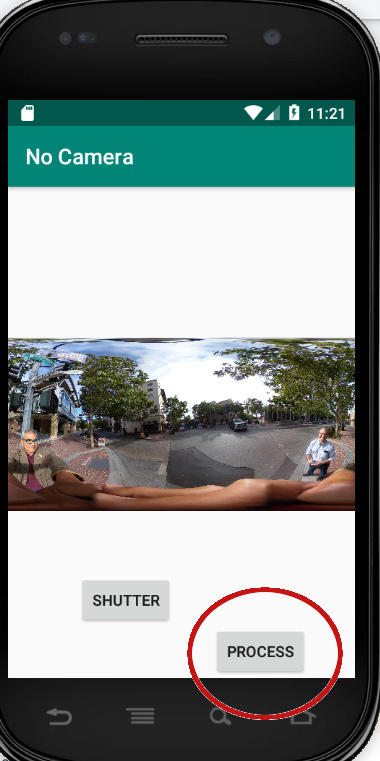
press the shutter button.
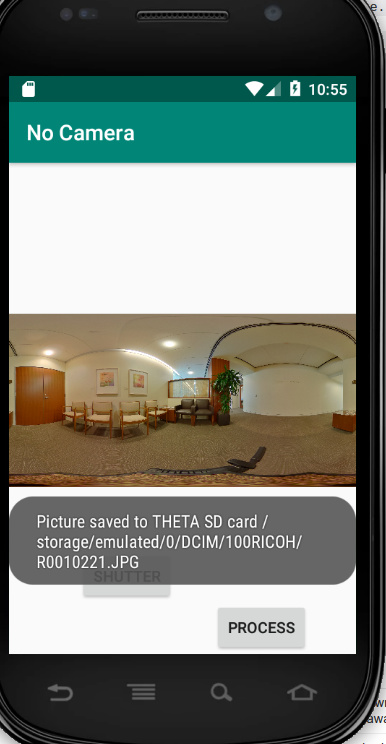
The app will save an actual RICOH THETA V image to the virtual SD card of the Android Virtual Device (AVD). The image file will be saved to /sdcard/DCIM/100RICOH. This is mapped to /storage/emulated/0/DCIM/100RICOH/ on most devices.
The simulated camera can take four images by default. You can add additional images to the assets folder for testing.
You can log into your AVD to see the files. You can delete the files and the app will restore the file when you take a picture.

In MainActivity.java, there is a method called processImage(). Put your image processing code in that method. It receives a string for the full image path that was just taken by the RICOH THETA camera.
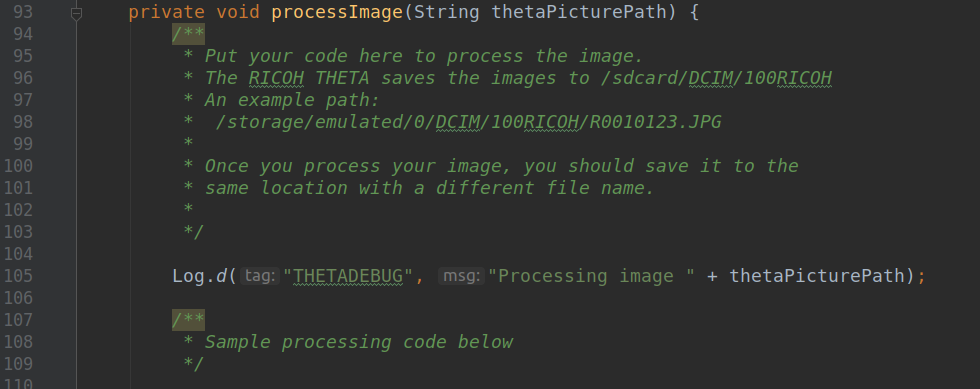
Image Processing Demo
Developers can process the image inside the camera by running common libraries such as TensorFlow or OpenCV. You can also push the image to a cloud or messaging system. Examples
for all of these plug-ins with GitHub repos of the full code are included in the Getting Started Guide.
The demo included with this app, reduces the size of a RICOH THETA image from 10.7MB to 0.12MB for transmission over networks.
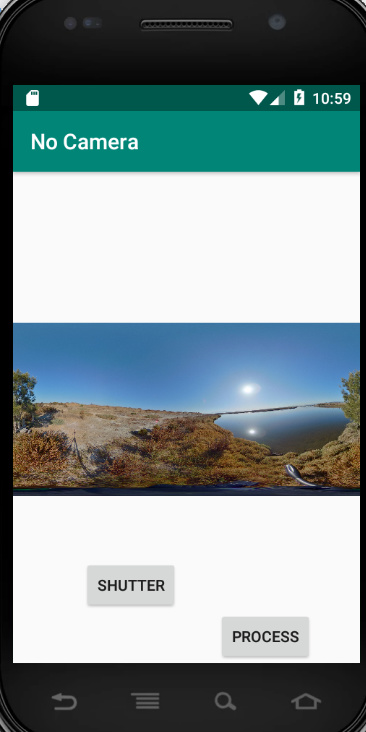
Take a picture first, then press PROCESS.
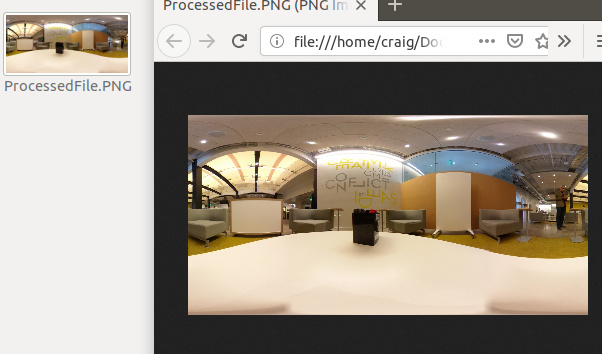
You can see the processed image file in your AVD.

Download the file to your local computer with adb pull.
You can now view and analyze the processed file on your local computer.
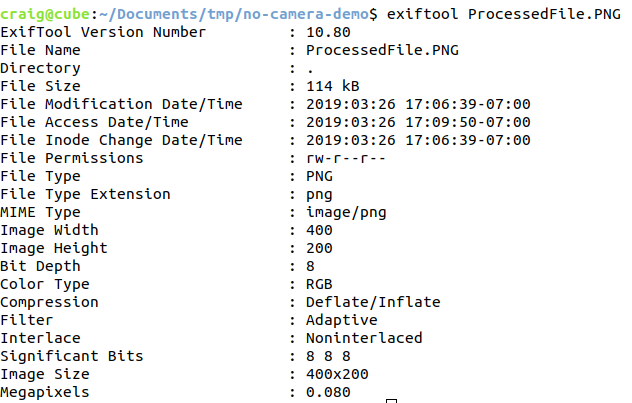
exiftool is useful for inspecting metadata.
Metadata
The metadata is stripped out of the images in this example. In particular, the ProjectionType is not set to equirectangular. You can add the metadata in with exiftool for testing.

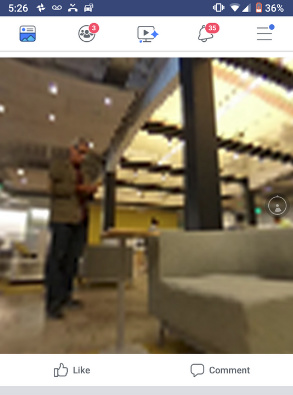
Once you have the ProjectionType set to equirectangular, the image will be viewable in 360 apps such as Facebook. Note that the image resolution is intentionally low to reduce file size for transmission over unstable cellular networks in remote areas.
Loading RICOH THETA Sample Images Manually
You do not need to use this app to store images in your AVD. You can manually save the images into the correct directory with adb.
RICOH THETA V sample images are available here:
If you do not have a camera, load the sample image into /sdcard/DCIM/100RICOH with
adb push /sdcard/DCIM/100RICOH/R0010123.JPG
Log into your AVD with:
adb shell
cd /sdcard/DCIM/100RICOH
Check to see that the image is installed in the proper directory.

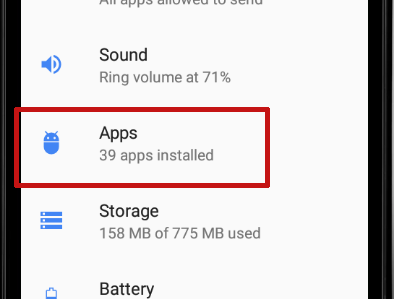
App Permissions
To use this app, you must set the permissions in Settings.
In Android Virtual Device, select Setting → Apps to
enable storage permissions.
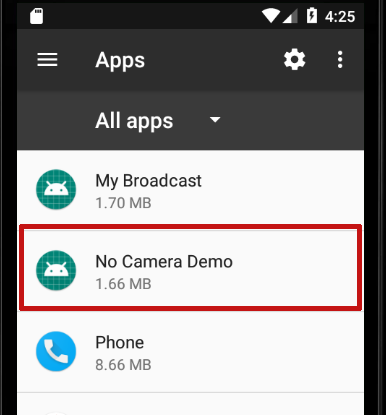
Select app No Camera Demo
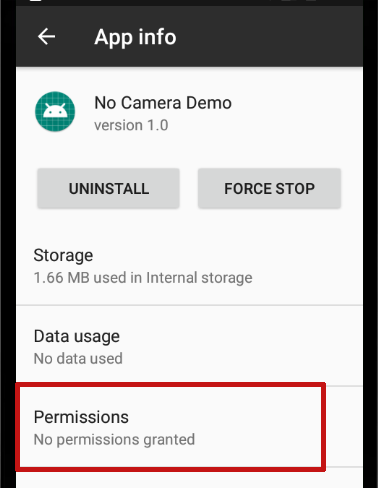
Select permissions.
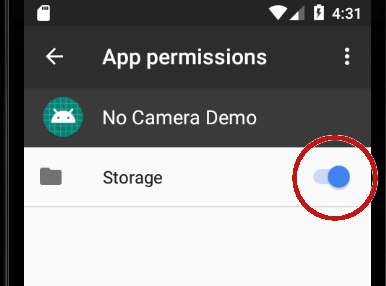
Enable Storage permissions.
Finishing RICOH THETA Plug-in
If you’re working on a submission for the 2019 Dream and Build Contest and do not have a RICOH THETA camera, Oppkey may be able to help you add the functionality needed to complete your plug-in on actual RICOH THETA hardware. If you need help, please post in the forum at the link above.