I had the previous version of the Ricoh Theta Stitcher Plugin for Lightroom (vs. 2.101) and it was working. I then had a problem with my computer and ended up reloading the newer version of the stitcher (vs. 2.20), the one that was updated Nov. 26, and now when I go to run the plugin, the plugin stays as ‘Ricoh Theta stitcher setup.exe’ and the actual stitcher never opens up (ricoh theta stitcher.exe). Is any one else having this problem? After it asks me to install it, I don’t have the option of actually opening the stitch.exe file. I really don’t want to have to pay for an external stitching app as this has worked well for me in the past 2 months.
So, the stitcher plugin (2.20) is now being accessed in LRC and comes up and the altered image comes up, but then the image is not saved. I have already checked my memory space and there is enough. The image comes up, I click the ‘ok’ box and it disappears.
Help, please…
You should provide a step by step description with screenshots of what you are doing.
First, thank you for your response.
Preliminary info: I have uninstalled and reinstalled both the latest versions of Light Room Classic and the most recent Ricoh theta stitcher plugin (2.20)
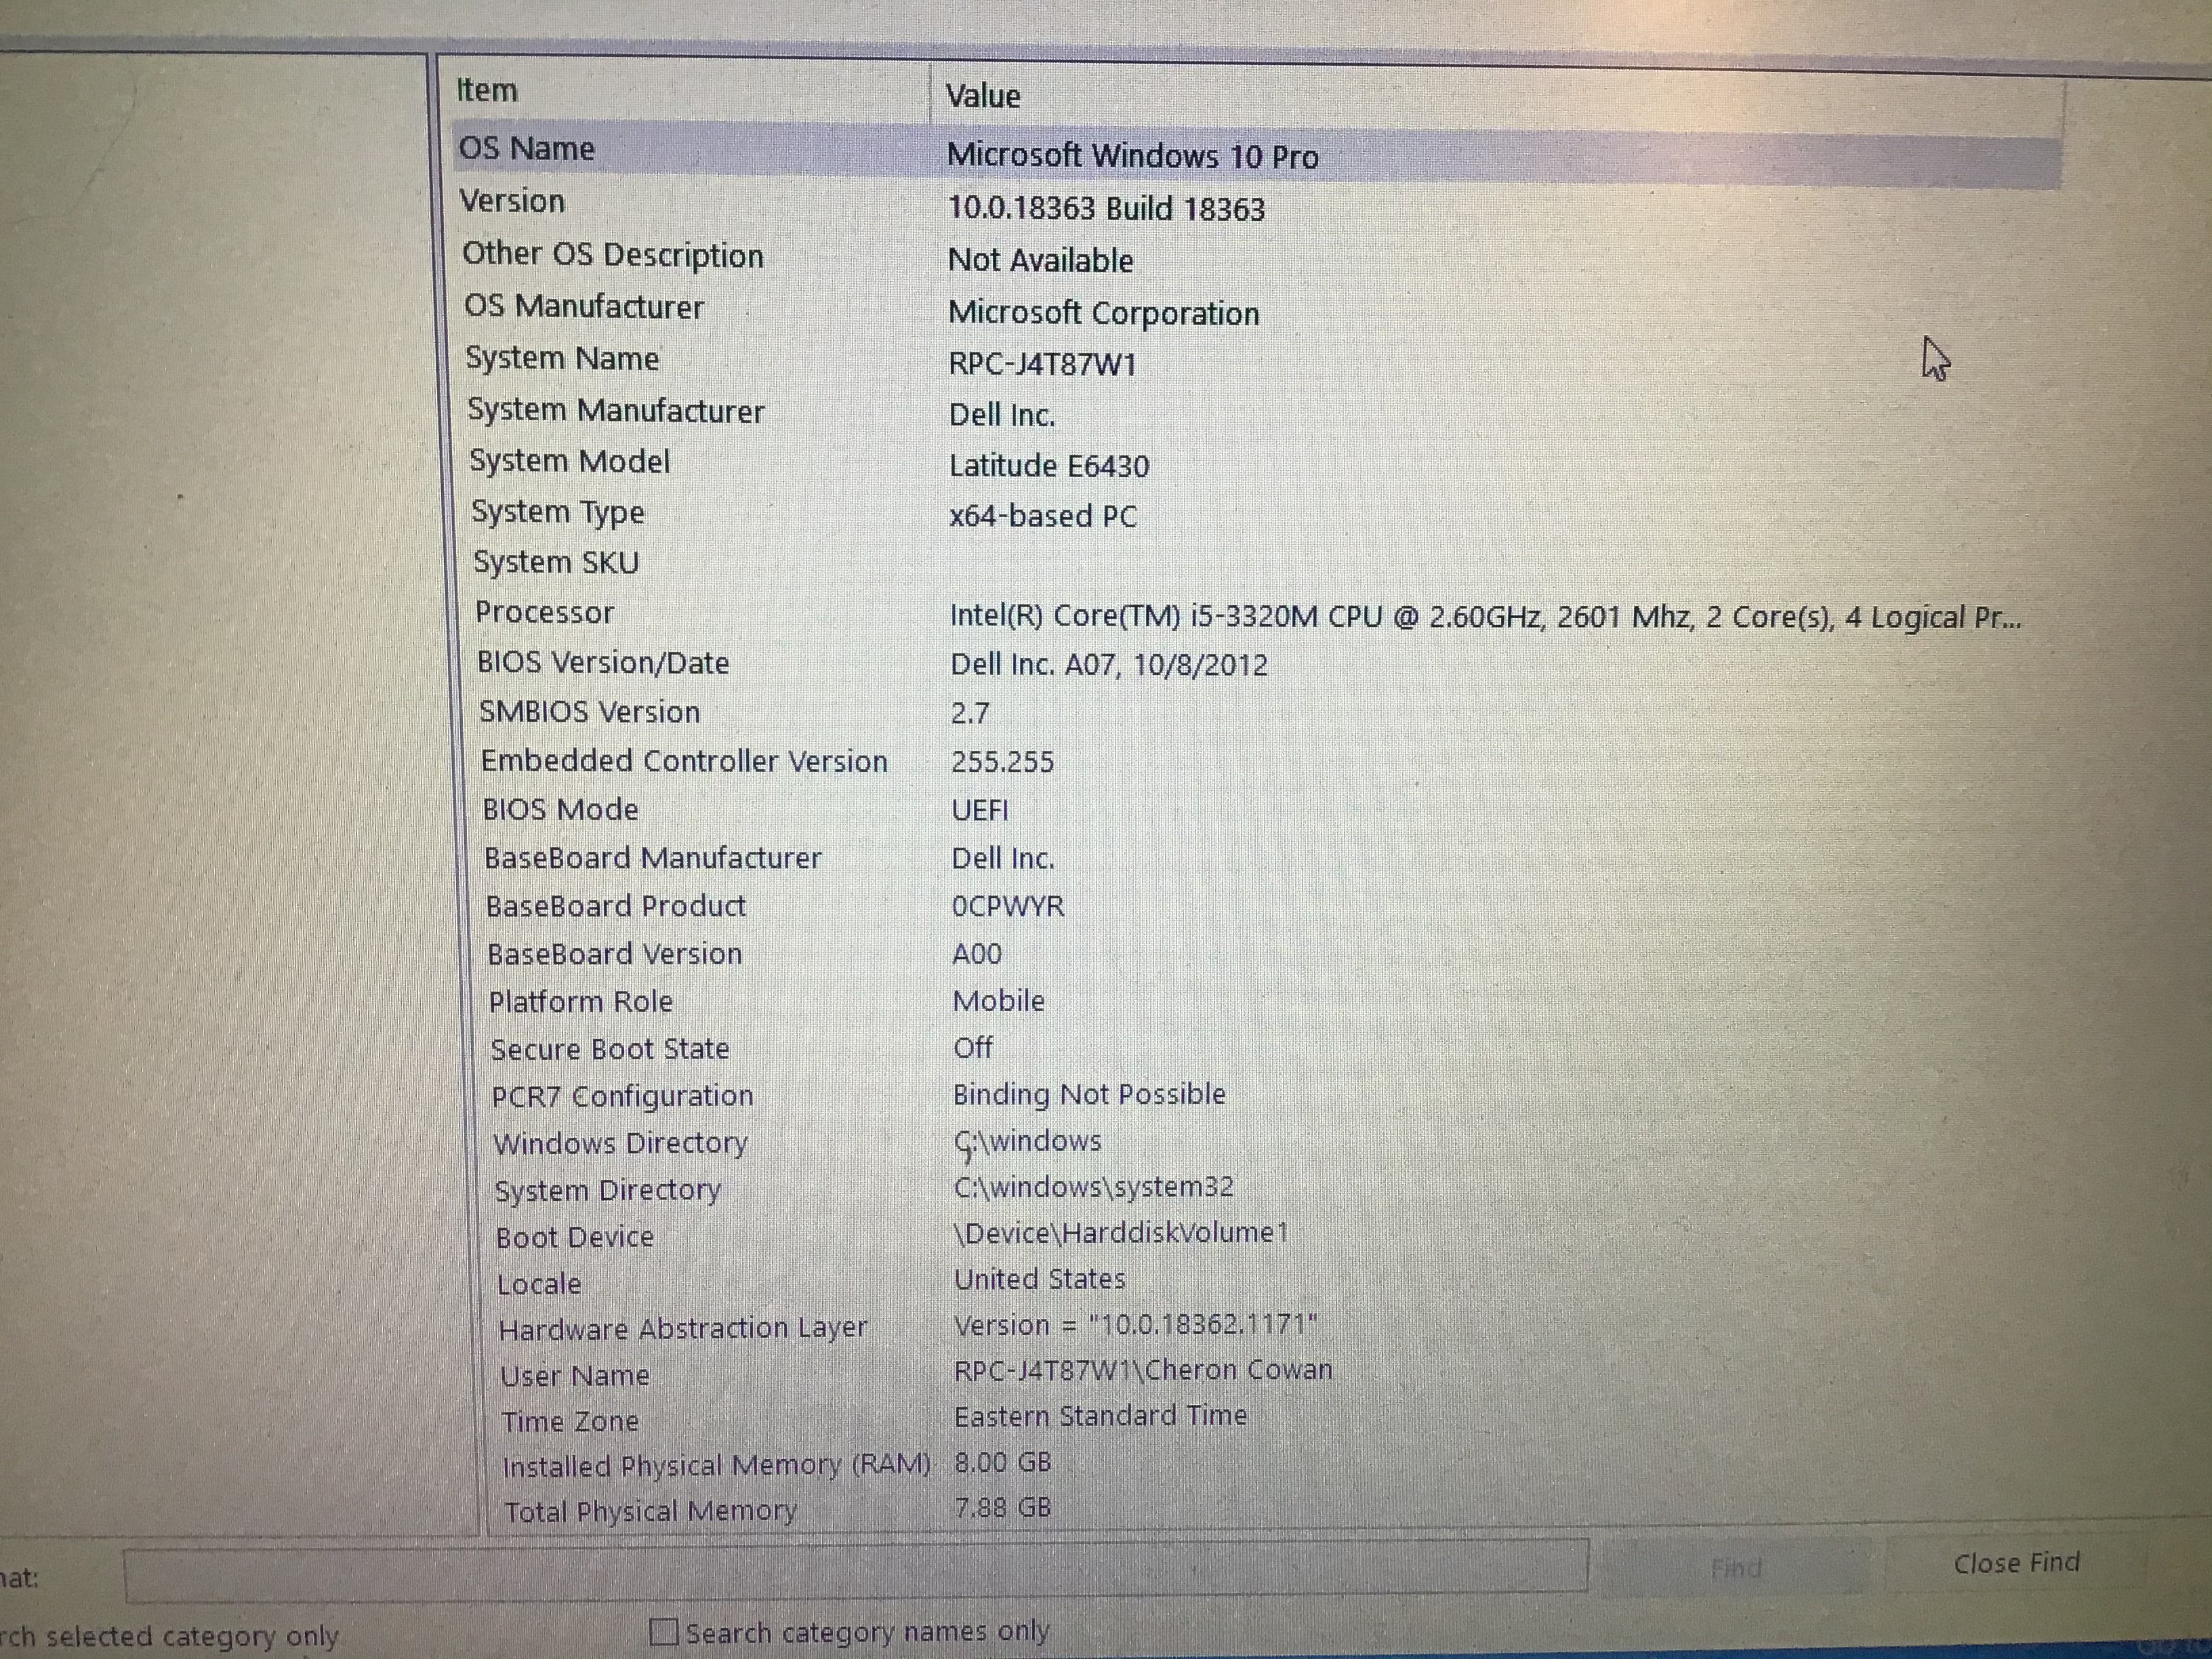
This is the computer info:
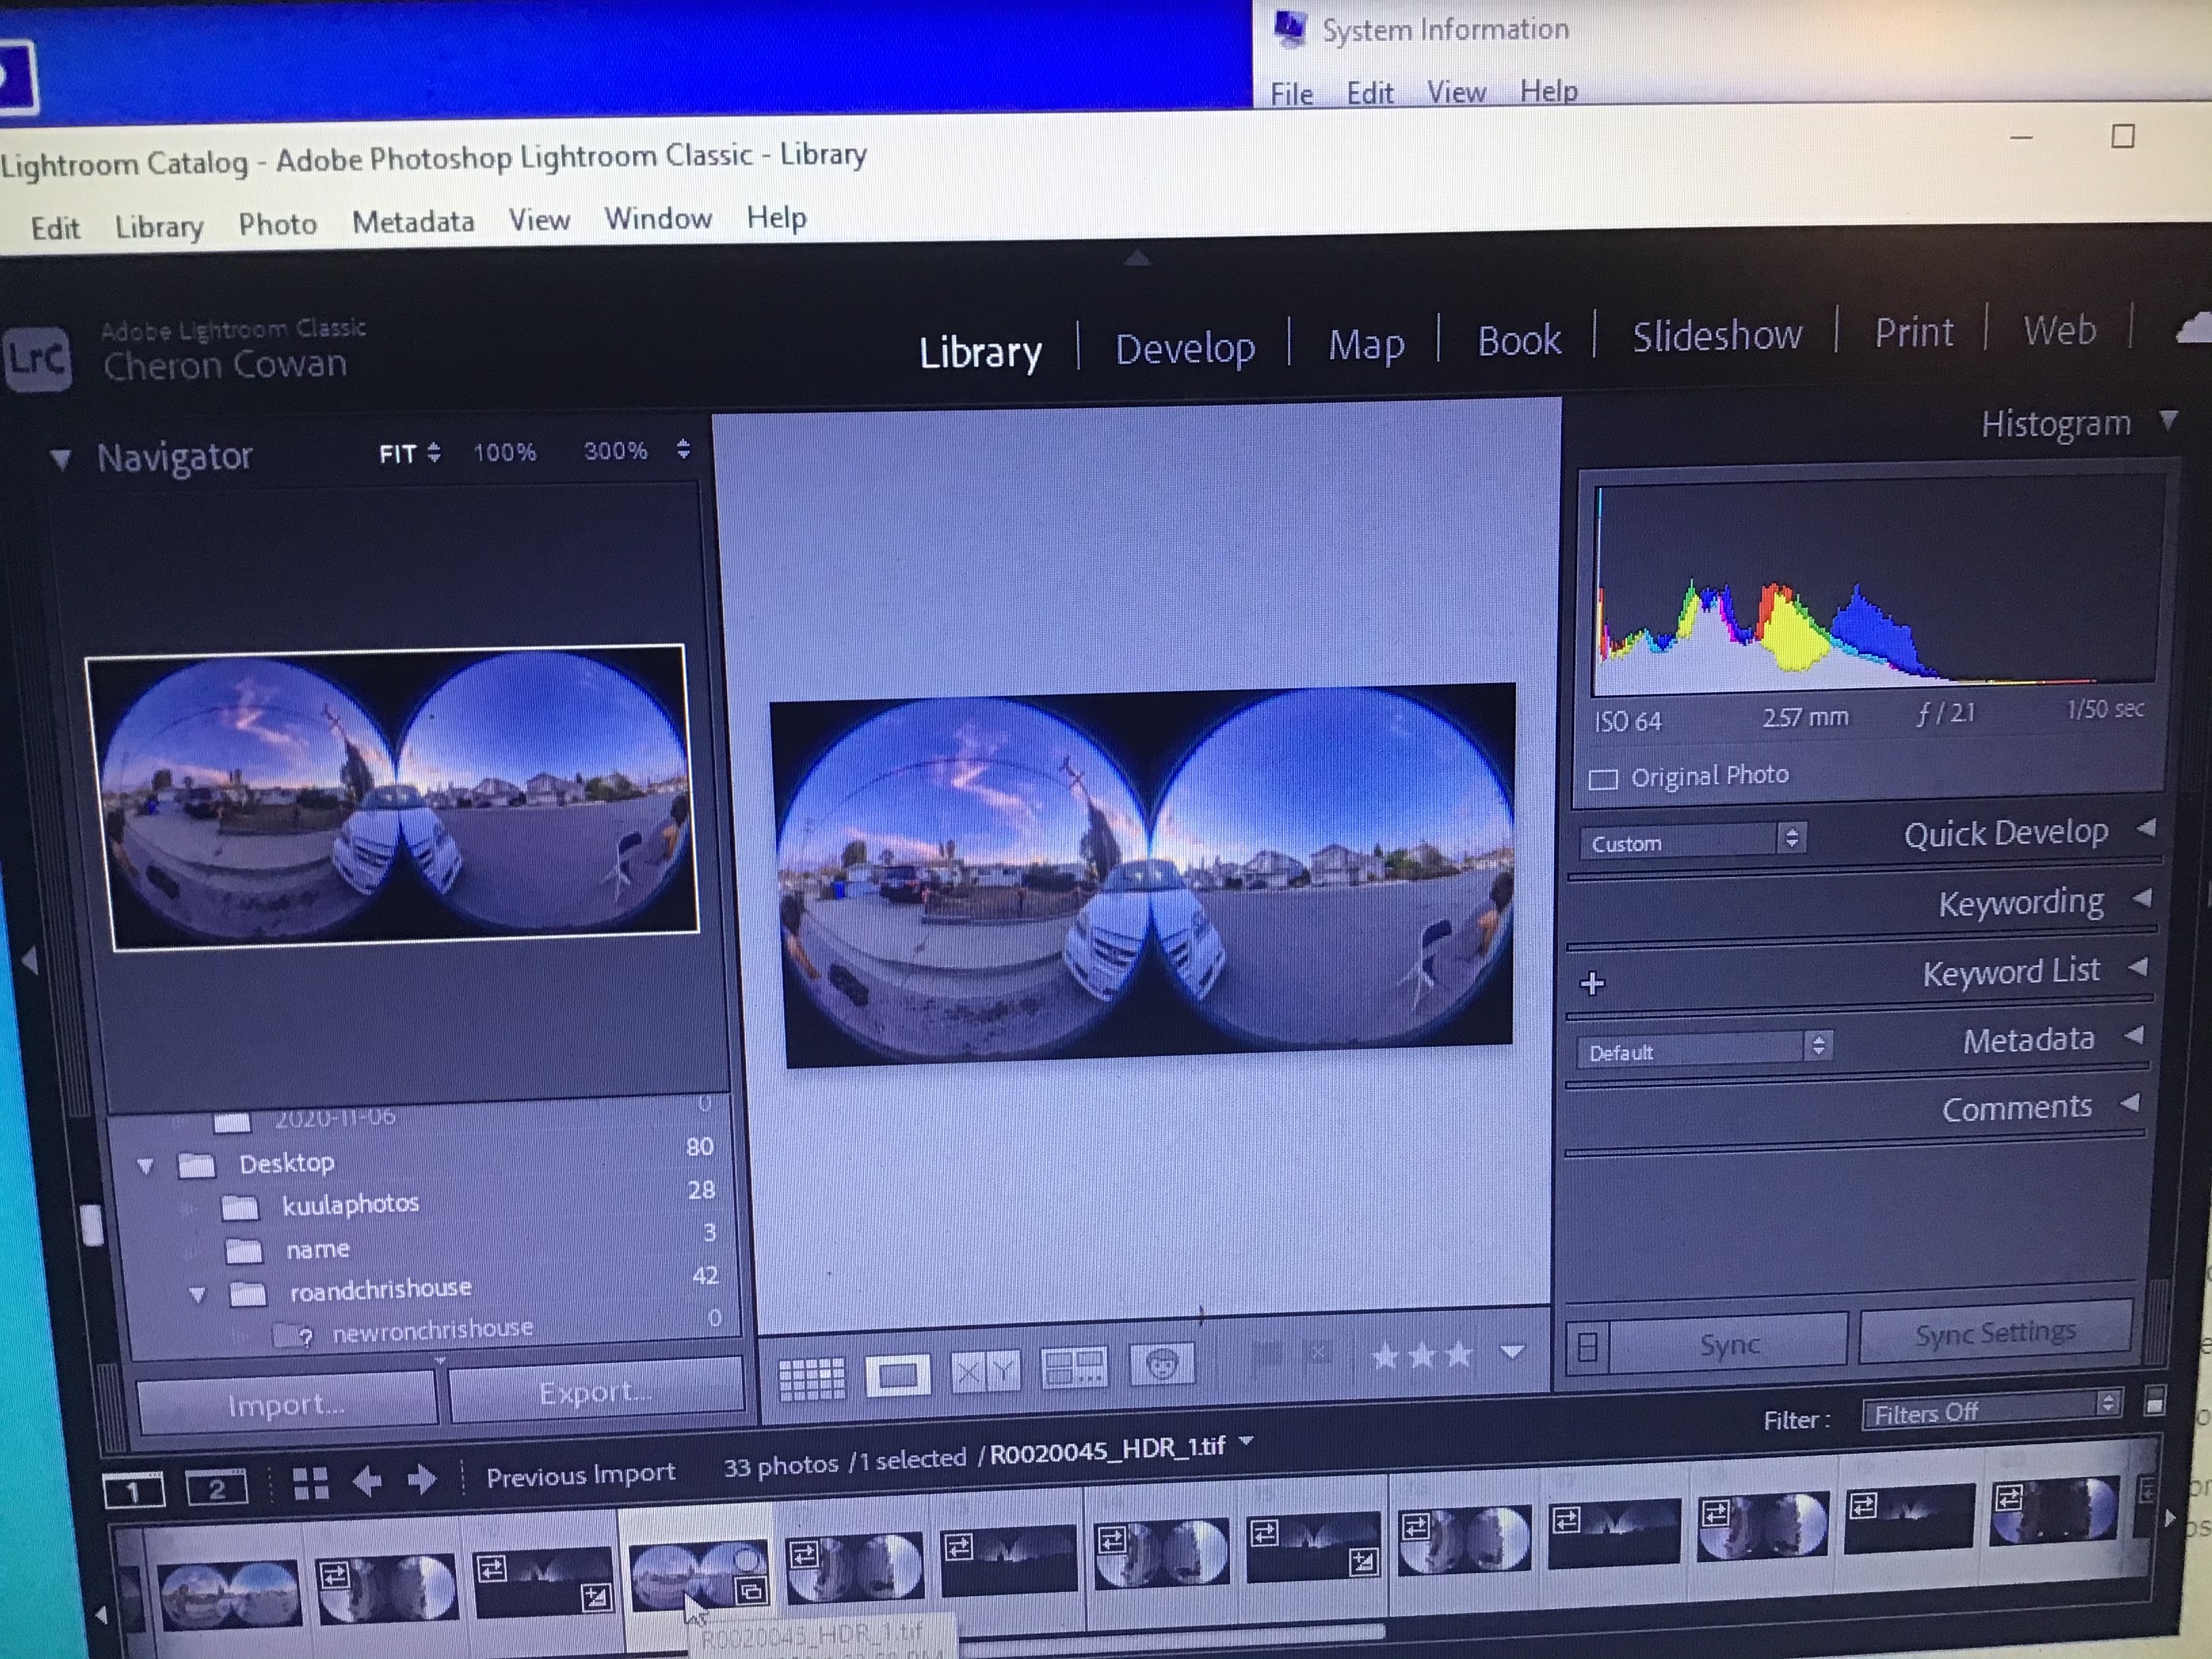
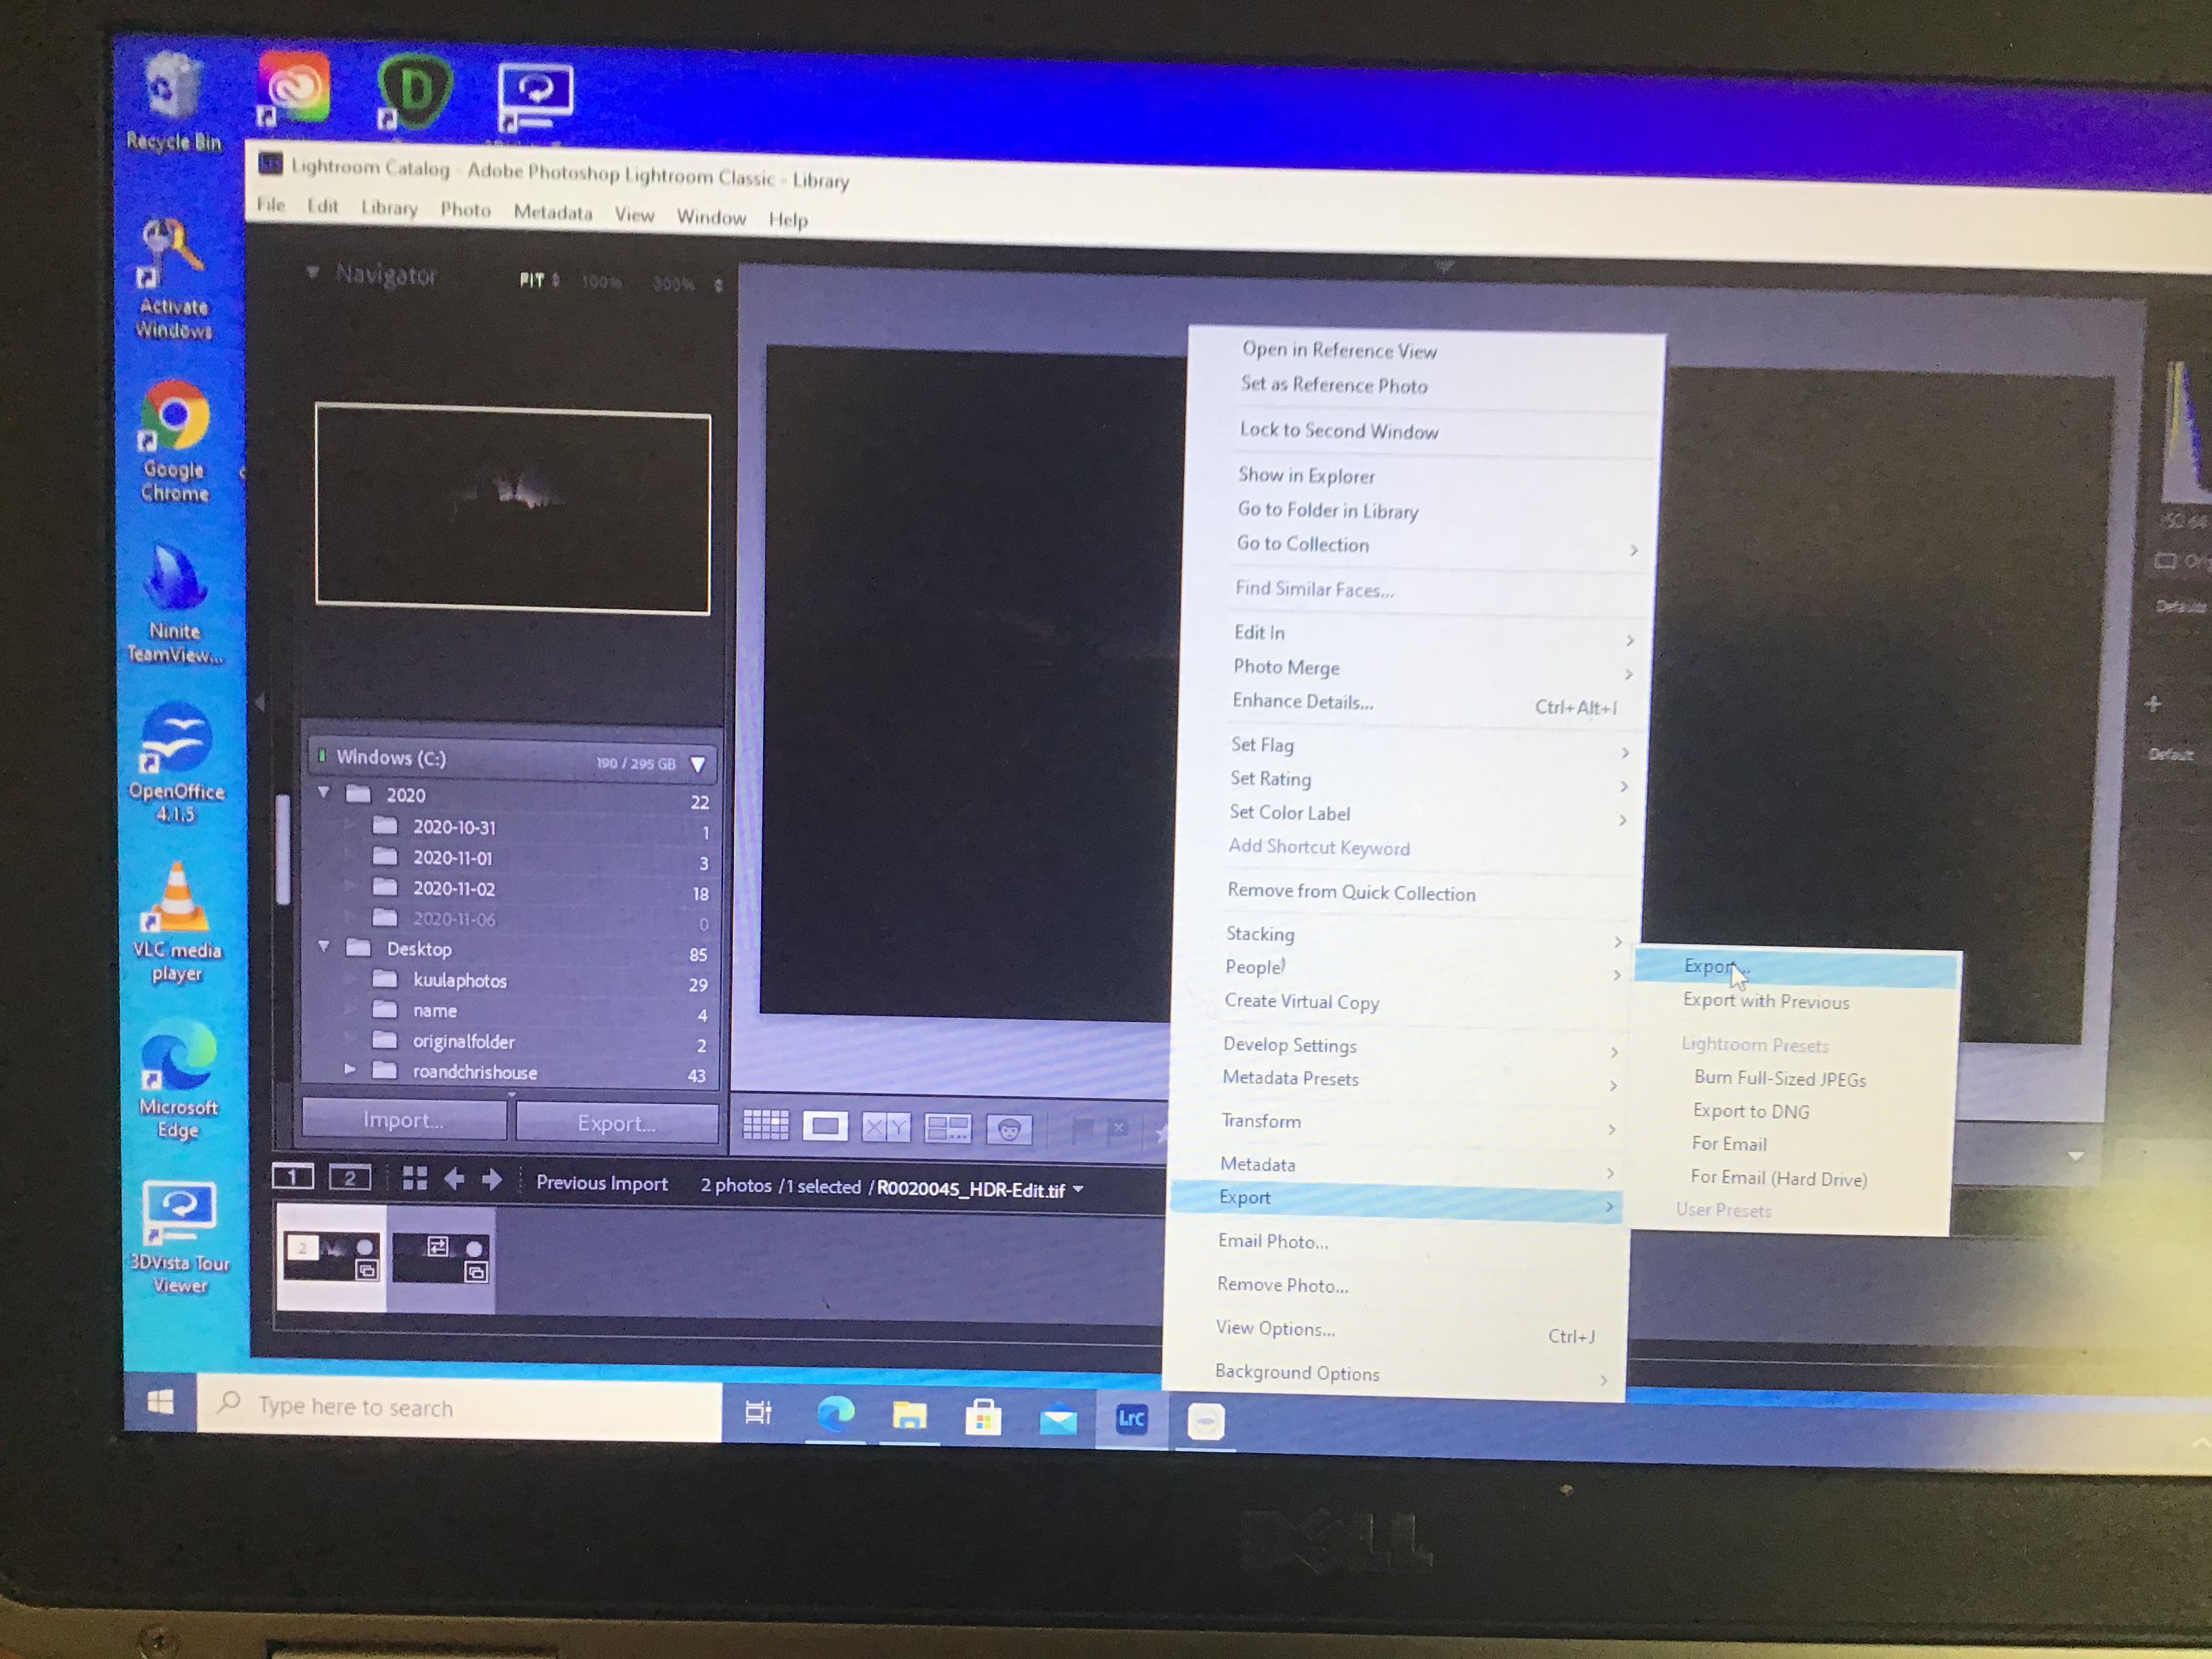
I open LRC and import the photograph (both the HDR_DNG and DNG images are already in the same folder):
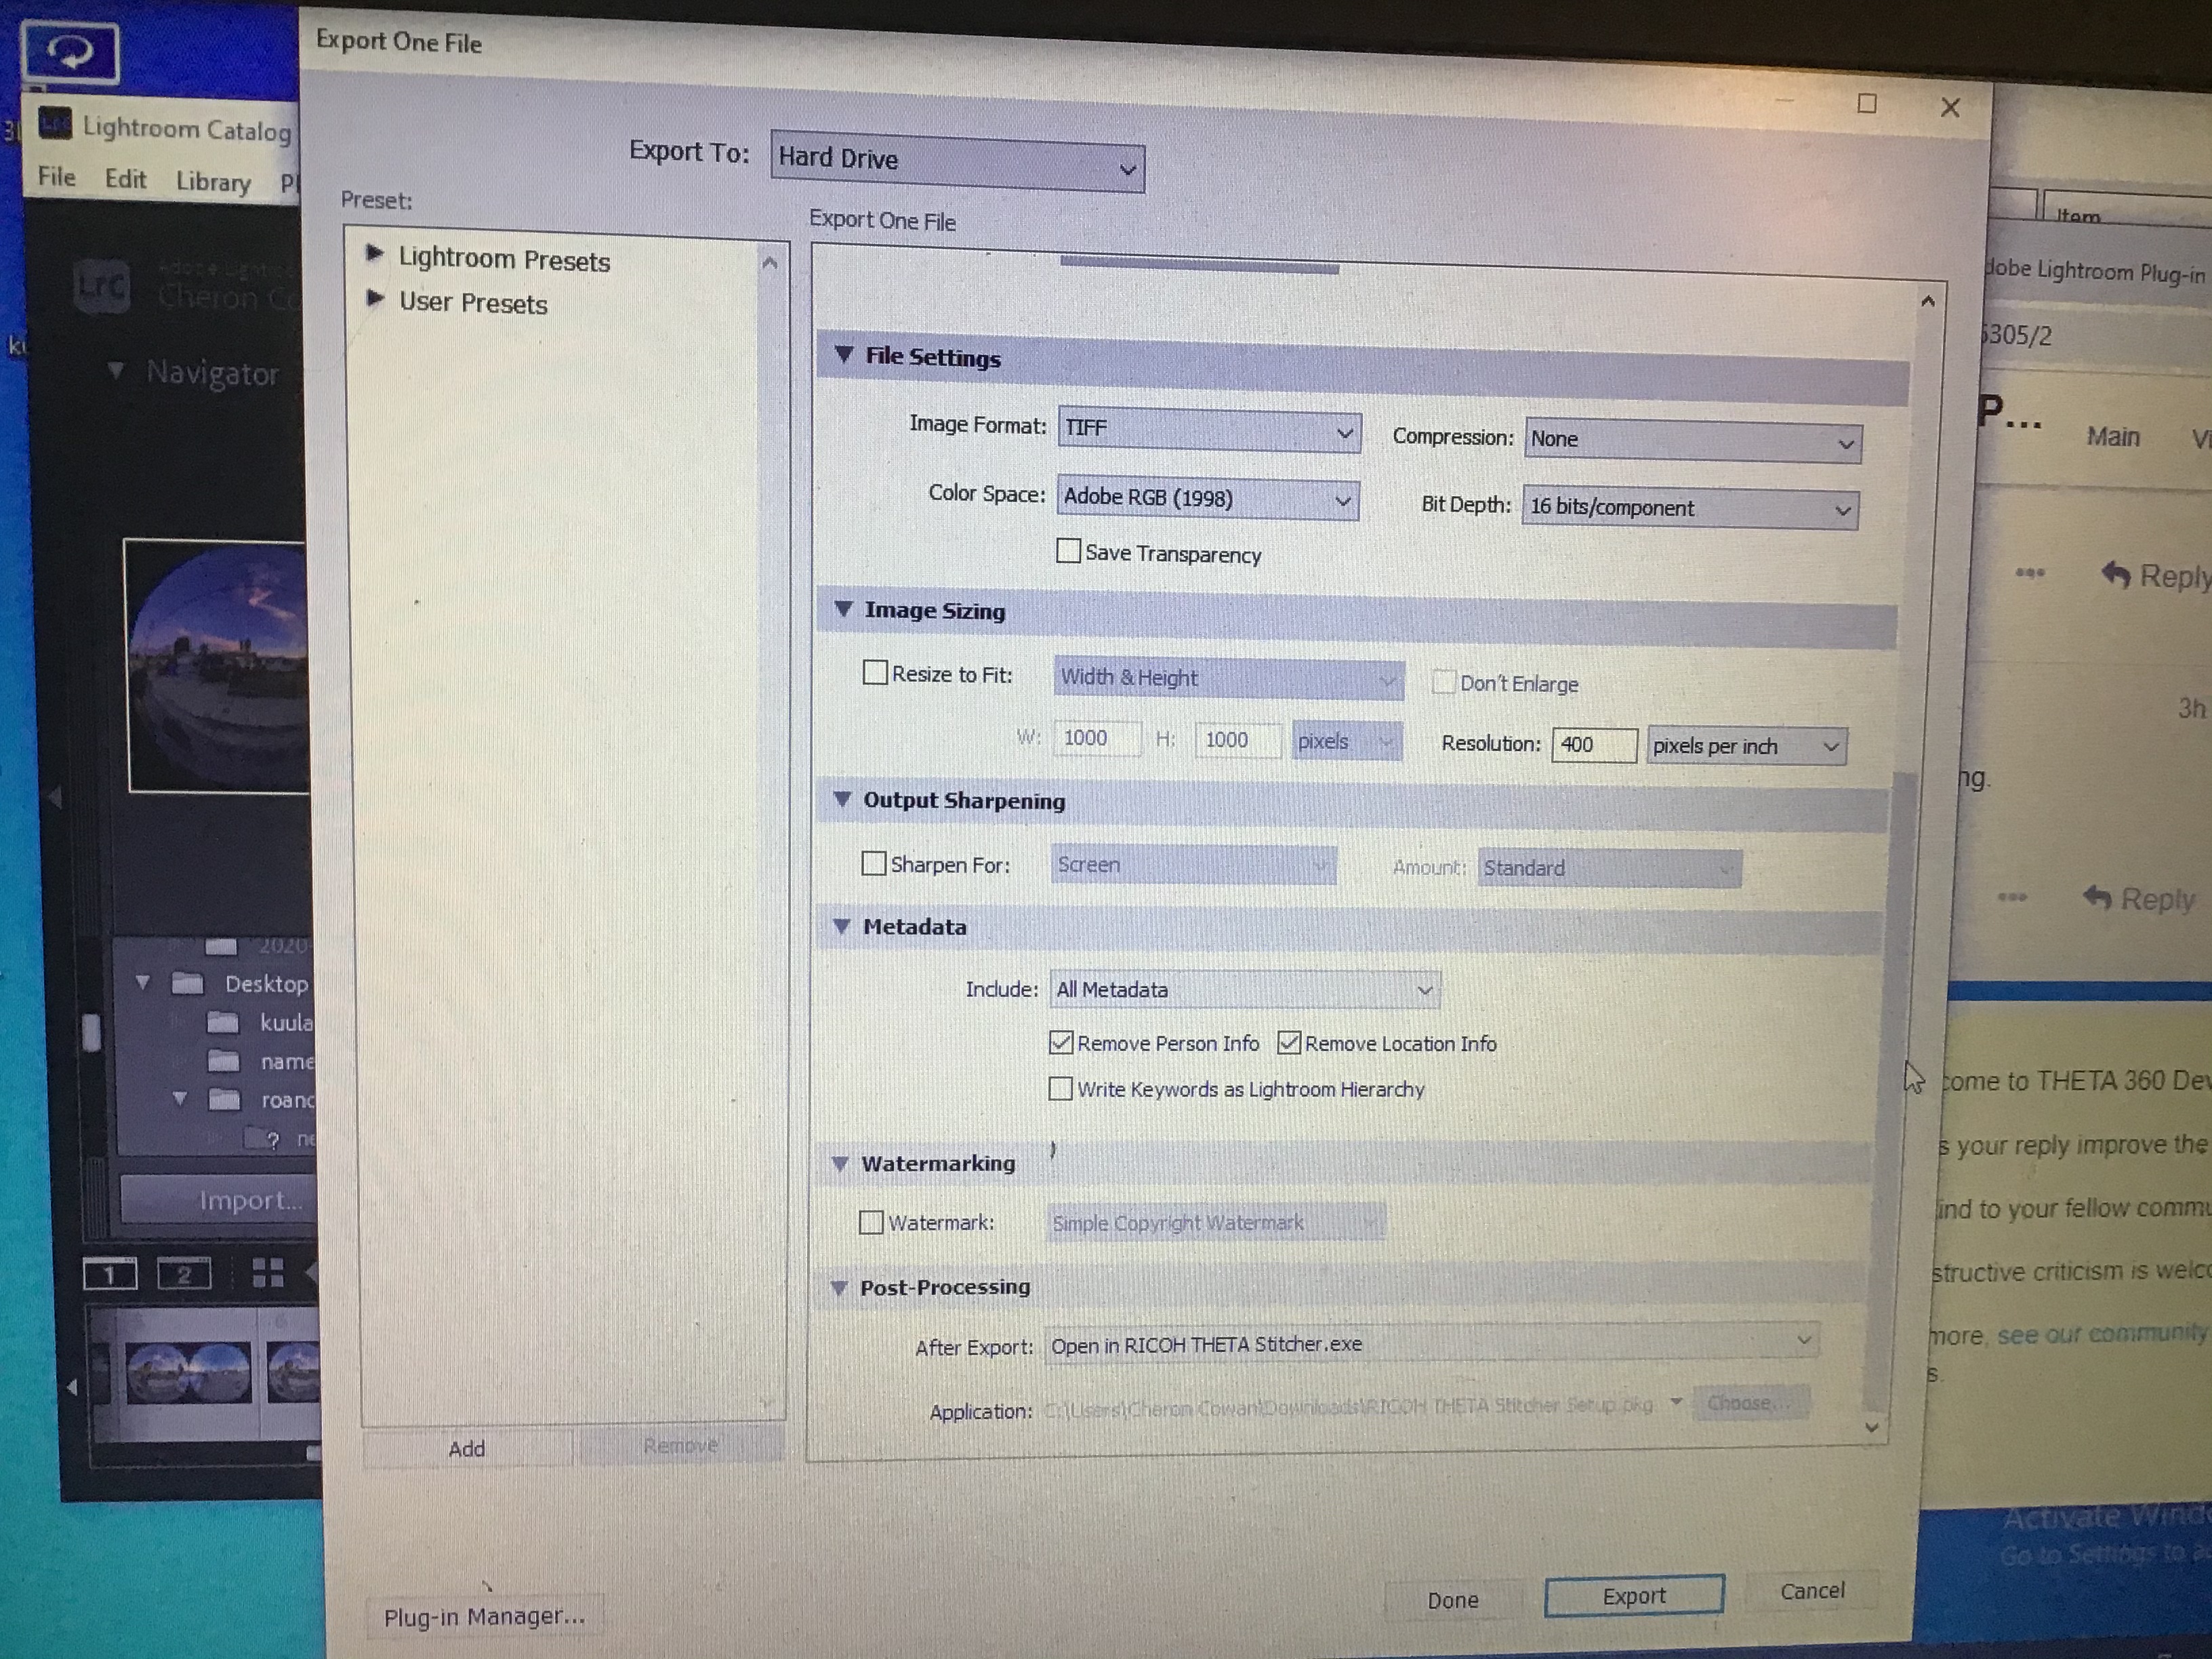
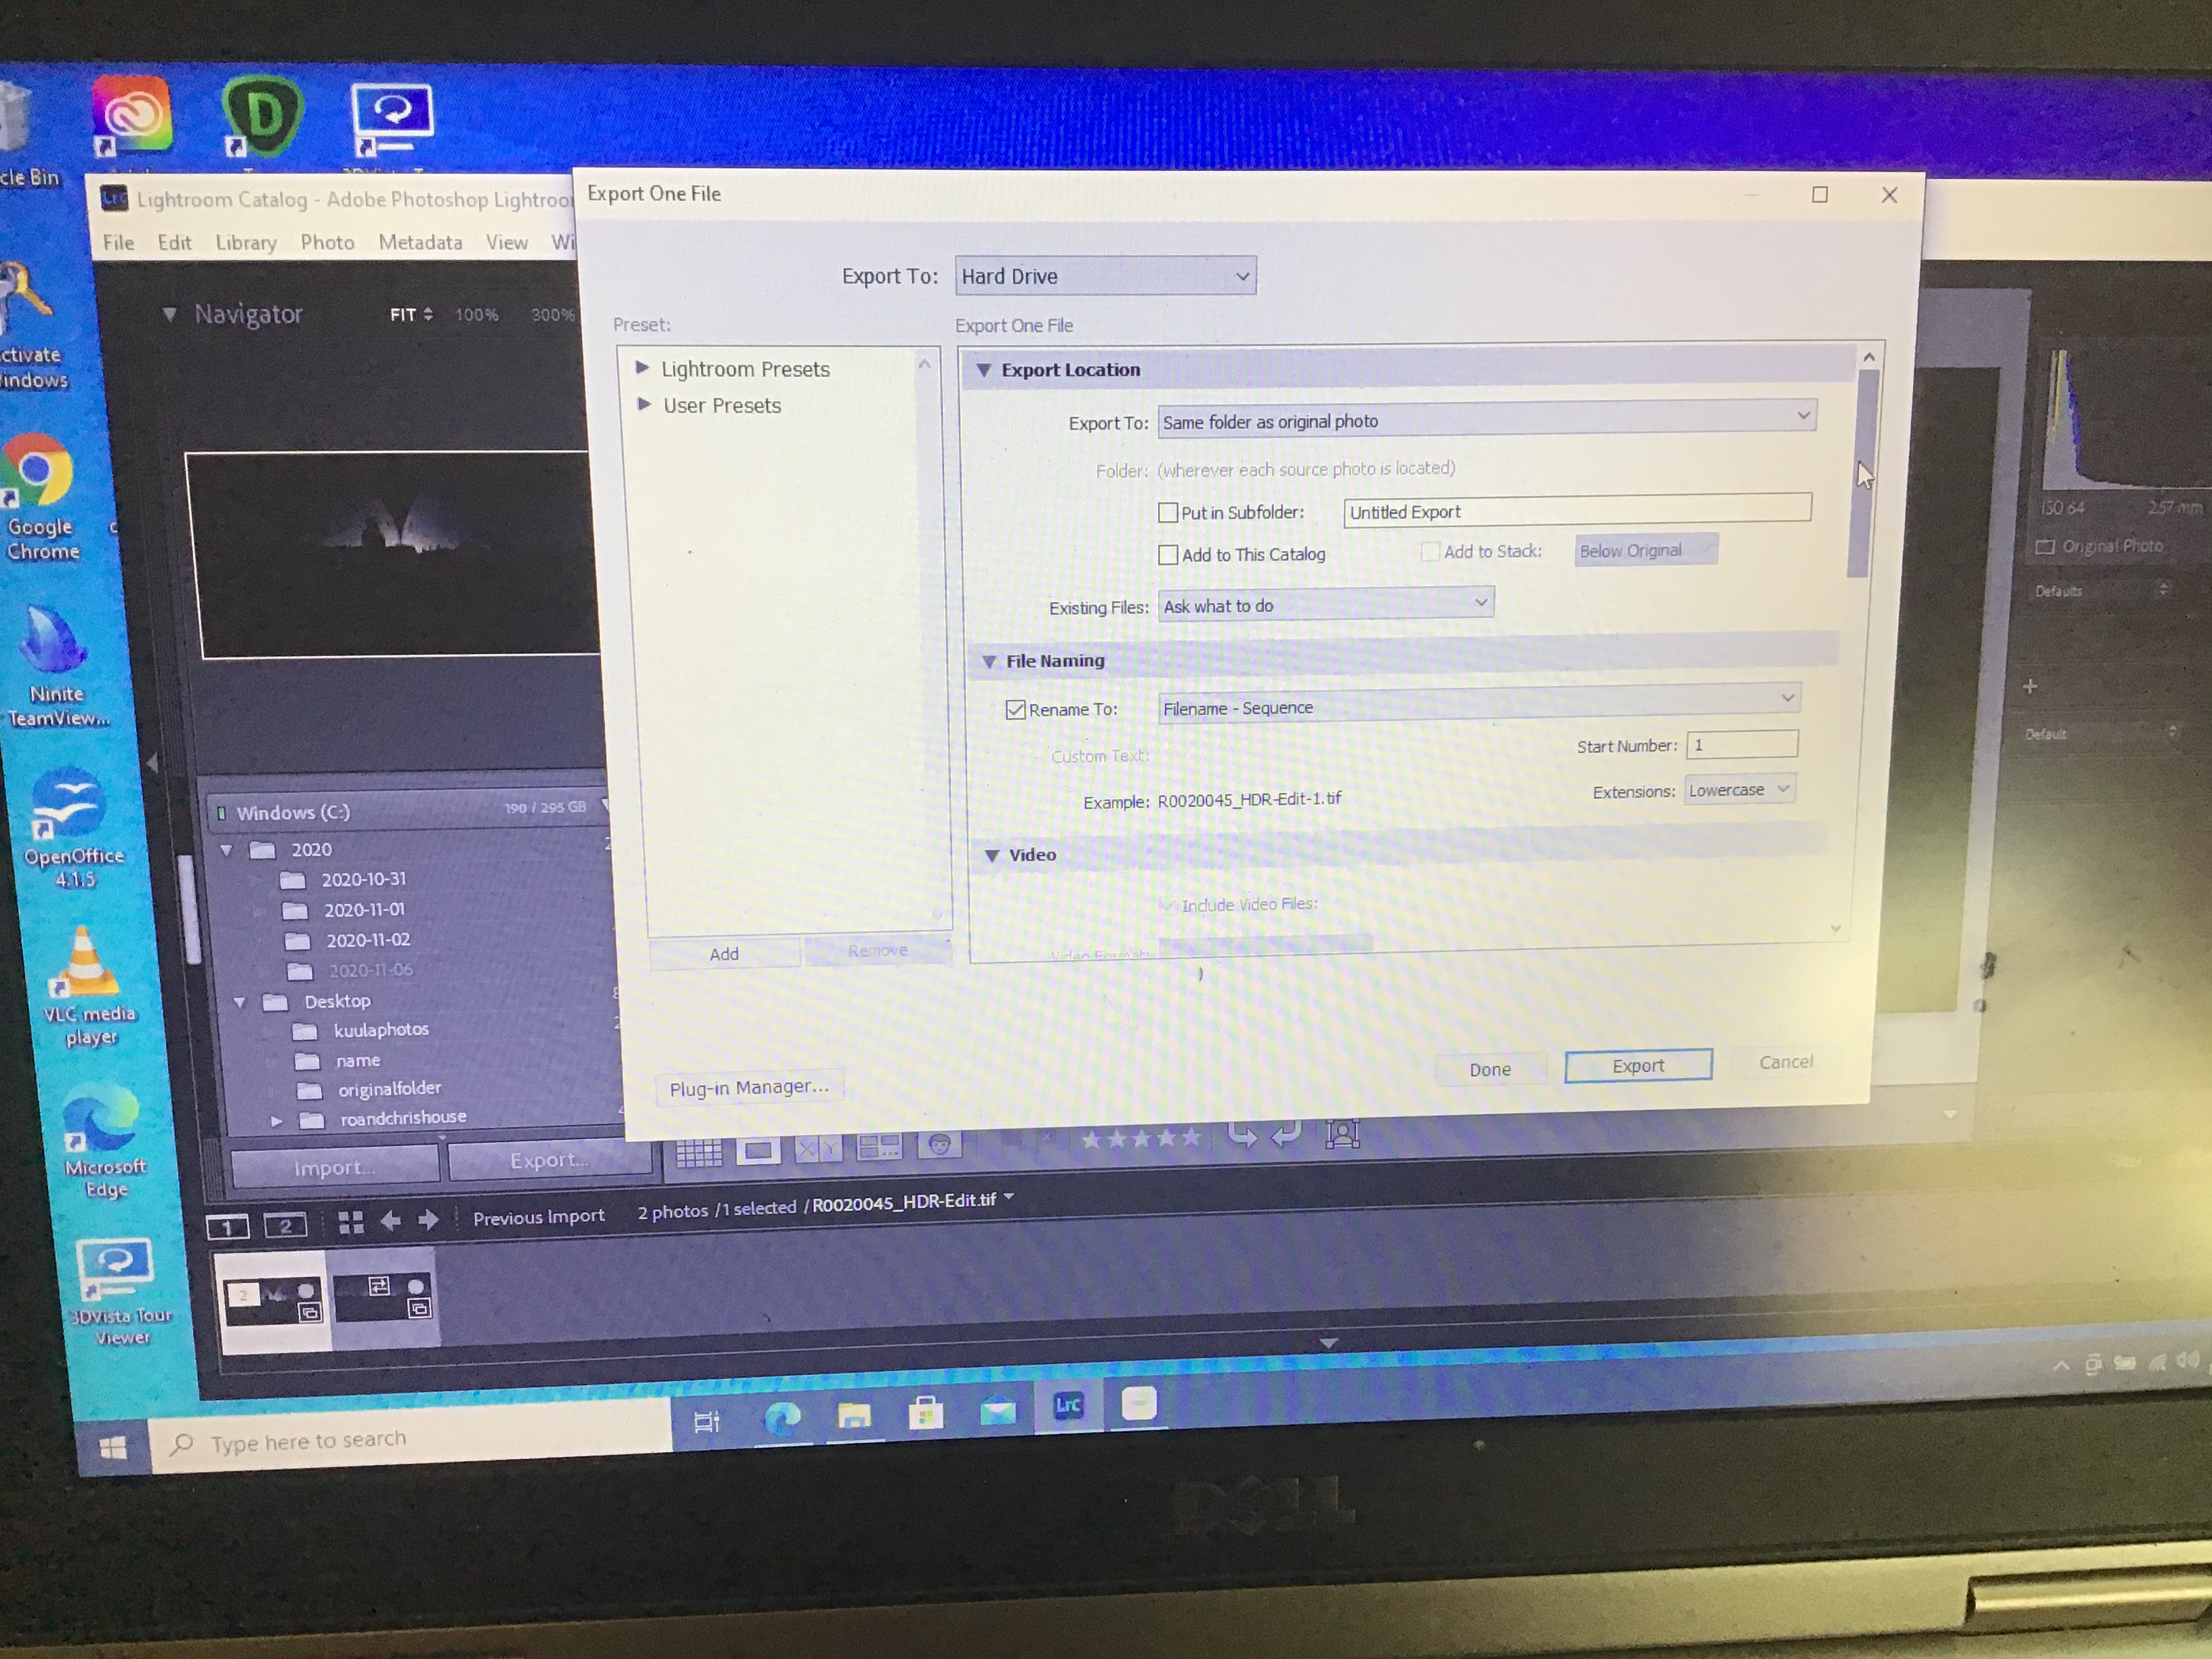
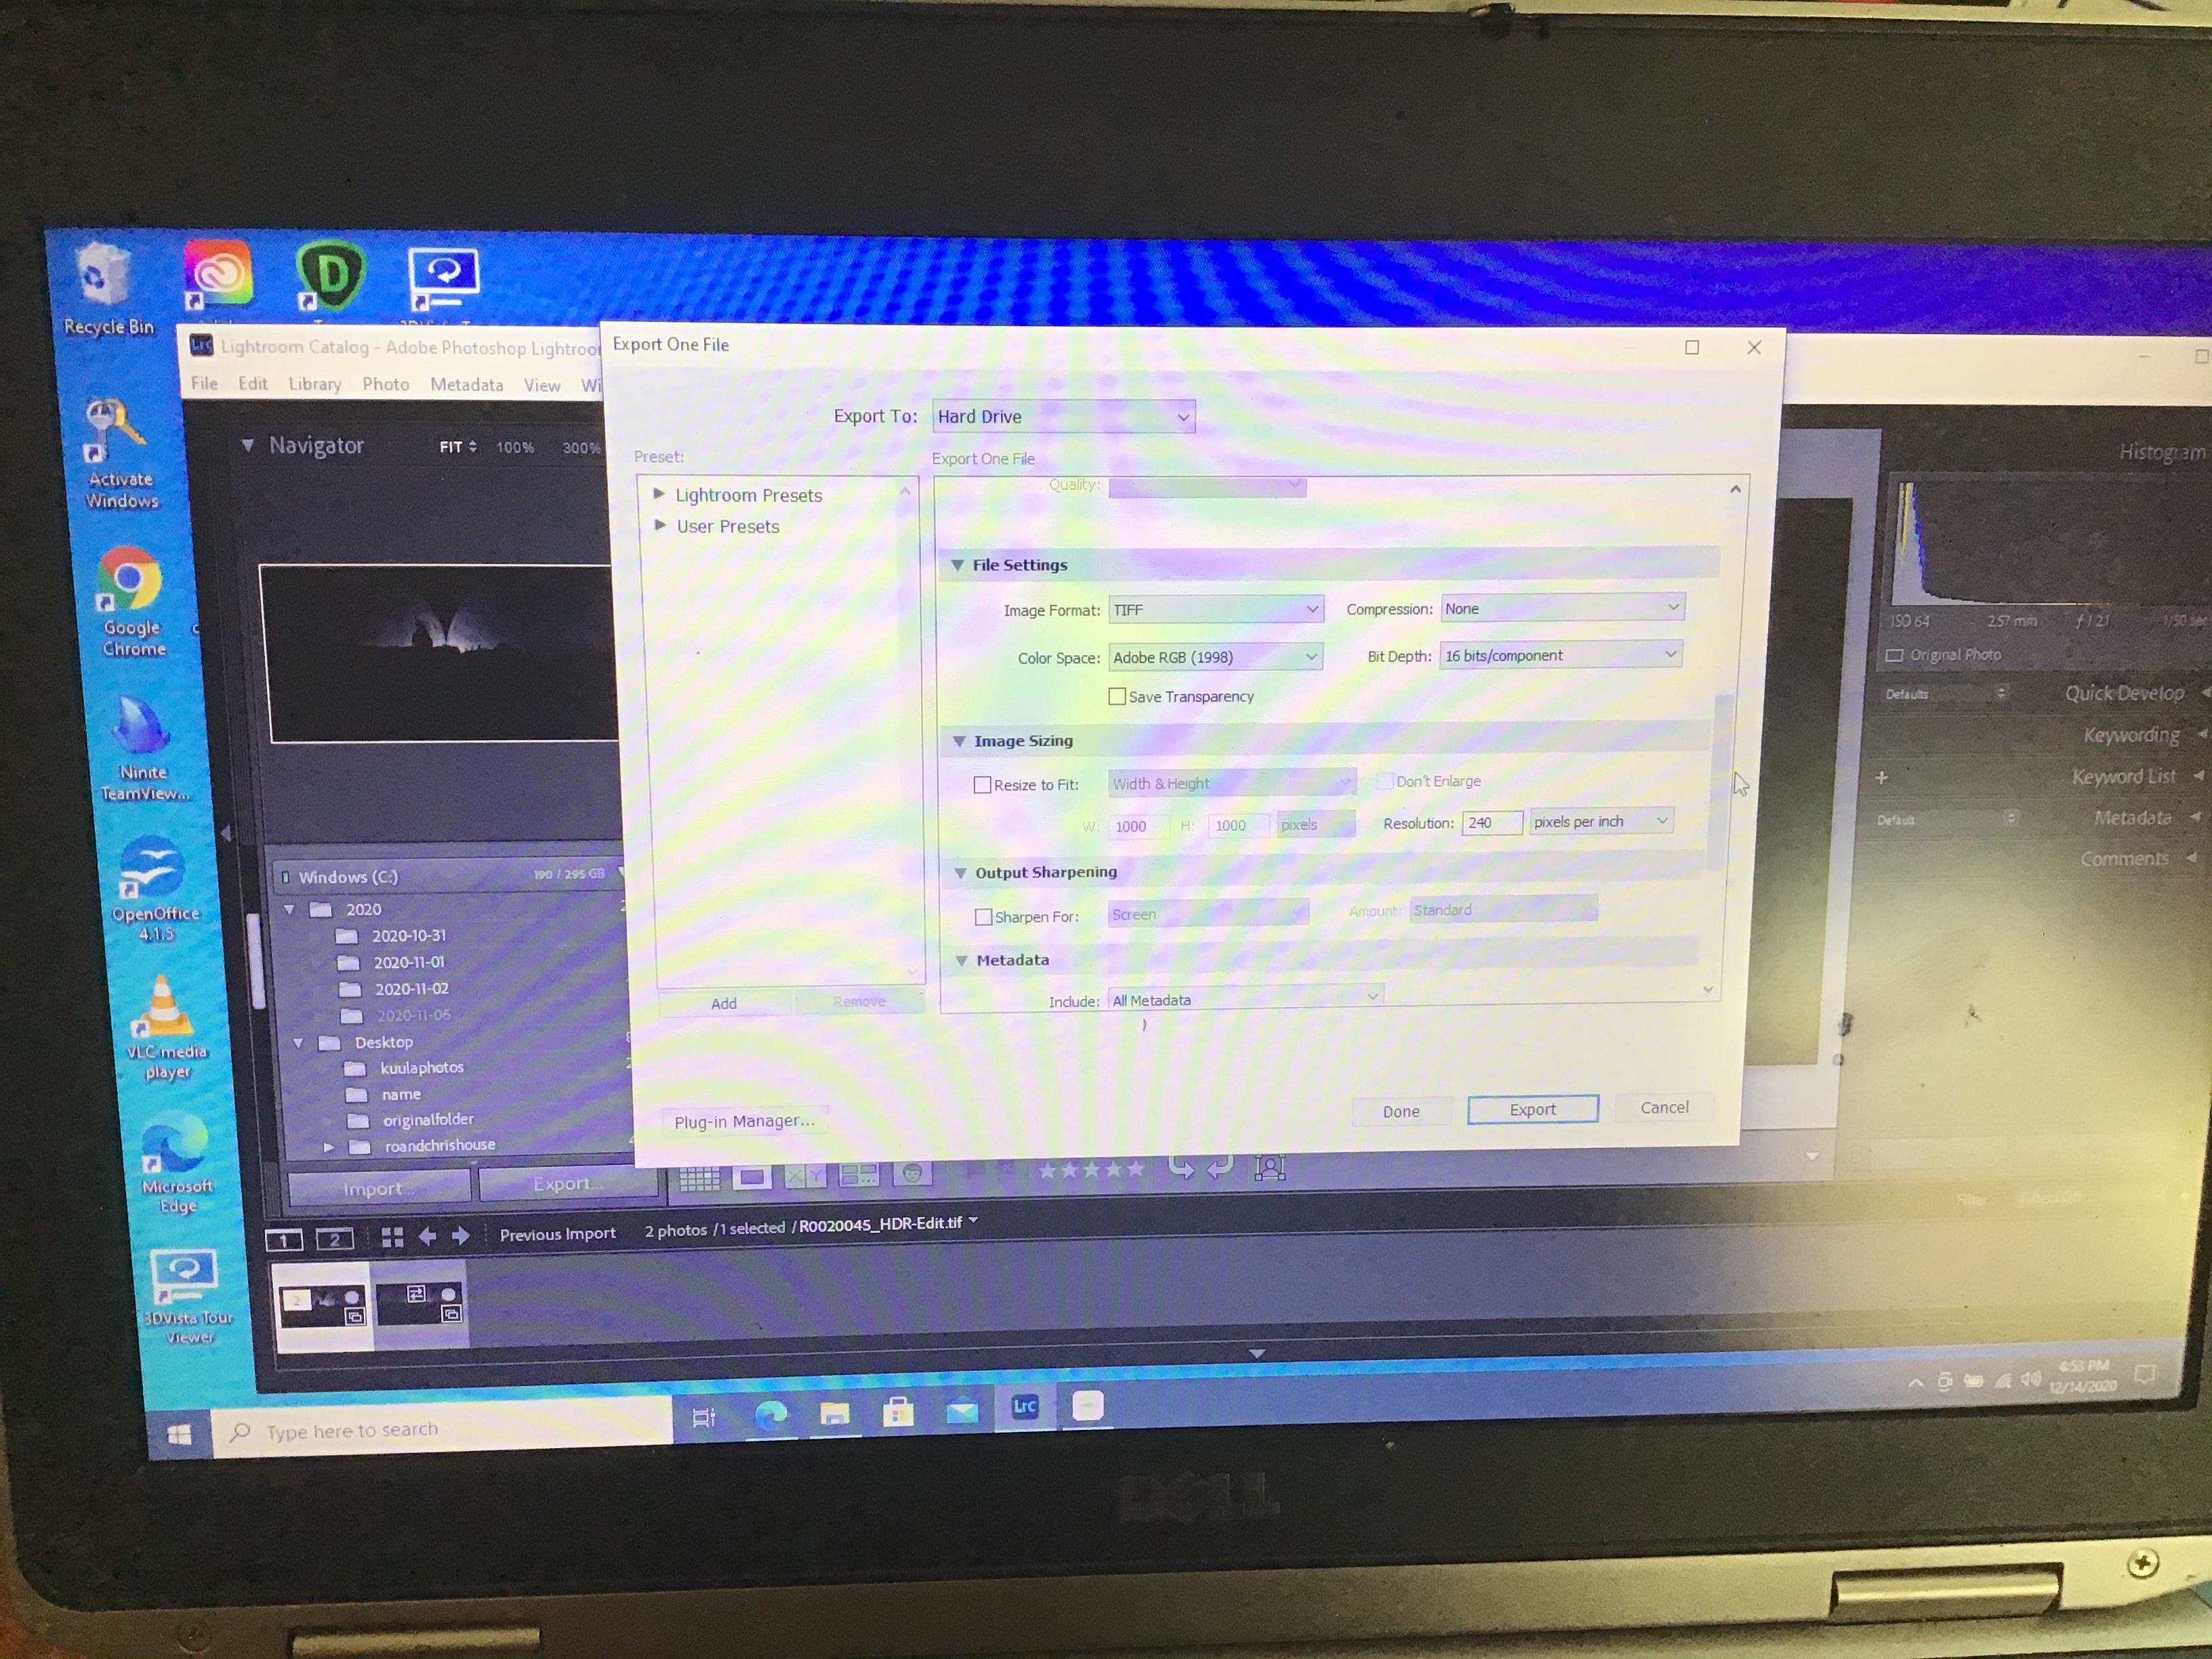
I export the file to Ricoh theta stitcher:
After I hit export at the bottom, this comes up (which looks like it should, except that I downloaded the 2.20 version of the stitcher and it is still acknowledging the 2.10.1 version):

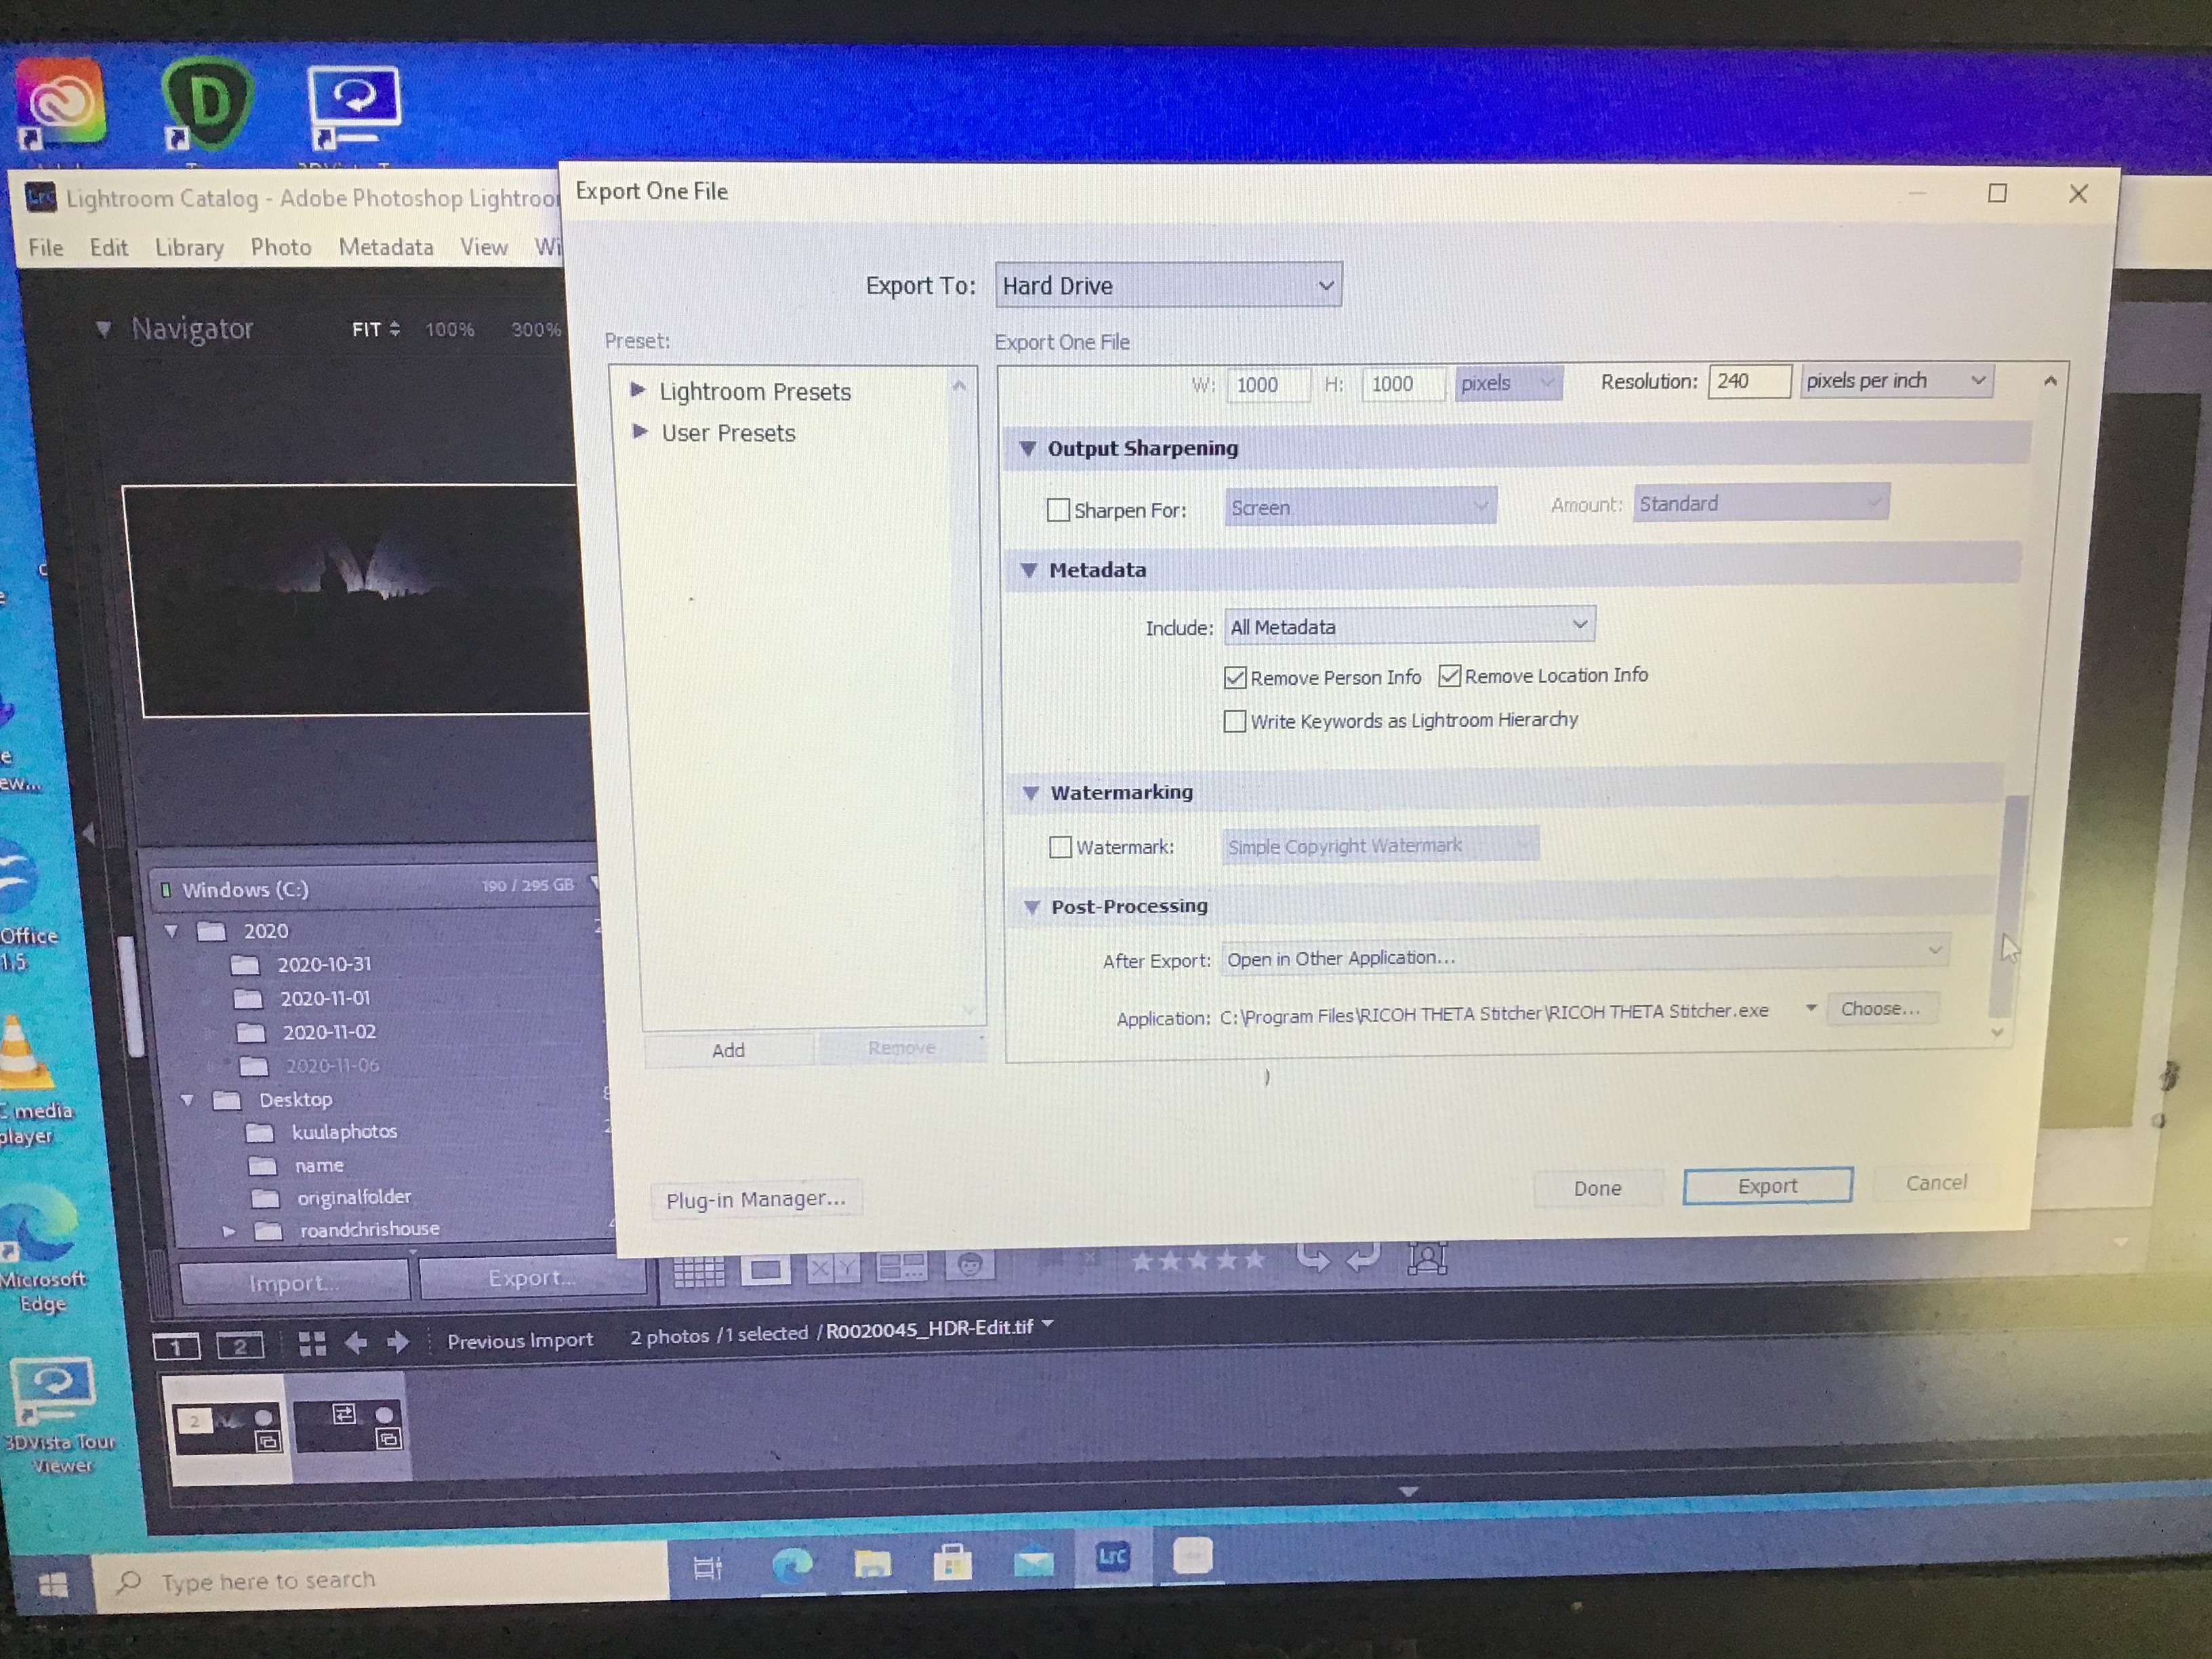
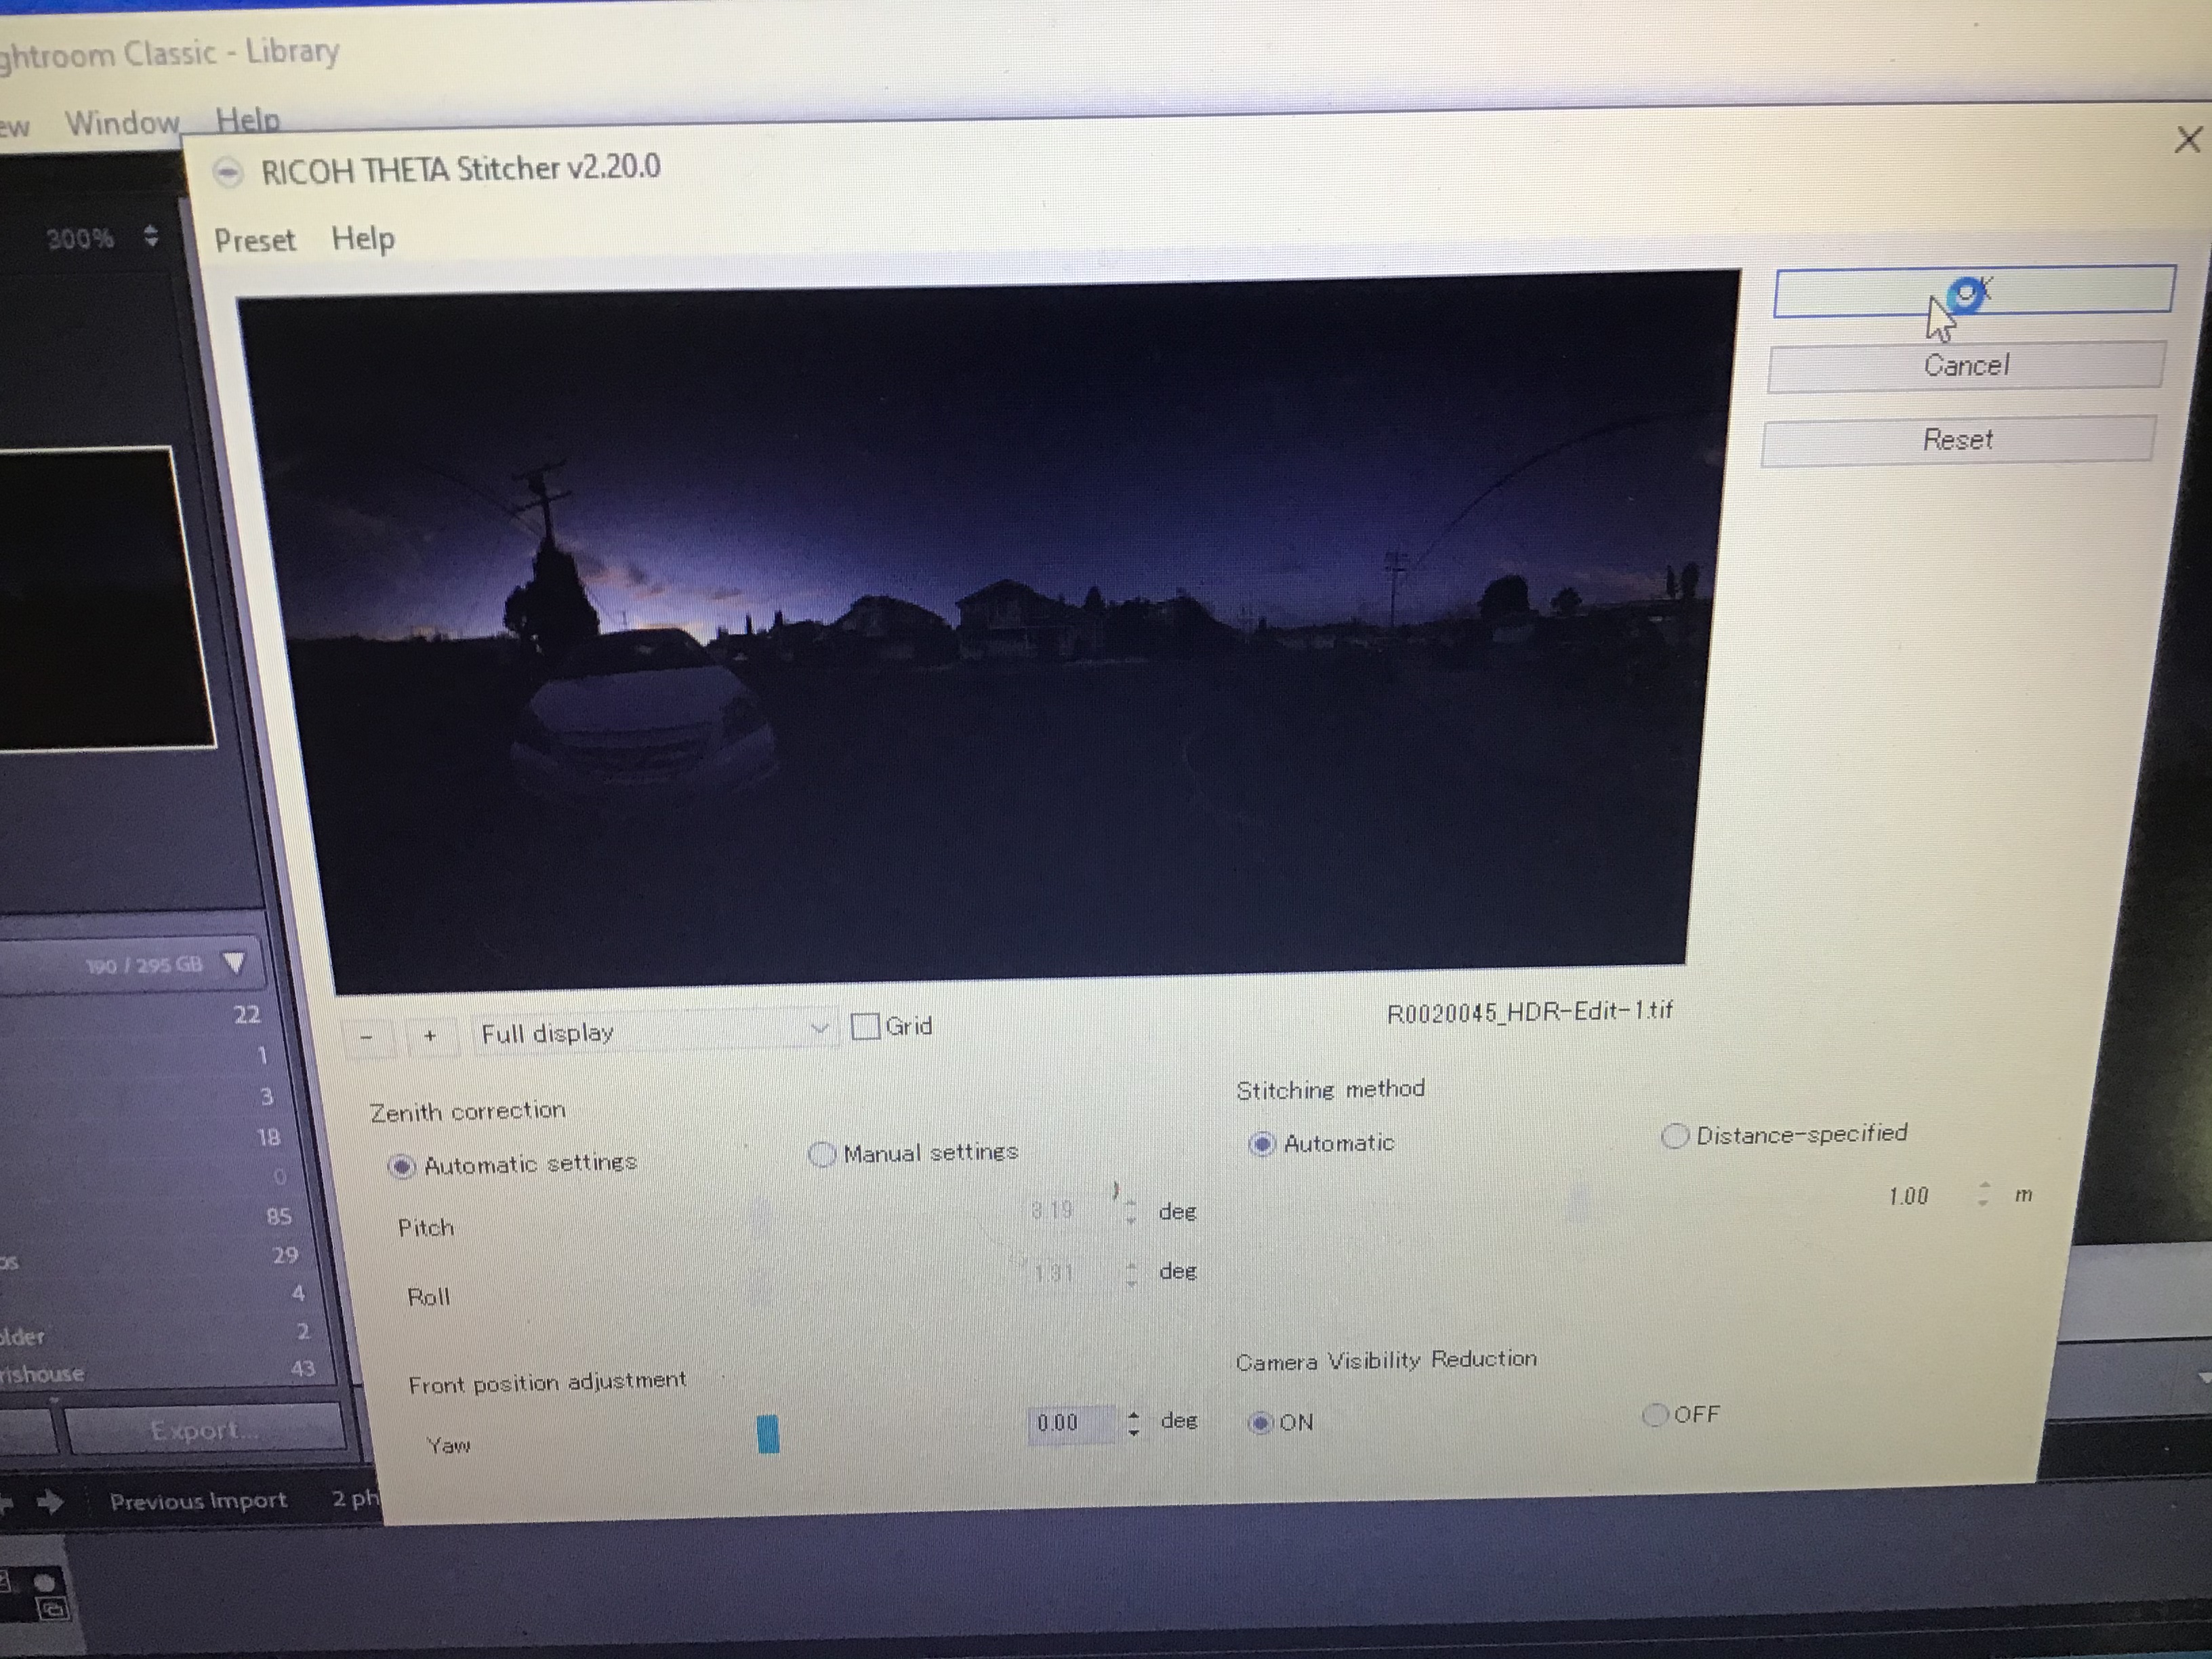
And then this screen pops up:
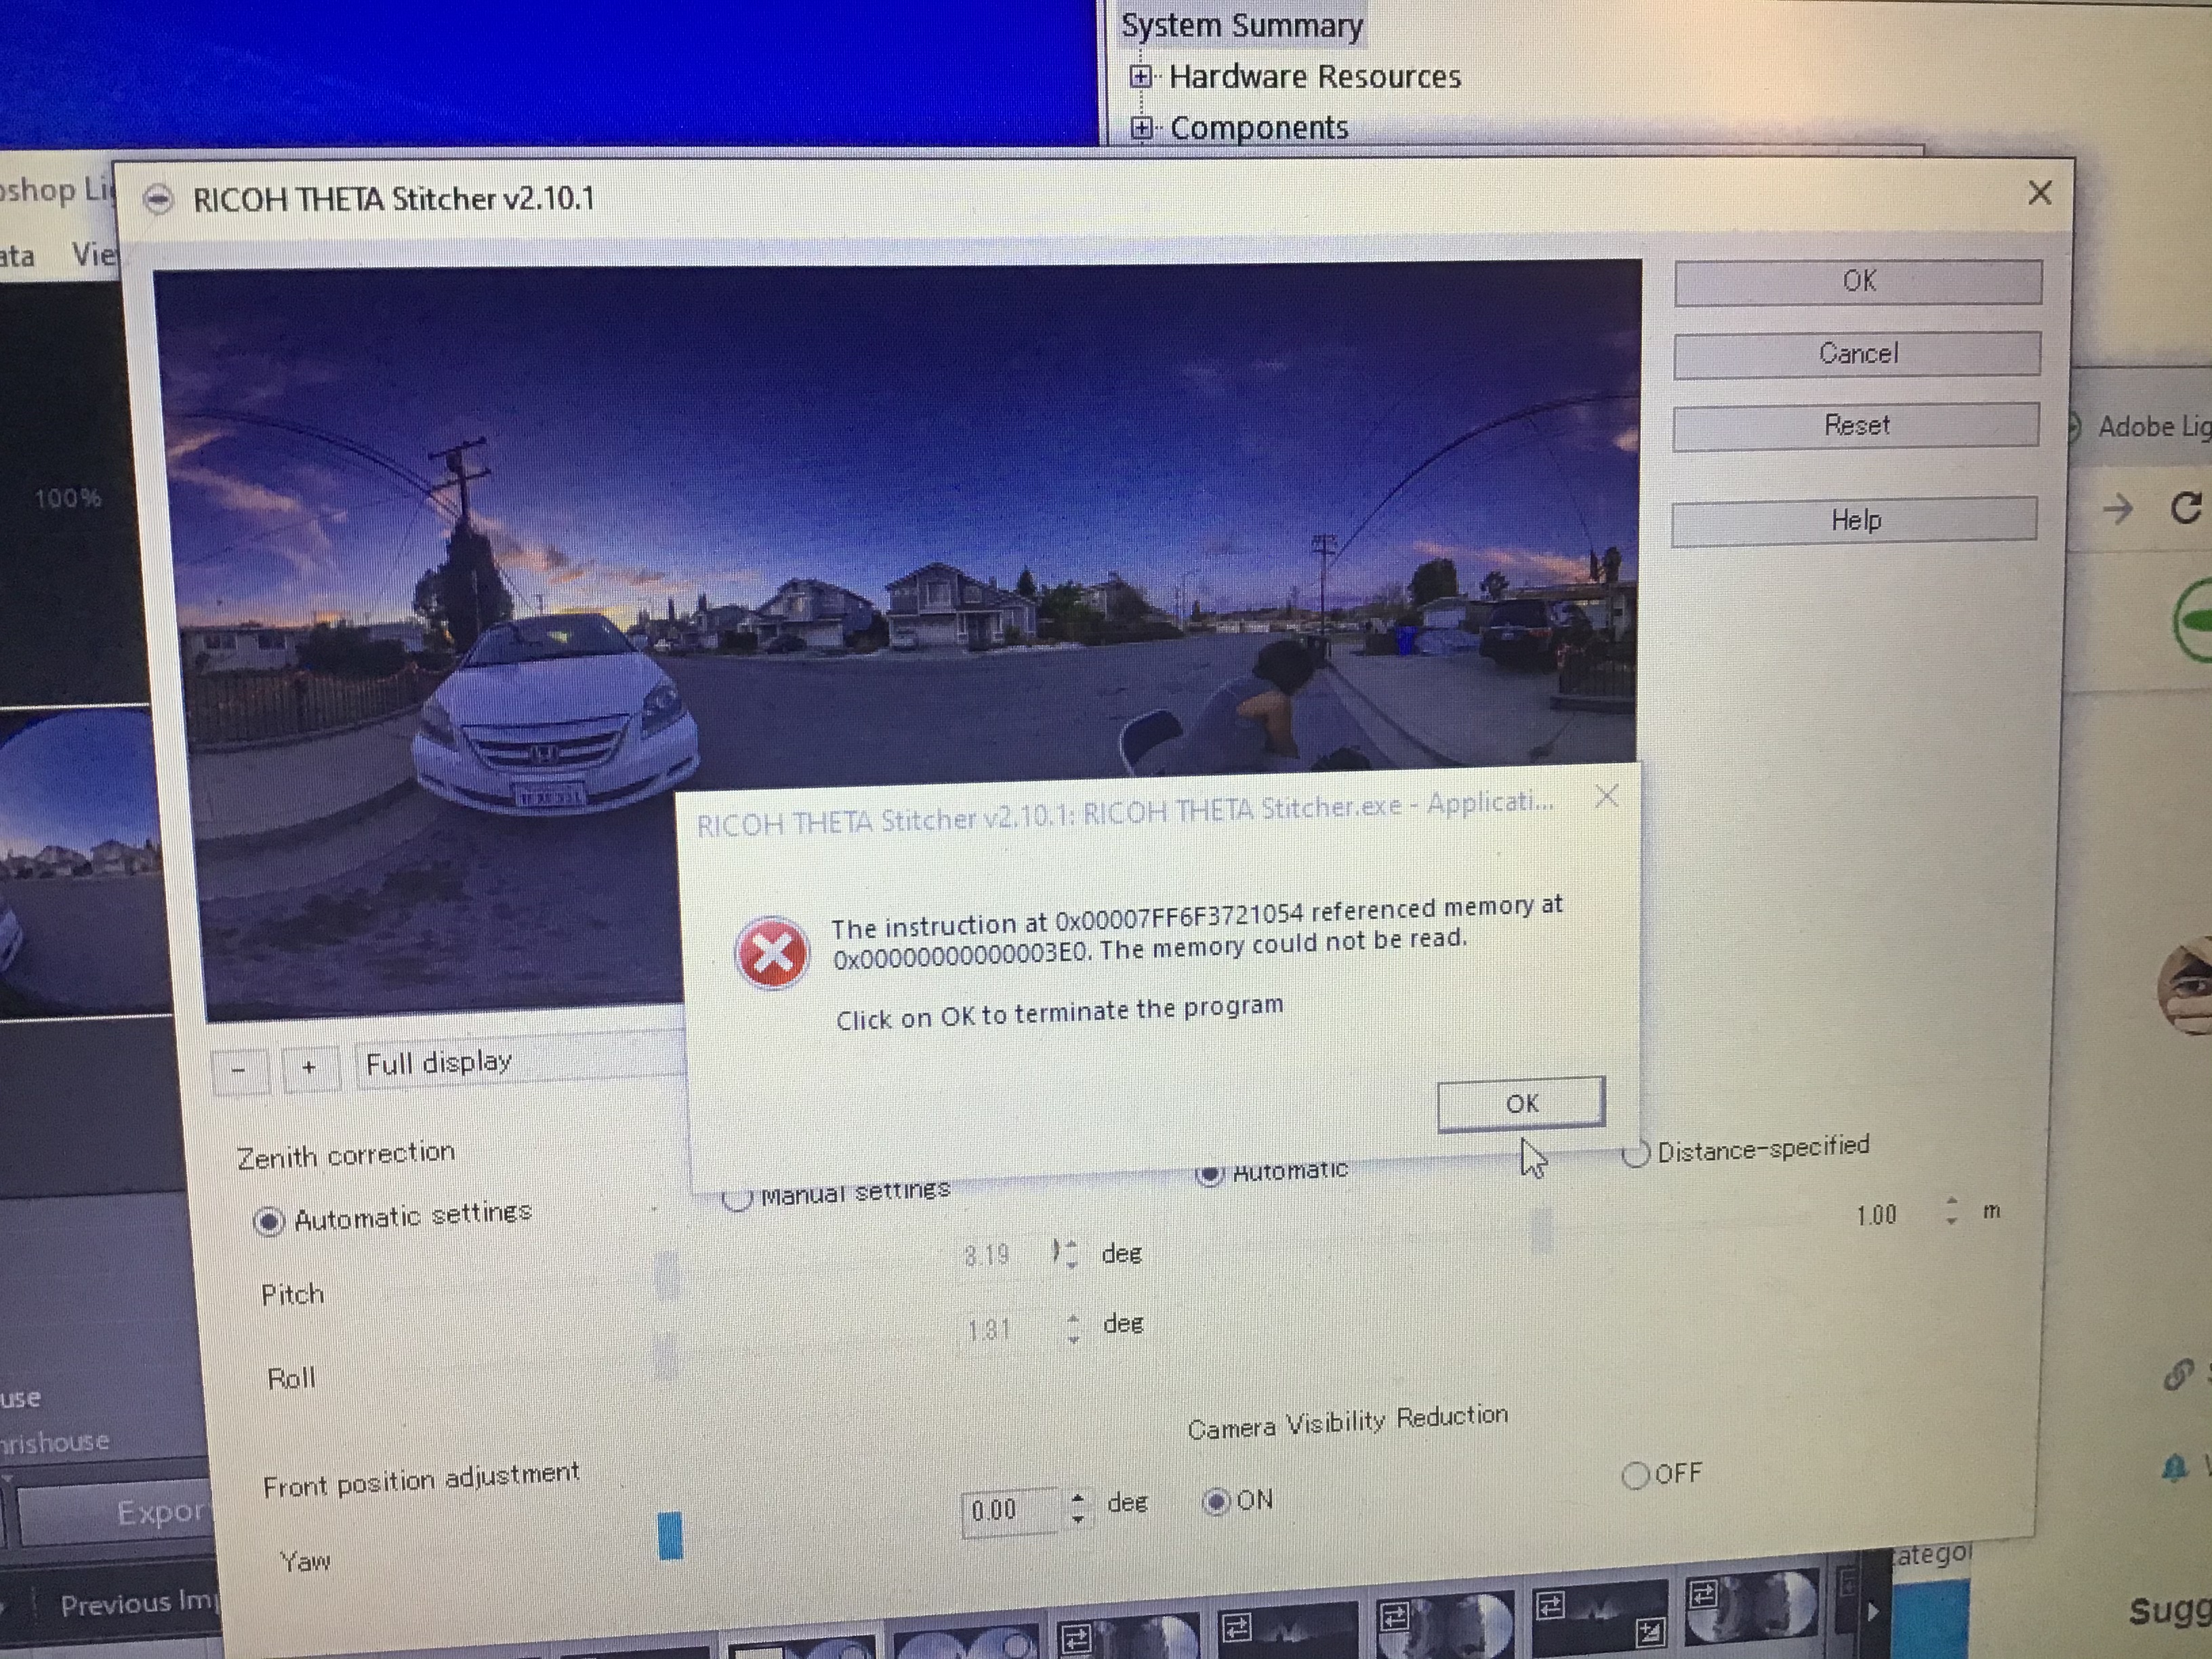
And nothing else happens.
Again, before I downloaded the 2.20 version of the stitcher, the stitching was working fine.
Thank you for any input. I am getting a little frustrated because I feel like I have exhausted all possibilities I know of troubleshooting these. I have researched the past posts that address the stitcher in LRC and I still am having issues.
And then this screen
Summary
This text will be hidden
In the export configuration under ‘Post-Processing’ … ‘Application’ you have configured the setup executable of the stitcher - not the installed executable!
Even more, it’s the Mac version and you’re running windows … 
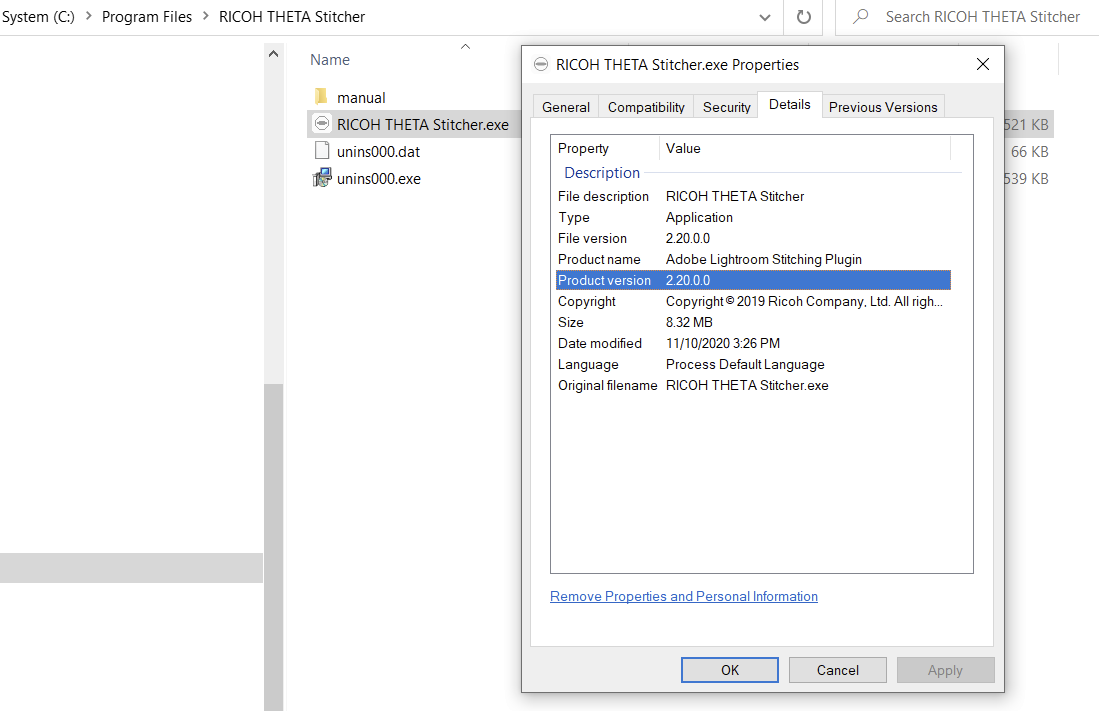
The installed executable can usually be found under
C:\Program Files\RICOH THETA Stitcher\RICOH THETA Stitcher.exe
Double-check that this is the latest version via the file properties:
Again, thank you for your response. I uninstalled LRC and the Ricoh stitcher again and executed the following sequence (please don’t judge the photos, as I am simply trying to concentrate on getting the plugin to work):
After the export, this came up:
I hit export and then this came up:
And the final image was still this (again, I have not exposed the pics and wanted to just work with the plug in):

Please note, the details of the plugin I downloaded are correct:

So, I can only ascertain at this point that there is a bug somewhere as again, I did not have this problem with the previous iteration of the Ricoh theta stitcher
Thank you for taking the time to read this,
Cheron
Great, now you have installed the stitcher correctly!
The next step is to configure its interface to Lightroom as described in the manual - please read it and follow the instructions.
It helps to understand how the interface works:
- You original file is
R0020045_HDR-Edit.tif. - When you export this as input to the stitcher, Lightroom creates a copy named
R0020045_HDR-Edit-1.tif. - The stitcher reads this copy, stitches the image and saves that to the same file when being closed.
- Finally, Lightroom needs to read this updated file and syncs it into its catalog.
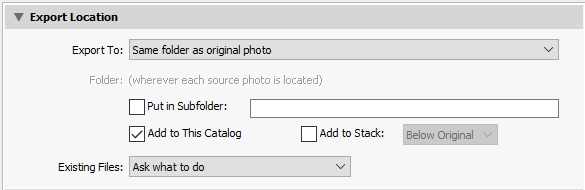
For the last point, you have to check ‘Add to this Catalog’ as recommended in the manual:
No, this is not the final image created by the stitcher, but the original!
Just synchronize the folder and you should see the stitched version.
First, thank you for taking the time to answer my questions and helping me to problem solve.
I what you said and it did not work. I went back and reviewed my computer specs.
I realized the problem. I downloaded an app to tell me what my opengl is on my computer and it is 4.0 and I need 4.1 to run the ricoh theta stitcher app now. So, my computer now is not compatible with this plugin :(.
I am just going to have to get alternative stitching software because that right now will be less expensive than buying another computer.
Again, thank you for the input.
1 Like
Hmm, what exactly did not work this time?
All your previous errors were installation and configuration problems - nothing wrong with the stitcher.
If your current problem - whatever it is - is really caused by the OpenGL version: Did update you graphics driver to the latest version?
I hit the ‘ok’ button and nothing comes up. Occasionally, I get a ‘Rich Theta Stitcher not responding’ quote while the box is up. I have gone through the manuel line by line to configure the stitcher. I checked the ‘add to catalog’. I really don’t know what else it could be.
I don’t know how to sychronize the folder, apparently.
Right-click on the folder with the original DNG and select ‘Synchronize Folder…’.
The stitched TIFF image should appear in the same folder as the DNG.
BTW: Youtube has many instructional videos on how to install the stitcher and how to work with it.
It may be helpful to follow these as an end-to-end guide.
Hi all,
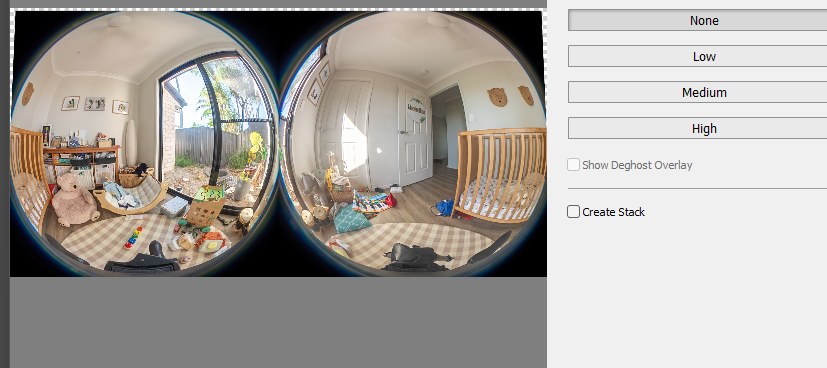
Whenever I bring in a set of bracketed shots (either AE Bracket or Multi Bracket), and then merge them into a hdr I get the following result - warping/tapering at the top of the image. Enabling ‘align’ fixes the problem but it also means the stitcher won’t work. Should these results be troubling?