Building a Web Site for 360 Images with Django, Bootstrap, A-Frame

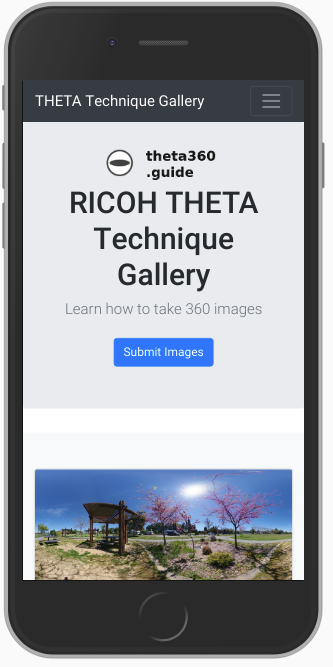
I recently built a 360 image technique gallery using Django to test web technologies to display RICOH THETA images and share 360 photography techniques.

GitHub repository for site

The process was straightforward, thanks to A-Frame, which handles all the 360 navigation and display.

If you’re interested in working with @jcasman and I on the project, put a note down below.

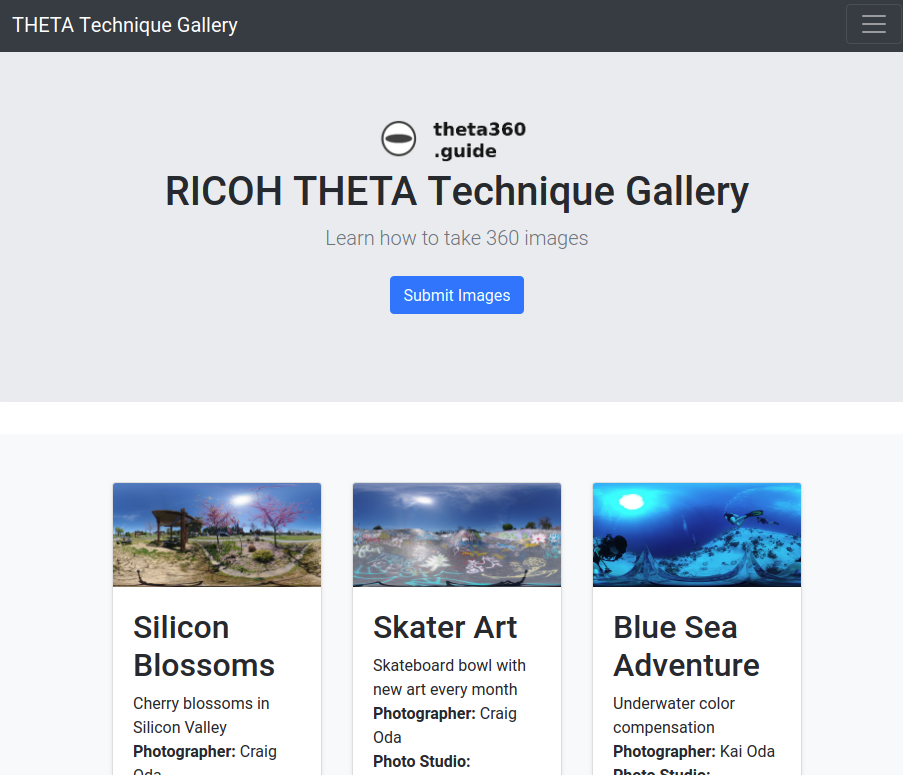
In addition to the primary Grid page of images, site shows different views of the image.

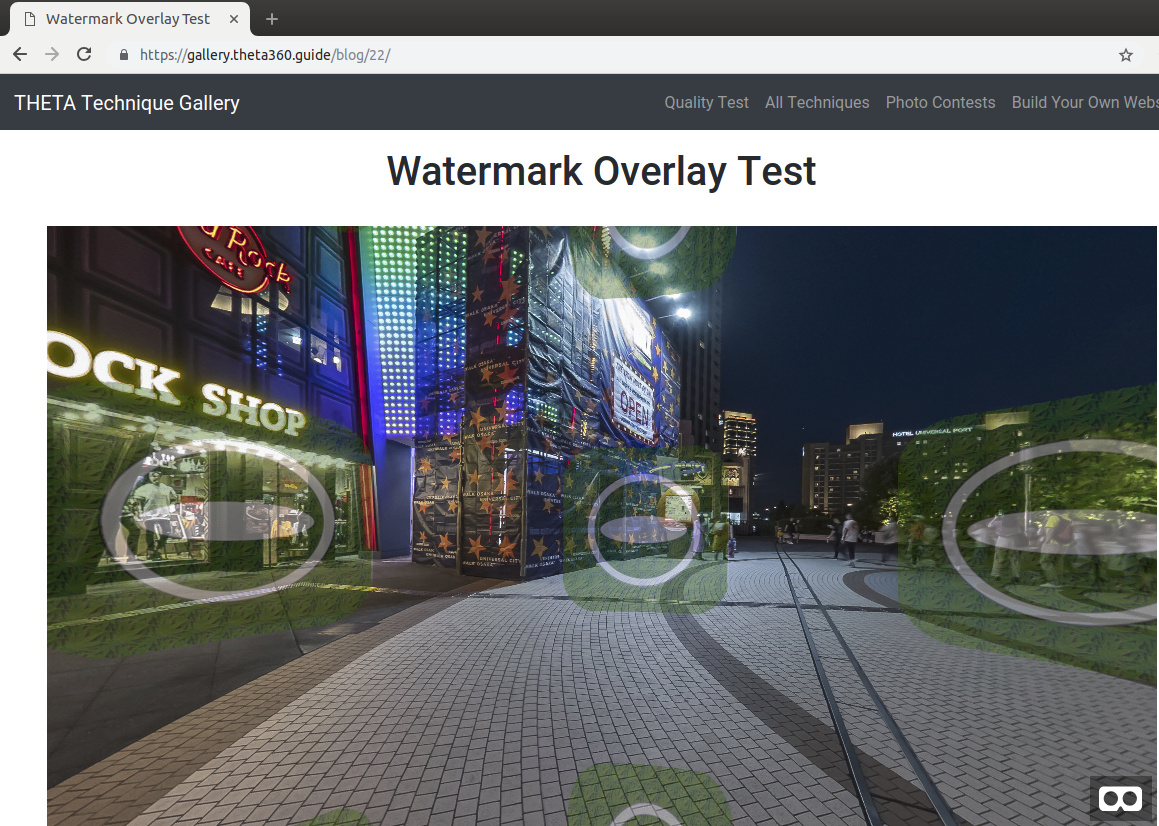
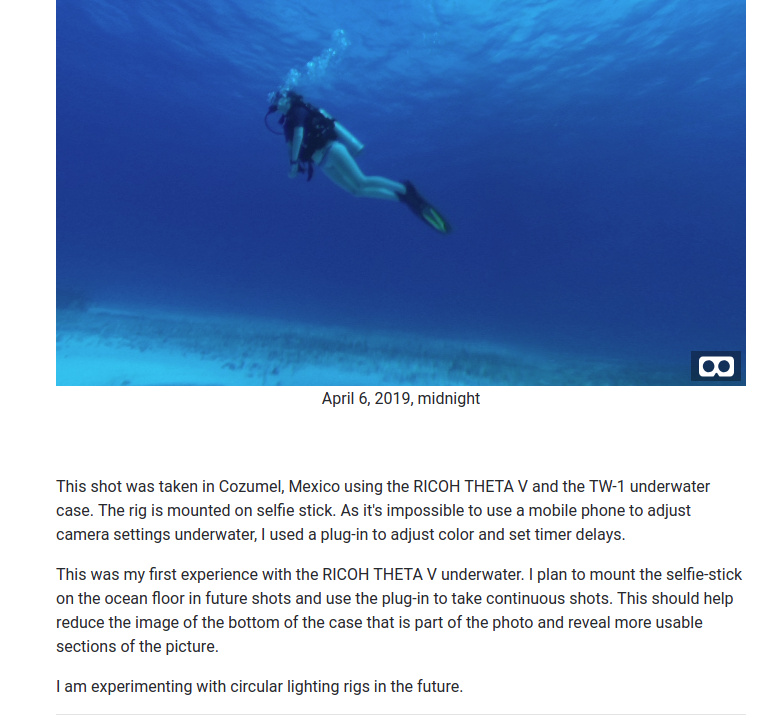
There’s a details view with with space for several paragraphs of text about the image. In the view below, I embedded the A-Frame scene into the web page. The image has navigation.

There’s also a full-screen VR headset mode with head motion and controller navigation.

If viewed in a web page, people can scroll through the images and see summary descriptions.
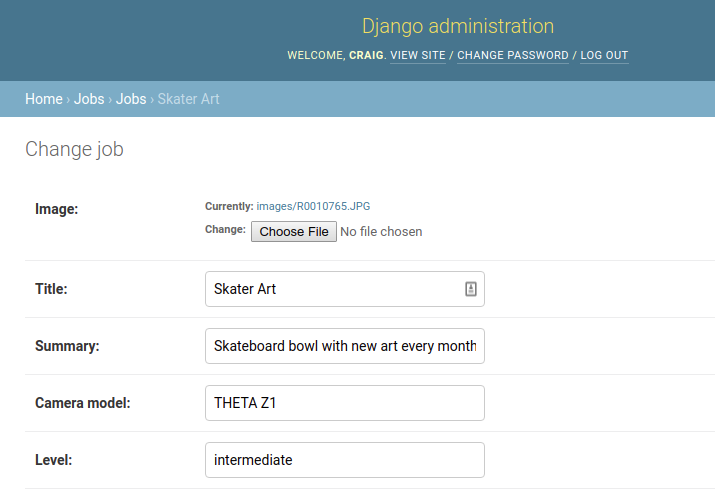
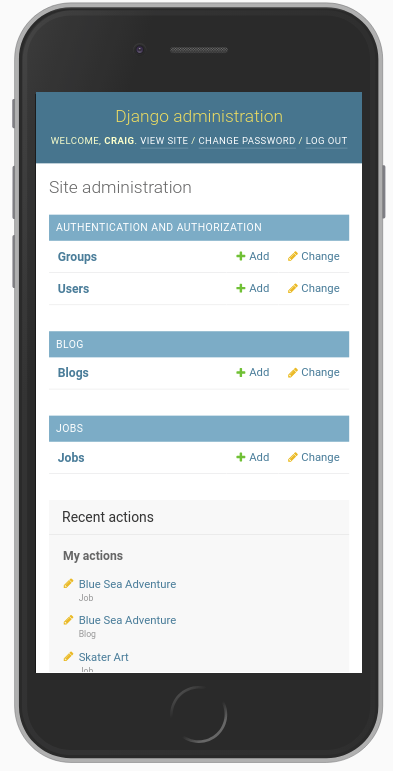
Management System

The site has user login with staff and admin roles.

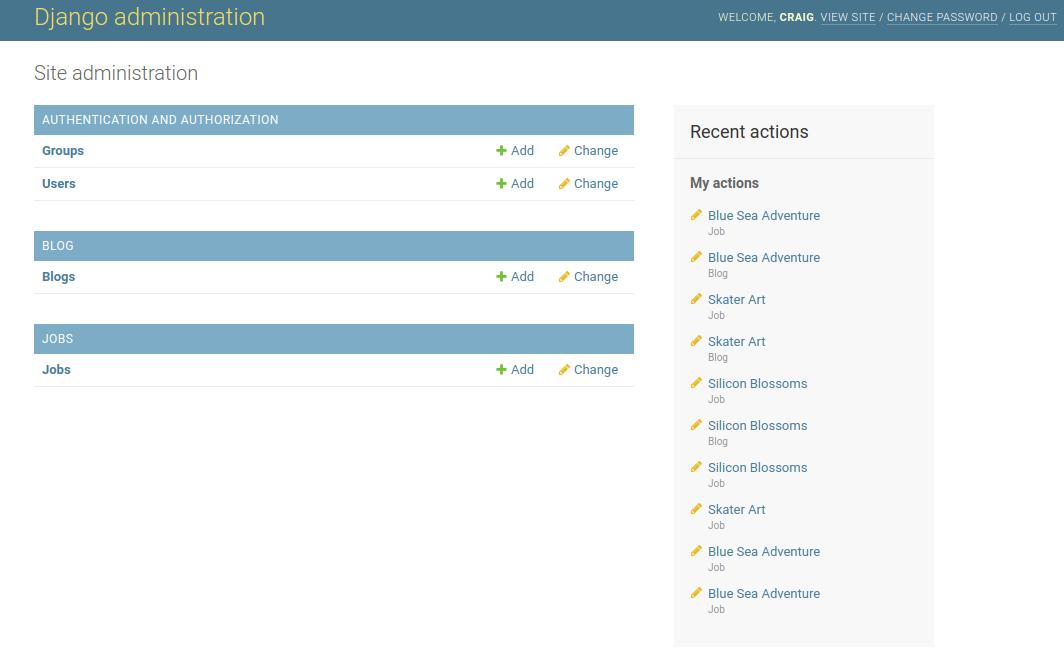
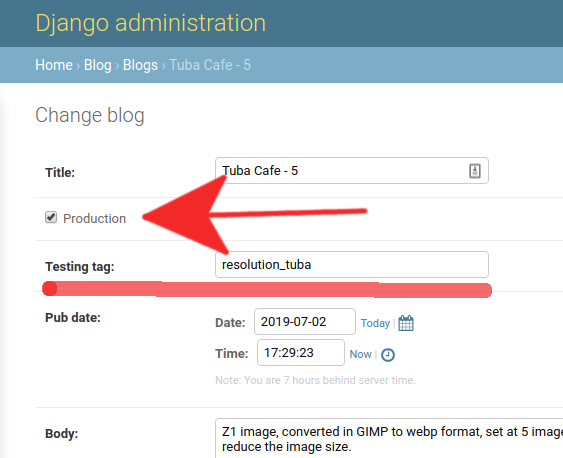
New images are added to the gallery through a web interface.

Laying out the Images

The album is based on copying the Bootstrap Album example.

Mobile Resizing

Thanks to Bootstrap, the album will automatically resize and reduce the columns from 3 to 1 column on mobile.


A-Frame

A-Frame is really easy to use. In the <head> of your html file, put this:

 <script src="https://cdnjs.cloudflare.com/ajax/libs/aframe/0.7.1/aframe.min.js" integrity="sha256-SNDsmWBFQwJAjxLymQu5Fqh6rW4RKLJXUQboy3O0BUA=" crossorigin="anonymous"></script>

In the body, this is the section that calls up the image.

        <div id="main-image">
        <a-scene embedded>
          <a-sky src="{{blog.image.url}}"></a-sky>
        </a-scene>
      </div>

The css styling

a-scene {
  height: 600px;
  width: 100%;
}
#main-image {
  margin: auto;
}

Next Steps

We are looking for the following:

  • photographers that are willing to share their images and techniques on the site in the future
  • web developers interested in using, copying, or contributing to the code for this technique gallery

If You’re a Photographer

  • Picture must be taken on THETA V, Z1, SC, S
  • Must include information on how the picture was taken
  • Self-promotion is OK. You can include information on your photography studio in the description.

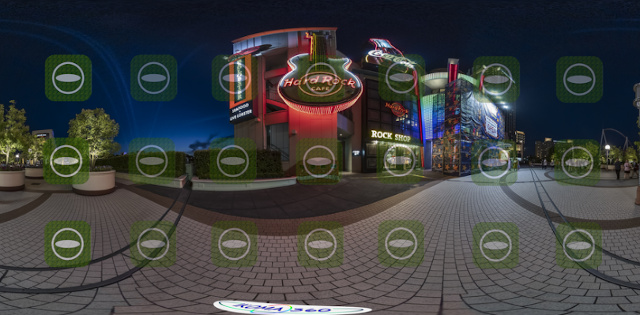
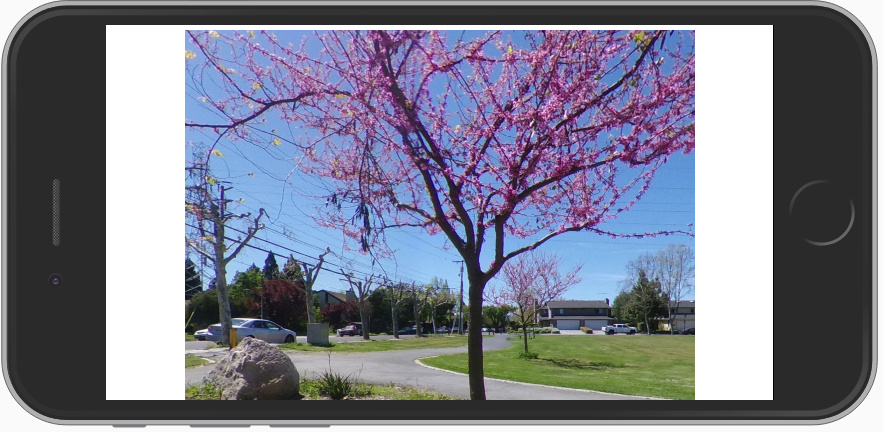
The images in this article are not the images we will use in the site. These are placeholder images we are using to test the system. We would like to use your images. :slight_smile:

If You’re a Web Developer

We are using these technologies.

  • A-Frame
  • Bootstrap 4 (HTML, CSS)
  • Django 2.2
  • Python 3.6
  • PostgreSQL

Future Challenges

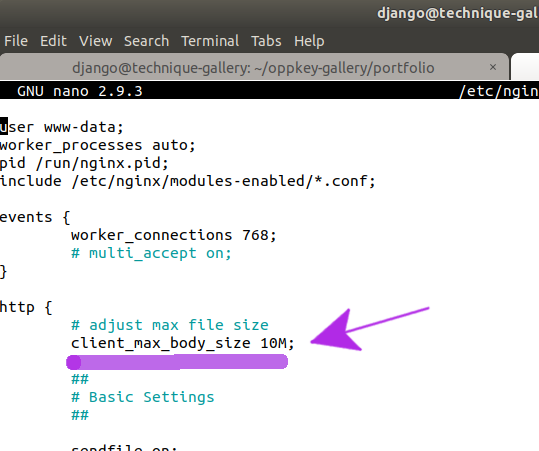
Images are currently stored at full resolution. We may run into problems when we try to move this to Digital Ocean for hosting.

3 Likes

Deploying 360 Image Gallery to DigitalOcean

I used this guide to deploy my test site to DigitalOcean. The guide is long, but easy to follow and comprehensive.

Virtual servers on DigitalOcean are called droplets. I am using a $5/month droplet for testing with these specifications:

  • 1 GB memory
  • 25 GB disk
  • 1 TB transfer
  • 1 CPU
  • Ubuntu 18.04 x64

IMO, this is very cheap for $5/month.

NGINX

The guide took me through NGINX and gunicorn configuration, both of which are fairly new to me.

Having worked with web servers for a long time, I usually use Apache. However, it seems like NGINX is growing faster than Apache.

The configuration is similar. I’m not using any advanced features of NGINX or Apache to notice any differences.

The only problem I ran into with the tutorial was trying to upload the THETA images. The Z1 images are 8MB and too large for the default NGINX settings. Initially, I got these errors when trying to upload Z1 images through the web interface.

image

I was able to figure out the solution using ServerFault.

In the http section of /etc/nginx/nginx.conf, I added the line:

client_max_body_size 10M;

image

restart nginx

$ sudo systemctl restart nginx

Upload through a web browser now works and I can work with THETA Z1 images up to 10M in size.

Gunicorn

Gunicorn is used to get the Python code to work with NGINX. It stands for Green Unicorn. As far as I can tell, it helps with server performance. As the implementation was easy, I decided to just follow the tutorial and use it.

https with certbot renewal

I implemented SSL using this nice guide on DigitalOcean. I used Let’s Encrypt as the Certificate Authority.

I already had NGINX setup and the ufw firewall setup. I also had the DNS setup using namecheap (would probably use Google domains if I set up the domain from the start).

install certbot

$ sudo add-apt-repository ppa:certbot/certbot
$ sudo apt-get update
$ sudo apt-get install python-certbot-nginx

set up the SSL certificate with certbot

sudo certbot --nginx -d example.com -d www.example.com

Separating Development and Production Settings

In the Django, settings.py file, I added this:

try:
    from .local_settings import *
except ImportError:
    pass

I then created a file local_settings.py to store the production server credentials for secret key, database username and password. With this system, I’m set up to share the app code on GitHub with “development” credentials and not compromise the security of the production server.

Google Analytics and HTML Snippets

To see which techniques are popular, I added Google Analytics to every page of the site. I stored my Google Analytics snippet in a file called, ga.html.

In each HTML file, I added this code to the <head>.

    <head>
        {% load staticfiles %}
        {% block ga %}
          {% include "snippets/ga.html" %}
        {% endblock ga %}

The funky looking {% %} characters are used to enclose code that is specific to Django. Most of the HTML file is plain HTML and easy to read.

image

Using Google Analytics real-time overview, I can get immediate confirmation that my snippet is set up properly by opening up a browser tab and confirming that I’m going to each page.

Summary and Next Steps

Moving from a development workstation to a site on DigitalOcean was fairly painless thanks to excellent documentation on the setup. Separating the production “secret” credentials into a separate file was also easy. Once I fix some of the major problems with the site, I’ll make the GitHub repo public.

I’m still passing 8MB RICOH THETA Z1 images around, which is slowing down the site. Although the images load and the site is functional, it’s not practical for performance reasons right now.

The site is also limited to images that photographers are comfortable sharing with everyone as it allows the full-quality image to be downloaded with a right-click.

I’m going to continue to use the 8MB image files for now as I want to experiment with extracting and displaying the EXIF data of the images.

Problems

problem fix
Must upload image twice. Once for front page, once for detail page Assess rewriting "app" structure to one of the following approaches:
  1. single "app" for front page and detail.
  2. import front page data from details "jobs" app and eliminate input management system for front page
Mobile VR view not tracking head movement on detail page Study at A-Frame documentation. Implement change to detail.html
Images take a long time to load make thumbnail images using Python library and cache thumbnails for front page inside of app. Look into other image optimization techniques

Testing Image Size and Quality Settings

Testing done with GIMP.

name camera original thumbnail full size
Blue Sea Adventure THETA V 2.1MB 5.5kB webp 50% quality 170kB webp 50% quality
Silicon Blossom THETA Z1 7.9MB 16.1kB webp 70% quality 1.9MB webp 50% quality
Skatepark THETA Z1 8MB 10.3kB webp 70% quality 791kB webp 50% quality

Testing HTML, A-Frame, Other JavaScript

Sites to share ideas

1 Like

Improving Website Performance for 360° Images

360° cameras can produce fantastic images and initiate a whole new way of telling stories and communicating information. You can see in all directions, instead of being guided along a specific visual path. The viewer decides what to look at, instead of the photographer controlling the narrative.

However, how do photographers share their 360° images? Including a full sphere of RGB photographic data means bigger files sizes and slower web performance. Facebook and other sites that support 360° images have solved the problem by lowering the quality of the images. But did they get the balance right?

I’m not so sure. @codetricity and I set out to test file size related to web performance. There are quite a few variables, not the least being the network that the viewer is connected to. This testing is not intended to be comprehensive.

We set out to test website performance for 360° images to see if we could lean more towards quality - photographers! - while keeping in mind the need to have decent website performance or no one (users!) will spend time looking at the images.

Conclusion

I’ll give the conclusion first. Simply by changing format to .webp and reducing the image quality setting when exporting, you can achieve a file size 1/40th of the original with a very noticeable increase in loading time from 4.6 secs to 1.3 secs.

The difference in quality, without close inspection, is negligible.

Tools Used

For images

  • RICOH THETA Z1 360° camera, set to auto settings
  • open source GIMP image manipulation program

For web serving

  • Django, Bootstrap, A-frame
  • Digital Ocean, postgresql, nginx, Unicorn
  • Public network available at Hanahaus, a co-working space in Palo Alto - The intention is a “normal” network setup

For Testing

  • First did it manually, making sure the content was not cached in the browser, running in an Incognito Window, timed by hand with a digital stopwatch - Note: In the table below, the times are manual - We gave up below 2.0 secs since we figured manual dexterity was starting to interfere
  • Inputting the URL into several different commonly available web tools like Google Developers PageSpeed Insights - Note: This information will be included in a later post
Image Size Notes Example URL Load Time
tuba-original 8.6MB Starting point, Z1 image https://gallery.theta360.guide/blog/5 4.6 secs
tuba-100-wp.webp 6.8MB image quality set to 100 https://gallery.theta360.guide/blog/6 4.3 secs
tuba-90-wp.webp 2.5MB image quality set to 90 https://gallery.theta360.guide/blog/7 2.7 secs
tuba-80-wp.webp 1.1MB image quality set to 80 https://gallery.theta360.guide/blog/8 2.5 secs
tuba-70-wp.webp 718.9K image quality set to 70 https://gallery.theta360.guide/blog/9 2.0 secs
tuba-60-wp.webp 610.4K image quality set to 60 https://gallery.theta360.guide/blog/10 NA
tuba-50-wp.webp 524K image quality set to 50 https://gallery.theta360.guide/blog/11 NA
tuba-40-wp.webp 441.5K image quality set to 40 https://gallery.theta360.guide/blog/12 NA
tuba-30-wp.webp 371.6K image quality set to 30 https://gallery.theta360.guide/blog/13 NA
tuba-20-wp.webp 314.1K image quality set to 20 https://gallery.theta360.guide/blog/14 NA
tuba-10-wp.webp 257.8K image quality set to 10 https://gallery.theta360.guide/blog/15 1.5 secs
tuba-5-wp.webp 220K image quality set to 5 https://gallery.theta360.guide/blog/16 1.2 secs

How Low Can You Go?

It’s quite clear that the final version is a trade off of size - which translates to speed - and quality - which translates to many photographic details like clarity and vividness. Low quality means high speed.

I believe that 5% quality shows some unacceptable degradation in quality. (Though actually it’s not as bad as I would have imagined.)

In a web viewing environment, 20% is good enough. That’s tuba-20-wp.webp at 314.1K.

Disagree? I’d like to hear your opinion.

1 Like

I moved the code for the site here:

Another test you should do is on the thumbnail image size. Currently, the thumbnail file size is 400px by 200px at 70% quality and stored in webp format.

I think we should test loading 24 different thumbnails on one page. In each test, we should use a different thumbnail size:

  • 300 x 150px
  • 400 x 200px
  • 500 x 250px
  • 600 x 300px
  • 700 x 350px

Using the previous test data, we can also take a guess at what image quality to use, for example 5% or 40% or 70%


If there’s interest, in this concept, we can put different templates over the database. It would require a new DigitalOcean droplet at $5/month per droplet to make each site live.

For example, someone was asking about used car dealer templates. There are many Bootstrap templates for car dealers, like this:

http://preview.themeforest.net/item/carzone-a-complete-car-portal-website-html-wireframe/full_screen_preview/21522638?ref=cirvitis


Update: Wed July 3, 2019

Changed model of image data to have boolean flag for “production”. There is also a “testing tag”. Use the same tag for the entire series of pictures in one test.

image

I implemented this to reduce clutter on this URL:
https://gallery.theta360.guide/blog/

Instead of having 11 images of Tuba Cafe, we can show one. Using the “Testing Tag”, I built a page that displays all images from a test series.

https://gallery.theta360.guide/blog/qualitytuba/


Metadata

The processing strips out the metadata. We’ll need to get the metadata from the original image that is uploaded to the site before processing.

Initial Test Using exiftool

code for exiftool test on GitHub

1 Like

Watermark Overlay and EXIF Extraction Tests

Live site. Image by @Juantonto of IKOMA360. Taken with Z1.

Overlay file used in this test.

Command Line Technique Using ImageMagick

  1. create watermark mask at 40% transparency. Make the mask the same size as the original image 7168x3584
  2. make a composite image with the watermark using ImageMagick.

Example

$ composite  theta_logo.png toyo-hardrock.jpg new-image.jpg

Explanation

  • composite is the name of the ImageMagick command
  • theta_logo.png is the name of the watermark overlay
  • toyo-hardrock.jpg is the name of the original image
  • new-image.jpg is the name of the output image

Technique Using Django on the Server

from django.shortcuts import render
from subprocess import Popen, PIPE, STDOUT


def watermark(request):
    # pass in file name after upload for production
    image_file_name = "/home/craig/Pictures/theta/2019/watermark/toyo-hardrock.jpg"
    logo_file_name = "/home/craig/Pictures/theta/2019/watermark/theta_logo.png"
    output_file = "/home/craig/Development/django/shell/shell/media/new-image.jpg"
    # composite is part of imagemagick package
    Popen(['composite', '-geometry', '+3000+1600', logo_file_name,
        image_file_name, output_file], stdout=PIPE, stderr=STDOUT)

    return render(request, 'watermark.html', {"output": output_file.split('/')[-1]})

Explanation

  • Popen allows you to run any shell command from inside of Python. You can even run a full Bash script. In this case, composite is the name of the command
  • the command and arguments are passed on a list
  • composite handles all the file I/O. In this simple test, I’m just using the file that was saved to disk. In production, you will want to set up checks.
  • stdout is piped back to Python

Screenshots

Equirectangular view

image

Mask

image

Metadata using exiftool

Command Line

$ exiftool filename.jpg

Django Python Example

from django.shortcuts import render
from subprocess import Popen, PIPE, STDOUT


def homepage(request):
    # pass in file name after upload for production
    image_file_name = "/home/craig/Development/django/shell/shell/media/osaka-night.jpg"
    process = Popen(['exiftool', image_file_name], stdout=PIPE, stderr=STDOUT)
    output_byte = process.stdout.read()
    output_list = str(output_byte)[2:-1].strip().split('\\n')
    return render(request, 'home.html', {"output": output_list, "filename": image_file_name.split('/')[-1]})

HTML

Note the use of the for loop to print out each line of the EXIF data.

<!DOCTYPE html>
<html lang="en">
<head>
<meta charset="UTF-8">
<meta name="viewport" content="width=device-width, initial-scale=1.0">
<meta http-equiv="X-UA-Compatible" content="ie=edge">
<script src="https://cdnjs.cloudflare.com/ajax/libs/aframe/0.7.1/aframe.min.js" integrity="sha256-SNDsmWBFQwJAjxLymQu5Fqh6rW4RKLJXUQboy3O0BUA=" crossorigin="anonymous"></script>
<style>
a-scene {
height: 400px;
width: 100%;
}

</style>
<title>EXIF Data extraction</title>
</head>
<body>
<h1>RICOH THETA exif output</h1>
  <a-scene embedded>
     <a-sky src="/media/{{filename}}" rotation="0 -130 0"></a-sky>
  </a-scene>

{% for line in output %}
    {{ line }}
    <br >
{% endfor %}

</body>
</html>

Code on GitHub

2 Likes