This example shows how to use and manage the RICOH THETA over your office network with Django.
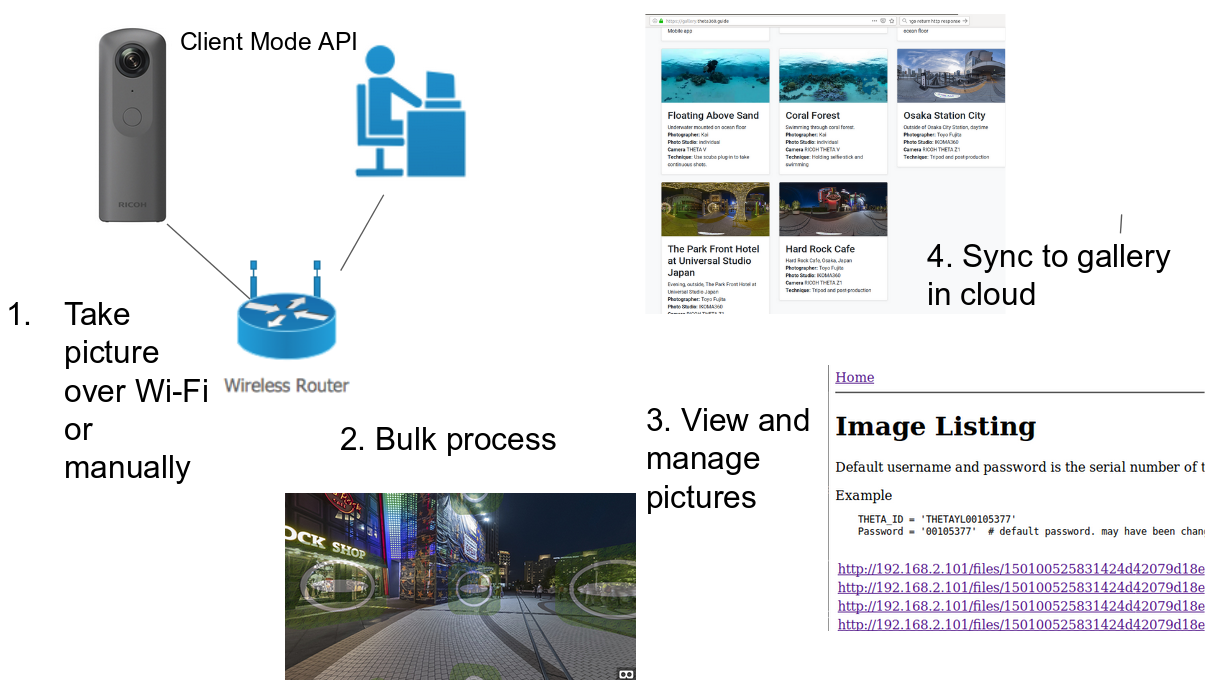
You’ll learn how to use the RICOH THETA v2.1 API (OSC) API over your office network by putting the THETA V into client mode. To avoid the hassle of getting your staff to connect their phone or laptop to the THETA with Wi-Fi, we will use the THETA client mode network option to use your own office network to assign the camera an IP address automatically.
This project is intended for education of a few simple concepts only. It is not intended for production use. To keep the code simple and concise, there is only minimal error checking.
Getting the Code
Code for this project is available on GitHub.
Install Project Dependencies
I recommend you run Python in a virtualenv.
$ python3 -m pip install virtualenv
You can then create a virtualenv, start it, and install the Python requirements
$ virtualenv myvenv
$ source myvenv/bin/activate
$ pip install -r requirements.txt
Modify views.py for Your Camera Settings
You must change the three settings below for your specific camera.
################
# Change the settings below
################
# global constants specific to your THETA. Change for your camera.
THETA_IP = '192.168.2.101'
THETA_ID = 'THETAYL00105377'
THETA_PASSWORD = '00105377' # default password. may have been changed
How To Find IP Address of Camera
You can find the IP address with the script tools/find-theta.py. This uses zeroconf to find the THETA with network discovery.
Browsing services, press Ctrl-C to exit...

Service THETAYL00105377._osc._tcp.local. of type _osc._tcp.local. state changed: ServiceStateChange.Added
  Address: 192.168.2.101:80
  Weight: 0, priority: 0
  Server: THETAYL00105377.local.
  No properties
Once you find the IP address, you must modify the constant in views.py. In actual use, you can include discovery into your Django project or assign static IP addresses to the THETA hardware ID with your Wi-Fi router.
Run Django Server
(myvenv) $ python manage.py runserver

....
July 19, 2019 - 21:52:22
Django version 2.2.3, using settings 'shell.settings'
Starting development server at http://127.0.0.1:8000/
Quit the server with CONTROL-C.
Connect Browser
Open browser to localhost:8000
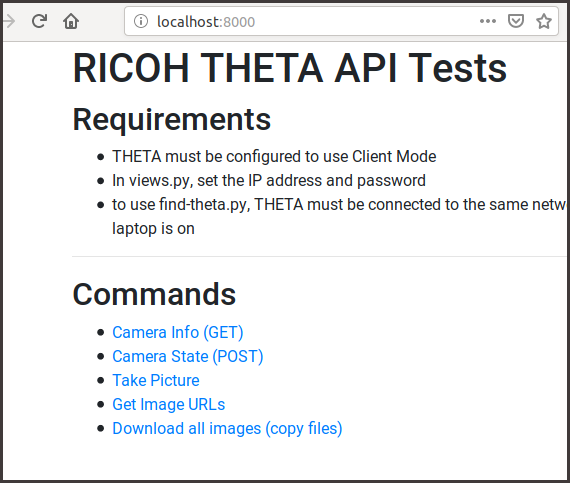
Clicking on one of the commands will show the HTTP response in the browser.
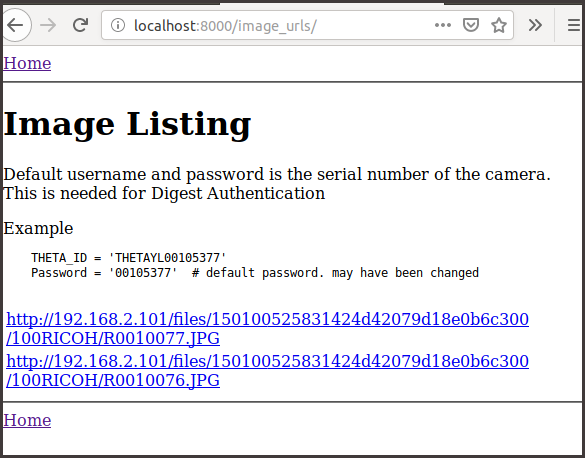
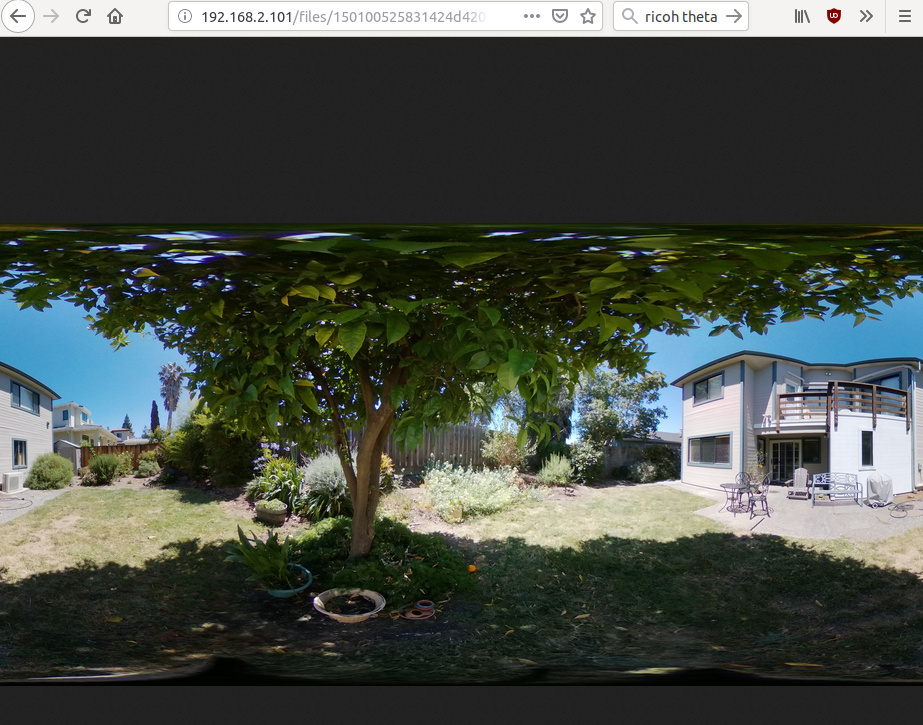
The image listing is basic right now.
You can preview the images directly on the camera before downloading the THETA images from the camera to your local system. The images are previewed in equirectangular.
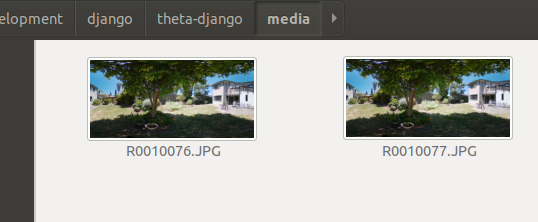
Images are copied from the camera to your local machine. The original image remains on your camera. The interface is minimal.
Images are stored in project_home/media
Code Explanation
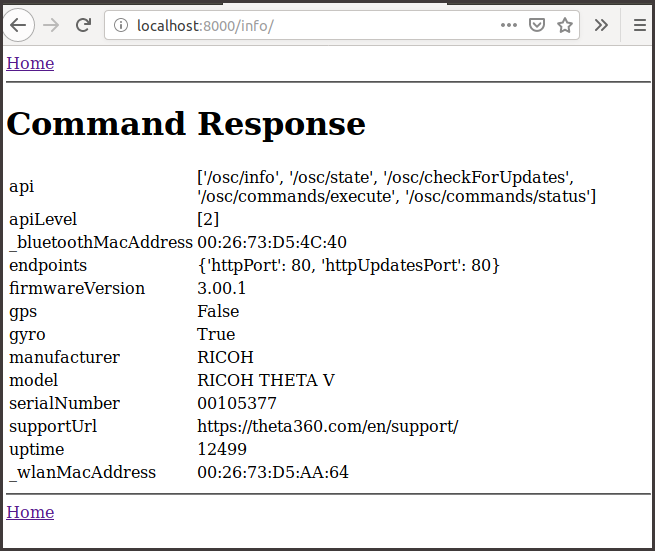
GET
The THETA API is run through an HTTP request using Python requests. To use client mode, you must also use Digest Authentication. The print statement is only for debugging purposes. You can delete it.
THETA_IP = '192.168.2.101'
THETA_ID = 'THETAYL00105377'
THETA_PASSWORD = '00105377'  # default password. may have been changed
THETA_URL = f'http://{THETA_IP}/osc/'


def info(request):
    url = f"{THETA_URL}info"
    resp = requests.get(url, auth=(HTTPDigestAuth(THETA_ID, THETA_PASSWORD)))
    data = resp.json()
    print(data)
    return render(request, 'commandhome.html', {'data': data})
POST
A simple post command is almost identical to the GET command. Note that the third parameter of render is a Python dictionary.
def state(request):
    url = f"{THETA_URL}state"
    resp = requests.post(url, auth=(HTTPDigestAuth(THETA_ID, THETA_PASSWORD)))
    data = resp.json()
    print(data)
    return render(request, 'commandhome.html', {'data': data})
Accessing data from HTML
In both examples, you can access the data value inside of your HTML with a simple for loop.
In commandhome.html
    <table>
    {% for key, values in data.items %}
    <tr>
        <td>{{key}}</td>
        <td>{{values}}</td>
    </tr>
    {% endfor %}
</table>
Take Picture Using POST and commands/execute
The basic format for most osc commands is osc/commands/execute. You then pass the specific command as a JSON payload like this: {"name": "camera.takePicture"}
def take_picture(request):
    url = f"{THETA_URL}commands/execute"
    payload = {"name": "camera.takePicture"}
    resp = requests.post(
                        url,
                        json=payload,
                        auth=(HTTPDigestAuth(THETA_ID, THETA_PASSWORD)))

    data = resp.json()
    pprint.pprint(data)
    return render(request, 'commandhome.html', {'data': data})
There is extensive documentation for using the API commands here.
Generating List of Images
The images are listed using the same /osc/commands/execute and payload technique. This will return a listing of the URLs of the images that are on the camera.
def generate_image_list():
    url = f"{THETA_URL}commands/execute"
    command_string = "camera.listFiles"
    payload = {
                "name": command_string,
                "parameters": {
                    "fileType": "image",
                    "entryCount": 20,
                    "maxThumbSize": 0

                }}
    resp = requests.post(
                        url,
                        json=payload,
                        auth=(HTTPDigestAuth(THETA_ID, THETA_PASSWORD)))

    data = resp.json()
    imageEntries = data["results"]["entries"]
    images = []
    for imageEntry in imageEntries:
        print(imageEntry["fileUrl"])
        images.append(imageEntry["fileUrl"])
    return images
Downloading Images
As the images are accessible on the camera as URLs, you just have to implement a way to store the files to your local storage.
I’m saving the image with the same file name from the camera. The images are saved to the media directory of the Django project.
def getImage(url):
    imageName = url.split("/")[6]
    print("saving " + imageName + " to file")
    with open(f'{PROJECT_MEDIA_DIR}{imageName}', 'wb') as handle:
        response = requests.get(
                    url,
                    stream=True,
                    auth=(HTTPDigestAuth(THETA_ID, THETA_PASSWORD)))

        if not response.ok:
            print(response)
        for block in response.iter_content(1024):
            if not block:
                break
            handle.write(block)
To start the download process, call the function above.
def download_all_images(request):
print("start download tester")
images = generate_image_list()
for imageLocation in images:
getImage(imageLocation)
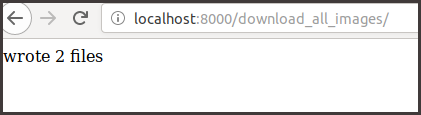
return HttpResponse(f'wrote {str(len(images))} files')
Next Steps
The article Building a Web Site for 360 Images with Django, Bootstrap, and A-Frame explains how to process images on the server as well as display them in a gallery.
Continue extending this project to address all phases of the workflow:
- image capture
- image processing
- image management
- image display
Additional Code Examples
In addition to the code for this project, there are two other repos:
- 360 gallery
- django-exiftool - how to use shell commands to process images