To test our new AI Theta Persona, I asked it how to create a new Flutter project with theta-client.

The response is basically accurate, though the source Flutter documentation for theta-client is a bit outdated. In particular, there is no need to specify swift and kotlin when creating a new Flutter project as this is the default.
- First, create a new Flutter project with specific platform support:
flutter create --platforms=android,ios -i swift -a kotlin your_app_name
- Since theta_client_flutter is not available on pub.dev, you need to copy the Flutter package from the source. Create a packages directory in your project and copy the theta-client Flutter package there:
mkdir -p packages/theta_client_flutter
Then copy the contents of theta-client/flutter into your packages/theta_client_flutter directory.
- Update your
pubspec.yamlto include the local theta_client_flutter package:
dependencies:
  flutter:
    sdk: flutter
  theta_client_flutter:
    path: ./packages/theta_client_flutter
- For Android setup, update your
android/app/build.gradleto set minimum SDK version to 26 or higher:
android {
    defaultConfig {
        minSdkVersion 26
    }
}
- For iOS setup, set the deployment target to iOS 15.0 or higher in your
ios/Podfile:
platform :ios, '15.0'
Remember to run:
flutter pub get
cd ios && pod install && cd ..
I built a minimal app to test out the theta-client setup.
Environment
- theta-client 1.12 (installed from the
flutterfolder of theta-client)
important: theta_client_flutter is not on pub.dev - Flutter 3.29
- Dart 3.7
- iOS 18.2
- THETA X firmware 2.63.0
Code Listing
import 'package:flutter/material.dart';
import 'package:theta_client_flutter/theta_client_flutter.dart';
void main() {
runApp(MyApp());
}
class MyApp extends StatelessWidget {
const MyApp({super.key});
@override
Widget build(BuildContext context) {
return MaterialApp(
title: 'THETA Client Demo',
theme: ThemeData(
colorScheme: ColorScheme.fromSeed(seedColor: Colors.deepPurple),
),
home: const MyHomePage(title: 'THETA Client Demo'),
);
}
}
class MyHomePage extends StatefulWidget {
const MyHomePage({super.key, required this.title});
final String title;
@override
State<MyHomePage> createState() => _MyHomePageState();
}
class _MyHomePageState extends State<MyHomePage> {
final _thetaClientFlutter = ThetaClientFlutter();
String screenInfo = '';
@override
void initState() {
super.initState();
try {
_thetaClientFlutter.initialize();
screenInfo = 'camera is initialized';
print(screenInfo);
} catch (e) {
screenInfo = 'Not initialized. confirm camera is connect with WiFi: $e';
print(screenInfo);
}
}
@override
Widget build(BuildContext context) {
return Scaffold(
appBar: AppBar(
backgroundColor: Theme.of(context).colorScheme.inversePrimary,
title: Text(widget.title),
),
body: Center(
child: Padding(
padding: const EdgeInsets.all(16.0),
child: Column(
children: <Widget>[
Text('Flutter demonstration of RICOH THETA official SDK'),
ElevatedButton(
onPressed: () async {
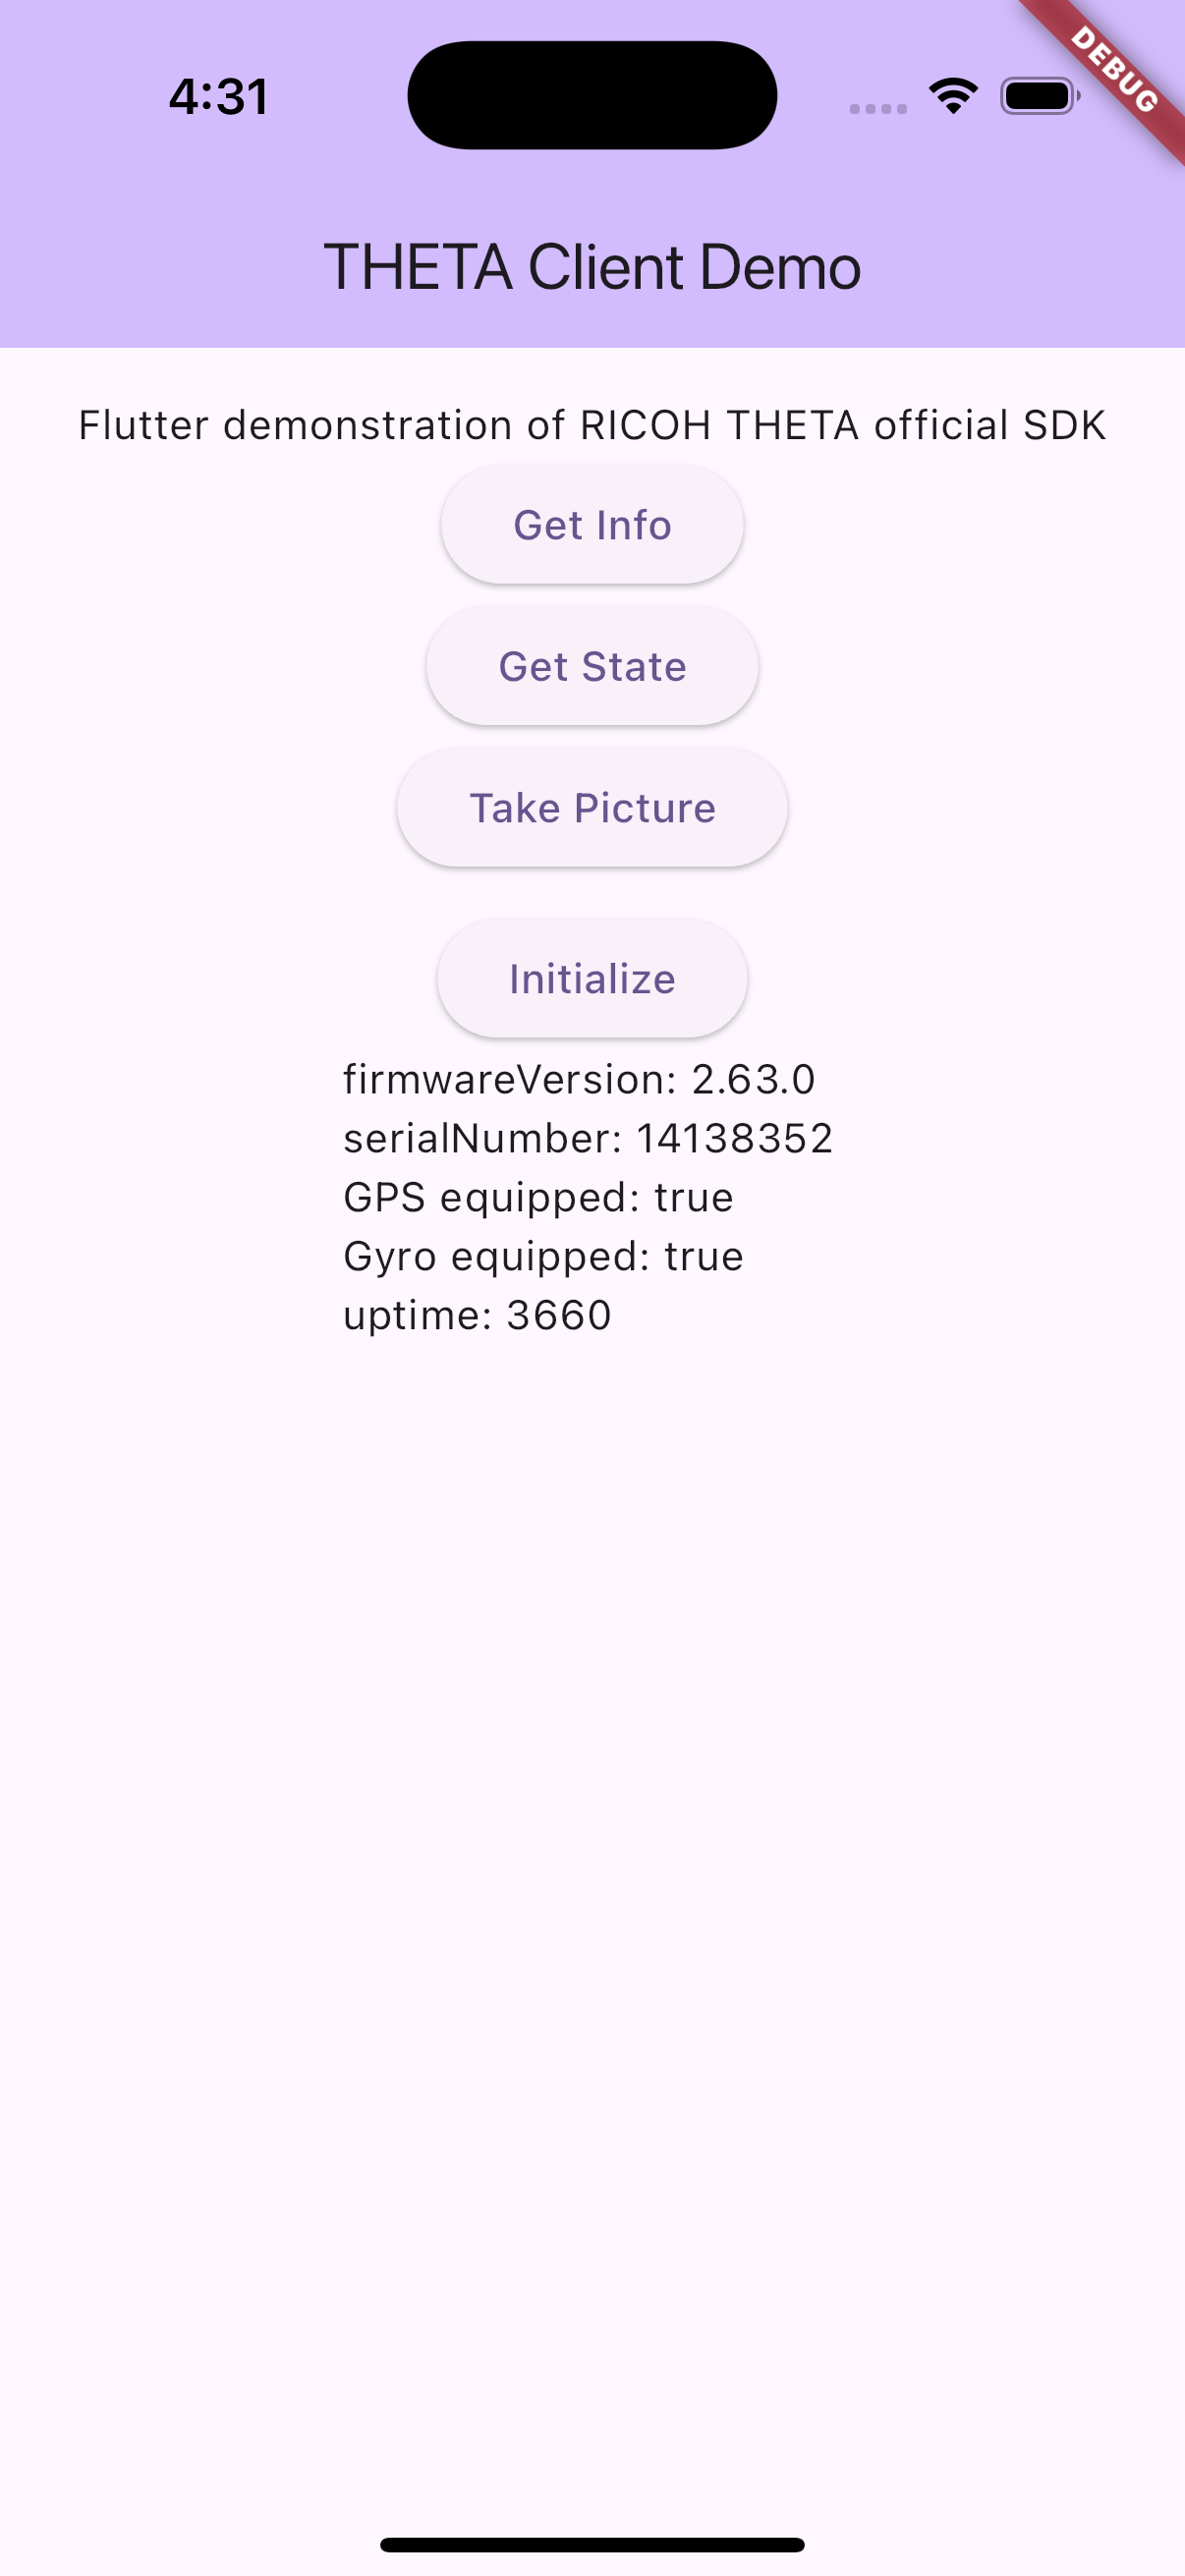
final info = await _thetaClientFlutter.getThetaInfo();
setState(() {
screenInfo =
'firmwareVersion: ${info.firmwareVersion}\n'
'serialNumber: ${info.serialNumber}\n'
'GPS equipped: ${info.hasGps}\n'
'Gyro equipped: ${info.hasGyro}\n'
'uptime: ${info.uptime}';
print(screenInfo);
});
},
child: const Text('Get Info'),
),
ElevatedButton(
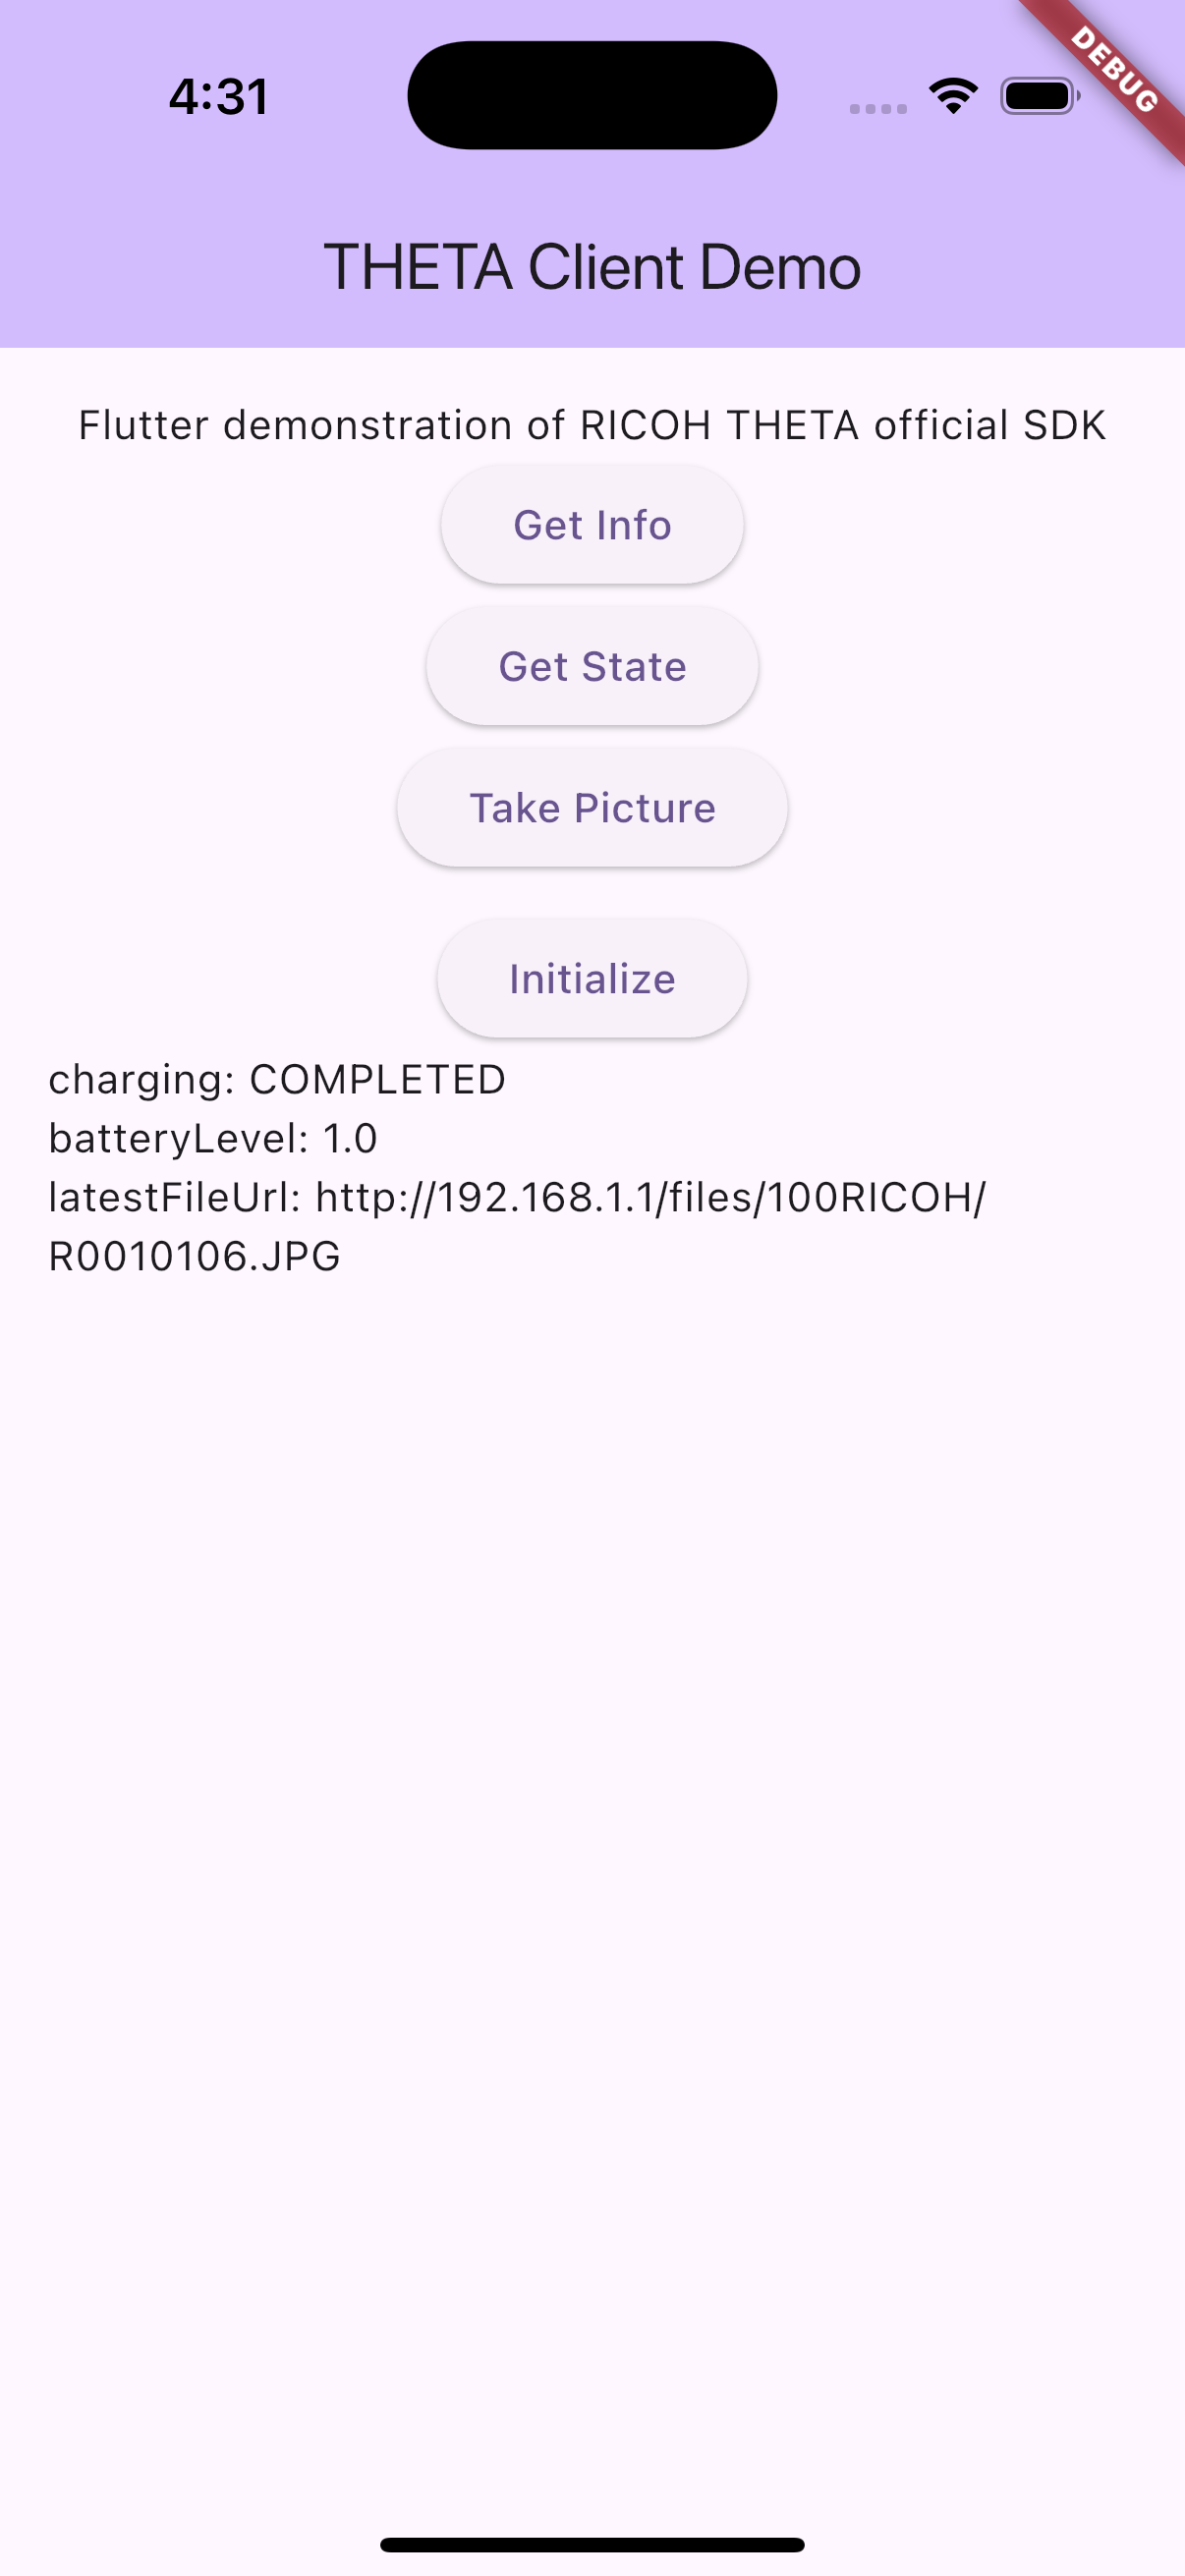
onPressed: () async {
final thetaState = await _thetaClientFlutter.getThetaState();
setState(() {
screenInfo =
'charging: ${thetaState.chargingState}\n'
'batteryLevel: ${thetaState.batteryLevel}\n'
'latestFileUrl: ${thetaState.latestFileUrl}';
print(screenInfo);
});
},
child: const Text('Get State'),
),
ElevatedButton(
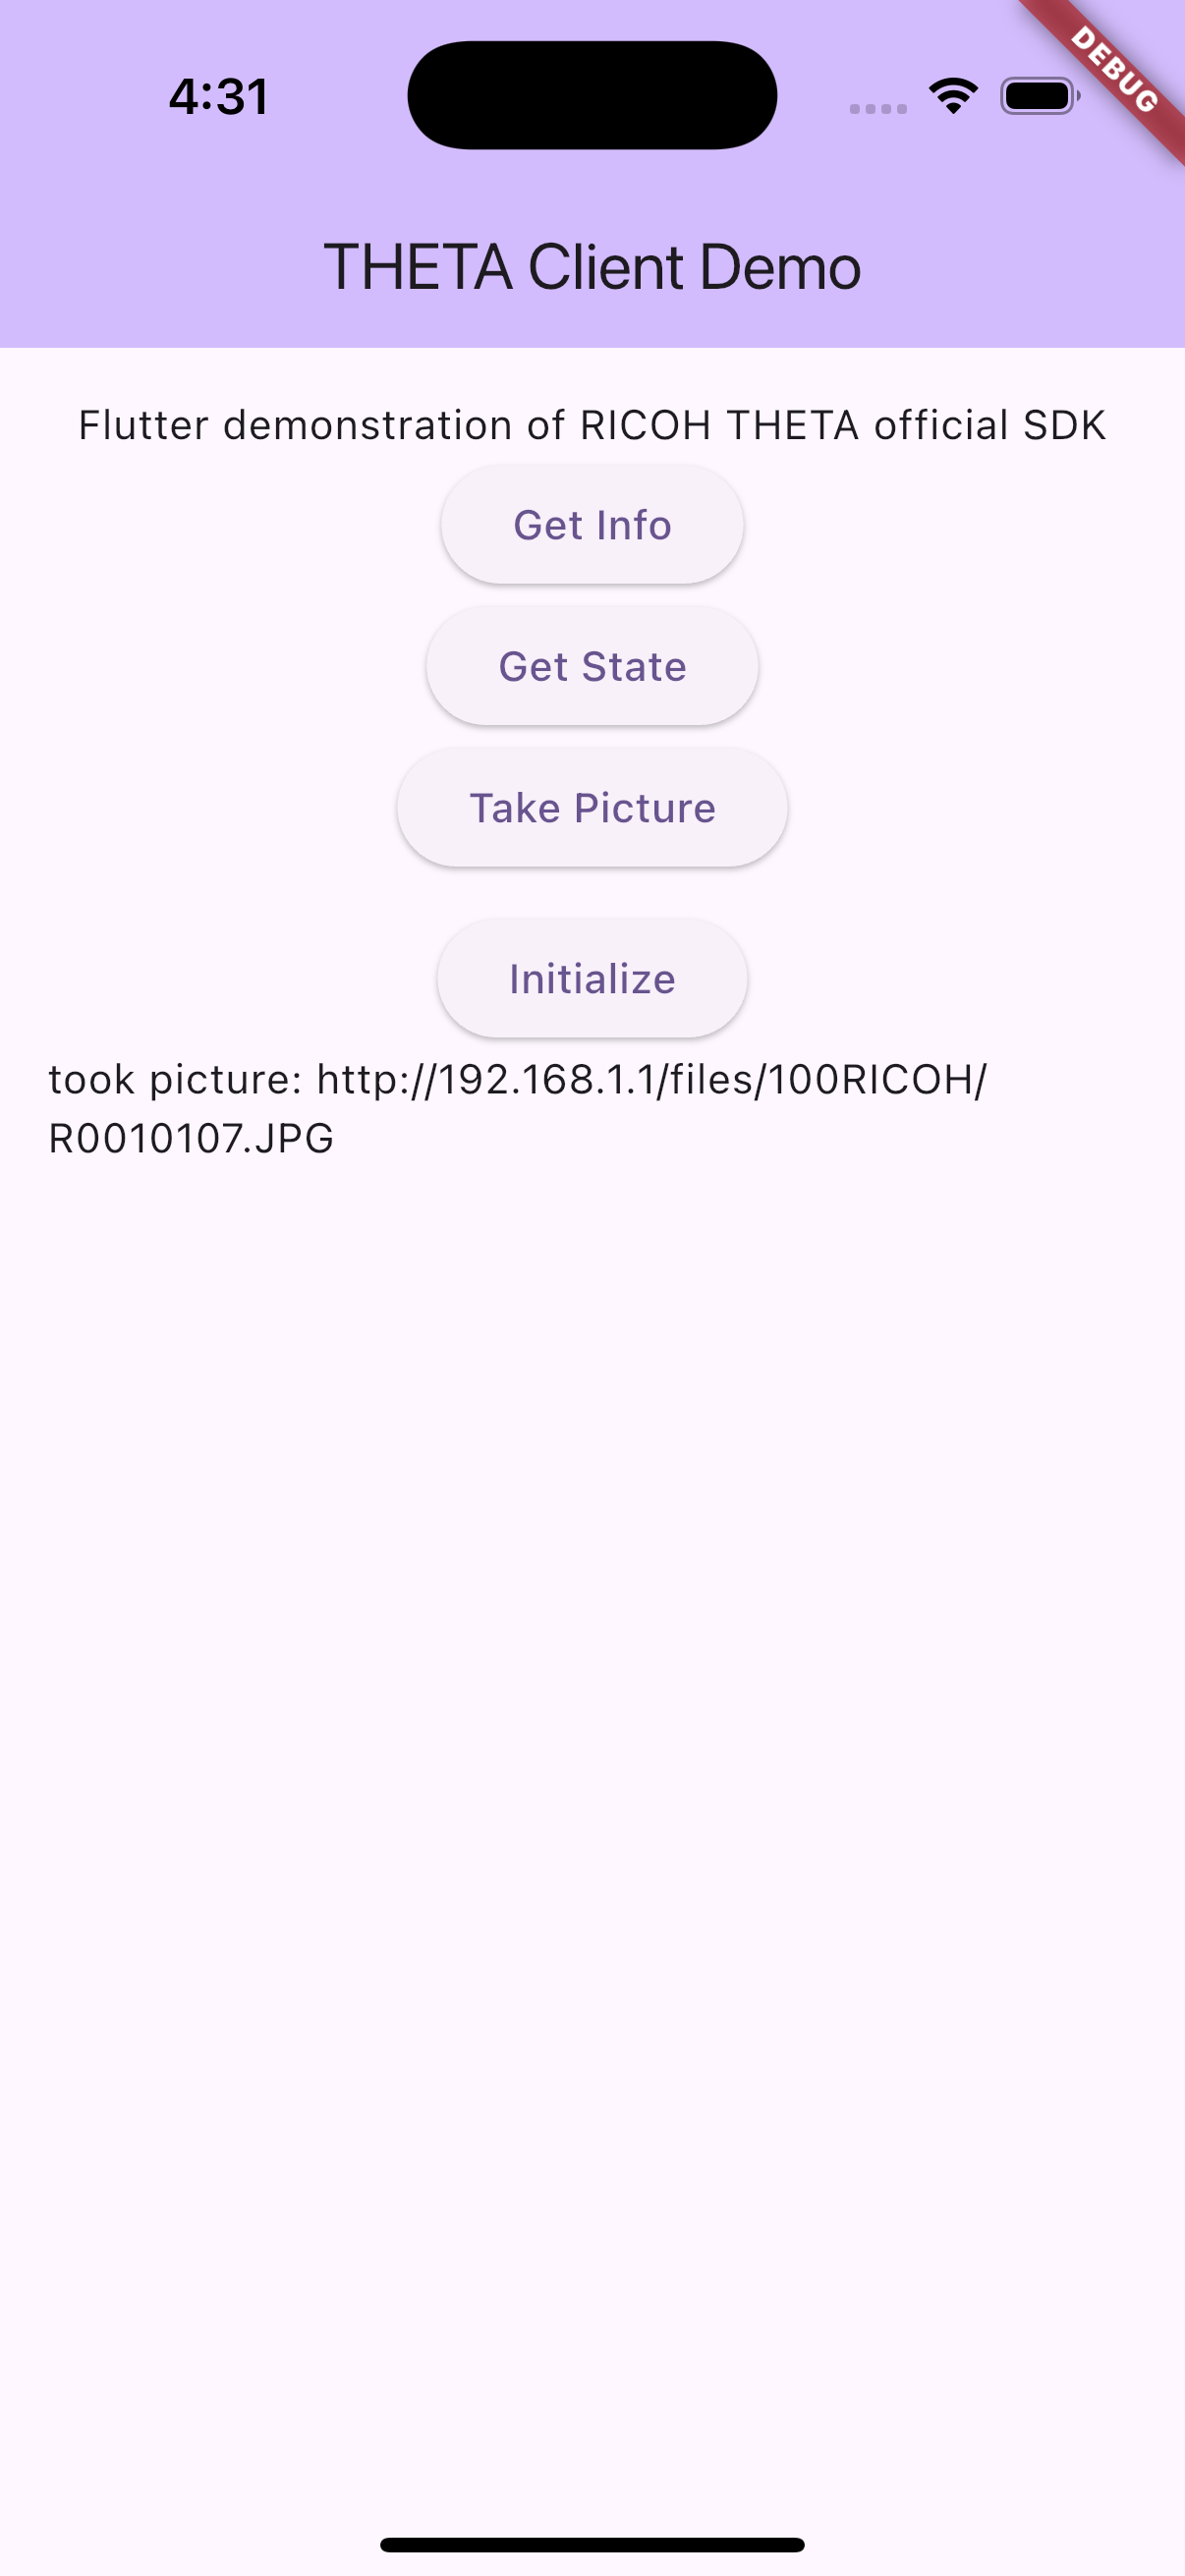
onPressed: () async {
final builder = _thetaClientFlutter.getPhotoCaptureBuilder();
var photoCapture = await builder.build();
photoCapture.takePicture(
(onSuccess) {
setState(() {
screenInfo = 'took picture: $onSuccess';
print(screenInfo);
});
},
(onError) {
setState(() {
screenInfo = 'error: $onError';
print(screenInfo);
});
},
);
},
child: const Text('Take Picture'),
),
const SizedBox(height: 10),
ElevatedButton(
onPressed: () async {
try {
await _thetaClientFlutter.initialize();
screenInfo = 'camera is initialized';
print(screenInfo);
} catch (e) {
screenInfo =
'Not initialized. confirm camera is connect with WiFi: $e';
print(screenInfo);
}
},
child: const Text('Initialize'),
),
SelectableText(screenInfo),
],
),
),
),
);
}
}
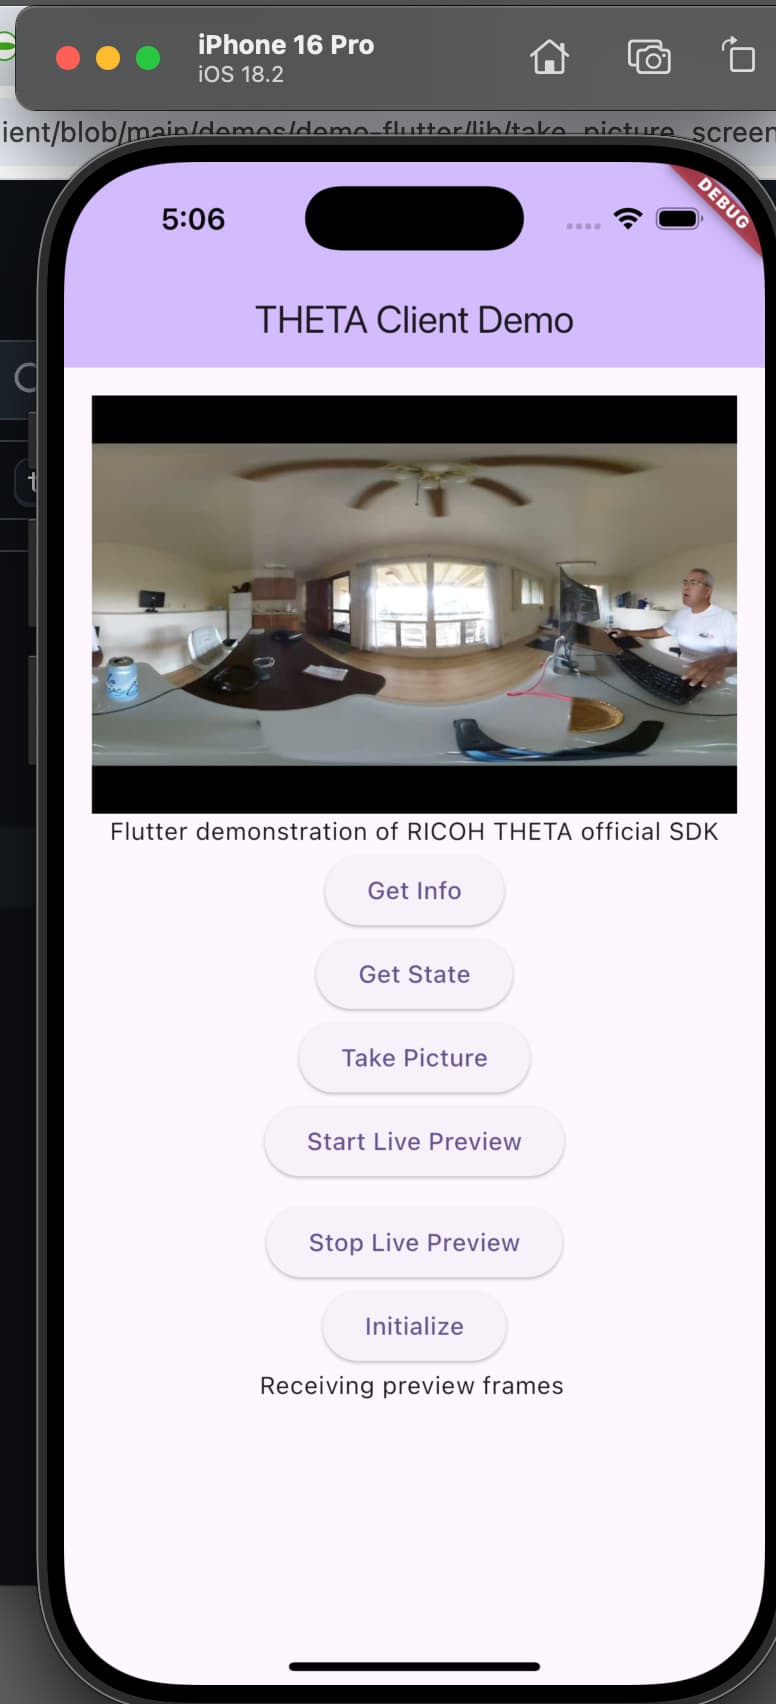
Screenshots
Code on GitHub
This code may be different from the minimal code snippet above as I intend to add things like live preview, thumbnail and image listing