Demonstration of what bitmap configuration doesn’t affects the colors quality, when the pixels are stored on a digital images processing.
Introduction
A bitmap configuration describes how pixels are stored and this affects the quality as well as the ability to display transparent colors. In this project we are going to explore all the tools of Bitmap.Config, which is very useful in OpenCV and in the digital images processing and to know all the possible configurations of Bitmap, and not to be left alone with the theoretical knowledge.

![]()
Guillermo Alberto Perez Guillen
Created July 22, 2019 © CC BY-SA
OpenCV Camera Using Bitmap.Config
Demonstration of what bitmap configuration doesn’t affects the colors quality, when the pixels are stored on a digital images processing.
Story
1.- Introduction
A bitmap configuration describes how pixels are stored and this affects the quality as well as the ability to display transparent colors. In this project we are going to explore all the tools of Bitmap.Config, which is very useful in OpenCV and in the digital images processing and to know all the possible configurations of Bitmap, and not to be left alone with the theoretical knowledge.
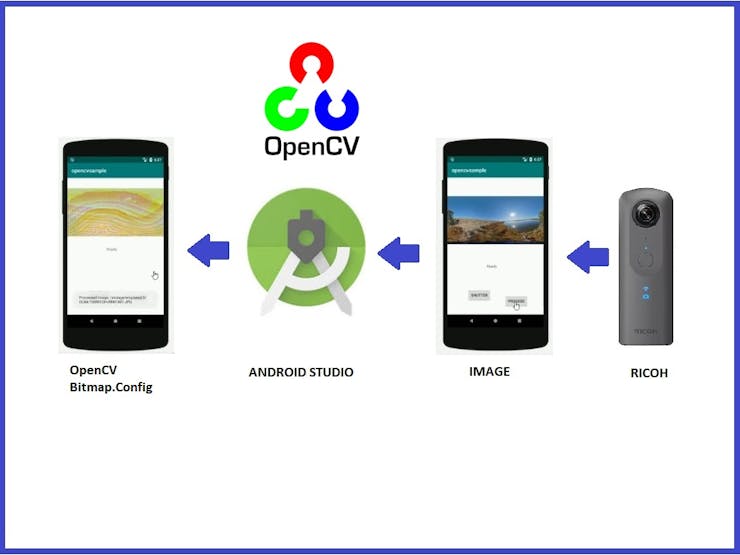
Schematic diagram
We’re going to use RICOH THETA Plug-in template to use OpenCV in plug-ins built without the camera, and you can download it from: GitHub - codetricity/no-camera-opencv: RICOH THETA Plug-in template to use OpenCV in plug-ins built without the camera
Here you will find all the recommendations for installation and use of this plug-in.
- JRE 1.8.0
- Android Studio 3.3.2
- Gradle 4.10.1
- OpenCV 3.4.5
- in gradle.build (app) specify
sourceCompatibilityandtargetCompatibilityas 1.8 due to use of lambda
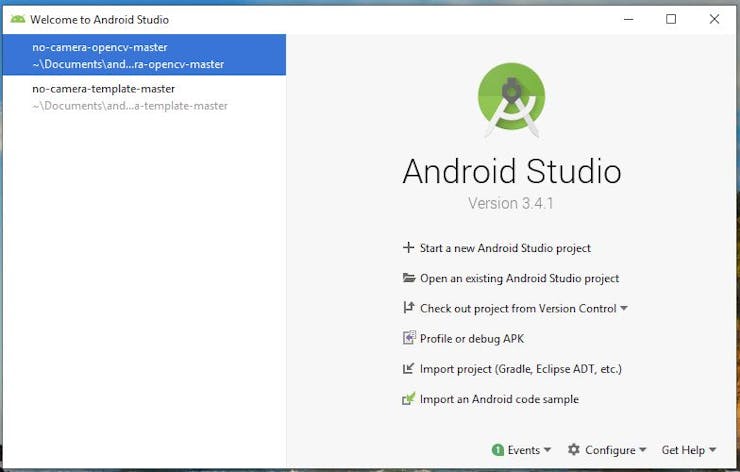
We are going to use Android Studio version 3.4.1. and you can download the latest version from: https://developer.android.com/studio

In my case I used OpenCV version 4.1.0, and you can download it from: Releases - OpenCV

Following the recommendations, we unzip the file: opencv-4.1.0-android-sdk.zip
- Now we have to open the Android.mk file, which is in the path: no-camera-opencv-master\app\jni\Android.mk
- We have to change the old path of the OpenCV.mk file: include /home/craig/Development/ricoh/plugin/contest/no-camera-opencv/OpenCV-android-sdk/sdk/native/jni/OpenCV.mk
- In my case I use Windows 10 and my route would be: include C:\Users\Jupiter\Documents\android\OpenCV-android-sdk\sdk\native\jni\OpenCV.mk
Now we’re ready to open the Android Studio project and make changes.
2.- Bitmap.Config.ALPHA_8
Each pixel is stored as a single translucency (alpha) channel. This is very useful to efficiently store masks for instance. No color information is stored. With this configuration, each pixel requires 1 byte of memory.
public static final Bitmap.Config ALPHA_8
Modify the following line and test this Bitmap.
Bitmap bmp = Bitmap.createBitmap(img.getWidth(), img.getHeight(), Bitmap.Config.ALPHA_8);
You can download the apk file of this application on this link: ALPHA_8
This application runs on Android 8.1, Nexus 5 and is signed by me.
3.- Bitmap.Config.ARGB_4444
This field was deprecated in API level 29. Because of the poor quality of this configuration, it is advised to use ARGB_8888 instead.
Each pixel is stored on 2 bytes. The three RGB color channels and the alpha channel (translucency) are stored with a 4 bits precision (16 possible values.) This configuration is mostly useful if the application needs to store translucency information but also needs to save memory. It’s recommended to use ARGB_8888 instead of this configuration.
Note: as of Build.VERSION_CODES.KITKAT, any bitmap created with this configuration will be created using ARGB_8888 instead.
public static final Bitmap.Config ARGB_4444
Modify the following line and test this Bitmap.
Bitmap bmp = Bitmap.createBitmap(img.getWidth(), img.getHeight(), Bitmap.Config.ARGB_4444);
Here I don’t attach the application because the result is very similar to the Bitmap ARGB_8888, but with lower image quality.
4.- Bitmap.Config.ARGB_8888
Each pixel is stored on 4 bytes. Each channel (RGB and alpha for translucency) is stored with 8 bits of precision (256 possible values.) This configuration is very flexible and offers the best quality. It should be used whenever possible.
public static final Bitmap.Config ARGB_8888
Use this formula to pack into 32 bits:
int color = (A & 0xff) << 24 | (B & 0xff) << 16 | (G & 0xff) << 8 | (R & 0xff);
Modify the following line and test this Bitmap.
Bitmap bmp = Bitmap.createBitmap(img.getWidth(), img.getHeight(), Bitmap.Config.ARGB_8888);
You can download the apk file of this application on this link: ARGB_8888
This application runs on Android 8.1, Nexus 5 and is signed by me.
5.- Bitmap.Config.HARDWARE
Special configuration, when bitmap is stored only in graphic memory. Special configuration, when bitmap is stored only in graphic memory. Bitmaps in this configuration are always immutable. It’s optimal for cases, when the only operation with the bitmap is to draw it on a screen.
public static final Bitmap.Config HARDWARE
Modify the following line and test this Bitmap.
Bitmap bmp = Bitmap.createBitmap(img.getWidth(), img.getHeight(), Bitmap.Config.HARDWARE);
Here I don’t annex the application because it had a failure.
6.- Bitmap.Config.RGBA_F16
Each pixels is stored on 8 bytes. Each channel (RGB and alpha for translucency) is stored as a half-precision floating point value. This configuration is particularly suited for wide-gamut and HDR content.
public static final Bitmap.Config RGBA_F16
Use this formula to pack into 64 bits:
long color = (A & 0xffff) << 48 | (B & 0xffff) << 32 | (G & 0xffff) << 16 | (R & 0xffff);
Modify the following line and test this Bitmap.
Bitmap bmp = Bitmap.createBitmap(img.getWidth(), img.getHeight(), Bitmap.Config.RGBA_F16);
Here I don’t annex the application because it had a failure.
7.- Bitmap.Config.RGB_565
Each pixel is stored on 2 bytes and only the RGB channels are encoded: red is stored with 5 bits of precision (32 possible values), green is stored with 6 bits of precision (64 possible values) and blue is stored with 5 bits of precision. This configuration can produce slight visual artifacts depending on the configuration of the source. For instance, without dithering, the result might show a greenish tint. To get better results dithering should be applied. This configuration may be useful when using opaque bitmaps that don’t require high color fidelity.
public static final Bitmap.Config RGB_565
Use this formula to pack into 16 bits:
short color = (R & 0x1f) << 11 | (G & 0x3f) << 5 | (B & 0x1f);
Modify the following line and test this Bitmap.
Bitmap bmp = Bitmap.createBitmap(img.getWidth(), img.getHeight(), Bitmap.Config.RGB_565);
You can download the apk file of this application on this link: RGB_565
This application runs on Android 8.1, Nexus 5 and is signed by me.
8.- Conclusions
The images used and loaded in this project are heavy and have the following characteristics:
- Format: jpg
- Size: 2.43 MB to 3.72 MB
- Dimensions: 5372 x 2688 pixels
The best image Bitmap format to work with digital image processing is ARGB_8888. The second is the Bitmap format ARGB_4444.
The Bitmap ALPHA format shows us that it is only useful for loading digital masks.
The Bitmap RGB_565 is useful when we want to make an image opaque.
The formats not recommended and where I had failures and errors to run the application were: HARDWARE and F_16.
For example, if we want to apply the Canny edge detector to the following image:

We apply digital image processing and we get:
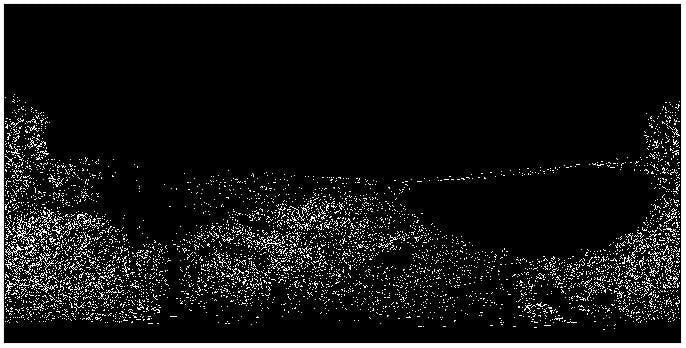
Canny Edge Detector test
We can also find faces in the following image and using the Haar Cascade Classifier :
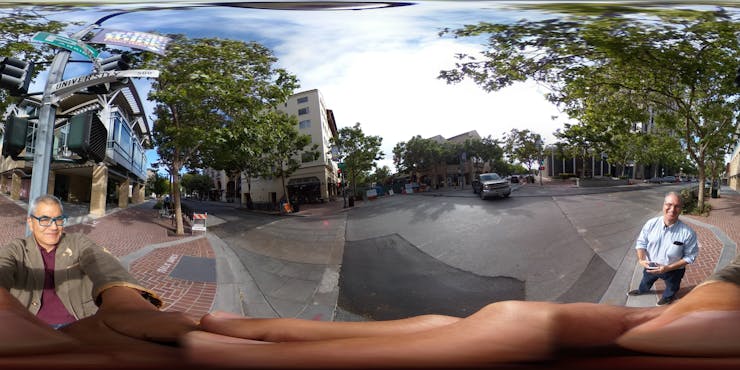
RICOH THETA image
We will surely find two faces:
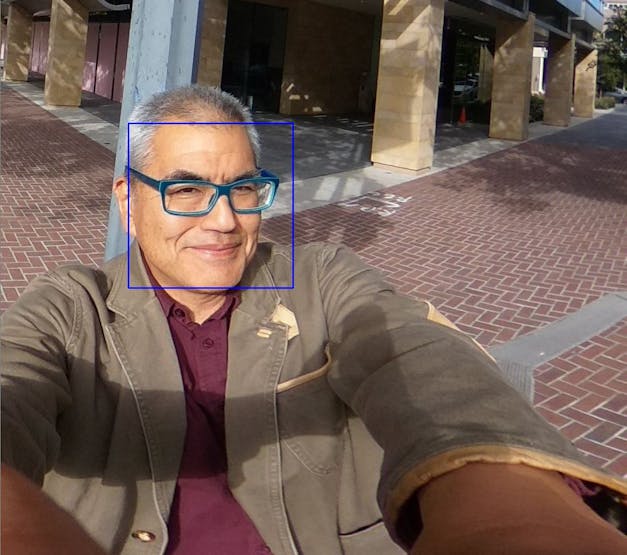
Haar Cascade Classifier - Test 1
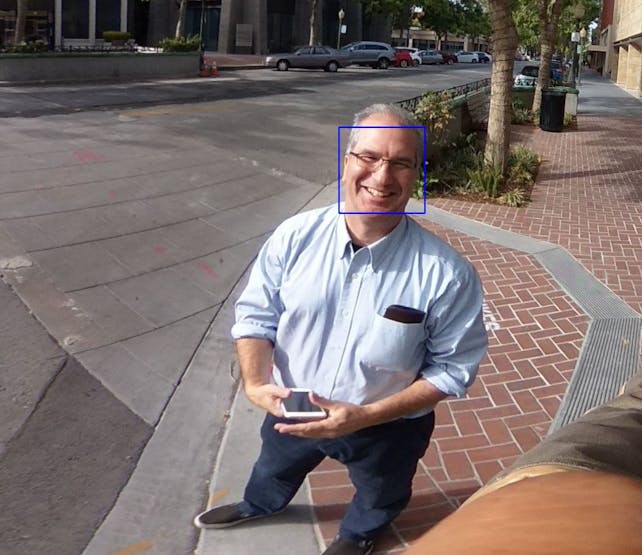
Haar Cascade Classifier - Test 2
This is what I want to do in the future and the code can be found at the end of the tutorial., and this project is just beginning and when I have more updates I will share them with you.