Part 1 - FastCV introduction and installation
Part 2 - How To Use Android NDK to Build FastCV for the RICOH THETA
Part 3 - How To Create a FastCV Application with the RICOH THETA Plug-in SDK
This article was originally published in Japanese by roohi_3.
Source Code for this Project
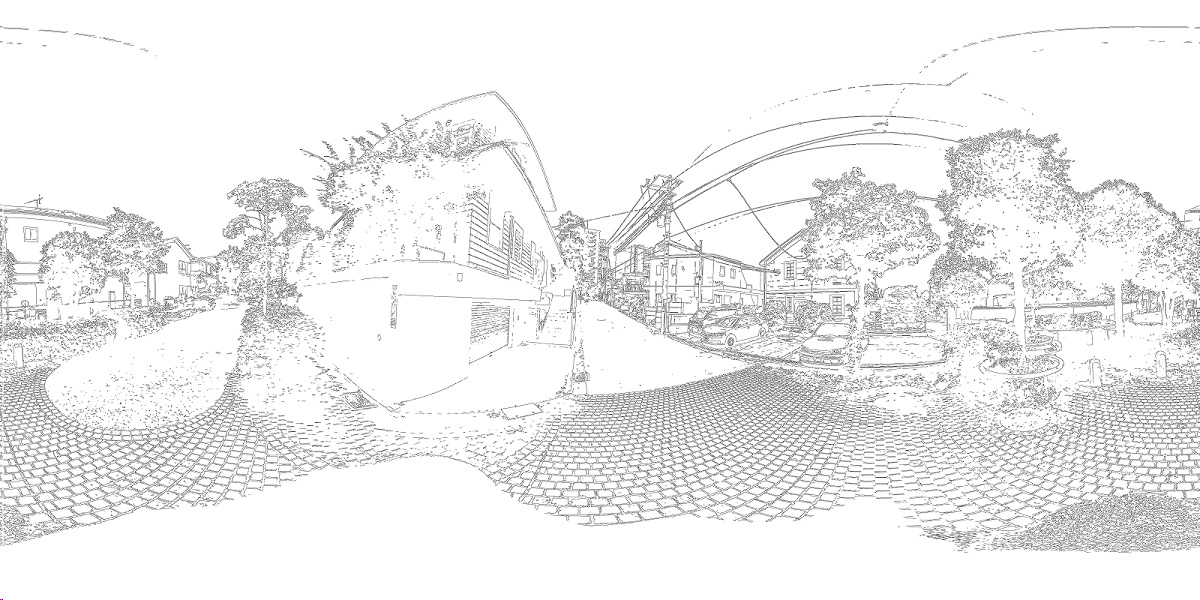
With this plugin, you can take pictures like the one below. If you press the shutter to shoot still images normally, THETA will automatically process the image inside THETA.
Advance preparation
Android Studio Project
The plug-in requires camera control, but since that part is beyond the scope of this article, we will use the sample code published in this repository:
When using the Camera API, metadata such as Exif and XMP is not added to the shooting data. If you shoot via the WebAPI, metadata is attached. If you need metadata please consider developing your app using the WebAPI.
The following code example may be helpful:
Exif class in the following project
ricohapi/theta-automatic-face-blur-plugin
Set permissions
In order to use the plug-in, you must set the permissions for camera, microphone and storage.
If the permissions are not set, even if you activate the plug-in, it drops immediately.
For plugins installed via the plugin store, permissions are automatically set as described in the manifest.
During development, you must set the permissions manually.
When developing, it is easy to set permission using Vysor .
How to set permissions
Follow the steps below to set the permissions.
- Open the prepared project in AndroidStudio
- Start up Vysor
- Select “
 ” or “Build> Run” from AndroidStudio and execute the plug-in on THETA
(since the permission setting is not done, the executed plug-in should drop immediately) - On Vysor, display the application list from the home screen
- Open the Settings application and select “(Plugin name)> Permissions”
- Turn on various items

Processing method
In this plug-in, we will modify the still picture shooting part of the sample code . In still image shooting, the following processing is performed.
- Recognize the shutter button was pressed
- Set shooting parameters (exposure, white balance, image format, etc.)
- Shoot with camera control
- Acquire captured image data
- Save image data
This plug-in performs image processing between “4.Acquire captured image data” and “5. Save image data”.
Method for acquiring photographed image data
Processing related to the camera is in CameraFragment.java. The image data can be taken from onPictureTaken in Camera.PictureCallback.
The first argument byte[] data, contains the image data in JPEG format. We will take this data and use it for image processing.
This section summarizes the processing required before and after image processing.
 // CameraFragment.java

private Camera.PictureCallback onJpegPictureCallback = new Camera.PictureCallback() {
    @Override
    public void onPictureTaken(byte[] data, Camera camera) {

        // ...

        byte[] dst = mImageProcessor.process(data);

        // ...
    }
};
In the example above, it is assumed that if the captured image data is passed to ImageProcessor the process method of the class data , the image processed data dst will be returned.
How to handle image data
Preprocessing of image processing
As briefly explained above, using onPictureTaken will result JPEG format images. On the other hand, FastCV does not assume that JPEG format is handled. For this reason, the image we need to input to FastCV is RGBA8888 and must be converted into pixel format.
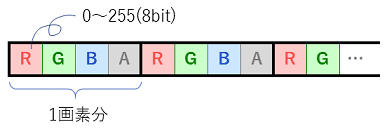
About RGBA 8888 format
The contents of the data of RGBA 8888 are as shown below. Values of Red, Green, Blue and Alpha (Opacity) are arranged in order on a pixel-by-pixel basis. Values of 0 to 255 (8 bits) are included in each channel. As opposed to JPEG being an image compression format, RGBA 8888 has information on all pixels.
As I mentioned above, as a pretreatment for input to FastCV, JPEG must be converted to RGBA8888.
RGBA8888 can be treated as Bitmap class .
As a further note, we can not pass the Bitmap class to the Native code as it is, so we will pass the byte array from the Bitmap class.
From receipt of captured image data until passing it to FastCV (Native code)
The preprocessing chart is as follows.

Post processing of image processing
From FastCV image processing, image data of RGBA 8888 format is output in byte array.
In post-processing of image processing , convert the data after image processing to JPEG , PNG, etc. (image compression) and save it.
When compressing image data, use the method of Bitmap class. For that purpose, we convert data after image processing from byte array to Bitmap type.
From receiving FastCV (Native code) data after image processing until saving
The post-processing is shown in the following flow.

Method of mutual conversion of each format
By using Bitmap and BitmapFactory of Android SDK, you can convert the format and type of the image mentioned above.
For the mutual conversion of these, please refer to the following article etc.
Mutual conversion of Bitmap / JPEG / byte array on Android
Next - Image Processing with FastCV
The next section will cover image processing flow, image processing APIs, handling data with FastCV.