I’m still on a drive to find some way to edit / manipulate my 360 images (not video) on a Windows based PC.
As I have singularly failed to find an app that is as easy to use as Theta+ it struck me that perhaps one of the many Android emulators out there would be the way forward. Only problem is, I can’t work out how to make the Theta+ app see the images once I have the emulator and app installed.
Has anybody else tried this and succeeded and is willing to share. Or has anyone fond an app as good as Theta+ (no problems with paying for it) that works on Win10?
Hello,
Unfortunately in my experience there is no desktop equivalent to the Theta+ app.
At least, not a 360 photo specific tool that does the same things. There are several “general purpose” tools that can be used, but you need a lot of skills to use them effectively.
Here’s what I use when I edit photos on Desktop (I’m on MacOS, but these apps should work the same on Windows):
Lightroom Classic: this is the editor I use the most, since I already use it organize my photos, it helps a lot with repetitive tasks and I can use it as a starting point for the other editors I mention below.
In recent releases Lightroom Develop module became somehow “360 aware”, and sliders in “Basic” panel doesn’t create seams. You can use other tools like denoise and sharpen (but check the results), and even local adjustments, being careful to use them far from the seam line. If you use gradients, be careful to make them horizontal.
Unfortunately Lightroom can’t preview 360 photos, so I still use the Theta desktop app to view the image as a 360 - I configured it as an external editor. Lightroom preserves 360 metadata.
Photoshop CC: since it’s a general purpose editor, it can also edit 360 photos, but it’s somehow complicated - As in Lightroom CC you can use ACR to do general edits that are “360 aware”.
You can also preview your photo in 360 and do local edits using the menu 3D > Spherical Panorama > New Panorama Layer From Selected Layer(s). Unfortunately it’s not a smooth workflow.
There are lots of ways to create tiny planets and other interesting projections from 360 phots on Photoshop, but the easiest and most effective way I found so far is using the Flexify plugin from Flaming Pear. Photoshop can preserve 360 metadata, but, as everything else with it, it’s complicated.
Affinity Photo: like Photoshop it’s a general purpose editor, and as Photoshop it lets you preview and edit equirectangular images as 360 photos, but the workflow is a lot smoother and easier than in Photoshop. From this point of view , I like it more than Photoshop. Affinity photo preserves 360 metadata
GoPro VR Player: I use it both to preview 360 photos and to quickly create tiny planets (menu Window > Print screen HQ). When you create tiny planets you lose photo metadata.
I also use Lightroom Classic and Photoshop CC and fairly happy with them as day to day tools but hadn’t thought about making the desktop app as an external editor to view the 360’s.
I think I may need to investigate the PS CC side of it and try and watch some vids on using the 360 side of it as my only use of that to date has been for creating high quality output for my drone 360s… and at this stage have no idea how I’d use it to edit / manipulate / etc a 360 image.
Flexify looks intriguing so I’m going to install the trial and see how I get on with it.
I tried a trial of Affinity before and never got on with it but I may re-visit it.
It’s a shame Circular Studio (Mac) hasn’t made the leap to PC, so I’m also going to look further into trying to get one of the Android emulators working and if I do I’ll post the how here.
Thanks for the reply - all good info and some ideas to work with.
I’d previously used Bluestacks but it never worked on my system but as they have a newer version out I decided to give it another spin.
Installed, logged into Google Play and installed Theta+ - then I navigated (via settings … essentially Android settings…) to my internal “android” storage and then dragged and dropped my Theta 360 desktop images. After a few seconds a popup appeared to tell me that my images had copied. Opened Theta+ and began to edit my images on my desktop.
Result. I can also, if I choose, login to Insta, FB, etc and share direct from BlueStacks. Just need to work out how to re-extract edited images now.
To finish up, To extract, you simply go to ‘media manager’ and click on ‘export to windows’ and then select the relevant images / files, then a location and job done.
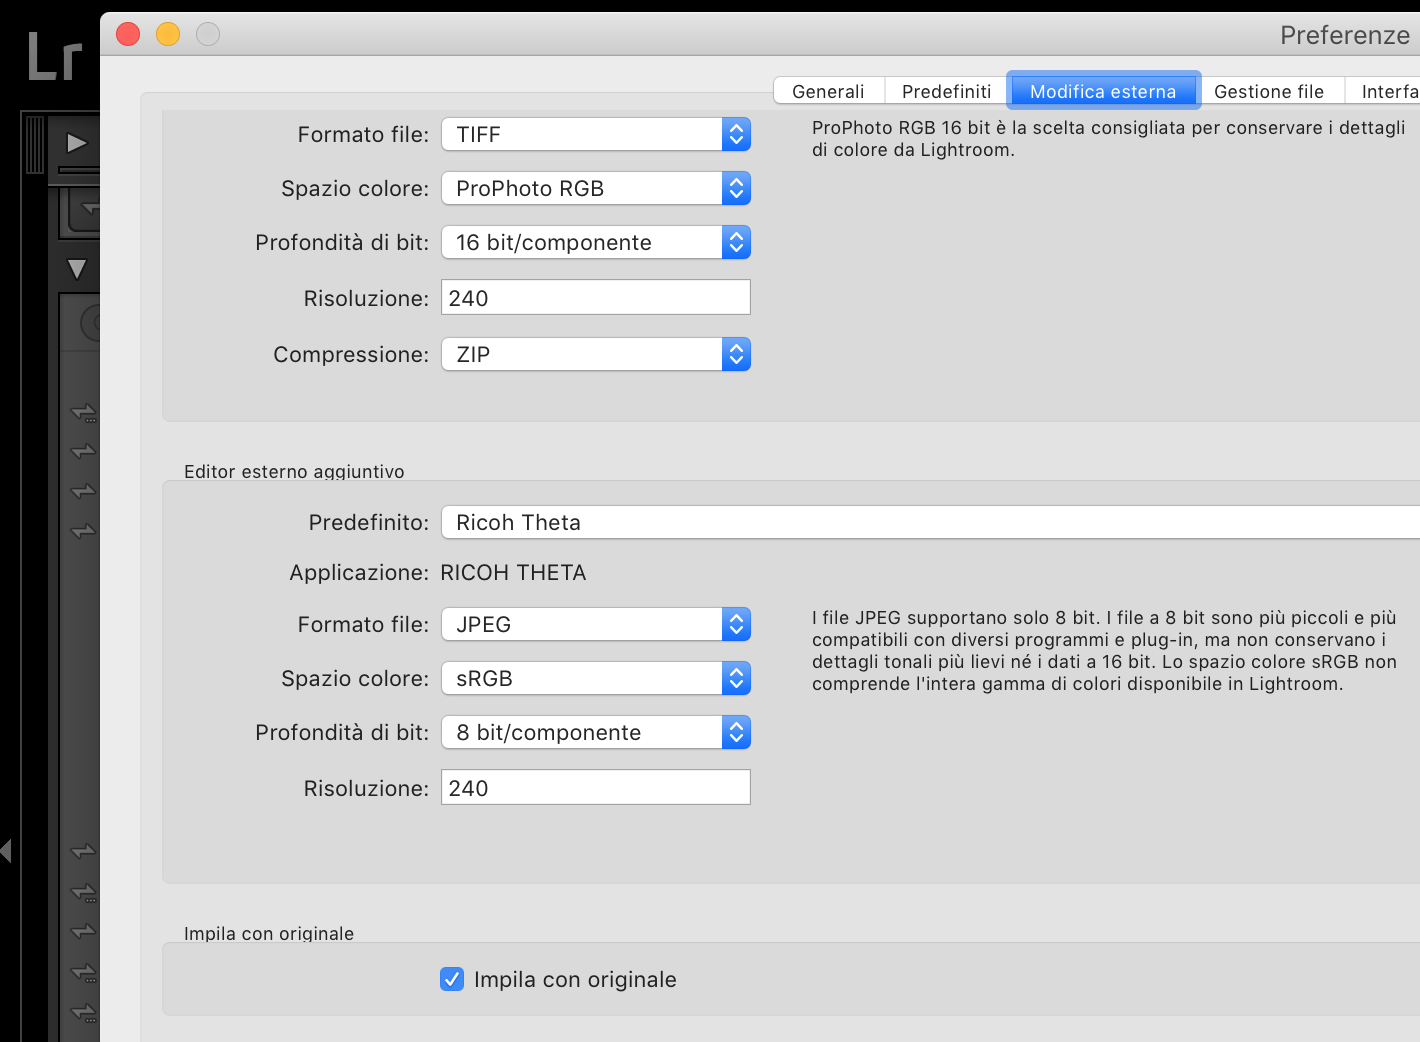
This is my workflow in Lightroom (sorry for the Italian screenshots, I hope they are helpful):
First, I set up Theta desktop app as an external editor in Lightroom like this. The point here is to choose sRGB color space to preview the colors right, since Theta app doesn’t support other color spaces. Theta app supports TIFF files, but there’s no reason to use them, since we only want to preview our work.
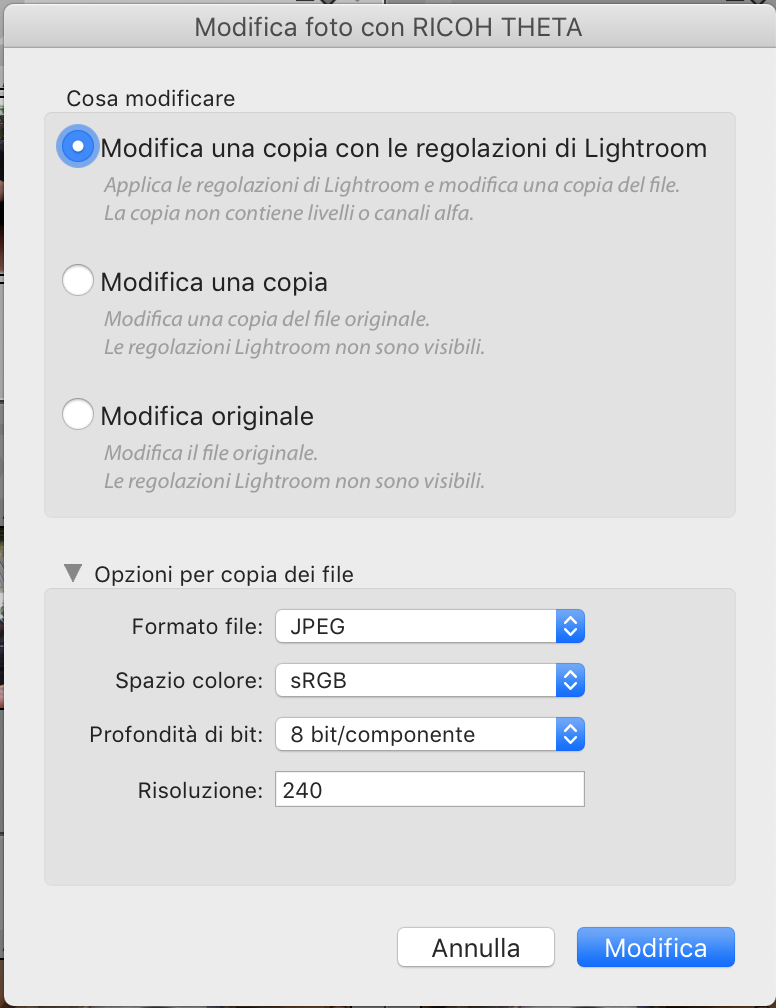
Then, when I want to preview a photo in 360 I right click on it and choose “Edit in” > “Ricoh Theta”. If I didn’t edit the image before, I just tell Lightroom that I want to “edit” the original file. If I did some edits I tell it to create a copy with my edits - I’ll throw away this file from Lightroom once I I viewed it and close Theta app.
It works. At least, while we are waiting for a proper 360 preview support coming to Lightroom Classic.
Circular Studio it’s nice, but workflow and results from it are not as good as you can get using other tools. For example, output is limited to 4096 px 8 bit (even when exporting to TIFF) - you can’t change resolution and bit depth (it could be useful to prevent data loss if you plan to do more edits), and you need to use other tools anyway.
All in all, I prefer to use Flexify plugin in Photoshop: workflow is smoother and more powerful (you can use content aware tools to patch nadir, 360 view to add or edit other contents, tune colors, and then turn the result in a tiny planet).
One only annoying thing in this workflow: once you run Flexify, the output image resolution is the same of the shorter side of the image - so you may want to upscale the image to your desired final resolution before you run Flexify.
 , I like it more than Photoshop.