Hi, everyone,
This guide shows you how to download an image on the user’s device on the theta-client SDK with React Native on your system with the help of an Android emulator.
Content
- Prerequisites
- Setup the React Native environment for the theta-client demo
- Build the download image functionality
- Install
rn-fetch-blobas a dependency - Update
AndroidManifest.xmlfile - Enhance the UI to download the image on a button press
- Install
- Demo
- Conclusion
Prerequisites
- Set up the React Native environment by referring to this documentation
- Download and install an Android emulator (for example, Android Studio)
My Development Environment
I am using HP Omen that uses Windows 11 operating system… but the guide can be used for macOS and Linux as well.
Mobile platform: Android 13
Steps to setup the React Native environment for the theta-client
1. Clone the GitHub repository
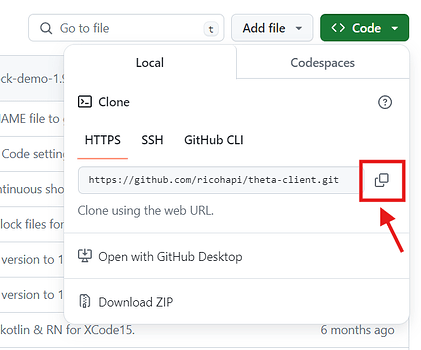
On the GitHub page of theta-client, click on the “Code” dropdown button.
On the “Local” tab, click on the copy icon to copy the web URL.
Open the text editor of your choice, such as VS Code, then open the terminal, and type the following command:
git clone https://github.com/ricohapi/theta-client.git
This command clones the theta-client project on your system.
2. Go to the React Native demo
From the project root directory, go inside the React Native demo folder by following the path below:
theta-client > demos > demo-react-native
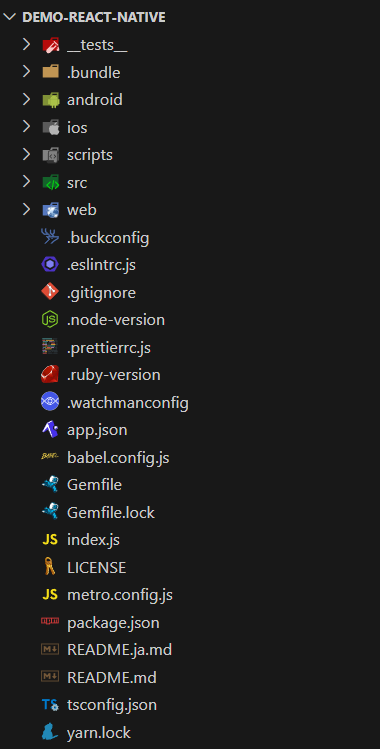
The file structure of the “demo-react-native” folder is like this:
3. Replace the API endpoint
For this demo, we do not have access to the 360-degree camera, so we cannot use the API endpoint of the camera. To get the list of images, we can use fake storage.
The API endpoint of fake storage provides a list of photos that can be used if the user does not have a camera. This API endpoint is great for testing new features.
- To replace the API endpoint, go to
MainMenu.tsxby following the path below:
demo-react-native > src > MainMenu.tsx
- Find the
endpointvariable in the code located inside theinitThetafunction.
const MainMenu = ({navigation}) => {
  const goTake = () => {
    navigation.navigate('take');
  };
  const goList = () => {
    navigation.navigate('list');
  };

  const initTheta = async () => {
    const endpoint = 'http://192.168.1.1';
    const config = {
      // clientMode: { // Client mode authentication settings
      //   username: 'THETAXX12345678',
      //   password: '12345678',
      // }
    };
    await initialize(endpoint, config);
    console.log('initialized.');
  };
- Replace the string, “https://192.168.1.1” with the below API endpoint:
const MainMenu = ({navigation}) => {
  const goTake = () => {
    navigation.navigate('take');
  };
  const goList = () => {
    navigation.navigate('list');
  };

  const initTheta = async () => {
    // const endpoint = 'http://192.168.1.1';
    const endpoint = 'https://fake-theta.vercel.app';
    const config = {
      // clientMode: { // Client mode authentication settings
      //   username: 'THETAXX12345678',
      //   password: '12345678',
      // }
    };
    await initialize(endpoint, config);
    console.log('initialized.');
  };
4. Install all dependencies
Ensure that you are on this path:
theta-client\demos\demo-react-native
Run the command below to install all the dependencies
yarn install
5. Open an Android emulator
We need a virtual Android device that is connected to our React Native app to see any changes we make to the code. For this, you can use any Android emulator, but in this guide, we are using “Android Studio”.
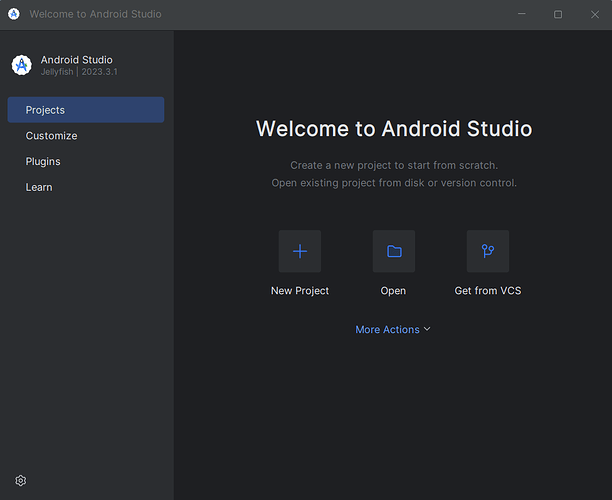
1. Open Android Studio
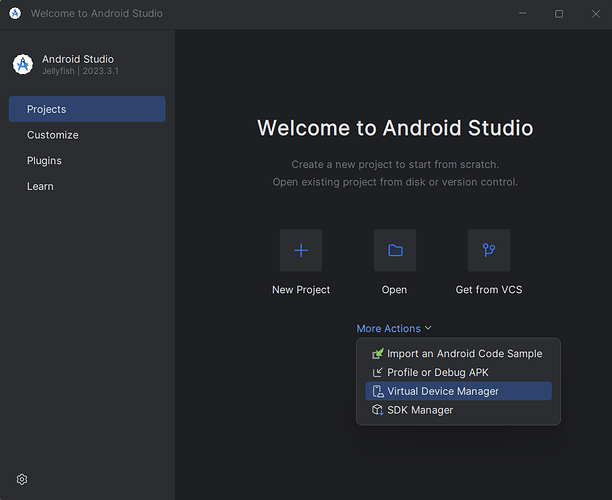
2. Go to Virtual Device Manager
Click on the “More Actions” dropdown button and click “Virtual Device Manager”.
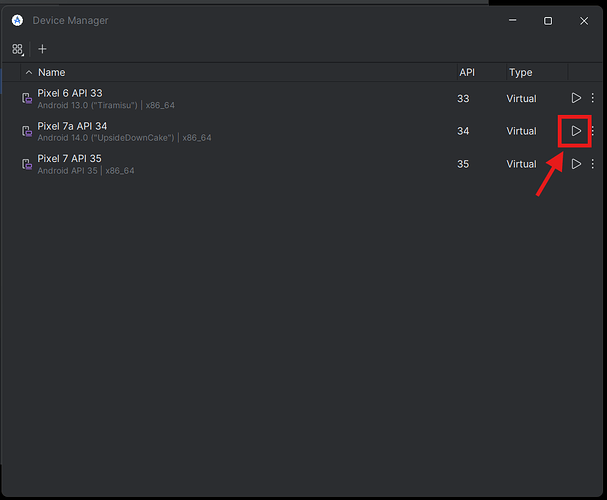
3. Open a virtual device
Click on the “Play” icon to open any one of your virtual devices. If you do not have any virtual devices created, you can create one from here.
4. The emulator launches
Here, we have launched a Pixel 7a device.
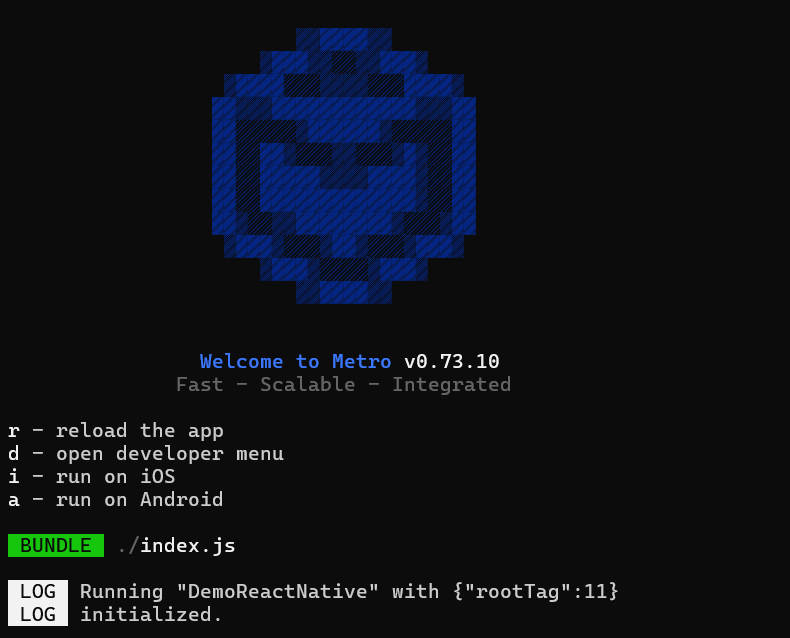
But before actually running the project with yarn run android, we have a few things to do. It is explained in the next section.
Build the download image functionality
Now, we will work on building the functionality to download an image on a button press. Let’s start with the first step.
Open the terminal of your text editor (in my case, VS Code) and type the following command:
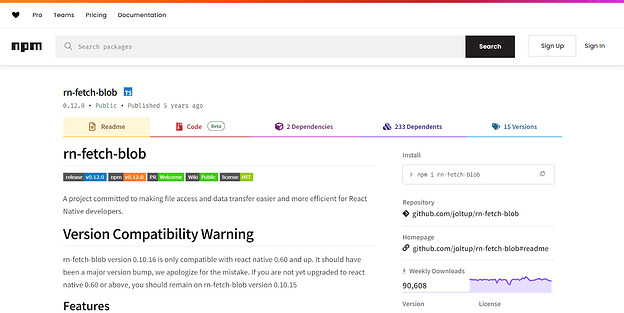
yarn add rn-fetch-blob
This will install the package in our project.
The dependencies on the package.json file will look like this
"dependencies": {
    "@react-navigation/native": "^6.1.0",
    "@react-navigation/native-stack": "^6.9.5",
    "marzipano": "0.10.2",
    "react": "18.2.0",
    "react-native": "0.71.14",
    "react-native-safe-area-context": "^4.4.1",
    "react-native-screens": "^3.18.2",
    "react-native-webview": "^13.6.2",
    "rn-fetch-blob": "^0.12.0",
    "theta-client-react-native": "1.9.1"
  },
You can see that the newly installed rn-fetch-blob package is present.
"rn-fetch-blob": "^0.12.0"
Starting with Android 11 and regardless of the app’s target SDK version, you do not need to request permission for WRITE_EXTERNAL_STORAGE explicitly from the user, so there will be no user interaction required.
If you request permission for WRITE_EXTERNAL_STORAGE from the user, it will always result in ‘never_ask_again’ and you will not be able to download any image. So, you need to skip the process of requesting the permission.
However, to ensure that we still have the access to WRITE_EXTERNAL_STORAGE on lower Android versions prior to Android 11, we need to do a few things on the AndroidManifest.xml file.
- Go to the
AndroidManifest.xmlfile present here: demo-react-native > android > app > src > main > AndroidManifest.xml - Paste the following command above the
<application>tag:
<uses-permission android:name="android.permission.WRITE_EXTERNAL_STORAGE" />
For Android, we are going to use Android Download Manager, which is the default download manager for Android. It notifies the user when the download is finished.
- To use it, add the following code inside the
<intent-filter>tag:
<action android:name="android.intent.action.DOWNLOAD_COMPLETE"/>
The final AndroidManifest.xml should look like this:
<manifest xmlns:android="http://schemas.android.com/apk/res/android"
  package="com.demoreactnative">

    <uses-permission android:name="android.permission.INTERNET" />
<uses-permission android:name="android.permission.WRITE_EXTERNAL_STORAGE" />

    <application
      android:name=".MainApplication"
      android:label="@string/app_name"
      android:icon="@mipmap/ic_launcher"
      android:roundIcon="@mipmap/ic_launcher_round"
      android:allowBackup="false"
      android:theme="@style/AppTheme">
      <activity
        android:name=".MainActivity"
        android:label="@string/app_name"
        android:configChanges="keyboard|keyboardHidden|orientation|screenLayout|screenSize|smallestScreenSize|uiMode"
        android:launchMode="singleTask"
        android:windowSoftInputMode="adjustResize"
        android:exported="true">
        <intent-filter>
            <action android:name="android.intent.action.MAIN" />
            <category android:name="android.intent.category.LAUNCHER" />
            <action android:name="android.intent.action.DOWNLOAD_COMPLETE"/>
        </intent-filter>
      </activity>
    </application>
</manifest>
3. Run the app
Whenever we make changes to the AndroidManifest.xml file, we have to build the project.
Type the command below on the terminal to run the app:
yarn android
This command will execute react-native run-android
Note:
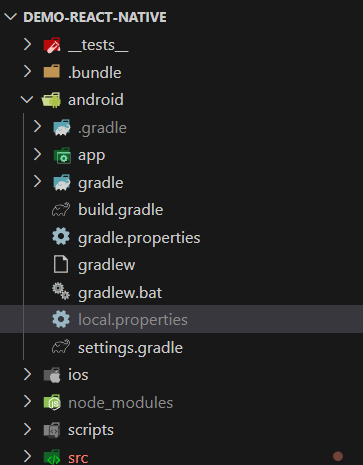
Sometimes when you try to build your project, you may encounter this error:
Solution:
- Create a
local.propertiesfile inside the android folder. Path: demo-react-native > android > local.properties
- Paste your Android SDK path on the
local.propertiesfile and save it. It will be something like this:
sdk.dir=C:\Users\UserName\AppData\Local\Android\sdk
- Run yarn run android again
- The project should run
4. Create a function to download a single image
We need to create a function that can download an image on the press of a button. Here’s how we can do it:
- Go to demo-react-native > src > ListPhotos.tsx
- Copy and paste the code below. We will understand what this code does after this.
import RNFetchBlob from 'rn-fetch-blob';

const downloadImage = async (imageFileName: string, imageUrl: string) => {
  const {config, fs} = RNFetchBlob;
  const PictureDir = fs.dirs.PictureDir;

  const date = new Date();
  const fileName = `${imageFileName}_${Math.floor(
    date.getTime() + date.getSeconds() / 2,
  )}.jpg`;

  const options = {
    fileCache: true,
    addAndroidDownloads: {
      useDownloadManager: true,
      notification: true,
      path: `${PictureDir}/${fileName}`,
      description: 'Downloading image.',
    },
  };

  config(options)
    .fetch('GET', imageUrl)
    .progress((received, total) => {
      const percentage = Math.round((received / total) * 100);
    })
    .then(res => {
      Alert.alert('Download Success', 'Image downloaded successfully.');
    })
    .catch(err => {
      Alert.alert('Download Failed', 'File download failed.');
    });
};
Breakdown of the code
In the above code, we have imported the rn-fetch-blob module using ES6 import statement.
import RNFetchBlob from 'rn-fetch-blob'
Next, we have declared a function that takes two parameters in the form of strings:
- imageFileName: Name of the image
- imageUrl: URL of the image
We have destructured the RNFetchBlob object and taken out config and fs properties. We will use config to send a few additional information for downloading the image. We will use fs to access the file system of the user’s device.
const {config, fs} = RNFetchBlob;
We are going to store the downloaded image inside the Pictures directory on the user’s virtual device. For that, we have chosen the PictureDir from the file access API of RNFetchBlob and assigned it to the PictureDir variable.
const PictureDir = fs.dirs.PictureDir;
Next, we are utilizing the Date objects of JavaScript to give a unique file name to the downloaded image.
 const date = new Date();
  const fileName = `${imageFileName}_${Math.floor(
    date.getTime() + date.getSeconds() / 2,
  )}.jpg`;
Before sending the GET request for downloading the image, we have to send a few additional information to the config method of RNFetchBlob. This information include:
- fileCache: We want the downloaded image to be cached hence, the value is set to true.
- addAndroidDownloads: This is optional information and is only specified for the Android operating system.
- useDownloadManager: We are going to use the native Android Download Manager, so the value is true.
- notification: When image download succeeds or fails, the user will be notified.
- path: The destination path where the image will be downloaded and stored.
- description: The description of the downloaded image
const options = {
    fileCache: true,
    addAndroidDownloads: {
      useDownloadManager: true,
      notification: true,
      path: `${PictureDir}/${fileName}`,
      description: 'Downloading image.',
    },
  };
Finally, we can perform a GET request with JavaScript Fetch API by initializing the config method for the download request.
config(options)
    .fetch('GET', imageUrl)
    .progress((received, total) => {
      const percentage = Math.round((received / total) * 100);
    })
    .then(res => {
      Alert.alert('Download Success', 'Image downloaded successfully.');
    })
    .catch(err => {
      Alert.alert('Download Failed', 'Image download failed.');
    });
};
In the above code, we have also attached a progress method on our GET request. This optional method will inform us how much downloaded data it has received from the server. We can use this to show a progress bar or an indicator to show the progress of the download operation.
In case of success or failure, an alert pop-up will appear on the user’s device with the particular title and description as specified in the alert method.
5. Create a “Download” button for images
To actually perform the download operation, we have to call the downloadImage function but where should we call it?
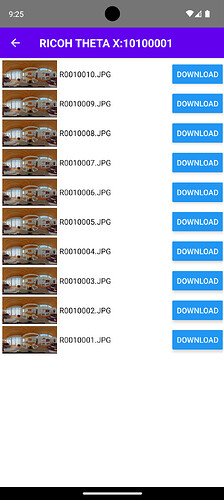
We will create a simple Button component and attach it to each image. When the user presses the button, the particular image attached with the button will be downloaded.
To create a button:
- Ensure that you are on this path: demo-react-native > src > ListPhotos.tsx
- Import Button component from React Native
import { Button } from 'react-native';
- Go to the items variable
- Modify the items variable to include the
Buttoncomponent.
const items = files.map(item => (
    <TouchableOpacity
      style={styles.fileItemBase}
      key={item.name}
      onPress={() => onSelect(item)}>
      <Image style={styles.thumbnail} source={{uri: item.thumbnailUrl}} />
      <View
        style={{
          width: Dimensions.get('window').width - 108,
        }}>
        <View style={styles.largeSpacer} />
        <View
          style={{
            flexDirection: 'row',
            alignItems: 'center',
            justifyContent: 'space-between',
          }}>
          <Text style={styles.fileName}>{item.name}</Text>
          <Button
            title="Download"
            onPress={() => downloadImage(item.name, item.fileUrl)}
          />
        </View>
        <View style={styles.largeSpacer} />
      </View>
    </TouchableOpacity>
  ));
In the above code, we have created the Button inside a map function, which maps over the files variable and displays each image in a single column based layout.
We have attached an onPress event on the button that will call the downloadImage function and pass the name of the item and the URL of the file as the two arguments.
- Output
Demo
We have built the functionality of downloading and storing the image on the user’s device. Now it is time for some action.
Here are the steps we will perform:
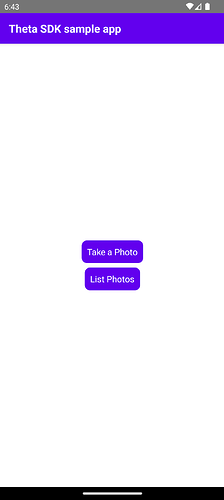
- When the react native demo runs, the home screen on the Android virtual device will be like this:
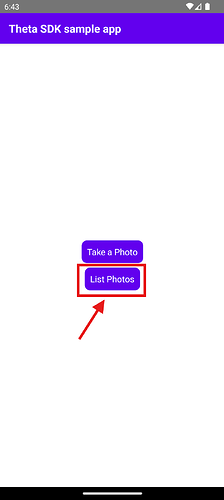
- Click on “List Photos” button
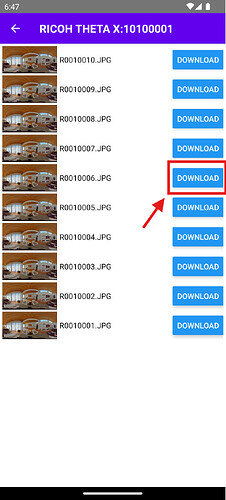
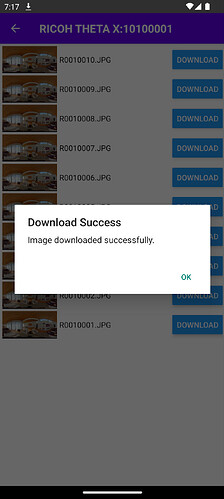
- A screen will open displaying a list of images. Click on the “Download” button of any image to download it. In this case, let’s download this image: “R0010006.JPG”
- An alert will appear on the screen when the image is successfully downloaded.
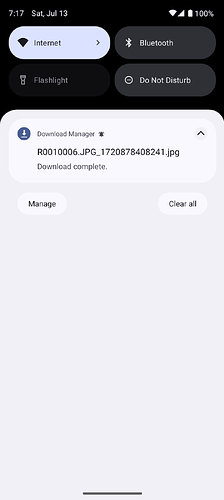
- The Android Download Manager will notify the completion of the image download operation through a notification too.
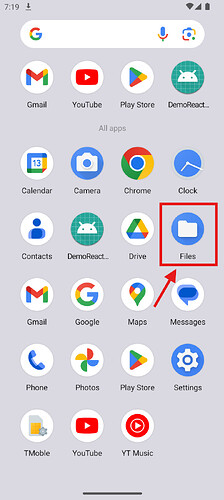
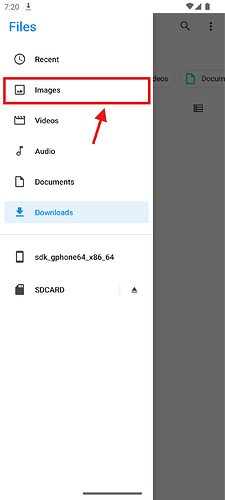
- Let’s see the storage to check if the newly downloaded image is present. Open the “Files” app on the virtual device.
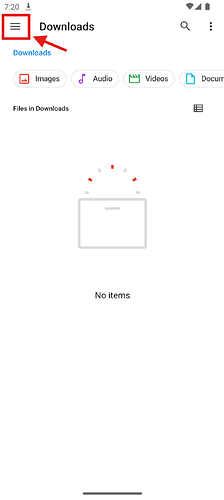
- The “Downloads” screen will open. Press on the Hamburger menu icon to open the sidebar.
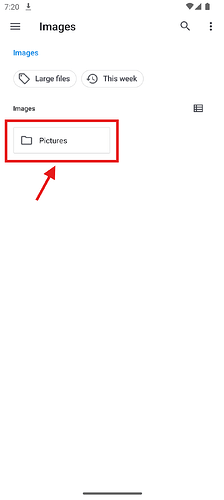
- Press the “Images” option
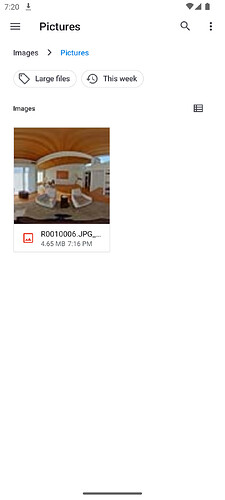
- You will see that the “Pictures” directory has been created. Press on the “Pictures” button to open it.
- On the “Pictures” screen, the newly downloaded image is present!
- You can press the image to open it
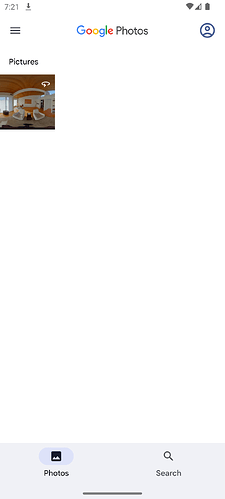
- The image will also be present on the “Google Photos” app
Conclusion
In this guide, we saw how to set up the React Native environment for the theta-client demo and perform the functionality to download any image to the “Pictures” directory on a user’s device.
Feel free to leave a comment in case of any doubts about this.
