Hi, @codetricity
Guideline is just a guideline.
Aligning panos and shooting places may depend on your creativity & imagination. I always think, “What do people want to see?”
Example @Boze Is.;
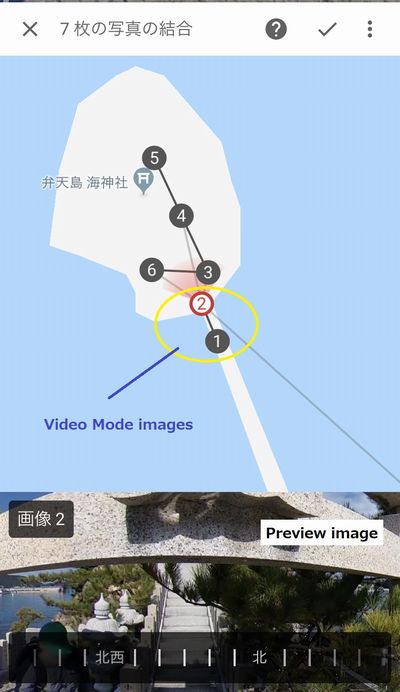
Caption; No.3 - No.6 images/Dual Fisheye Plugin
I started recording Video Mode from the Naza port. And I walked on the red bridge of the Umi Shrine(弁天島 海神社). As you see in YouTube,I stopped recording in front of the gate(鳥居). Why?
We Japanese believe inside of the gate is the holy place. The holy place should be taken 360 photos with the special methods.
Yes!, That’s Dual Fisheye Image plugin.
The first image inside the gate was shot at the bottom of the stone stairs.And then, I read the commentary of the stone plate during the second shooting. I was so excited and very interested in the legend “じんこんさん(神権伝説)”
So, I decided to skip shooting on the middle of the stone stairs.
This is じんこんさん(Jin kon san). People around the islands trust and respect the legend. We must do so.
This is my story and imagination.
How do you think?
Toyo