This article was originally published in Japanese by roohi_3.
Image processing with THETA plug-in - FastCV introduction
Hello, this is @roohii_3 of Ricoh. I’ve recently been working on image processing projects with Python and OpenCV. Until last year I was designing and developing a project using C++ as the main language.
The latest model of RICOH THETA, the THETA V, introduced in November 2018, supports customization with "plug-ins". Developers can create plug-ins by registering in the RICOH THETA Plug-in Partner Program.
When I started with Android development, I heard the keyword "NDK" for the first time. As I work image processing projects on a daily basis, I decided to create a plugin that does some sort of image processing.
I used FastCV as the image processing library. As this is a broad topic, I’ll focus on "Introducing FastCV - using a simple API". I will summarize the procedure for image processing with FastCV in a future article.
What is FastCV
FastCV is a Computer Vision library provided by Qualcomm. It is distributed under a Qualcomm license. Operations involved in image processing are optimized for ARM processors and are particularly effective for Qualcomm’s Snapdragon processors. To use FastCV, it is necessary to program with C/C ++ using the Android NDK (Native Development Kit).
Why FastCV?
When people discuss image processing libraries, many people think of OpenCV. With "OpenCV for Android SDK", It’s not that OpenCV cannot be used to build a plug-in. However, since RICOH THETA V uses Snapdragon as the main processor, I am going to try and use FastCV.
API Reference
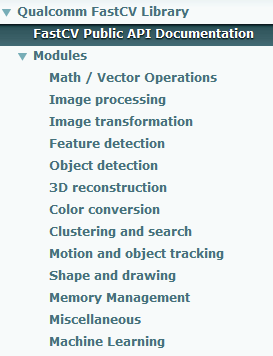
Documentation is included with Qualcomm FastCV Library.
It seems that modules such as basic point processing, feature point extraction, clustering, and machine learning are also available.
Development Environment
The procedure introduced in this article was confirmed with the following environment.
- RICOH THETA V firmware ver. 2.50.1
- RICOH THETA Plug-in SDK ver. 1.0.1
- Windows 7 Professional 64 bit
- Android Studio ver. 3.2.1
- NDK ver. 18.1.5063045
- FastCV ver. 1.7.1
Preparation
Organize the NDK development environment and install FastCV SDK.
Development environment development
Please refer to the links below to arrange the introduction of Android Studio and the plugin development environment.
- THETA Plug-in Development: Procedure for setting THETA to Developer mode
- THETA Plug-in Development: How to move RICOH THETA Plug-in SDK with THETA
- Ricoh THETA V Plugin Application Development Community Guide
- Android Studio
Installation of NDK
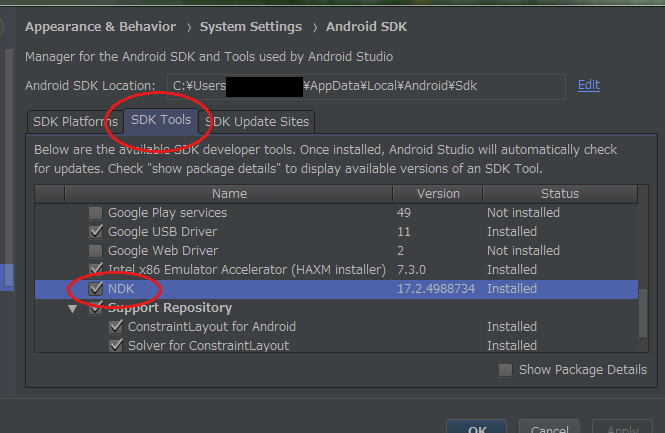
- Launch Android Studio and select "Tools > SDK Manager" from the menu
- Select "SDK Tools" tab, check "NDK" and click "OK"
Follow the screen and click "Finish" when installation is completed
Install FastCV SDK
- Register an account with Qualcomm Developer Network
- Download FastCV SDK Installer from the FastCV Computer Vision SDK
- Run the downloaded installer
In my case, the FastCV SDK was installed in the following location.
C:/Android/Development/fastcv-android-1-7-1
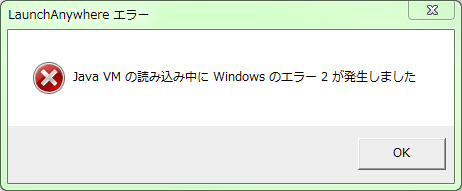
If you see the following error when executing the installer, specify the Java VM on the command line.
To the command line, enter as follows:
fastcv-installer-android-1-7-1/fastcv-installer-android-1-7-1.exe LAX_VM "C:/Program Files(x86)/Java/jre1.8.0_171/bin/java.exe"
In my next article, I will cover preparation of the Android project file first then explain how to import FastCV and build it.


