M5Stack ESP32 Arduino and RICOH THETA

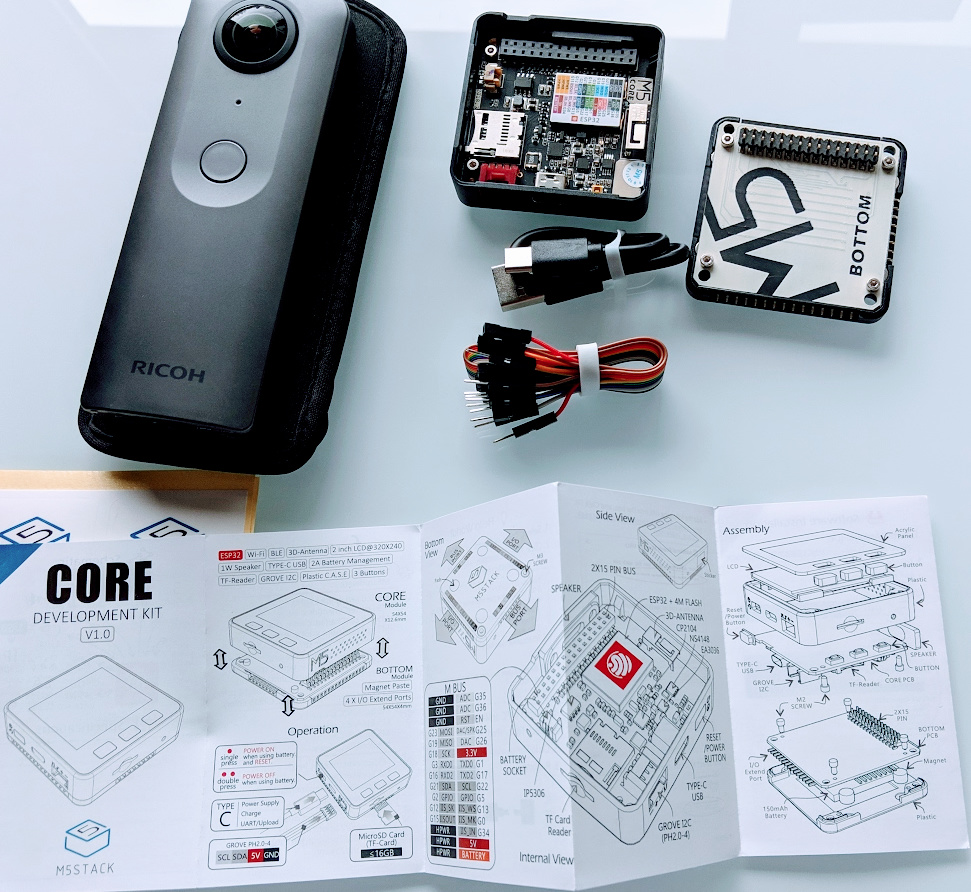
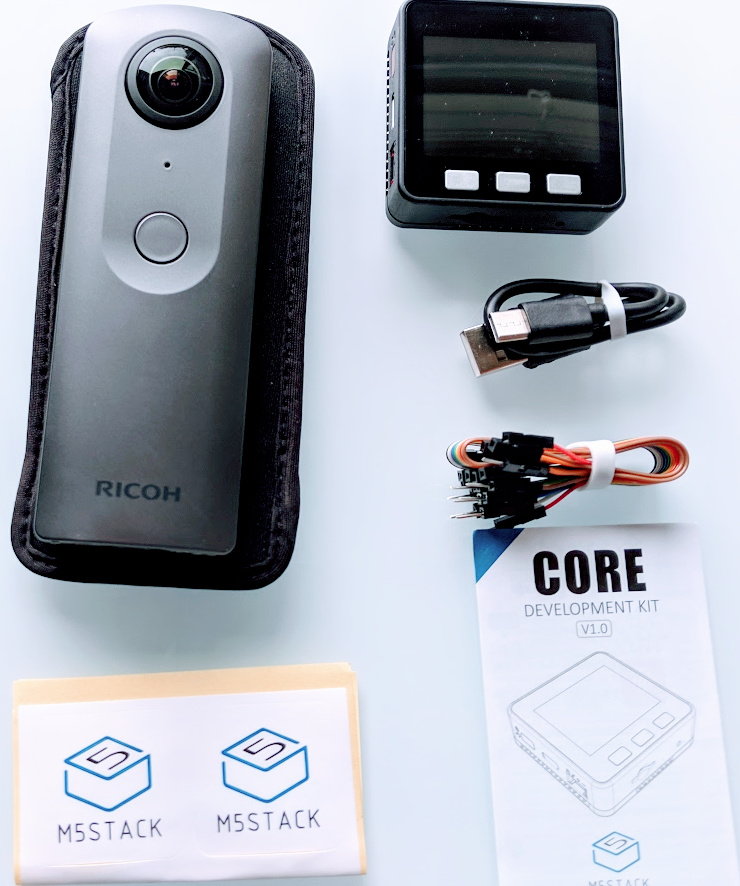
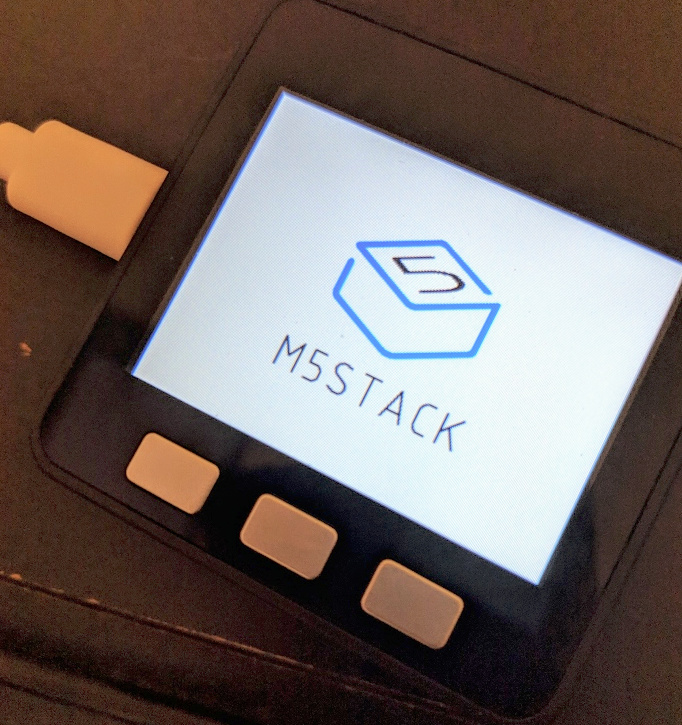
The M5 Stack is an ESP32 Arduino development platform that comes in a nice case with buttons and a large number of IO ports.

In the picture below, the M5 Stack is in the upper right.

It’s possible to control the THETA V using the M5 Stack.

This picture from KA-2 on Qiita.

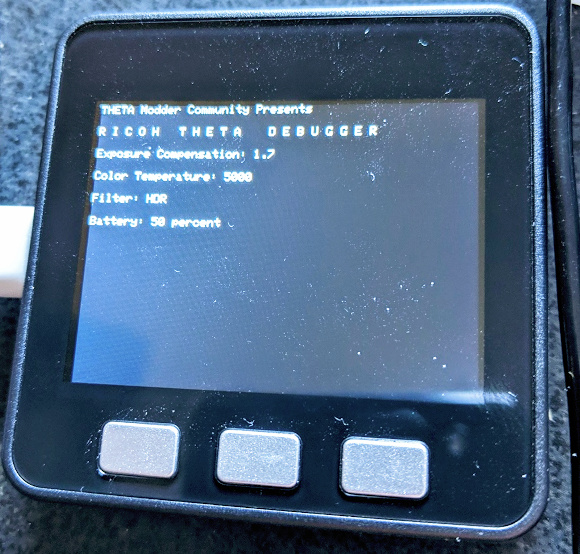
KA-2 also has it working with as a external screen monitor for THETA information.

You can see a demo of his project here:

Project code from KA-2 is here:


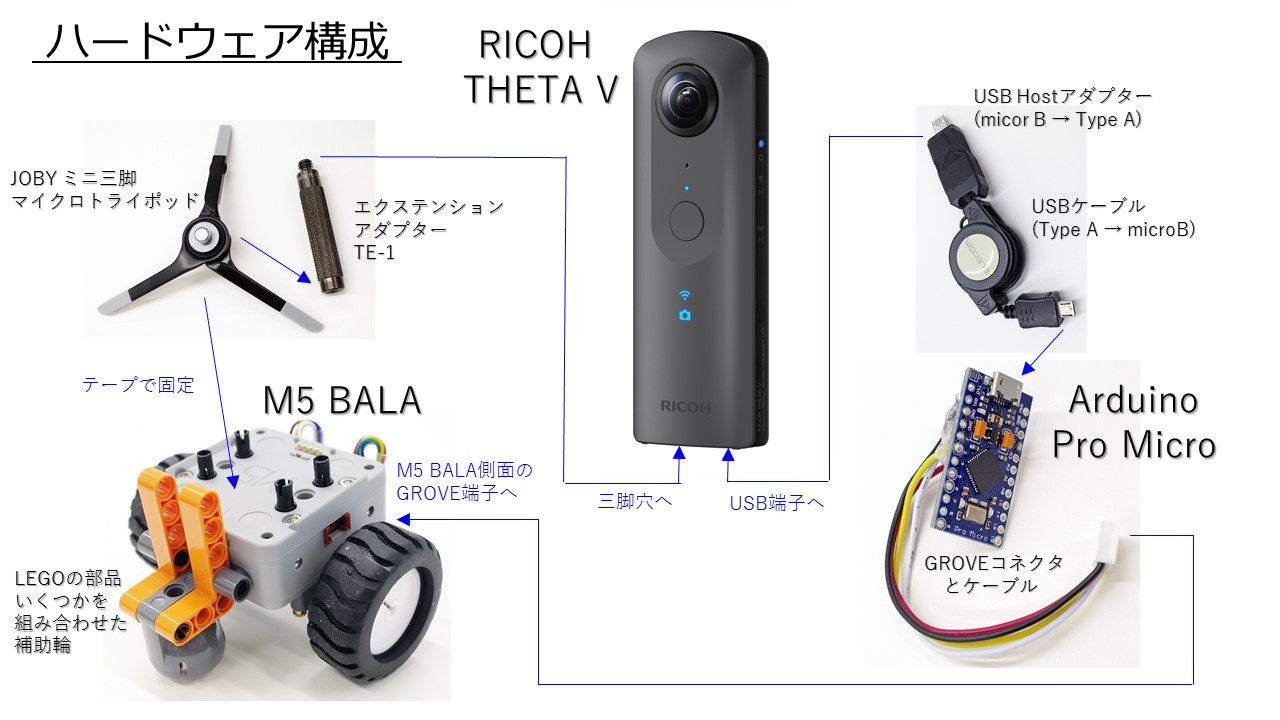
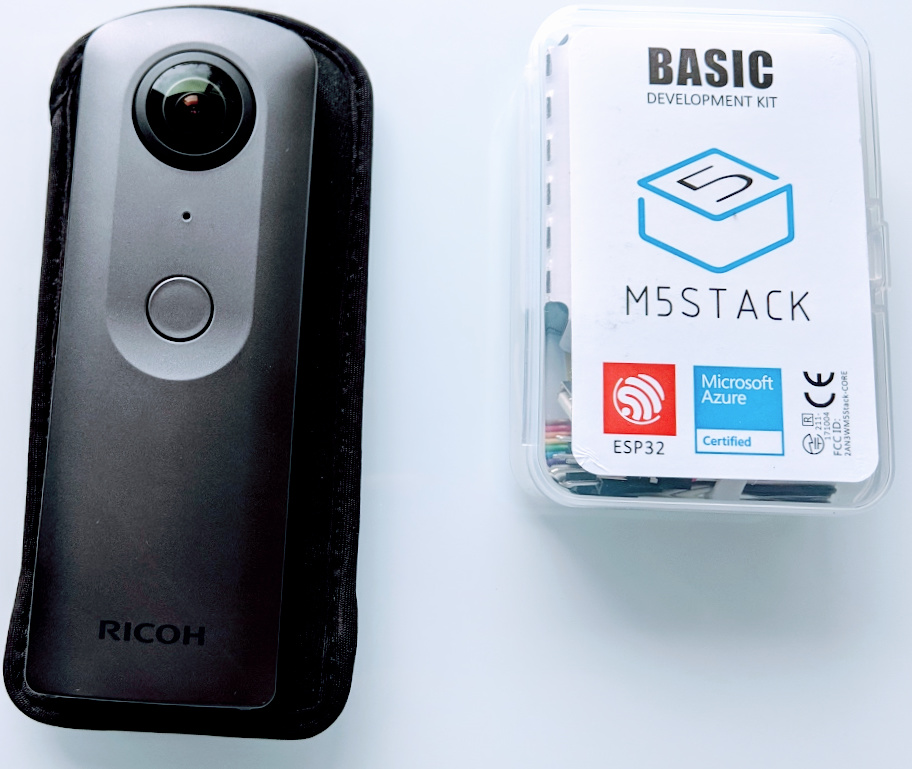
Hardware and Basic Kit

Everything comes in a nice plastic box. I got this for $40 from Amazon with 2 day free Prime shipping.

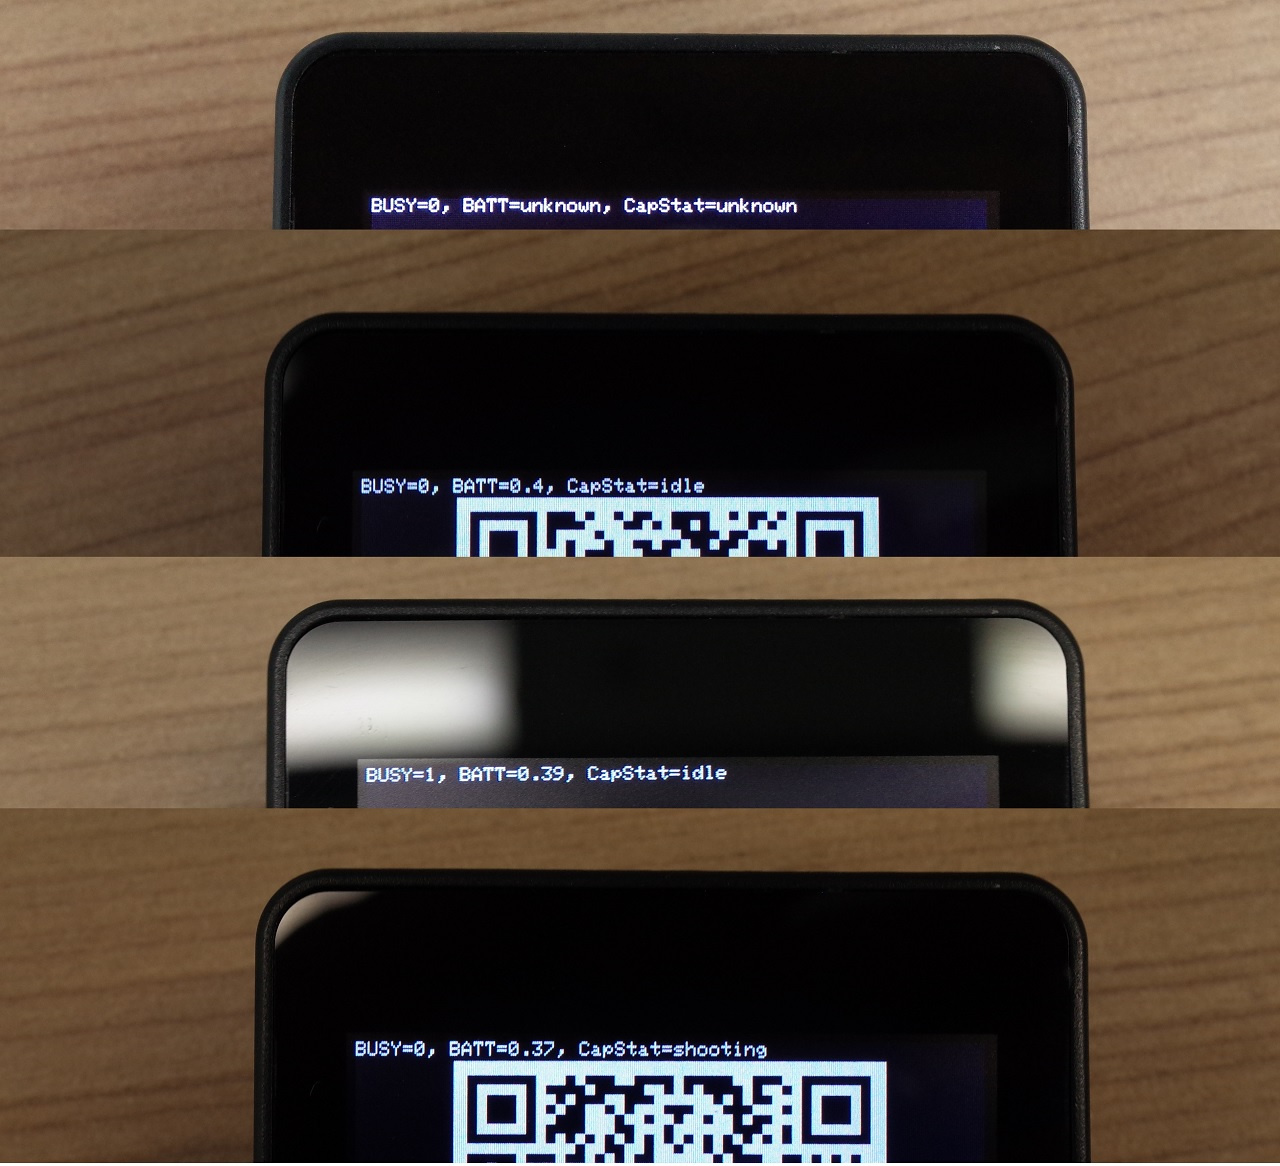
Display looks great.


Test of Plug-in

Compiles no problem on Android Studio.

3181c61f0344fddb11108e5532829bd86bf33679

Set Permissions with Wi-Fi

First, connect to the THETA via USB.

Second, you must give the plug-in permission to use the USB port in order to connect with the M5 Stack. So run the following commands:

$ adb shell settings put global usb_debug true
$ adb tcpip 5555
$ adb connect 192.168.1.1:5555 

NOTE: In the example above, replace the IP address with the IP address of your THETA such as 10.42.0.181:5555 if you have your THETA connected to your computer in Client Mode (connecting THETA to router ).

Third, now connect from your computer directly to the THETA via Wi-Fi.

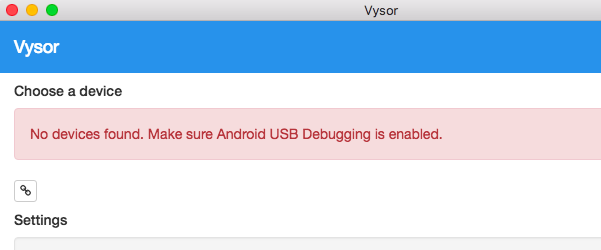
Connect Vysor to THETA with Wi-Fi

image

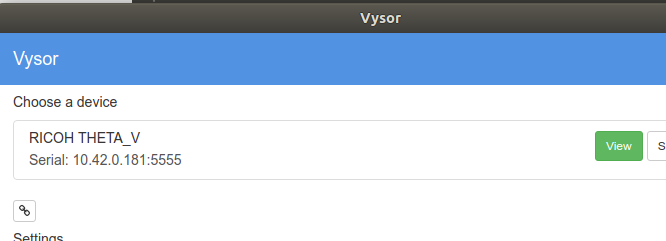
If you skipped the adb commands above, the THETA will not show up in Vysor over Wi-Fi.

no%20devices%20found

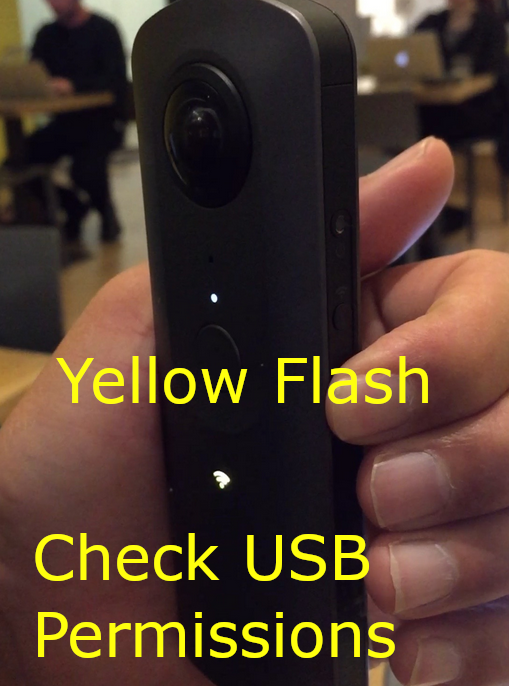
On the camera itself, if the Wi-Fi LED briefly blinks yellow, this is another indication the plug-in does not have permission to use the USB port. Please repeat the steps in this section to Set Permissions with Wi-Fi.

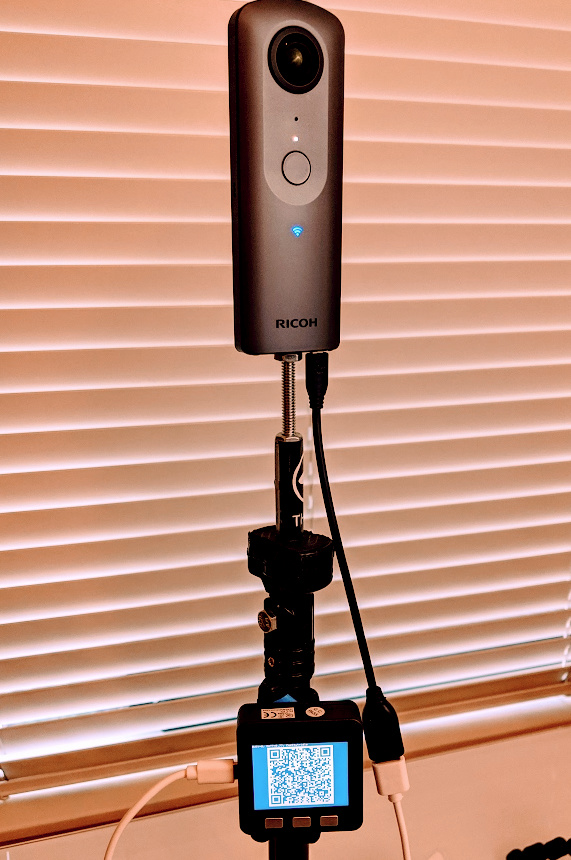
Connect M5Stack to THETA with USB OTG

When you plug the M5Stack into the THETA, you will see the message below.

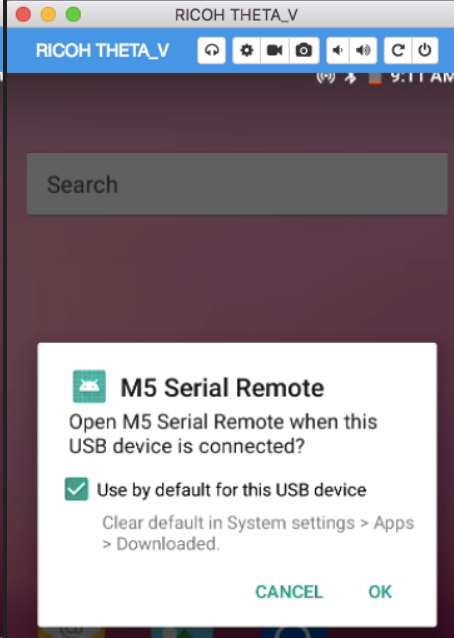
Click the checkbox and press OK.

With Arduino IDE

IMPORTANT: The instructions below are for Linux. For Mac and Windows, please see the alternate instructions

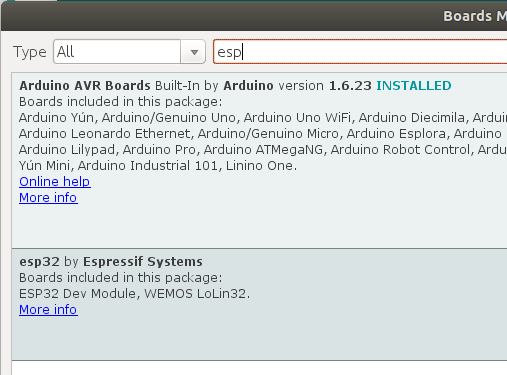
Install espressif esp32 support

http://www.m5stack.com/download/package_m5stack_index.json

After adding URL in previous step, go to boards manager and select espressif esp32.

Hit install.

image

Install M5Stack Library from Library Manager.

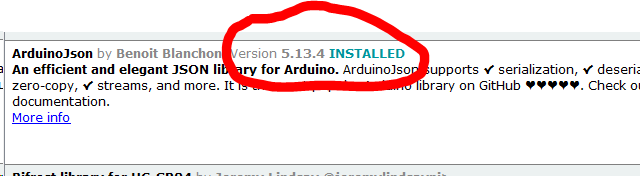
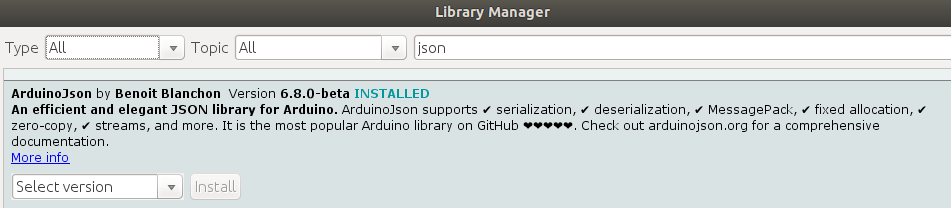
Install Arduino JSON Library

From inside of Library Manager, search for ArduinoJson
Install version 5.x not the beta version 6, which is installed by default.

Update pyserial

This step likely only needed on Linux.

I needed to update pyserial with

pip install pyserial

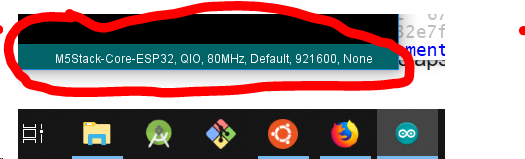
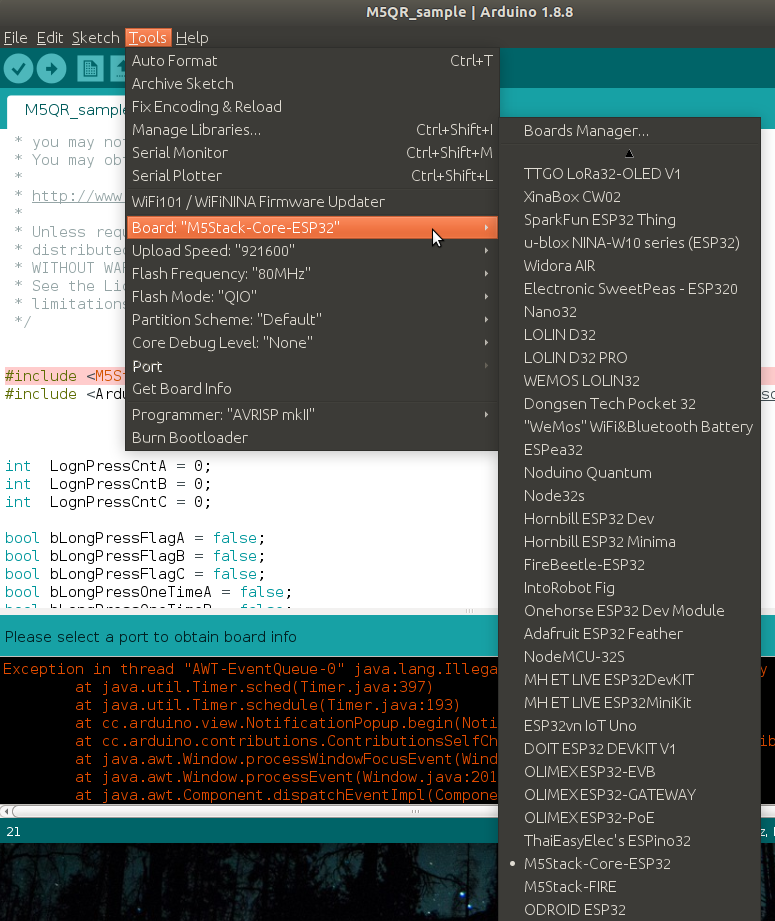
Select Board M5Stack-Core-ESP32

Select Port

image

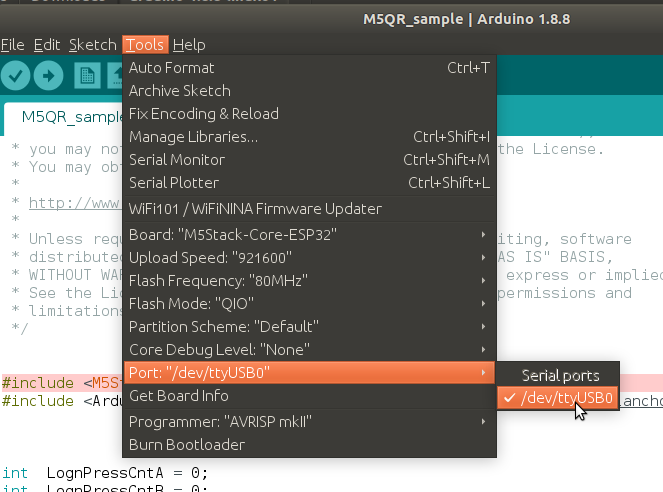
If the USB port does not show up (on Mac), you may need to install the serial driver for CP210x USB to UART Bridge.

See this document for more information.

Add User to Access USB Port

On Linux Ubuntu, I needed to add my user to the group that controls the USB port ttyUSB0.

image

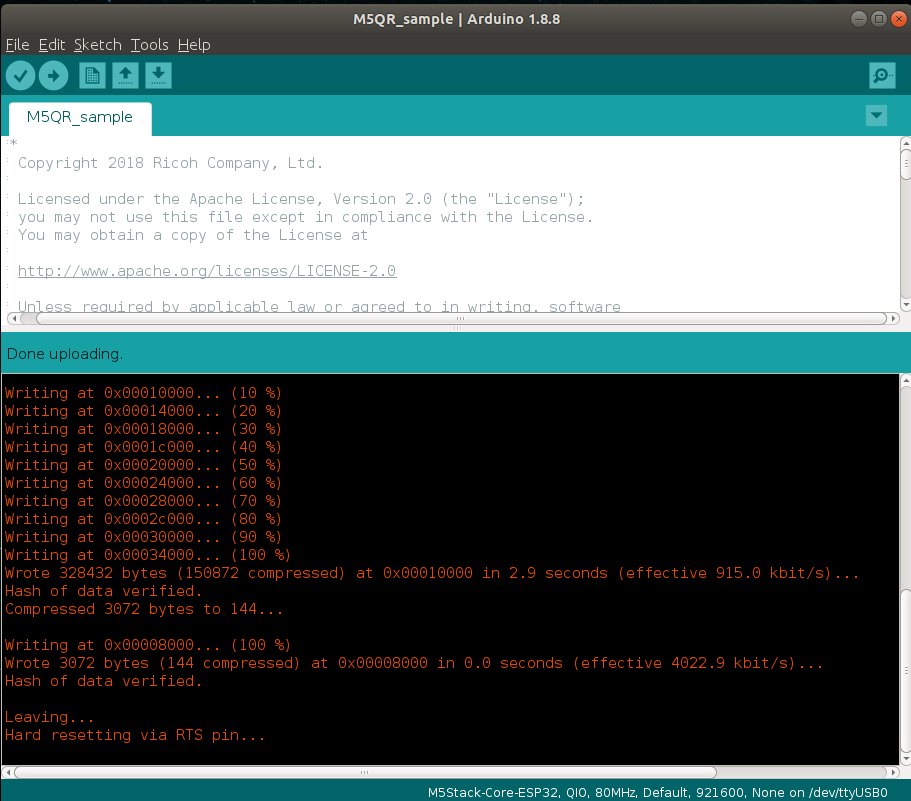
Load Sample Arduino Code From GitHub Repo

The Arduino file is in the same repo as the THETA Plug-in.
In folder M5QR_sample
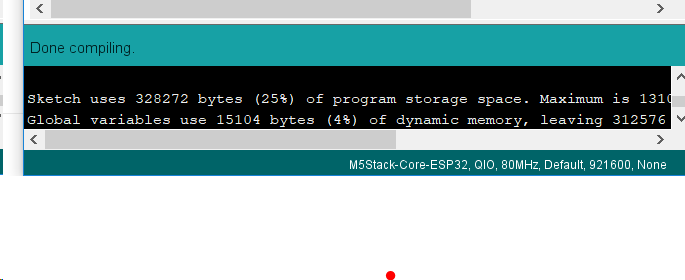
Upload to M5 Stack

Usage

Press Center Button on the M5Stack to take a picture

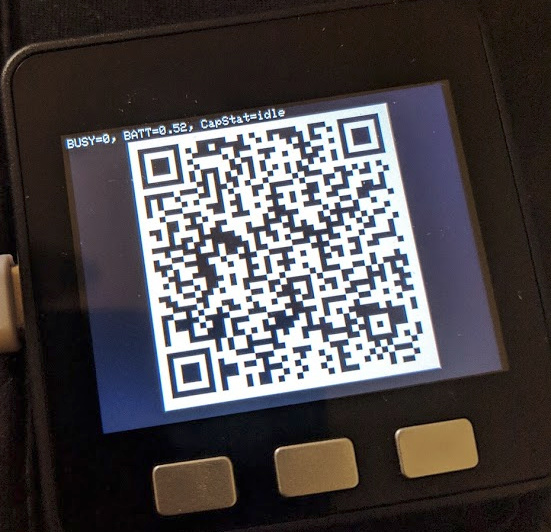
left button clears image.

right button restores last QR code.


M5Stack Can Draw Power From RICOH THETA

In my testing of the plug-in, it draws down power from the THETA quickly. Be sure to fully charge your THETA ahead of time for longer testing.

Point Mobile Phone Camera at QR Code

Google Pixel automatically finds URL to go to.

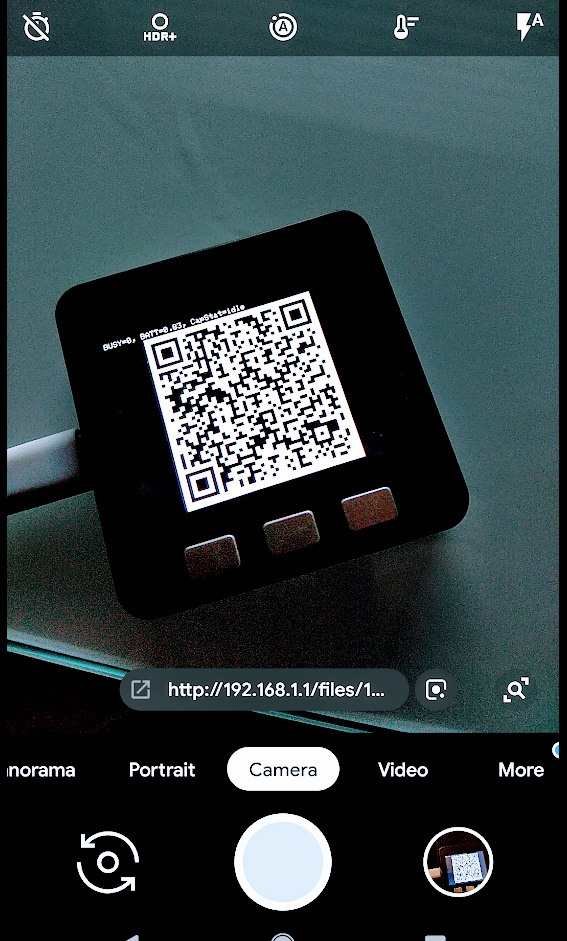
Opens up browser to preview image.


Community Modification for Camera Information

1 Like

I just got a chance to try this out. Actually, taking a picture with a remote shutter (the USB-C cable I’m using is 3’) and then just scanning the QR code with my regular phone app (iPhone 6 Plus) brings up new photos in Safari. Works really smoothy. I’m going to install the Arduino IDE and install M5Stack tools and see if I can learn more.

For the installation of the M5Stack board on Windows 10, this document is useful.

https://github.com/m5stack/m5stack-board-support/blob/master/doc/windows.md


This was also useful:

run git submodule update --init --recursive in the esp32 arduino folder

M5Stack board detected on Windows

image

ArduinoJson library 5.13.4

image

compile

image

Fully working on Windows 10.

1 Like

I installed Arduino IDE on my iMac. The documentation in the packaging is outdated. You need to ignore starting guide and use the scripts here:

https://github.com/m5stack/M5Stack/blob/master/docs/arduino-ide/mac.md

Then you can use Boards Manager and find M5Stack-Core-ESP32.

1 Like

Compile the code with the “verify” button on the IDE. You don’t need to flash the board if you want to preserve your existing program on the M5Stack. From roughly line 346 in the Arduino code, there is a function ExecWebApi. That is taking the results of /osc/state.
https://developers.theta360.com/en/docs/v2.1/api_reference/protocols/state.html

It looks like we can pull the state data as documented in the API link above and then put the results to the screen. It also looks like we could run any API command. I think the next task for the community is to parse the results of state and display to the M5Stack screen. I think the next challenge for @jcasman is to compile the existing code. You’ll need to get the libraries set up.

I think this would be easy for anyone from the embedded IoT community that you were involved with last year.

//-------------------------------------------
// THETA API functions
//-------------------------------------------
int     ThetaAPI_Post_State(void)
{
  int iRet=0;

  String strJson = ExecWebAPI("POST", "/osc/state", "", HTTP_TIMEOUT_STATE);
  
  iRet = strJson.length();
  if ( iRet != 0 ) {
    char sJson[iRet+1];
    strJson.toCharArray(sJson,iRet+1);
    StaticJsonBuffer<350> jsonBuffer;
    JsonObject& root = jsonBuffer.parseObject(sJson);
    if (!root.success()) {
      //Serial.println("ThetaAPI_Post_State() : parseObject() failed.");
iRet=-1;

Current status

  • removed QRcode from display
  • added last URL to text interface

Would like to display iRecordableTime to the screen. Coming out as zero right now.

I checked the output of the OSC API and it looks like _recordableTime is 0. Maybe it only shows the information when the camera is recording. The results of info might be more promissing as I can at least grab the apiLevel, serialNumber, uptime, bluetoothMacAddress, wlanMacAddress.

theta360.guide community!

We’ve set up a private repo for this code on GitHub. We’ve had me, Craig and another community member put some work into it. It’s come along quite a ways! If you’re interested in trying it out, maybe adding some functionality or not, please just drop me a note at jcasman@oppkey.com or DM me here (@jcasman) and I’ll get you access to the repo.

Exciting stuff!

1 Like

Thanks to the community contribution, I think we can access and display the full API results.

The M5Stack turns on automatically when it’s plugged into the THETA and is immediately usable.

@jcasman, you should post some pictures of community contribution builds.

Community Contribution Update: 2/14/2019

Code modified by IoT community member. Tested and photographed by @jcasman

Community Contribution Update: 2/15/2019

Sample Arduino code.

M5Stack-THETA-Debugger.zip (4.9 KB)


Information on ArduinoJson

The M5Stack sample code uses ArduinoJson to parse the response from the RICOH THETA.

There is good documentation on this library below.

I’m testing ArduinoJson Assistant to get memory pool sizes.


Update 2/27/2019: We just had a giveaway of 4 M5Stack Units to RICOH THETA developer community members. To receive updates on giveaways, please make sure you are registered for this site.

Note on connecting THETA to other devices

I’m cross-posting this information from the THETA Dream and Build developers contest. It points out that using serial communications over USB requires setting permission on the THETA. This can be done in a development environment fairly easily, since a developer can connect using something like Vysor and accept the connection. This is required by the Android architecture. But it cannot currently be implemented in a finished plug-in submitted to the THETA Plug-in Store, since it requires the end user acknowledgement.

“THETA can be attached to feature-specific devices like a GPS module using an OTG cable connector. However, for the purposes of this Dream and Build THETA contest, the Android-based plug-in architecture of the RICOH THETA does not give a way to set permissions using USB data transfer without interaction on a screen. For a developer, this is not an issue, as tools like Vysor can be used. However, the goal of the contest is to create a functioning plug-in that an end user can download and install without setting any permissions. Since this is not possible, please be sure to implement your ideas a different way.”

Hello, My name is Shasha, I am a project manager from M5Stack Inc. It’s amazing to see you have made such impressive project out of M5Stack with RICOH THETA. Would it be possible i share the link of this post to our official community so that more M5 users would see your amazing work. Thank in advance.

2 Likes

@Shasha_Liu, please share. There are also more projects.

Using M5 Bala

Video

The author is KA-2 “Katsu”

1 Like

Thank you so much, this means a lot to us. Thank you for making such impressive work out of M5.

1 Like

@Shasha_Liu it might help your community to put the original links to the Japanese articles by KA-2, Katsu. There’s code examples. The community can use Google Translate to convert it to English or the language of their choice.

  1. THETA Plug-in M5Stack QR Code Image Sharing and Serial Remote Control
  2. THETA Plug-in M5BALA Part 1: Creating Radio Control
  3. THETA Plug-in M5BALA Part 2: Guidance by Line Trace

Great, i am so excited, i will let you know once it post , and you will have all of the credit . Thanks again.

@Shasha_Liu, thank for all your help. The credit should go to KA-2 “Katsu”.

got it, i will. thanks a lot

2 Likes
2 Likes

Cool to see it on Hackster. Thanks @Shasha_Liu!

1 Like