This is the third section in the series of modifying and getting started with the Theta Client and React Native Demo.
In the last article in this series, we learned how to store data offline (locally) using the async storage package. In part 3 of the series, we will learn how to store data from the Data Center Component to the Cloud. We do not just want to save data locally; we want to sync it with the cloud. One thing about storing data using the async storage package, as we did in the last article, is that it has some limitations when considering factors like “size of data.” Async storage helps us persistently store data in a key-value pair, but it works best when dealing with small amounts of data.
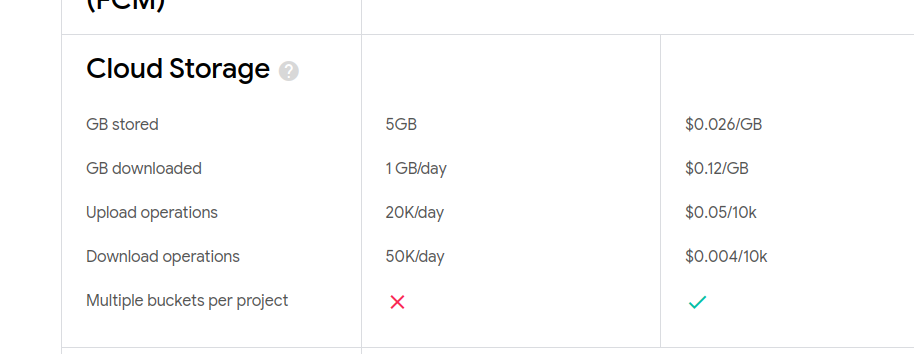
For this guide, we will implement Firebase as a cloud service to handle data storage. Using Firebase, we can overcome the limitations of local storage and ensure our data is secure, scalable, and accessible from anywhere. Firestore, a NoSQL database provided by Firebase, will be our choice for storing and syncing data in real-time, which will significantly enhance the functionality and reliability of our application.
What is Firebase?
Firebase is a platform developed by Google for creating mobile and web applications. It provides a suite of cloud-based tools and services that help developers build, improve, and grow their apps. Firebase is known for its real-time database, authentication services, cloud storage, analytics, and a variety of other tools that streamline the development process. It is designed to handle backend infrastructure, enabling developers to focus on creating great user experiences without worrying about server management.
What is FireStore?
Firestore, also known as Cloud Firestore, is a scalable and flexible NoSQL cloud database provided by Firebase. It allows developers to store and sync data between users and devices in real time. Firestore supports rich queries, atomic transactions, and offline data persistence, making it an ideal choice for applications that require real-time data synchronization and offline capabilities. With Firestore, data is organized into documents and collections, allowing for a more structured and easily accessible format compared to traditional databases.
This guide mainly focuses on modifying the present Data Component, not the UI logic but the Data Storage logic, which currently uses async storage.
Without further ado, let’s get into the nitty-gritty of this guide.
This guide is divided into five sections:
- Setting up Firebase and FireStore
- Initializing and Installing Firebase into the Project
- Implementing the FireStore to handle the data storage for our app
- Saving/Getting data from FireStore
- Testing that the data gets saved to the firestore
Setting up Firebase
-
Navigate to Firebase’s official website by querying your browser with “Firebase”, sign up, and log in.
-
Setting up the Project
a. Click on the Firebase console in the header to open it, then create a new project.

b. Click on the “Create a project” button.
c. Add a name for your project, then click continue.
d. On the next page, turn off analytics.
e. Wait for the new project to be bootstrapped. Click continue when it is done.
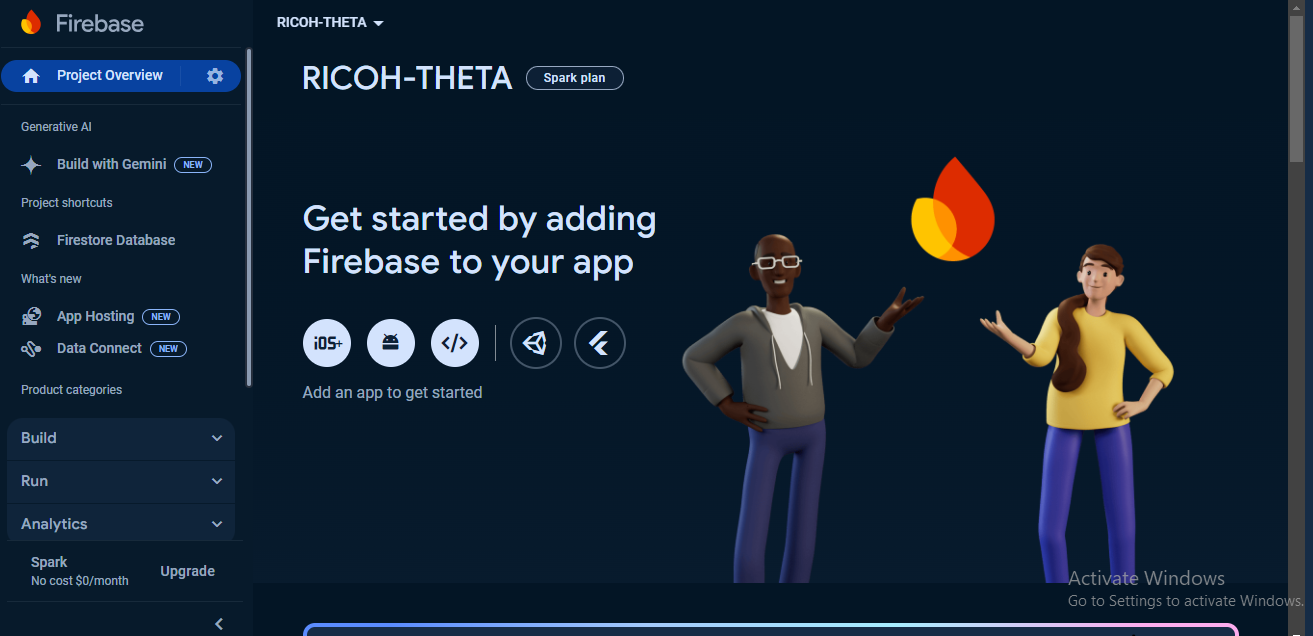
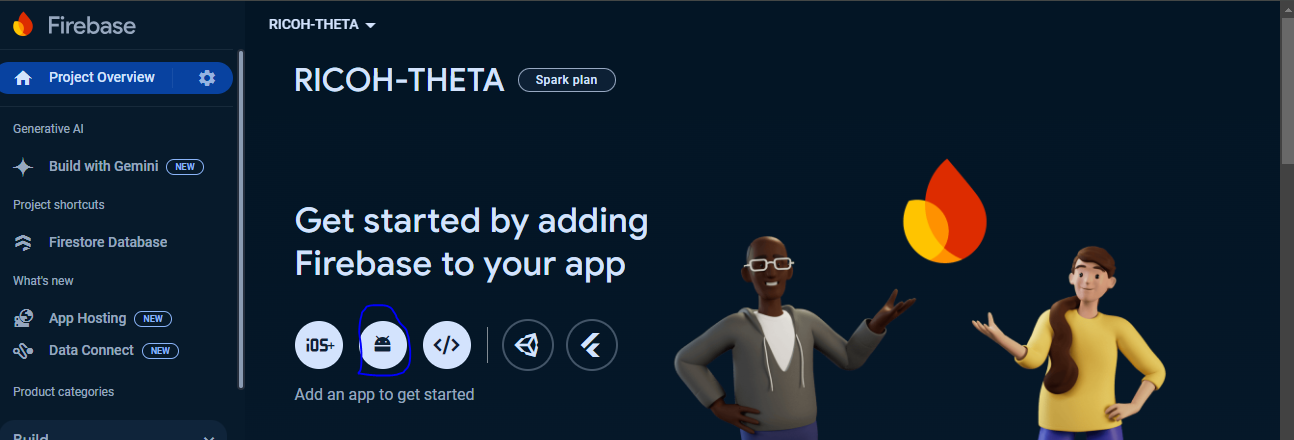
f. Add an app to get started. Since we are dealing with Android, we must use the Android app option when adding a new app. Hover on all the option icons, then click on the one for Android–the second from the left after the “ios” icon.
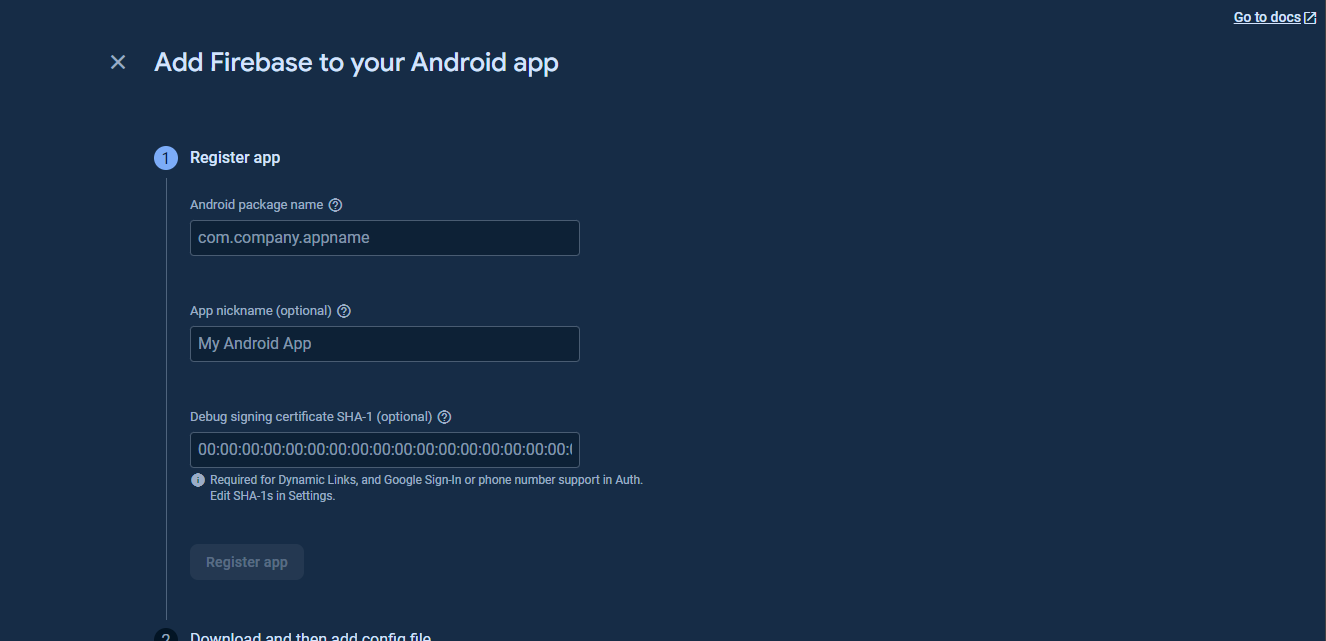
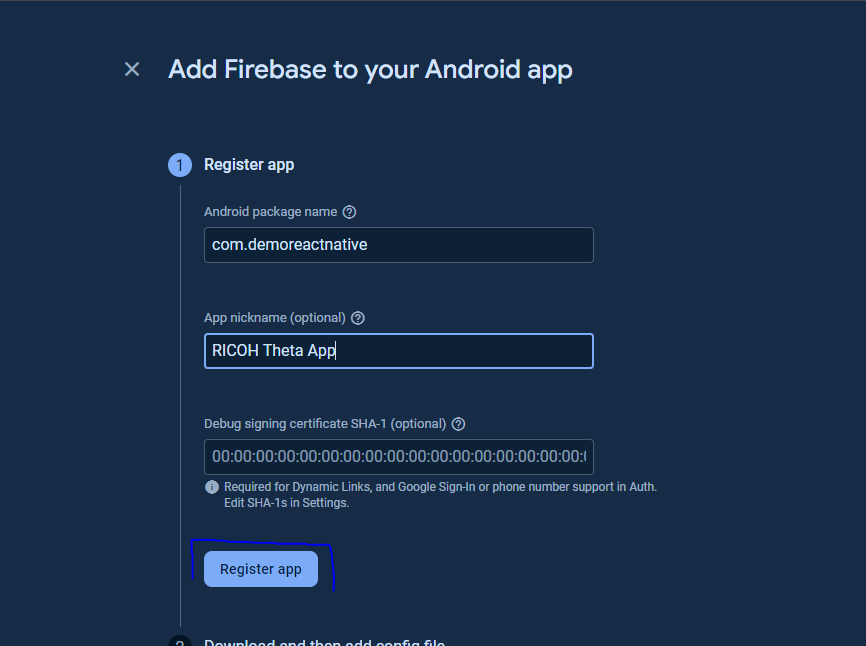
In the “add app” interface, we are expected to fill out some input fields. -
Adding Firebase to your Android app
Filling out the input fields for the “add app” session.
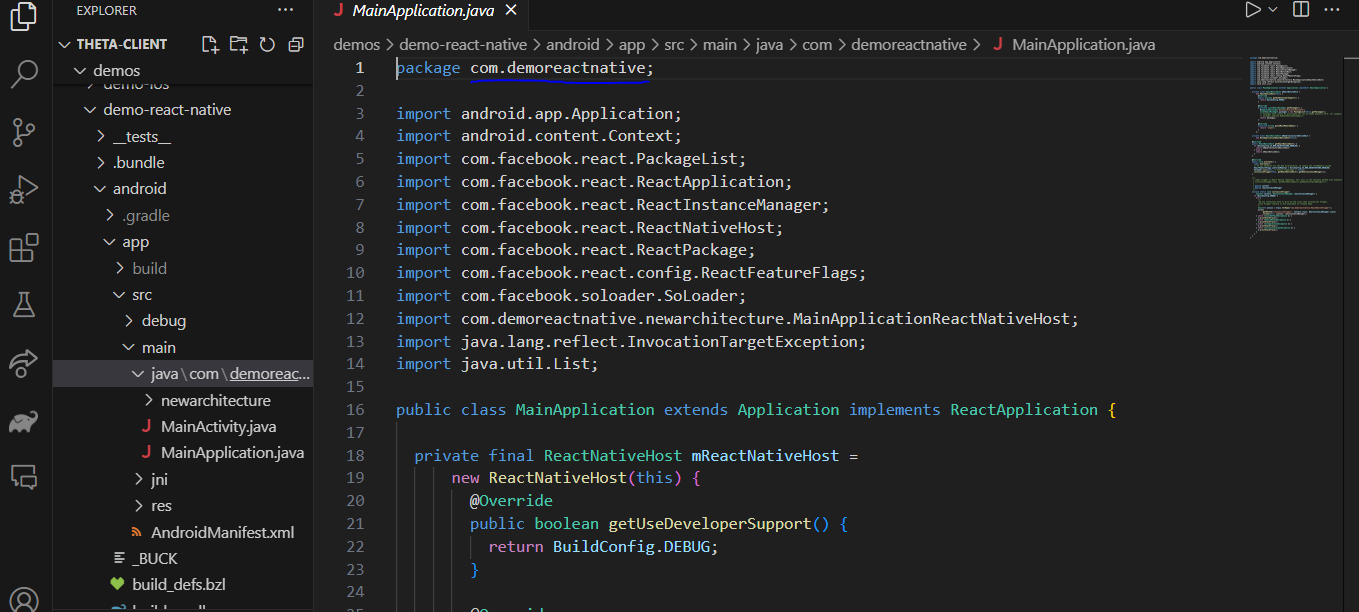
a. Inputting the Android package name: To get the Android package name, navigate like this: demo-react-native > android > app > src > main > java > com > demoreactnative > MainApplication.java
The package name is “com.demoreactnative.” Go back to Firebase and add it. You can then add an app name or leave it blank. Finally, click on “Register app.”
-
Download and then add Config file
a. Download thegoogle-services.jsonfile from the Firebase Console.
b. Place this file in the/android/appdirectory of your React Native project.
Note: To speed things up, you can download the file directly to theappdirectory, a subdirectory of theandroiddirectory.
c. Click on next to skip the Firebase SDK plugins.

Initializing and Installing Firebase into the Project
-
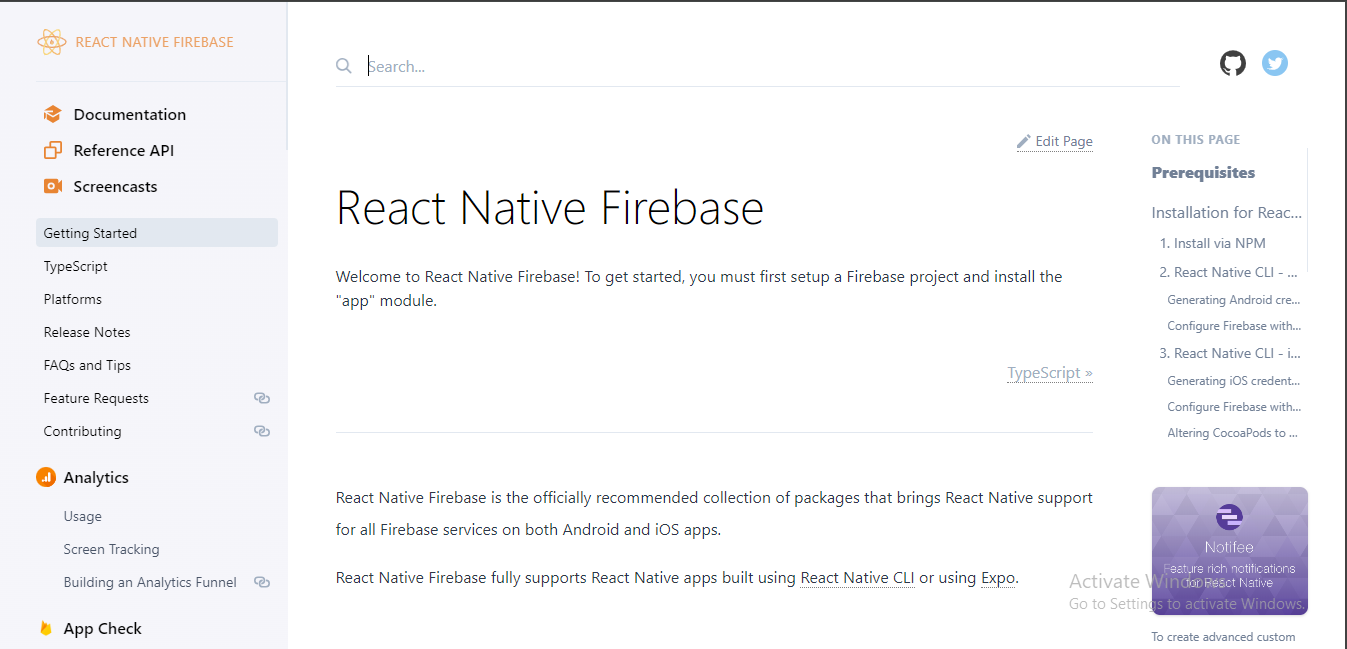
Query your browser to search for “react native firebase”, then click on the first link.
-
Install the React Native Firebase “app” module at the root of your React Native project—”demos/demo-react-native”—with NPM or Yarn.
# Using npm

npm install --save @react-native-firebase/app

# Using Yarn

yarn add @react-native-firebase/app
Here, we are using yarn.
-
Place the
google-services.jsonfile from the Firebase Console into/android/app.Thus, thegoogle-services.jsonfile location becomes/android/app/google-services.json. -
Navigate to the
demo-react-nativedirectory and first access thebuild.gradlefile in the app’s androidroot folder—demo-react-native`.
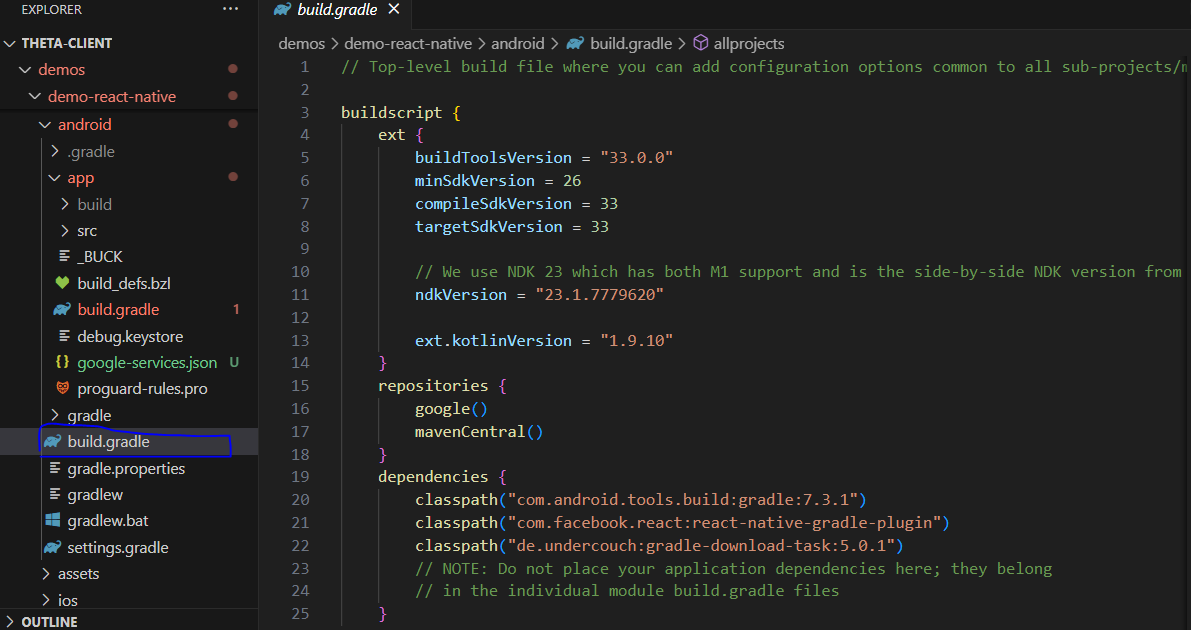
Add the following classpath to the dependencies section of the /android/build.gradle file:
classpath 'com.google.gms:google-services:4.4.2'
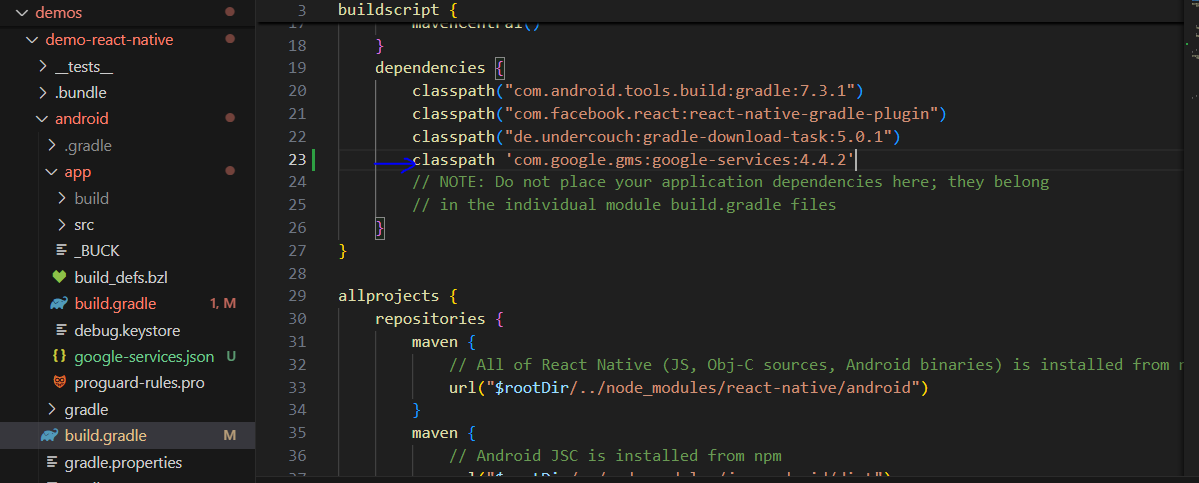
Save it to reconfigure the build file.
Now, to the /android/app/build.gradle file,
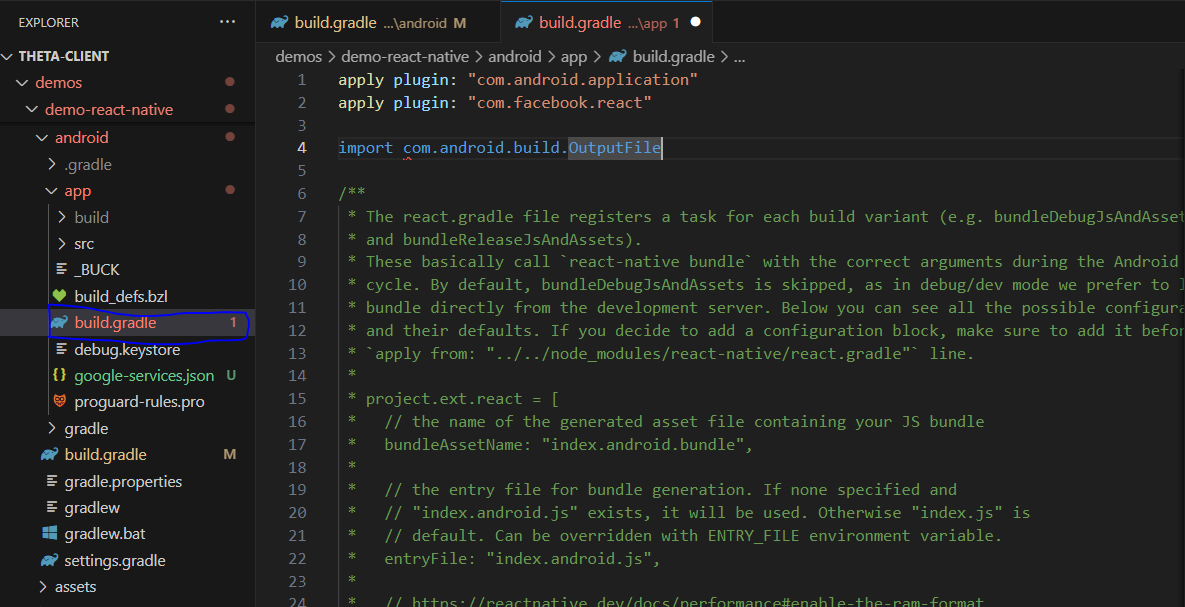
Add the Googe service plugin to the top of the file:
apply plugin: 'com.google.gms.google-services'
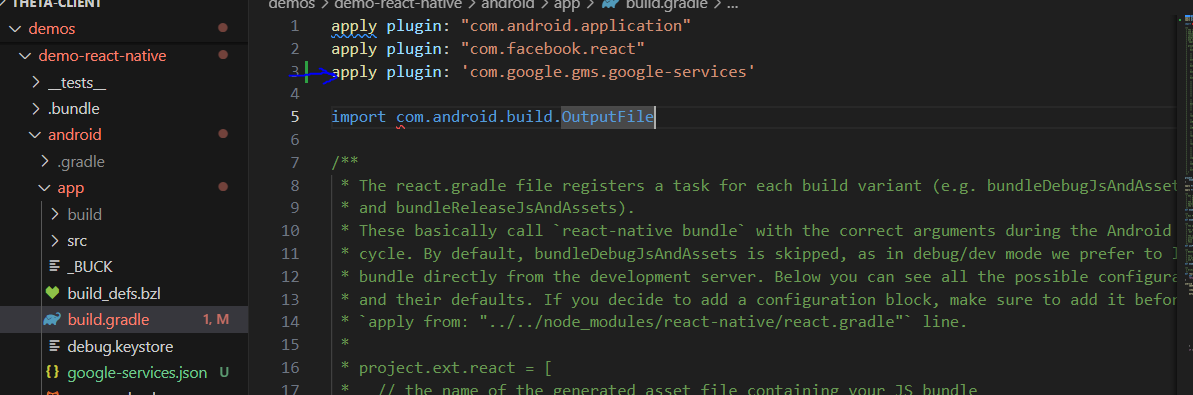
Save it to reconfigure the build.
Recap
-
Add the Google Services classpath dependency in
android/build.gradle. -
Apply the Google Services plugin in
android/app/build.gradle
Now that we have everything all set run:
yarn android
This will reconfigure the whole build since a lot has been changed.
Implementing the FireStore to handle the data storage for our app
-
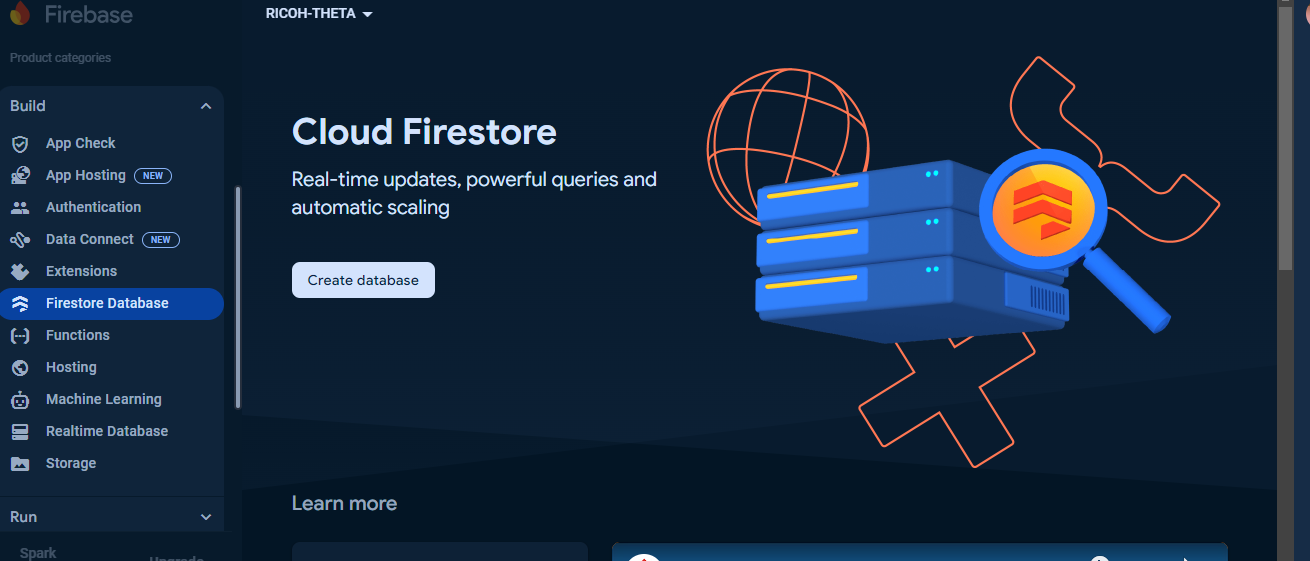
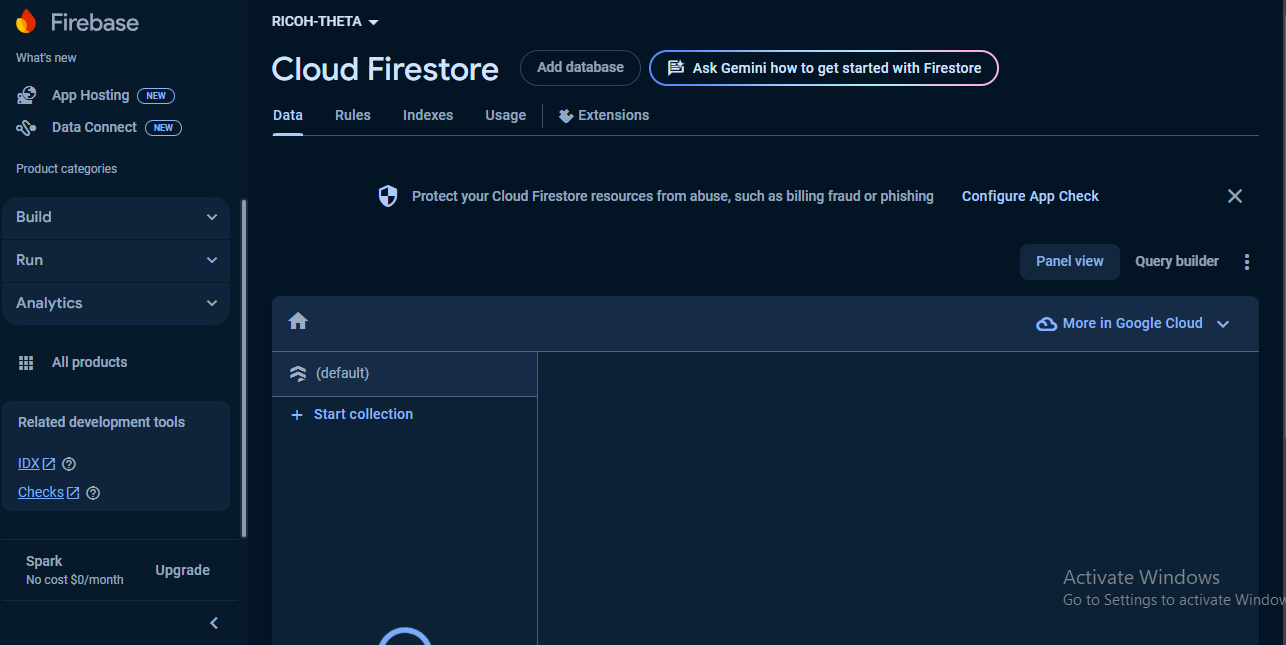
Go back to the Firebase Console and access the Firebase Database - Firestore from the “Build” dropdown.
-
Click on the “Create database” button. Follow the instructions thereafter and choose the default location. For this guide, I chose the “test mode” option instead of “Production mode.” Finally, click “Create,” and your Firebase Database will be created.
-
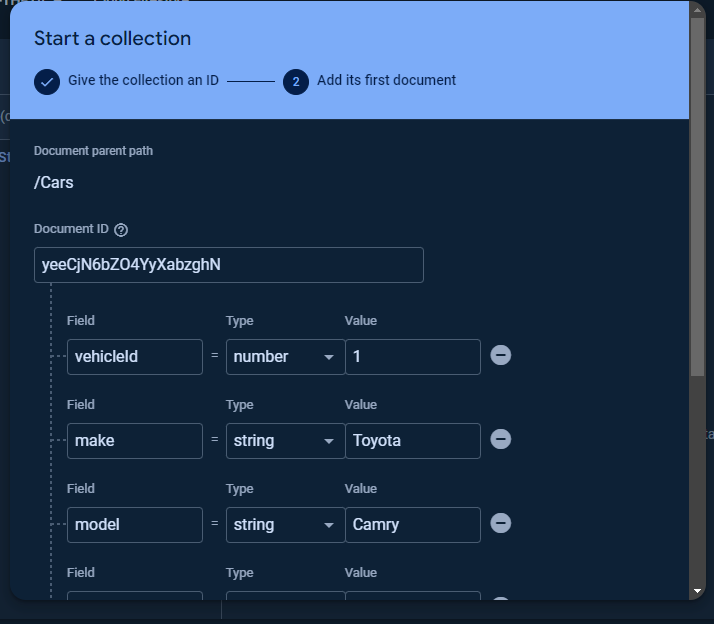
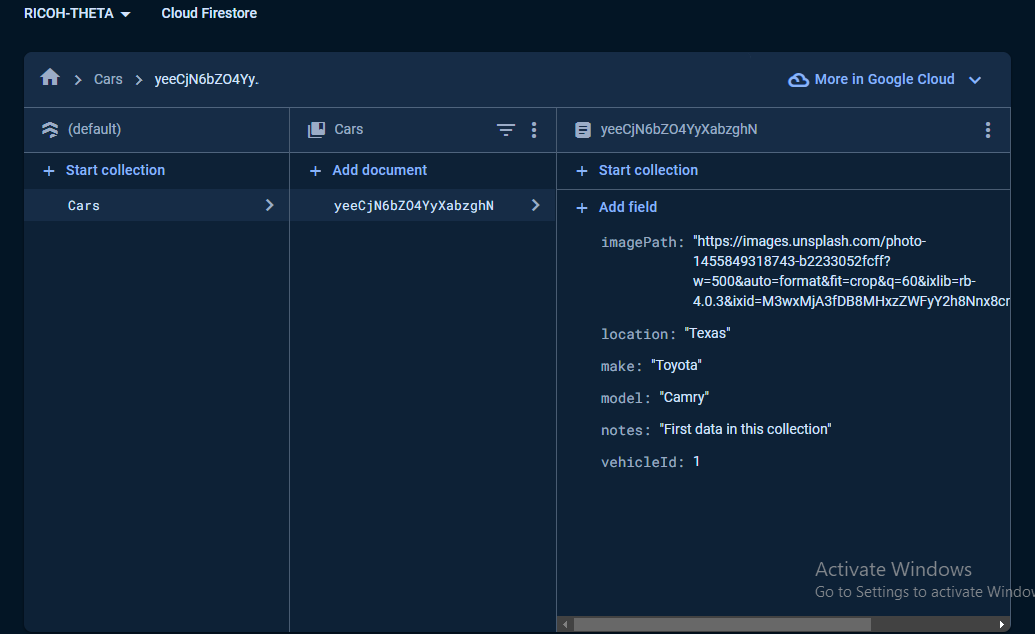
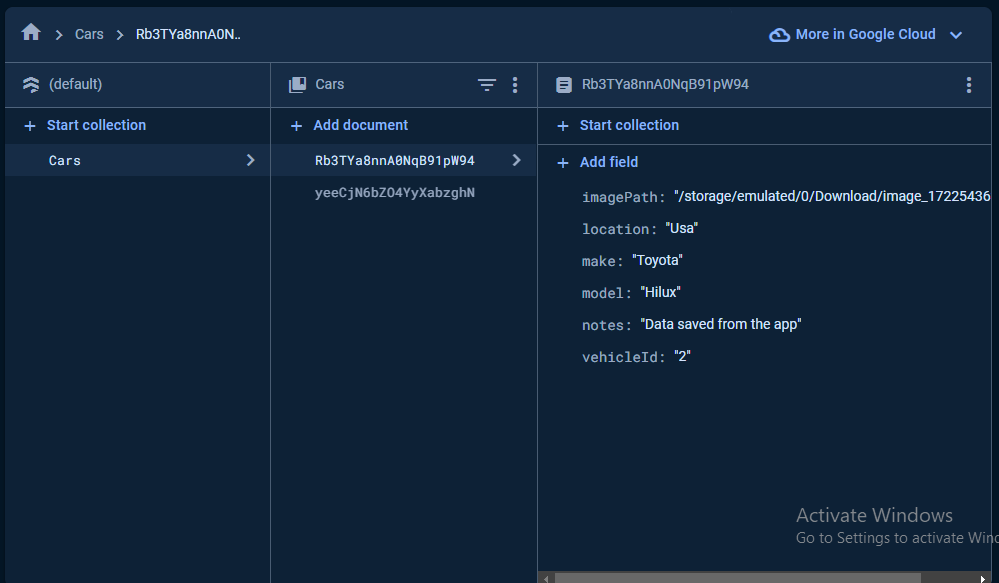
Start a collection inside FireStore itself. Give it a collection ID named “Cars” since that is what we are dealing with. Then, fill out the input fields of the Collection. You can add a Document ID or use the “auto-id” option from FireStore, which I used. Now, create a sample document under the Collection. Choose a field—“vehicleId”, “make”, “model”, “location”, “notes”, “imagePath”.
-
Save and view the dashboard.
Next, we want to be able to do what we just did above directly from the code, in the sense that once the user clicks on the “save” button in the Data Center form, the data automatically gets saved in our FireStore Collection. -
Install FireStore into your React Native app.
yarn add @react-native-firebase/firestore
Saving/Getting data from FireStore
First, let us try to get the data we manually added to firestore.
-
Fetching the data currently in the Collection
A. Initialize firestore in the project. To test faster, let’s use a screen we can easily access: the home screen, embedded in theMainMenu.tsxfile.
Note: When I installedfirestoredirectly from@react-native-firebase/firestore, I had an error saying firebase wasn’t initialized then I went ahead to create afirebase.jsfile inside thesrcdirectory. Thisfirebase.jsfile embeds the needed data for firebase configuration. Here is the content of the file:import firebase from "@react-native-firebase/app"; import firestore from "@react-native-firebase/firestore"; const firebaseConfig = { apiKey: "AIzaSyB2UodoTKyocvIG0ZVyRh6EvkHKyQEFGM0", projectId: "ricoh-theta-9e2cb", appId: "1:13705834856:android:c3b2731db6e8a29aa426dd", storageBucket: "ricoh-theta-9e2cb.appspot.com", }; if (!firebase.apps.length) { firebase.initializeApp(firebaseConfig); } export { firebase, firestore };Again, I got another error that the config data isn’t complete since it lacks a
databaseURl–this isn’t needed since we are using firestore, but it was requested, so I created a dummy url using myprojectId.Updated the
firebaseconfigobject to this:const firebaseConfig = { apiKey: "AIzaSyB2UodoTKyocvIG0ZVyRh6EvkHKyQEFGM0", authDomain: "ricoh-theta-9e2cb.firebaseapp.com", projectId: "ricoh-theta-9e2cb", storageBucket: "ricoh-theta-9e2cb.appspot.com", messagingSenderId: "13705834856", appId: "1:13705834856:android:c3b2731db6e8a29aa426dd", databaseURL: "https://ricoh-theta-9e2cb.firebaseio.com", // Dummy URL };And finally, no more errors.
In addition, you can get the values for the
firebaseconfigobject from both thegoogle-services.jsonfile and theappsection in the project settings.B. Next, recall that we are using the first screen of the app demo to access the data in the
Carscollection. Navigate to theMainMenu.tsxfile and create an asynchronous function to fetch the data.
First, import firestore from thefirebase.jsfile:import { firestore } from './firebase';The asynchronous function:
const fetchData = async () => {
    try {
      const carCollections = await firestore().collection("Cars").get();
      if (carCollections.empty) {
        console.log("No matching documents.");
        return;
      }
      carCollections.forEach(doc => {
        console.log(doc.id, "=>", doc.data());
      });
    } catch (error) {
      console.error("Error fetching data: ", error);
    }
 };
Note that in FireStore, data is stored using a
document(doc for short) embedded in acollection. A collection can have multiple documents, and a document can also have a collection.Function Definition:
The functionfetchDatais defined as an asynchronous function using theasynckeyword. This allows the use ofawaitinside the function to handle asynchronous operations more naturally.a. Fetching the Collection:
const carCollections = await firestore().collection("Cars").get();Explanation: This line initiates a query to Firestore to get all documents in the “Cars” collection.
Await: Theawaitkeyword pauses the execution of the function until the promise returned byfirestore().collection("Cars").get()resolves.
Result: The result,carCollections, represents the query snapshot, which contains all the documents retrieved from the “Cars” collection.b. Iterating Through the Documents:
carCollections.forEach(doc => { console.log(doc.id, "=>", doc.data()); });Explanation: If the “Cars” collection is not empty, this line iterates through each document in the
carCollectionsquery snapshot.
Action: For each document, it logs the document’s ID and data to the console. Thedoc.idrepresents the document’s unique identifier, anddoc.data()retrieves the data stored in the document.C. Now, let’s run the
fetchDatafunction by embedding it inside theuseEffect.This will automatically trigger the function once the component mounts.React.useEffect(() => { const subscription = AppState.addEventListener( 'change', handleAppStateChange, ); fetchData(); return () => { subscription.remove(); }; // eslint-disable-next-line react-hooks/exhaustive-deps }, []);Reload the metro terminal and ensure you are in the
MainMenu.tsxfile. You should get the current data in the Collection logged out.

Now that we see that Firebase and firestore work ideally in our build, as we have tested it in getting data from firestore (firebase database), you can clean the firestore code (the import and the asynchronous function) in the MainMenu.tsx file.
-
Saving data from the Data Center to the Firestore
Here, we are dealing with theDataCenter.tsxfile. When fetching the data, we used theget()method that firestore provides. Now that we want to add data to the database, we will use theadd()method.
Update thesaveDatafunction from this, which is presently usingasyncstorage:const saveData = async () => { const data = { vehicleId, make, model, location, notes, imagePath, }; try { const jsonValue = JSON.stringify(data); console.log(jsonValue); await AsyncStorage.setItem(`@vehicle_${vehicleId}`, jsonValue); Alert.alert("Data saved successfully"); navigation.goBack(); } catch (e) { console.error("Error saving data", e); Alert.alert('Failed to save data’); } };To this:
const saveData = async () => {
  const data = {
    vehicleId,
    make,
    model,
    location,
    notes,
    imagePath,
  };

  try {
    await firestore().collection("Cars").add(data);
    Alert.alert("Data saved successfully");
    navigation.goBack();
  } catch (e) {
    console.error("Error saving data", e);
    Alert.alert("Failed to save data");
  }
};
Import firestore at the top of the
DataCentercomponentimport { firestore } from './firebase';In the function above, we use the
add()method to push data from the Data Center to theCarscollection. Whenever the button that triggers thesaveDatafunction is clicked, any new data submitted will create a new document under theCarscollection and add the data.
Testing the new Storage Method
- Click on the “list photos” button to launch the Phot list page
- Click on the download button for a particular photo, then wait for the alert that the download was successful. You will then be taken to the Data Center.
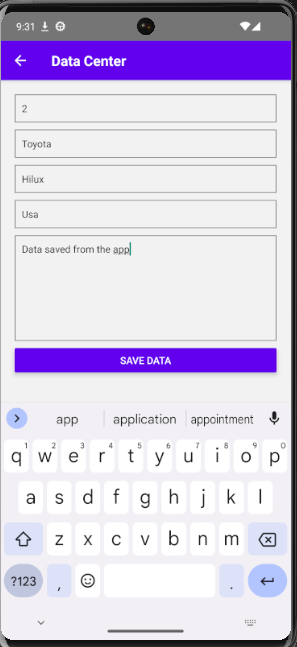
- Fill out the input fields in the Data Center and save them.
- Next, head to the firestore and check if the newly added data has been added to your
Carscollection.
Conclusion
This guide explored how to store data from our React Native app seamlessly in Firestore. We transitioned from using AsyncStorage to leveraging Firestore’s robust and scalable cloud storage solutions. By following the outlined steps, you can save, retrieve, and manage your app’s data more efficiently using Firestore. This integration enhances data persistence and allows real-time synchronization and advanced querying capabilities, ultimately leading to a more dynamic and responsive user experience.
If you enjoyed this, please like, share, and comment!