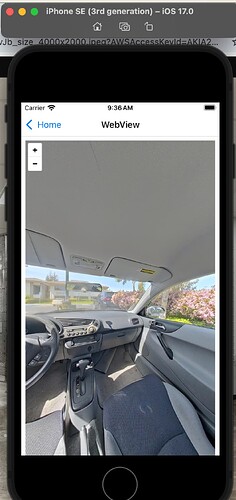
This article will practically represent the usage of a 360-degree Image Viewer. In my last article, I wrote about 5 free 360° Image Viewers for JavaScript Web and Mobile. If you thoroughly check it out, you’d agree that most Viewers aren’t supported on mobile but can be integrated using WebView.
As I said above, this is a practical guide and will be on the usage of the Pannellum Viewer.
Bootstrapping the Project
We’d be using Expo to set this build-up because according to the official React Native Docs, it is advisable to use a framework just like when using React it is also advisable to use a framework and currently most people use Vite for that. For this reason, we’d also be using a Framework for settings up here which will be Expo.
Run the command below to bootstrap the build:
$ npx create-expo-app@latest
Thanks to Expo, instead of cleaning up the boilerplate code by deleting it, you can simply run the command below to reset the project to something cleaner and you can pick it up from there. Check out this link to better understand the resetting feature.
$ npm run reset-project
Now open your Android emulator and run npm start to start the build.
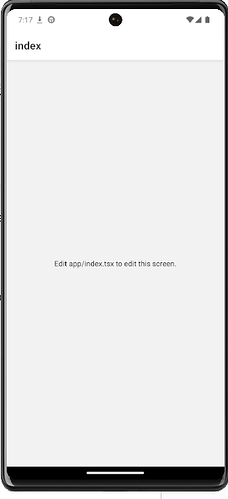
When you run the program, your output should be exactly like the screenshot below:
Installing the needed Dependencies
We would need to install the WebView package for React Native and also a file system that Expo provides us with.
The use:
react-native-webview: This package will load the web-based RICOH360 viewer.expo-file-system: This will help download and save the 360° image files locally for offline use.
Run the command below to install the needed dependencies:
$ npm install react-native-webview

$ npm install expo-file-system
Now, let’s go straight into the building.
Create an html file which will be loaded into the WebView.
Building the Application
Step 1: Set Up Pannellum in the build
Create a local HTML File for Marzipano:
- Create a folder named
assetsin your root directory if you don’t have it, then add apannellum-viewer.htmlfile to it. - Save your 360° image inside the
assetsfolder - Add pannellum’s CDN link inside your viewer setup code in
pannellum-viewer.htmland initialize the Viewer to display the 360° image:
In the html file above, we added the external links for Pannellum styles (this automatically imports the styles needed for the Panorama to be well structured) and Pannellum library (this gives users access to the library via the CDN link). Next, we initialized a Pannellum viewer by creating a new Pannellum Viewer instance and linking it to a<!DOCTYPE html> <html lang="en"> <head> <meta charset="UTF-8"> <meta name="viewport" content="width=device-width, initial-scale=1.0"> <title>Pannellum 360 Viewer</title> <link rel="stylesheet" type="text/css" href="https://cdn.jsdelivr.net/npm/pannellum@2.5.6/build/pannellum.css"> <script type="text/javascript" src="https://cdn.jsdelivr.net/npm/pannellum@2.5.6/build/pannellum.js"></script> <style> body, html { margin: 0; padding: 0; height: 100%; width: 100%; } #panorama { width: 100%; height: 100vh; } </style> </head> <body> <!-- Container for the Pannellum viewer --> <div id="panorama"></div> <script> pannellum.viewer('panorama', { "type": "equirectangular", "panorama": "360-degree.jpeg", "autoLoad": true, "autoRotate": -2, }); </script> </body> </html><div>element with the id “panorama”. It sets up the viewer by defining the image source using thepanoramaattribute, which specifies the path to a 360-degree image to be displayed. Thetypeis set toequirectangular, which is the most suitable for 360-degree images. In addition, we set the Viewer to automatically load and rotate itself.
Step 2: Load up the WebView to run the Pannellum Viewer
Here, you’d import the WebView to run the html file inside of the assets folder. We’d be using the main file of this build – the index.tsx file inside of the App folder.
-
Import the needed packages/modules
import { View, StyleSheet, Text } from 'react-native'; import { WebView } from 'react-native-webview'; -
Next, we’d embed the
WebViewinto this component and pass the props and values to it. The WebView will take in three props such as source (the file path of the html file), styles (the styles you want to apply to the WebView) and lastly the originWhitelist (this is what ensures that WebView can display content from any origin, allowing it to function correctly for local files).import { View, StyleSheet } from 'react-native'; import { WebView } from 'react-native-webview'; export default function Index() { return ( <View style={styles.container}> <WebView originWhitelist={['*']} source={require('../assets/pannellum-viewer.html')} style={styles.webview} /> </View> ); } const styles = StyleSheet.create({ container: { flex: 1, }, webview: { flex: 1, width: '100%', height: '100%', }, });Note, that React Native WebView is a package/library that helps us embed web-based instances/pages into a mobile build. It is usually used when one wants to quickly connect/access a web-based external page or when one wants to replicate a web experience on mobile.
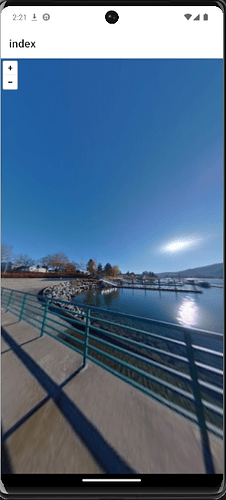
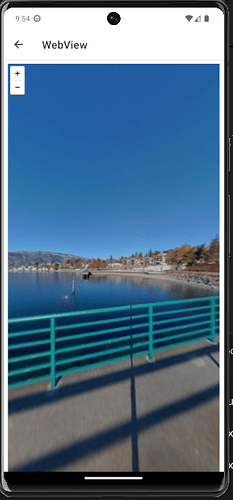
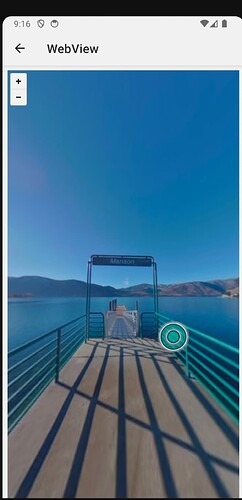
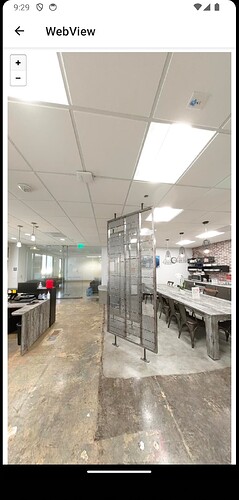
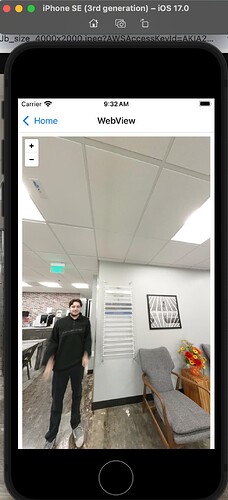
Here is what your build should display:
Step 3: Configure Expo for Offline Access
Expo supports offline assets bundling. With this feature, your file in the assets folder also gets bundled during the build process of the app, i.e. when you run npm build.
The configuration will be done in the app.json file specifically in the expo object. Add this to whatever you have in your expo object just before the ios object there:
"assetBundlePatterns": [
     "assets/**/*"
]
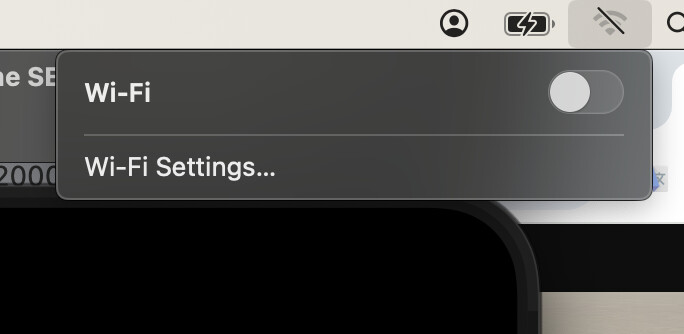
To confirm, switch off your data and see if you can still load up the html file and image.
Before proceeding to the next section in this tutorial, I’d like to bring in a section that explains my view and reason for using this particular viewer.
Why Pannellum Viewer
Just so you know before actually settling to use the Pannellum Viewer, I had already tried out two other robust VIewers but it is either they aren’t working perfectly well or there are some constraints to its usage. Pannellum stands to be very lightweight and also, the fact that one of the methods for integration is via the CDN external links makes it very suitable for a scenario like this (since we are using WebView to load it up). With this, all the needed codes can be written inside a single html file and then embedded in the WebView component.
Tips: One thing that I did which was quite helpful was trying to write the code (vanilla form – i.e. without frameworks) for the web first and testing it out then proceeding to use that tested code version in the mobile build. This helped me to easily understand where the bug was coming from especially when I tried out a Viewer and I thought that the issue was the code not knowing that it seemed it wasn’t just loading up via WebView. In other words, when doing such, try as much as possible to write the code for the Viewer to work on the web, after which you can then migrate that code to your mobile build.
Back to the subject matter…
Step 4: Making Image Support Offline mode
Here, the primary aim is to be able to access the image even when we don’t have an internet connection. There are various methods by which we can achieve this, but for this article, we’d be using the filesystem to write the logic for downloading and accessing the image when we are offline.
In this section, there will be some modifications to the former code. One is that we’d load our html directly into the WebView and not use the external file method currently used. Also, you will need an online version of the image you are presently using in the build. For me, I am using a 360-degree image from Unsplash and I was able to get the link.
The logic approach: When we are online i.e. connected to the internet, the Viewer uses the online version of the 360-degree image to display the image and also download a local version of that image to the filesystem where it will be accessed when there is no internet connection.
-
Import the filesystem from the expo at the very top in your
index.tsxfileimport * as FileSystem from 'expo-file-system'; -
Next, we’d create a function that will handle the logic for downloading and accessing the images locally when offline.
const [base64Image, setBase64Image] = useState<string | null>(null);
const fileUri = FileSystem.documentDirectory + '360-degree.jpg'; // Local file path

// Function to load the image (download if necessary)
try {
      // Check if the image already exists locally
      const fileInfo = await FileSystem.getInfoAsync(fileUri);

      if (fileInfo.exists) {
        // If the file exists, read it as base64 and use it
        const base64 = await FileSystem.readAsStringAsync(fileUri, {
          encoding: FileSystem.EncodingType.Base64,
        });
        setBase64Image(`data:image/jpeg;base64,${base64}`);
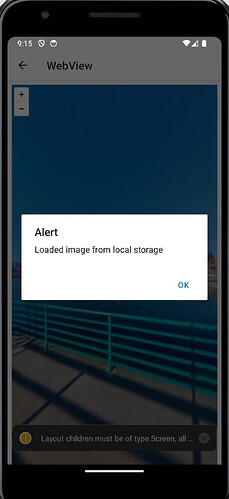
        alert("Loaded image from local storage");
      } else {
        // If the file doesn't exist, download it
        const { uri } = await FileSystem.downloadAsync(
          'https://images.unsplash.com/photo-1557971370-e7298ee473fb?ixid=MXwxMjA3fDB8MHxzZWFyY2h8M3x8MzYwfGVufDB8fDB8&ixlib=rb-1.2.1&w=1000&q=80',
          fileUri
        );
        const base64 = await FileSystem.readAsStringAsync(uri, {
          encoding: FileSystem.EncodingType.Base64,
        });
        setBase64Image(`data:image/jpeg;base64,${base64}`);
        alert("Downloaded and saved image");
      }
    } catch (error) {
      console.error("Error downloading or loading image: ", error);
    }
}
This code is responsible for downloading a 360-degree image from a URL, converting it to a base64 string, and caching it locally to support offline access. The conversion to base64 is necessary because the Pannellum viewer, running inside a WebView, cannot directly access local
file://URIs on Android due to security restrictions. By converting the image to base64, we can embed the image data directly into the HTML as an inline string, bypassing these limitations.The path for downloading the image is defined using
FileSystem.documentDirectory + '360-degree.jpg',which stores the image in the app’s local storage. Before downloading, the code checks if the image already exists usingFileSystem.getInfoAsync(). If it exists, the image is read from the local path and converted to base64 for display, ensuring offline functionality. If the image doesn’t exist, it’s downloaded from the URL, converted, and saved for future use. This approach guarantees that after the first download, the image can be accessed offline by using the cached local file.If you are working with RICOH THETA images, you can get the list of your images then loop the list and dynamically pass it to the Viewer.
-
Create a loading UI (spinner) to be displayed to the users while trying to download the image.
if (!base64Image) {
    // Show a loading spinner while the image is being downloaded or loaded
    return (
      <View style={{ flex: 1, justifyContent: 'center', alignItems: 'center' }}>
        <ActivityIndicator size="large" color="#0000ff" />
      </View>
    );
 }
In the code above, the conditional
if (!base64Image)checks whether the image has been successfully loaded or downloaded and converted to a base64 string. If thebase64Imageis stillnull(i.e., the image is not yet available), the app displays a loading spinner using theActivityIndicatorcomponent, centered within aView. This spinner gives the user visual feedback that the image is being processed, either through downloading or loading from local storage, and ensures the interface remains responsive while waiting for the image to be ready. -
Lastly, we’d load up the html file directly into the WebView and pass the converted string url of the image path to Pannellum
return (
    <View style={{ flex: 1 }}>
      <WebView
        originWhitelist={['*']}
        source={{
          html: `
            <!DOCTYPE html>
            <html>
            <head>
              <meta name="viewport" content="width=device-width, initial-scale=1.0">
              <title>Pannellum Viewer</title>
              <link rel="stylesheet" type="text/css" href="https://cdn.jsdelivr.net/npm/pannellum@2.5.6/build/pannellum.css">
              <script src="https://cdn.jsdelivr.net/npm/pannellum@2.5.6/build/pannellum.js"></script>
            </head>
            <body>
              <div id="panorama" style="width: 100%; height: 100vh;"></div>
              <script>
                pannellum.viewer('panorama', {
                  "type": "equirectangular",
                  "panorama": "${base64Image}",
                  "autoLoad": true,
                  "autoRotate": -2,
                });
              </script>
            </body>
            </html>
          `,
        }}
        style={{ flex: 1 }}
      />
    </View>
  );
The overall code for the
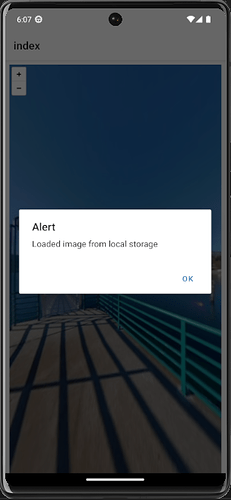
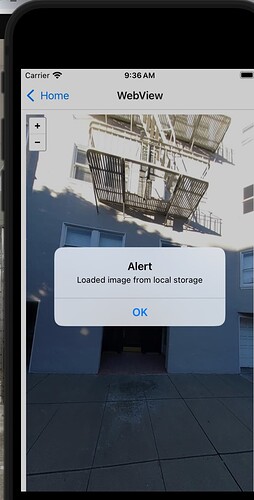
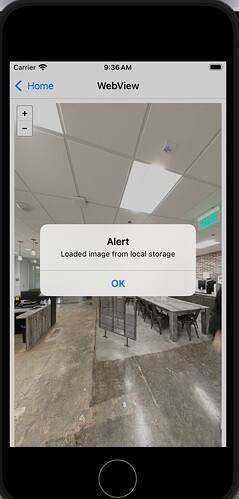
index.tsxfile:import * as FileSystem from 'expo-file-system'; import { useEffect, useState } from 'react'; import { View, ActivityIndicator } from 'react-native'; import { WebView } from 'react-native-webview'; export default function PannellumViewer() { const [base64Image, setBase64Image] = useState<string | null>(null); const fileUri = FileSystem.documentDirectory + '360-degree.jpg'; // Local file path // Function to load the image (download if necessary) async function loadImage() { try { // Check if the image already exists locally const fileInfo = await FileSystem.getInfoAsync(fileUri); if (fileInfo.exists) { // If the file exists, read it as base64 and use it const base64 = await FileSystem.readAsStringAsync(fileUri, { encoding: FileSystem.EncodingType.Base64, }); setBase64Image(`data:image/jpeg;base64,${base64}`); alert("Loaded image from local storage"); } else { // If the file doesn't exist, download it const { uri } = await FileSystem.downloadAsync( 'https://images.unsplash.com/photo-1557971370-e7298ee473fb?ixid=MXwxMjA3fDB8MHxzZWFyY2h8M3x8MzYwfGVufDB8fDB8&ixlib=rb-1.2.1&w=1000&q=80', fileUri ); const base64 = await FileSystem.readAsStringAsync(uri, { encoding: FileSystem.EncodingType.Base64, }); setBase64Image(`data:image/jpeg;base64,${base64}`); alert("Downloaded and saved image"); } } catch (error) { console.error("Error downloading or loading image: ", error); } } useEffect(() => { // Load the image when the component mounts loadImage(); }, []); if (!base64Image) { // Show a loading spinner while the image is being downloaded or loaded return ( <View style={{ flex: 1, justifyContent: 'center', alignItems: 'center' }}> <ActivityIndicator size="large" color="#0000ff" /> </View> ); } return ( <View style={{ flex: 1 }}> <WebView originWhitelist={['*']} source={{ html: ` <!DOCTYPE html> <html> <head> <meta name="viewport" content="width=device-width, initial-scale=1.0"> <title>Pannellum Viewer</title> <link rel="stylesheet" type="text/css" href="https://cdn.jsdelivr.net/npm/pannellum@2.5.6/build/pannellum.css"> <script src="https://cdn.jsdelivr.net/npm/pannellum@2.5.6/build/pannellum.js"></script> </head> <body> <div id="panorama" style="width: 100%; height: 100vh;"></div> <script> pannellum.viewer('panorama', { "type": "equirectangular", "panorama": "${base64Image}", "autoLoad": true, "autoRotate": -2, }); </script> </body> </html> `, }} style={{ flex: 1 }} /> </View> ); }Now, when you save up the new code and reload your build, you’ll see an alert that says “Downloaded and saved image”. Subsequently, when you reload the build or even off your data connection you’ll get a UI identical to the screenshot below:
Dynamic Image Loading with React Navigation in Expo: Passing URL Parameters to Pannellum Viewer
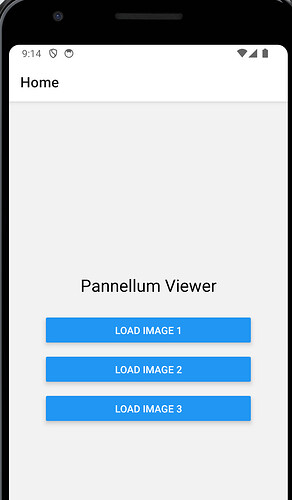
Now, one thing that comes to mind is how then can we make the image URL dynamic. We want to be able to pass in the URL dynamically from a React Native UI (here, we have chosen a button).
The logic: To achieve this, we can modify the setup to have a Home page that contains the buttons for selecting the image URL, and then navigate to the Index page (which is the viewer) while passing the URL as a prop. We’ll make use of the Expo Router (which you’re already using) to pass parameters when navigating between screens.
Here are the steps to achieve the aim of this section:
Step 1: Create a New Home Page
First, create a new file named index.tsx for the home page, where you’ll display the buttons. Change the other index.tsx file to viewer.tsx
import { View, Button, Text, StyleSheet } from 'react-native';
import { useRouter } from 'expo-router';

export default function Index() {
  const router = useRouter();

  return (
    <View style={styles.container}>
      <Text style={styles.headerText}>Pannellum Viewer</Text>
      <View style={styles.buttonContainer}>
        <Button
          title="Load Image 1"
          onPress={() => router.push({ pathname: './viewer', params: { url: 'https://images.unsplash.com/photo-1557971370-e7298ee473fb?ixid=MXwxMjA3fDB8MHxzZWFyY2h8M3x8MzYwfGVufDB8fDB8&ixlib=rb-1.2.1&w=1000&q=80' } })}
        />
      </View>
      <View style={styles.buttonContainer}>
        <Button
          title="Load Image 2"
          onPress={() => router.push({ pathname: './viewer', params: { url: 'https://images.unsplash.com/photo-1590874181851-a2b16c7e1786?w=500&auto=format&fit=crop&q=60&ixlib=rb-4.0.3&ixid=M3wxMjA3fDB8MHxzZWFyY2h8OHx8MzYwJTIwZGVncmVlfGVufDB8fDB8fHww' } })}
        />
      </View>
      <View style={styles.buttonContainer}>
        <Button
          title="Load Image 3"
          onPress={() => router.push({ pathname: './viewer' , params: { url: 'https://images.unsplash.com/photo-1645895581819-224a62ee03c3?w=500&auto=format&fit=crop&q=60&ixlib=rb-4.0.3&ixid=M3wxMjA3fDB8MHxzZWFyY2h8MjB8fDM2MCUyMGRlZ3JlZXxlbnwwfHwwfHx8MA%3D%3D' } })}
        />
      </View>
    </View>
  );
}

const styles = StyleSheet.create({
  container: {
    flex: 1,
    justifyContent: 'center',
    alignItems: 'center',
    padding: 16,
  },
  headerText: {
    fontSize: 24,
    marginBottom: 20,
  },
  buttonContainer: {
    marginVertical: 10,
    width: '80%',
  },
});
In the code above, we used the useRouter() hook from the expo-router that allows you to navigate between screens. We’re also using router.push() to navigate to the viewer.tsx page, passing the selected URL as a parameter. In addition, for the buttons when they are clicked, they will navigate to the viewer.tsx file and pass a different URL for each.
Step 2: Modify the Layout (_layout.tsx)
Add the newly created file to the layout.
import { Stack } from 'expo-router';

export default function RootLayout() {
  return (
    <Stack>
      <Stack.Screen name="index" options={{ title: 'Home' }} /> {/* Home page */}
      <Stack.Screen name="viewer" options={{ title: 'WebView' }}/> {/* WebView page */}
    </Stack>
  );
}
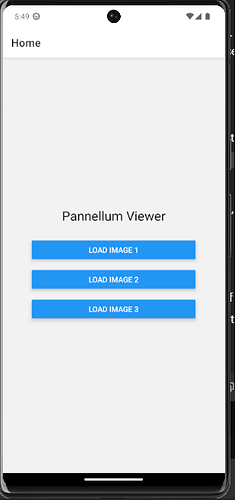
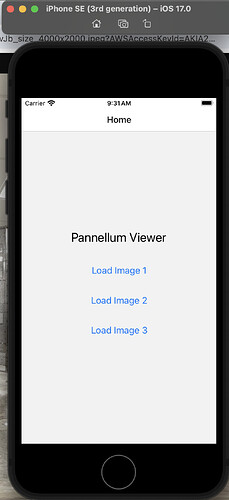
The home page:
Step 3: Modify the viewer.tsx File to Accept the Passed URL
Recall that in the index.tsx file, we are passing the image url via each button. Now, we want to be able to get those images to display them using the Viewer.
There isn’t so much of modification here. The major thing is just to get the image url and this will be done using the useSearchParams(). This hook retrieves the url parameter passed from the home page. The url is then used to download and display the image in the Pannellum viewer.
Import the Search Params method:
import { useLocalSearchParams, useRouter } from 'expo-router';
Destructure the parameters to get the url passed to it:
const { url } = useLocalSearchParams(); // Get the URL passed from home page
Next, we need to reload the loadImage function whenever the image url has changed via the click event of the buttons in the home page.
useEffect(() => {
    if (url) loadImage();
  }, [url]);
Here is the full code for viewer.tsx:
import { useLocalSearchParams, useRouter } from 'expo-router';
import { useEffect, useState } from 'react';
import { View, ActivityIndicator, Button, StyleSheet, TouchableOpacity, Text } from 'react-native';
import { WebView } from 'react-native-webview';
import * as FileSystem from 'expo-file-system';

export default function PannellumViewer() {
  const [base64Image, setBase64Image] = useState<string | null>(null);
  const { url } = useLocalSearchParams(); // Get the URL passed from the home page
  const fileUri = FileSystem.documentDirectory + '360-degree.jpg'; // Local file path
  const router = useRouter(); // For navigation

  async function loadImage() {
    if (!url) return; // No URL provided yet
    try {
      const fileInfo = await FileSystem.getInfoAsync(fileUri);

      if (fileInfo.exists) {
        const base64 = await FileSystem.readAsStringAsync(fileUri, {
          encoding: FileSystem.EncodingType.Base64,
        });
        setBase64Image(`data:image/jpeg;base64,${base64}`);
        alert("Loaded image from local storage");
      } else {
        const { uri } = await FileSystem.downloadAsync(url as string, fileUri);
        const base64 = await FileSystem.readAsStringAsync(uri, {
          encoding: FileSystem.EncodingType.Base64,
        });
        setBase64Image(`data:image/jpeg;base64,${base64}`);
        alert("Downloaded and saved image");
      }
    } catch (error) {
      console.error("Error downloading or loading image: ", error);
    }
  }

  useEffect(() => {
    if (url) loadImage();
  }, [url]);

  if (!base64Image) {
    return (
      <View style={{ flex: 1, justifyContent: 'center', alignItems: 'center' }}>
        <ActivityIndicator size="large" color="#0000ff" />
      </View>
    );
  }

  return (
    <View style={{ flex: 1 }}>
      {/* Absolute Back Button */}
      <TouchableOpacity onPress={() => router.back()} style={styles.backButton}>
        <Text style={styles.backButtonText}>Back</Text>
      </TouchableOpacity>

      {/* WebView to load Pannellum */}
      <WebView
        originWhitelist={['*']}
        source={{
          html: `
            <!DOCTYPE html>
            <html>
            <head>
              <meta name="viewport" content="width=device-width, initial-scale=1.0">
              <title>Pannellum Viewer</title>
              <link rel="stylesheet" type="text/css" href="https://cdn.jsdelivr.net/npm/pannellum@2.5.6/build/pannellum.css">
              <script src="https://cdn.jsdelivr.net/npm/pannellum@2.5.6/build/pannellum.js"></script>
            </head>
            <body>
              <div id="panorama" style="width: 100%; height: 100vh;"></div>
              <script>
                pannellum.viewer('panorama', {
                  "type": "equirectangular",
                  "panorama": "${base64Image}",
                  "autoLoad": true,
                  "autoRotate": -2,
                });
              </script>
            </body>
            </html>
          `,
        }}
        style={{ flex: 1 }}
      />
    </View>
  );
}

const styles = StyleSheet.create({
  backButton: {
    position: 'absolute',
    top: 40, // Adjust based on your design
    left: 10,
    backgroundColor: '#000',
    padding: 10,
    borderRadius: 5,
    zIndex: 1, // Ensures the button stays on top
  },
  backButtonText: {
    color: '#fff',
    fontSize: 16,
  },
});
There is presently an issue with the build. Recall that in the initial code, we tried to cache the image for offline mode. Now, when you click on any of those buttons, you don’t get the desired result because it is still loading up the image from the local storage.
To fix this, we’d have to set a unique fileUri based on the button that is clicked. We want to use the title from the button with the image’s name when downloading and caching that image. To do that, we’d need to add the title variable as part of the parameters sent to the viewer.tsx file.
Add the title variable to the button parameters in the index.tsx file. Like this:
import { View, Button, Text, StyleSheet } from 'react-native';
import { useRouter } from 'expo-router';

export default function Index() {
  const router = useRouter();

  return (
    <View style={styles.container}>
      <Text style={styles.headerText}>Pannellum Viewer</Text>
      <View style={styles.buttonContainer}>
        <Button
          title="Load Image 1"
          onPress={() => router.push({ pathname: './viewer', params: { url: 'https://images.unsplash.com/photo-1557971370-e7298ee473fb?ixid=MXwxMjA3fDB8MHxzZWFyY2h8M3x8MzYwfGVufDB8fDB8&ixlib=rb-1.2.1&w=1000&q=80', title: 'Load Image 1' } })}
        />
      </View>
      <View style={styles.buttonContainer}>
        <Button
          title="Load Image 2"
          onPress={() => router.push({ pathname: './viewer', params: { url: 'https://images.unsplash.com/photo-1590874181851-a2b16c7e1786?w=500&auto=format&fit=crop&q=60&ixlib=rb-4.0.3&ixid=M3wxMjA3fDB8MHxzZWFyY2h8OHx8MzYwJTIwZGVncmVlfGVufDB8fDB8fHww', title: 'Load Image 2' } })}
        />
      </View>
      <View style={styles.buttonContainer}>
        <Button
          title="Load Image 3"
          onPress={() => router.push({ pathname: './viewer', params: { url: 'https://images.unsplash.com/photo-1645895581819-224a62ee03c3?w=500&auto=format&fit=crop&q=60&ixlib=rb-4.0.3&ixid=M3wxMjA3fDB8MHxzZWFyY2h8MjB8fDM2MCUyMGRlZ3JlZXxlbnwwfHwwfHx8MA%3D%3D',title: 'Load Image 3' } })}
        />
      </View>
    </View>
  );
}

const styles = StyleSheet.create({
  container: {
    flex: 1,
    justifyContent: 'center',
    alignItems: 'center',
    padding: 16,
  },
  headerText: {
    fontSize: 24,
    marginBottom: 20,
  },
  buttonContainer: {
    marginVertical: 10,
    width: '80%',
  },
});
Navigate to the viewer.tsx file:
const { url, title } = useLocalSearchParams(); // Get both the URL and title from search params
Define the function to get the document directory. I am creating a special function for this so we don’t have a type error since the value can be null.
// Function to safely get the document directory
  const getDocumentDirectory = () => {
    if (FileSystem.documentDirectory) {
      return FileSystem.documentDirectory;
    } else {
      console.error("Document directory is null!");
      return ''; // or handle the case properly
    }
  };
We want to use the title variable we passed as a parameter, to define the file path. For example, if the title passed is “load Image 1”, we need a function to convert it into this: load_image_1.jpg. To do this, we’d also need to write the logic using regex.
const getFileUri = (title: string) => {
    const documentDirectory = getDocumentDirectory();
    return `${documentDirectory}${title.replace(/\s+/g, '_').toLowerCase()}.jpg`;
 };
Moving forward, let’s make use of the getFileUri() to detect the file path to download or fetch the local image.
Update your loadImage() function and useEffect hook with the code below:
async function loadImage() {
    if (!url || !title) return; // No URL provided yet
    const fileUri = getFileUri(title); // Use a unique file URI for each image
    try {
      const fileInfo = await FileSystem.getInfoAsync(fileUri);

      if (fileInfo.exists) {
        const base64 = await FileSystem.readAsStringAsync(fileUri, {
          encoding: FileSystem.EncodingType.Base64,
        });
        setBase64Image(`data:image/jpeg;base64,${base64}`);
        alert("Loaded image from local storage");
      } else {
        const { uri } = await FileSystem.downloadAsync(url as string, fileUri);
        const base64 = await FileSystem.readAsStringAsync(uri, {
          encoding: FileSystem.EncodingType.Base64,
        });
        setBase64Image(`data:image/jpeg;base64,${base64}`);
        alert("Downloaded and saved image");
      }
    } catch (error) {
      console.error("Error downloading or loading image: ", error);
    }
  }

  useEffect(() => {
    if (url && title) loadImage();
  }, [url, title]);
Go ahead, save and reload your app to see if things work properly now.
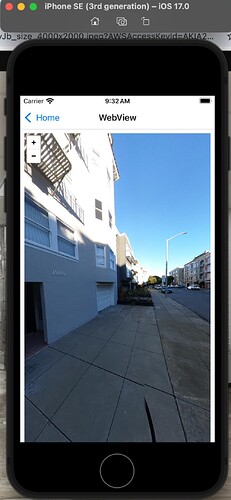
The first button should give this:
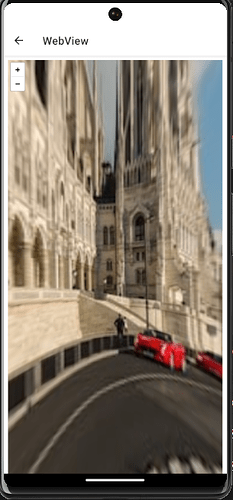
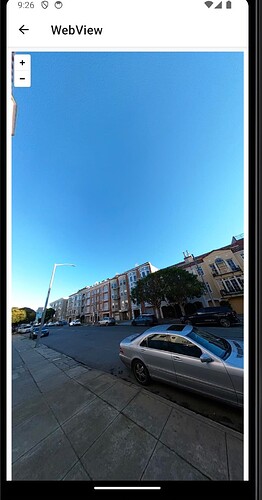
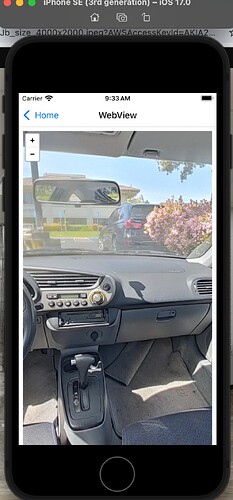
Second button:
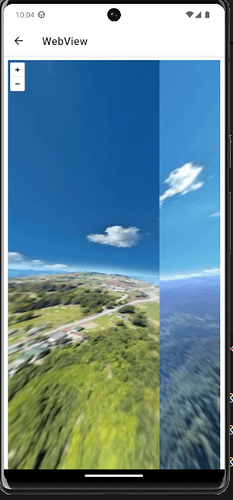
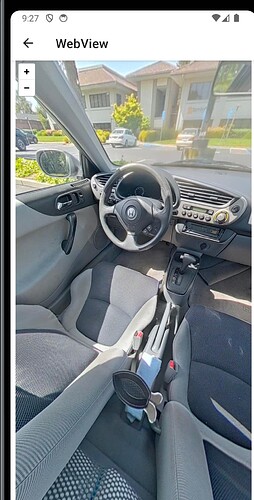
Third button:
Now, the image passed to the Viewer is dynamic and not hard coded. You can test further by switching off your internet connectivity to see that everything works fine even offline.
Conclusion
In this article, we talked about the use of Pannellum Viewer and how to render it in a mobile build using the WebView component. We proceeded to make the image URLs dynamic being controlled from a React Native UI (the buttons). You can modify the build by adding some customizations to the Pannellum Viewer. Here is the source code if you want to confirm some parts of the code.
Please do well to like, share and drop a comment!
