How to download an image from the URL in the camera and save it to local mobile app device storage using React Native and Theta-Client
With this comprehensive guide, you can effortlessly download and store images from a URL on your mobile device and gain insights into creating forms efficiently. The step-by-step instructions in this resource are practical and easy to follow, making it a valuable tool for individuals looking to download photos from the Theta-Client list. The guide’s structured approach ensures a seamless learning experience, enabling users to master these essential tasks quickly and effectively.
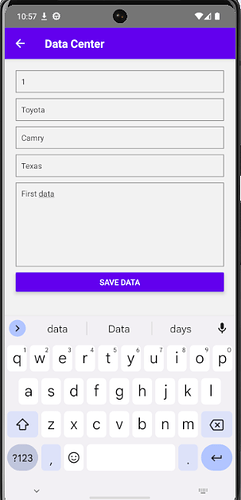
The target audience for this guide is those in car sales. Since our target audience is car dealers, we’re interested in grabbing input from the user and adding the following data to our images: vehicle ID number, make of car (like Toyota), model of car (like Camry), location of car (like Austin, Texas, USA), and additional notes. The target audience for this guide is for those in car sales, but this can be easily modified based on your preferences
This guide will follow up on the previous article; hence the previous one is a prerequisite. There, you will learn more about the project’s setup. If you have done that, come here, open the project in your IDE, then navigate to your terminal and make sure you are on the right path—“demos/demo-react-native.”
Launch your Android studio virtual device emulator, after which you should return to your project and run “yarn android.”
This guide will be divided into two parts—“Displaying and Verifying the Image URl” and “Downloading the images and creating the data center (form).”
Note this is a continuation of my last article. You need this to understand this guide.
Part 1: Displaying and Verifying the Image URL
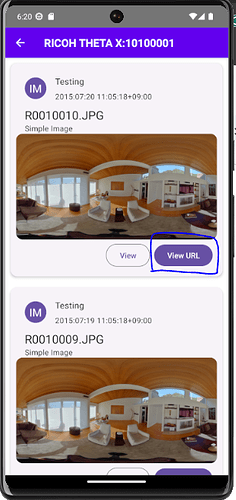
Since we need the url to be able to download the image, let’s try to detect what the url looks like. To do this, we will modify the content in the items variable by adding a new button named ViewURL:
<Button onPress={() => console.log(item.fileUrl)}>View URL</Button>
This new button does a simple task: logging out the fileUrl.
const items = files.map((item) => (
  <TouchableOpacity style={styles.cardWrapper} key={item.name}>
    <Card style={{ padding: 10 }}>
      <Card.Title
        title="Testing"
        subtitle={item.dateTimeZone}
        left={LeftContent}
      />
      <Card.Content>
        <Tex variant="titleLarge">{item.name}</Tex>
        <Tex variant="bodyMedium">
          {item?.imageDescription || "Simple Image"}
        </Tex>
      </Card.Content>
      <Card.Cover source={{ uri: item.thumbnailUrl }} />
      <Card.Actions>
        <Button onPress={() => onSelect(item)}>View</Button>
        <Button onPress={() => console.log(item.fileUrl)}>View URL</Button>
      </Card.Actions>
    </Card>
  </TouchableOpacity>
));
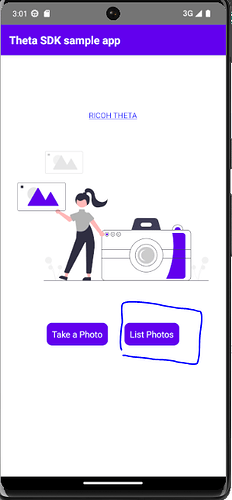
Save the newly added changes and reload the build. Open your Virtual device and click on “List Photos.”
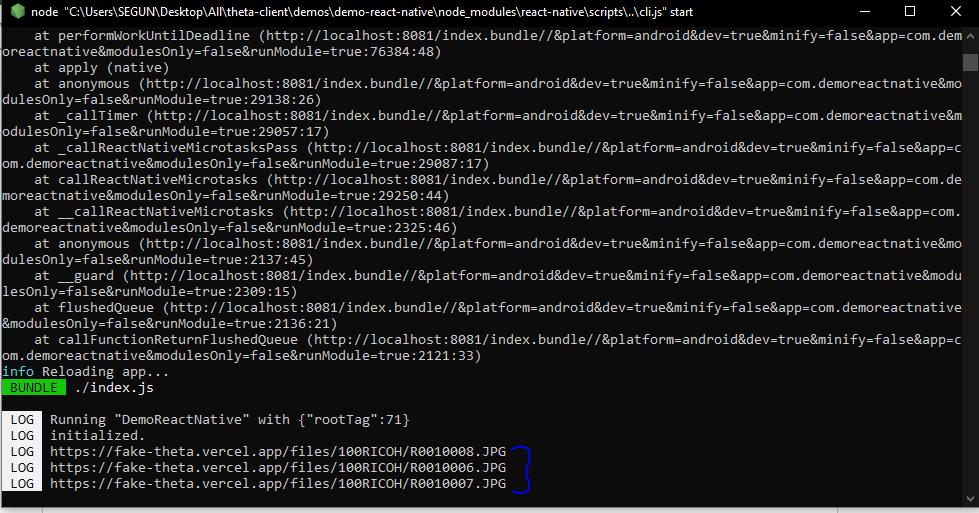
Next, click on the newly added button “View URL” for any of the listed images and confirm with the metro environment what was logged out.
For instance, I clicked on the sixth, seventh and eighth images in the list and got these URLs. Also, note that your url might not be in the same format if you are not using the Fake API endpoint in your build.
Verify the Image URL
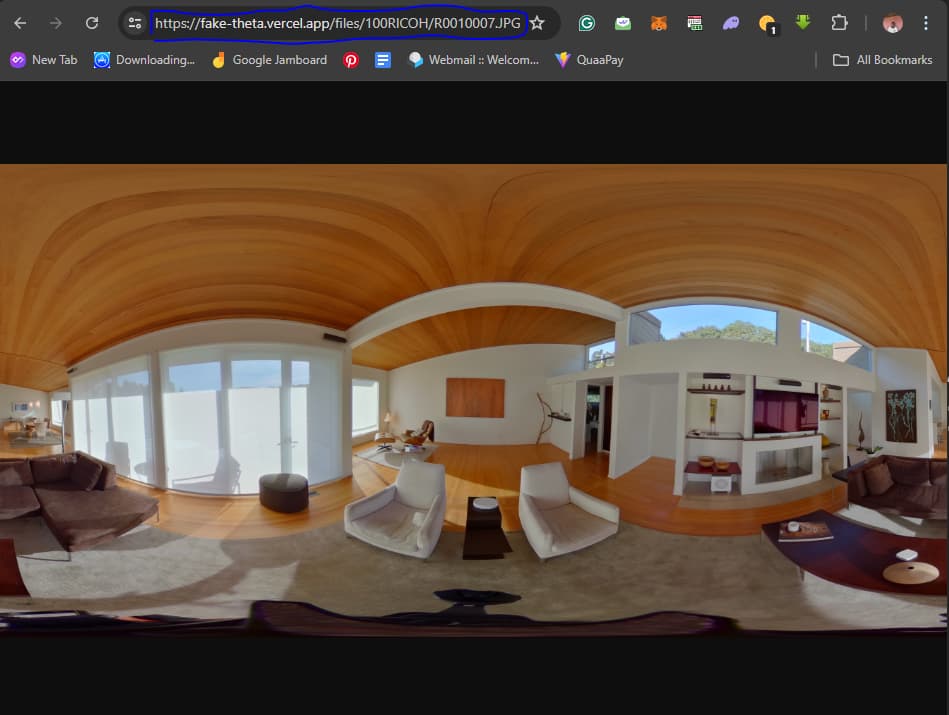
Before proceeding to the next segment, we must verify if the fileURL is accessible and can be parsed for downloading. To do this, copy one of the url that was logged out and paste it into the Google search box. If it returns the image, it is accessible, and we are good to go.
Now, let’s move on to the second part of this guide.
Part 2: Downloading the Images and Creating the Data Center (form)
To implement this feature (Downloading images) in the React Native Demo, we need to use a package called rn-fetch-blob—this will help us access the file system in the React Native Build. Here are the sub-steps in this section:
- Install and configure
rn-fetch-blob - We will need to create a Data center component since we want to create a data center that matches the image path after downloading it.
- Add the newly created Data Center Component to the Navigation stack in the
App.tsxfile. (Installing the AsyncStorage package (which is like the localStorage for React Native)) - Create the Logic to download images from their URL and navigate it to the Data Center Component once downloaded.
- Add a standard notification handler using the “react-native-toast-notifications” package.
- Run and test the overall build, access the images, and confirm that the data center matches the image.
Objective 1: Install and Configure rn-fetch-blob
Rn-fetch-blob is a project committed to making file access and data transfer easier and more efficient for React Native developers. In essence, it helps React Native Developers easily access the file system. In this build, we need to access the file system to write to it (add images to the file system).
Step 1: Install the library
$ yarn add rn-fetch-blob
Step 2: Navigate to your package.json file and check your React Native Version. If it is <0.60, run the command below to Link the library.
$ npx react-native link rn-fetch-blob
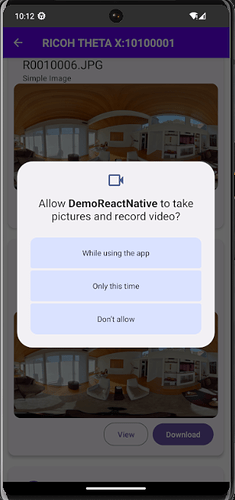
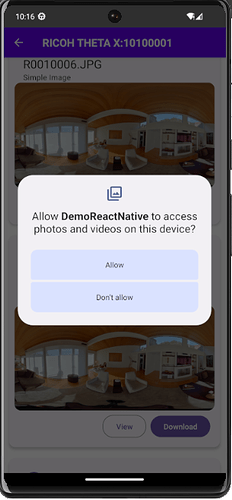
Step 3: To modify the file system, we need to request permission from Android. If you are conversant with applications that use your file system, like using your camera or music, you’d have noticed that they pop up a dialogue box that says, “The name of that app wants to access your camera. Do you want to allow it i.e give access, and you also get to specify when exactly you want to be giving it access is it every time or only when the app is active.” We also need to do this for this app to access the camera and photos.
-
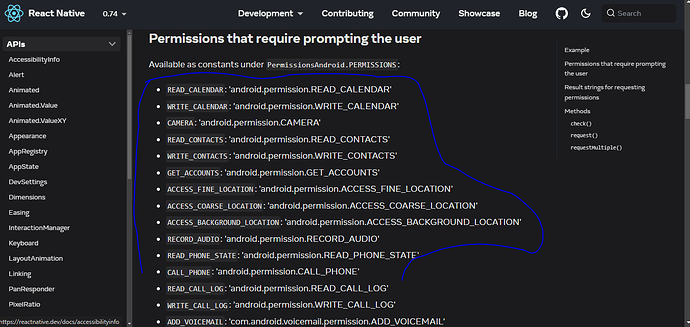
Head over to React Native Docs on Permissions for Android to learn more about the various available permissions.
-
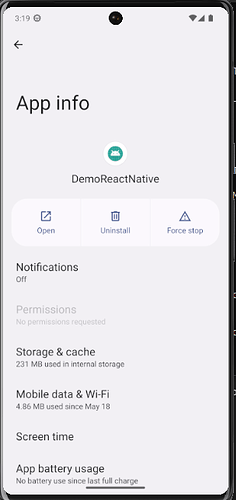
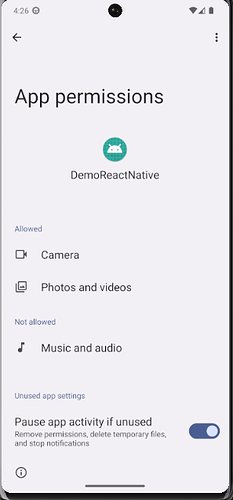
Now, let’s enable the permissions in our build file. But first, open the app settings for your build in your Virtual Device Manager, and you will notice that permissions are completely disabled.
Next, we want to enable permissions. First, we enable them, then request the ones we need. To do this, navigate to your Android module and add the necessary permissions. In your demo-react-native folder, navigate to the android directory, then app, src, and main. Inside the main directory, open the AndroidManifest.xml, where we will add the new permissions.
$ demo-react-native > android > app > src > main > AndroidManifest.xml
Just to add, the major permissions we need are: “the write to external storage” (which makes us add to the storage - like adding images) and “the read from external storage” (which helps us to read data from the file system - like getting images from the storage). Note that I added many permissions because there is a little variation – “READ_MEDIA_IMAGES” is supported for the Android 13 version, which is what my Virtual Device uses. We won’t need the camera and others, though. Just the “WRITE_EXTERNAL_STORAGE”, “READ_EXTERNAL_STORAGE”, and “READ_MEDIA_IMAGES”. These permissions enable us to read (access files in device storage) and write (add a file to storage) on the entity (device storage).
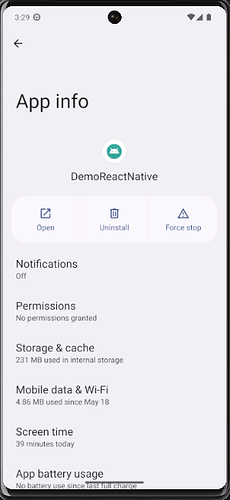
Now, reload your build and go back to access your app settings.
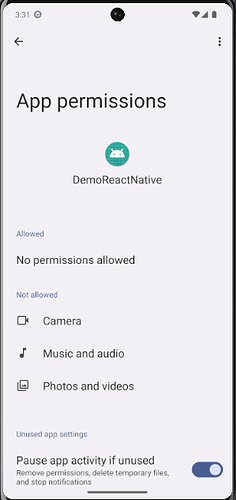
What we need to give access to based on the Android Permissions added to the build:
Next, since we have enabled permissions, we need to grant access. To do this, we would use the PermissionsAndroid module from ‘react-native’. Then, we request multiple permissions on all apps our build requires to function effectively.
Creating Permission Request Function
- Navigate into the
ListPhotos.tsxfile - Add the
PermissionsAndroidmodule to the imports modules from ‘react-native’
import {
  StatusBar,
  RefreshControl,
  ScrollView,
  TouchableOpacity,
  Alert,
  PermissionsAndroid,
} from 'react-native';
- Create the
grantPermissionfunction by utilising therequestMultiplemethod, which React Native provides.
const grantPermission = async (url: any) => {
  const granted = await PermissionsAndroid.requestMultiple([
    PermissionsAndroid.PERMISSIONS.READ_EXTERNAL_STORAGE,
    PermissionsAndroid.PERMISSIONS.READ_MEDIA_IMAGES,
    PermissionsAndroid.PERMISSIONS.CAMERA,
    PermissionsAndroid.PERMISSIONS.WRITE_EXTERNAL_STORAGE,
  ]);

  console.log("granted", granted);
  downloadImage(url);

  return granted;
};
Create a downloadImage function and call it inside the grantPermission function.
const downloadImage = async (url: any) => {
  // logic to write the download image function
  console.log(url);
};
Trigger grantPermission when the download button is clicked by adding this line of code to your Card render:
<Button onPress={async () => {grantPermission(item.fileUrl);}}>Download</Button>
What your Card component should look like now:
const items = files.map((item) => (
  <TouchableOpacity style={styles.cardWrapper} key={item.name}>
    <Card style={{ padding: 10 }}>
      <Card.Title
        title="Testing"
        subtitle={item.dateTimeZone}
        left={LeftContent}
      />
      <Card.Content>
        <Tex variant="titleLarge">{item.name}</Tex>
        <Tex variant="bodyMedium">
          {item?.imageDescription || "Simple Image"}
        </Tex>
      </Card.Content>
      <Card.Cover source={{ uri: item.thumbnailUrl }} />
      <Card.Actions>
        <Button onPress={() => onSelect(item)}>View</Button>
        <Button
          onPress={async () => {
            grantPermission(item.fileUrl);
          }}
        >
          Download
        </Button>
      </Card.Actions>
    </Card>
  </TouchableOpacity>
));
Here’s a summary of what the grantPermission function does:
- Requests Permissions: Asks the user for multiple storage and camera access permissions.
- Logs Permission Statuses: Prints the statuses of the requested permissions to the console.
- Downloads Image: Calls the
downloadImagefunction with a given URL to download an image. - Returns Permission Statuses: Returns the statuses of the requested permissions
Reload the build, click the download button, and a dialogue box will pop out asking you to give this app permission to access your camera, Photos, etc. Grant access, then navigate to your app settings in your virtual device to confirm if the access has been granted.
Allow app to access the file system:
You should get an interface identical to the snapshot below if access has been granted.
This is what is logged out:
Objective 2: Creating the logic for downloading the image.
Here, we will use the rn-fetch-blob package to access and write to the file system.
Step 1: Import the RNFetchBlob package
import RNFetchBlob from 'rn-fetch-blob';
Step 2: Navigate to the downloadImage function to create the logic for downloading images via the URL.
const downloadImage = async (url: any) => {
  // Define the path where you want to save the file
  const { config, fs } = RNFetchBlob;
  const downloads = fs.dirs.DownloadDir;
  const path = `${downloads}/image_${Date.now()}.jpg`;

  // Start downloading the image
  config({
    fileCache: true,
    addAndroidDownloads: {
      useDownloadManager: true,
      notification: true,
      path: path,
      description: "Downloading image",
    },
  })
    .fetch("GET", url)
    .then((res) => {
      console.log("The file is saved to:", res.path());
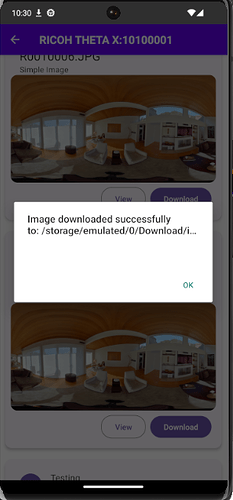
      Alert.alert(`Image downloaded successfully to: ${res.path()}`);
    })
    .catch((error) => {
      console.error("Error downloading image:", error);
      Alert.alert(`Failed to download image due to: ${error}`);
    });
};
-
We downloaded this image using the
RNFetchBlobpackage by destructuring theconfigandfsmethods. We then defined the directory to which we wanted to save the images. Here, we chose the download directory of the storage, but you can also choose another directory, like the picture directory, which is also available. The next thing is defining the path we want the image to take - using template literals(``), adding a string “image_” to signify the type,Date.now()to create a random number and finally adding the extension.jpg -
Next, configure the download using
rn-fetch-blobby enabling file caching and Android’s download manager for a better user experience, including showing a notification (while downloading, you will see “Downloading image”). -
We then fetched the image from the url via the
GETmethod. This initiates a download request for the image from the provided URL. -
Lastly, we handled the request type by displaying the right message via the
Alertmethod for each scenario.
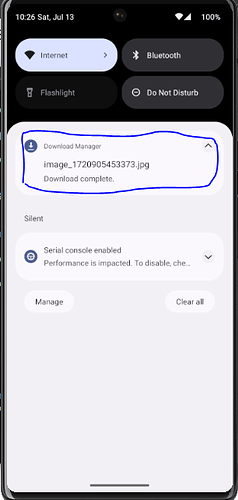
Now, back to testing the current state of the build. Reload the build, navigate to the ListPhotos component, click on the download button, enable access and wait till you see the notification that the image download has been successful.
Drag down your slide drawer to view the notification:
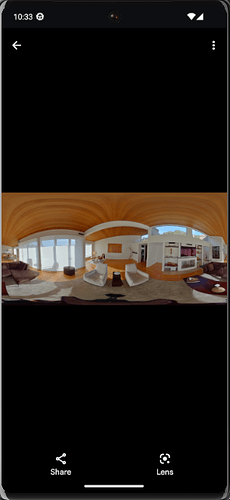
Click on the notification to access the image.
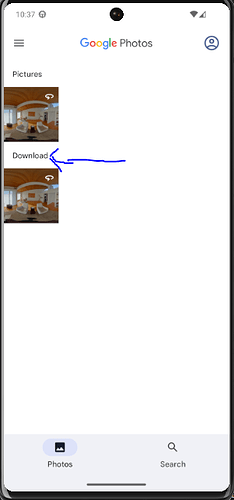
Try accessing the image from your photos. It should be in the download directory.
There is an image in the Picture directory because my first test used the Picture directory before switching it to Downloads.
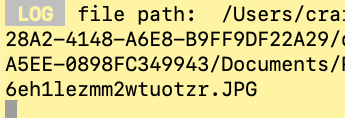
The image file location is logged out.
Objective 3: Create a data file with the local device and match the image to the data file.
This feature requires three steps. But first, let’s define its flow.
The flow of this Feature
- Download the image successfully.
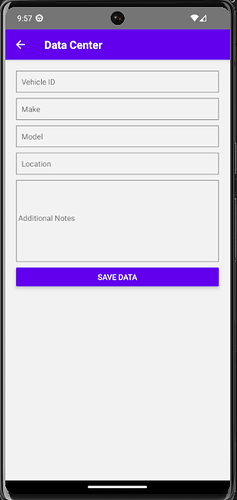
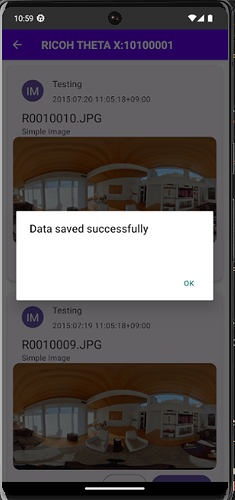
- Click “OK” to confirm the download. The app will automatically navigate to the Data Center Component, where the forms are embedded.
- Input the information, click save, and the file is saved to the local device using the
AsyncStorage. - The app navigates to the previous page (
ListPhotos) component.
Step 1: Install the AsyncStorage right in the demo-react-native using the command below:
yarn add @react-native-async-storage/async-storage
AsyncStorage is an asynchronous, unencrypted, persistent key-value storage for React Native apps. It has a simple API and is a good choice for storing small amounts of data, such as user preferences or app states. If you are familiar with the web, you will know this is similar to LocalStorage.
Step 2: Modify the downloadImage function to allow navigation to the Data Center component once the image has been downloaded. With this navigation, we will also share data, such as the imagePath.
To do this, add this line of code to your downloadImage function.
navigation.navigate('dataCenter', { imagePath: res.path() });
What the overall function should look like:
const downloadImage = async (any) => {
  // Define the path where you want to save the file
  const { config, fs } = RNFetchBlob;
  const downloads = fs.dirs.DownloadDir;
  const path = `${downloads}/image_${Date.now()}.jpg`;

  // Start downloading the image
  config({
    fileCache: true,
    addAndroidDownloads: {
      useDownloadManager: true,
      notification: true,
      path: path,
      description: "Downloading image",
    },
  })
    .fetch("GET", url)
    .then((res) => {
      console.log("The file is saved to:", res.path());
      Alert.alert(`Image downloaded successfully to: ${res.path()}`);
      navigation.navigate("dataCenter", { imagePath: res.path() });
    })
    .catch((error) => {
      console.error("Error downloading image:", error);
      Alert.alert(`Failed to download image due to: ${error}`);
    });
};
Step 3: Create the Data Center component
The target audience for this guide is those in car sales, but this can be modified based on your preferences. Since our target audience is Car dealers, then the Data Center will be taking in the following inputs:
- vehicle ID number
- make of car (like Toyota)
- model of car (like Camry)
- local of car (like Austin, Texas, USA)
- additional notes
import React, { useState } from "react";
import { View, TextInput, Button, Alert, StyleSheet } from "react-native";
import AsyncStorage from "@react-native-async-storage/async-storage";

const DataCenter = ({ navigation, route }) => {
  const [vehicleId, setVehicleId] = useState("");
  const [make, setMake] = useState("");
  const [model, setModel] = useState("");
  const [location, setLocation] = useState("");
  const [notes, setNotes] = useState("");
  const { imagePath } = route.params;

  const saveData = async () => {
    const data = {
      vehicleId,
      make,
      model,
      location,
      notes,
      imagePath,
    };

    try {
      const jsonValue = JSON.stringify(data);
      console.log(jsonValue);
      await AsyncStorage.setItem(`@vehicle_${vehicleId}`, jsonValue);
      Alert.alert("Data saved successfully");
      navigation.goBack();
    } catch (e) {
      console.error("Error saving data", e);
      Alert.alert("Failed to save data");
    }
  };

  return (
    <View style={styles.container}>
      <TextInput
        style={styles.input}
        placeholder="Vehicle ID"
        value={vehicleId}
        onChangeText={setVehicleId}
      />
      <TextInput
        style={styles.input}
        placeholder="Make"
        value={make}
        onChangeText={setMake}
      />
      <TextInput
        style={styles.input}
        placeholder="Model"
        value={model}
        onChangeText={setModel}
      />
      <TextInput
        style={styles.input}
        placeholder="Location"
        value={location}
        onChangeText={setLocation}
      />
      <TextInput
        style={styles.input}
        placeholder="Additional Notes"
        value={notes}
        onChangeText={setNotes}
      />
      <Button title="Save Data" onPress={saveData} />
    </View>
  );
};

const styles = StyleSheet.create({
  container: {
    flex: 1,
    padding: 20,
  },
  input: {
    height: 40,
    borderColor: "gray",
    borderWidth: 1,
    marginBottom: 10,
    padding: 10,
  },
});

export default DataCenter;
Explanation of the code above
Imports necessary modules:
ReactanduseStatefrom ‘react’.View,TextInput,Button,Alert,StyleSheetfrom ‘react-native’.AsyncStoragefrom ‘@react-native-async-storage/async-storage’.
Component definition:
DataCenteris a functional component that takes navigation and route as props.
State declarations:
useStatehooks are used to declare state variables:vehicleId,make,model,location, andnotes, all initialized to empty strings.imagePathis extracted fromroute.params.
Function to save data:
saveDatais an asynchronous function that:- Creates a
dataobject with the values ofvehicleId,make,model,location,notes, andimagePath. - Converts the
dataobject to a JSON string to save it. - Store the JSON string in
AsyncStoragewith a key formatted as@vehicle_{vehicleId}. - On successful storage, shows an alert “Data saved successfully” and navigates back.
- If there’s an error, log the error to the console and show an alert “Failed to save data”.
- Creates a
Step 4: Updating the Stack navigator in the App.tsx file to render the Data Center component.
Here is the new Stack screen we are adding:
<Stack.Screen options={{ title: 'Data Center' }} name="dataCenter" component={DataCenter} />
Import the Data Center component at the top of your App.tsx file:
import DataCenter from './DataCenter';
The entire App.tsx file should look like this:
import * as React from "react";
import { PaperProvider } from "react-native-paper";
import { NavigationContainer } from "@react-navigation/native";
import { createNativeStackNavigator } from "@react-navigation/native-stack";
import MainMenu from "./MainMenu";
import TakePhoto from "./TakePhoto";
import ListPhotos from "./ListPhotos";
import PhotoSphere from "./PhotoSphere";
import DataCenter from "./DataCenter";

const Stack = createNativeStackNavigator();

const screenOptions = {
  headerStyle: {
    backgroundColor: "#6200ee",
  },
  headerTintColor: "#fff",
  headerTitleStyle: {
    fontWeight: "bold",
  },
  headerBackTitle: "",
};

const App = () => {
  return (
    <PaperProvider>
      <NavigationContainer>
        <Stack.Navigator screenOptions={screenOptions}>
          <Stack.Screen
            options={{ title: "Theta SDK sample app" }}
            name="main"
            component={MainMenu}
          />
          <Stack.Screen
            options={{ title: "Take Photo" }}
            name="take"
            component={TakePhoto}
          />
          <Stack.Screen
            options={{ title: "List Photos" }}
            name="list"
            component={ListPhotos}
          />
          <Stack.Screen
            options={{ title: "Sphere" }}
            name="sphere"
            component={PhotoSphere}
          />
          <Stack.Screen
            options={{ title: "Data Center" }}
            name="dataCenter"
            component={DataCenter}
          />
        </Stack.Navigator>
      </NavigationContainer>
    </PaperProvider>
  );
};

export default App;
With these steps, your application should now allow you to download images, save vehicle data, and match the images with the data using AsyncStorage.
Now, when you click on the download button:
To access the data file saved, we will need to pass the key to the getItem method that AsyncStorage provides. You can read up on that from the official documentation and try to get the data you stored. Also, this time, you will use the JSON.parse() to read the data back to its original state.
Conclusion
In this guide, we examined how to use the RN-fetch-Blob to download images via their url and how to use AsyncStorage to save our data.
If you enjoyed this, please like, share and comment!
