THETA Z1 Official Standalone Stitcher Now Available

Update! Standalone app of RICOH THETA Stitcher for THETA Z1 is now available! l RICOH360 Blog

https://youtu.be/F4zGwIh_xTo

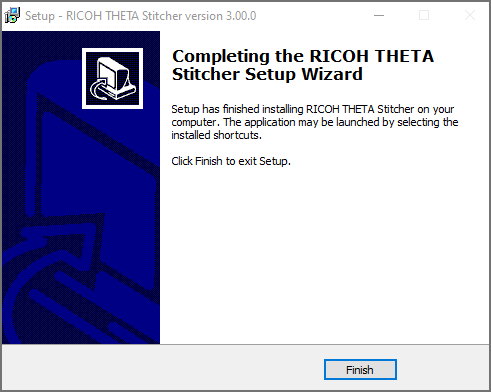
Install RICOH THETA Stitcher v3.00.0 from the official THETA website.

In order to use RICOH THETA Stitcher as a standalone application you must update to v3.00.0.

Click here to download

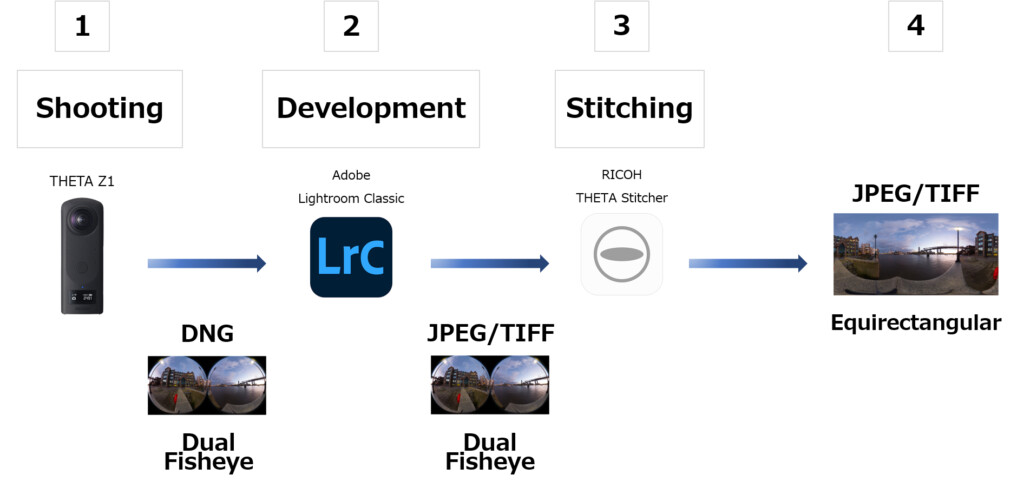
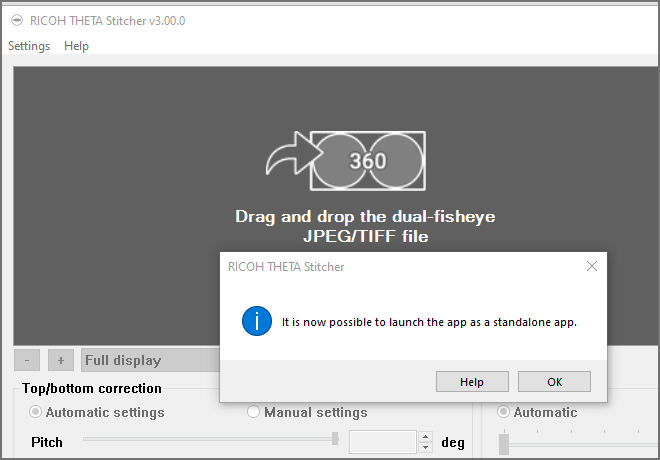
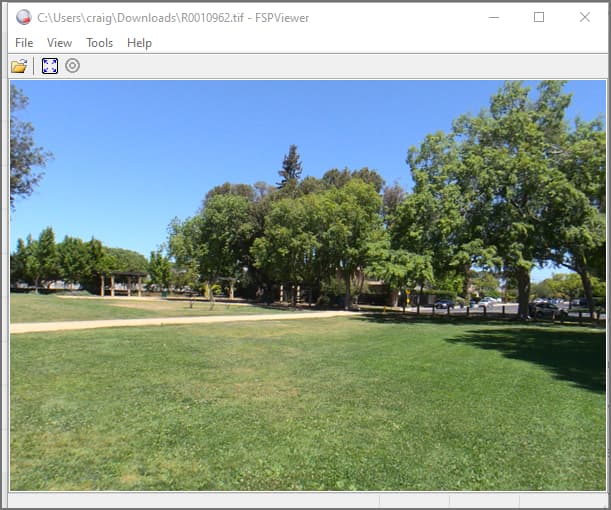
RICOH THETA Stitcher combines these JPEG / TIFF images into a 360-degree image by using equirectangular stitching.

Previously, RICOH THETA Stitcher(③) had to be used as a plugin in Adobe Lightroom Classic(②). But with the latest update, RICOH THETA Stitcher v3.00.0, Dual Fisheye JPEG / TIFF images exported from Lightroom can be stitched in RICOH THETA Stitcher (standalone).

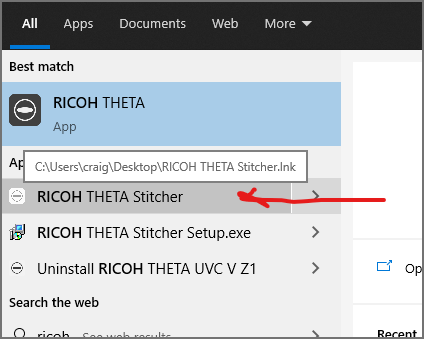
How to use the new standalone THETA Stitcher

  1. Develop RAW images shot by THETA Z1 with your RAW editing software* and export as JPEG / TIFF images (8-bit or 16-bit).

*The RAW editing software approved by Ricoh is Lightroom Classic 10.3.

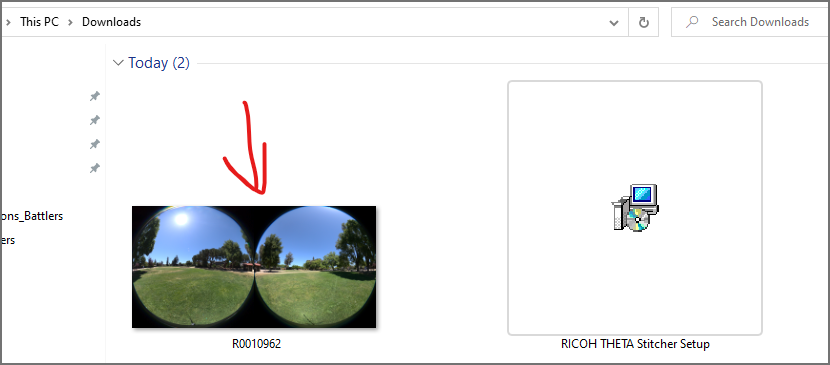
Developed Dual fisheye RAW(DNG) JPEG/TIFF Data

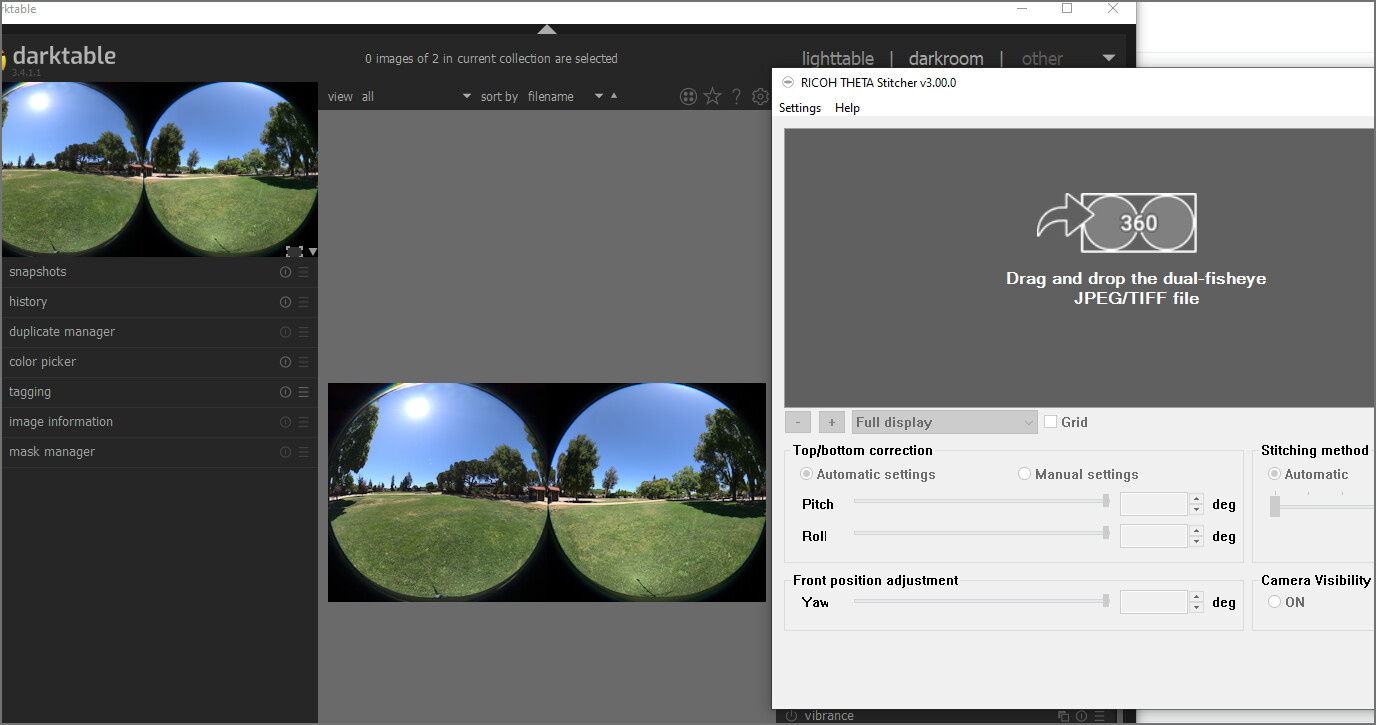
  1. Launch RICOH THETA Stitcher on PC, and drag and drop the JPEG / TIFF images that you want to stitch into 360 degrees. ↓

For Mac pc, aliases (shortcuts) are not automatically generated on the desktop even if RICOH THETA Stitcher is installed. Launch RICOH THETA Stitcher from Launchpad or create an alias directly on your desktop if needed.

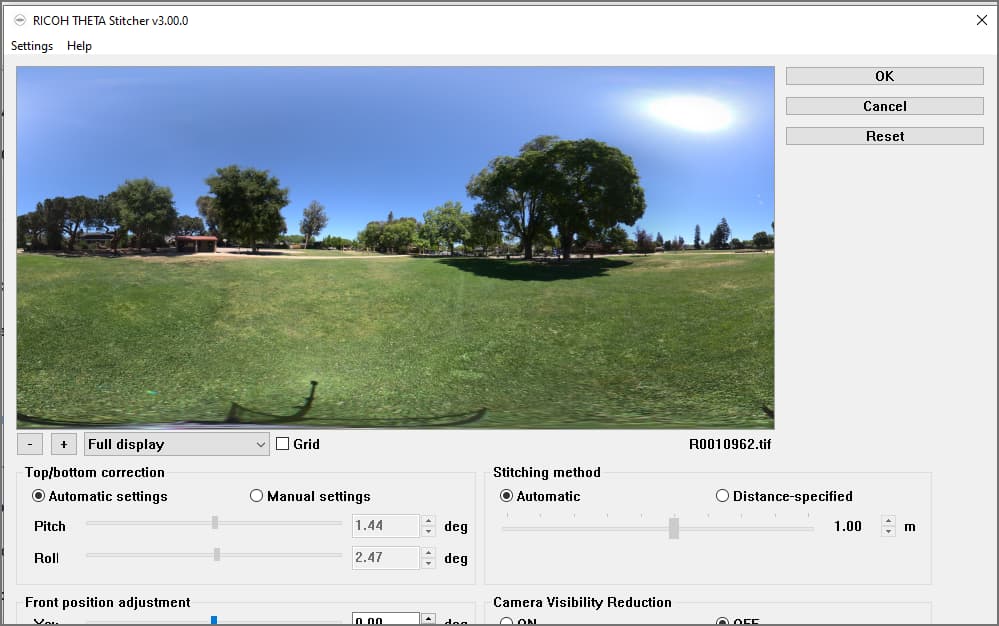
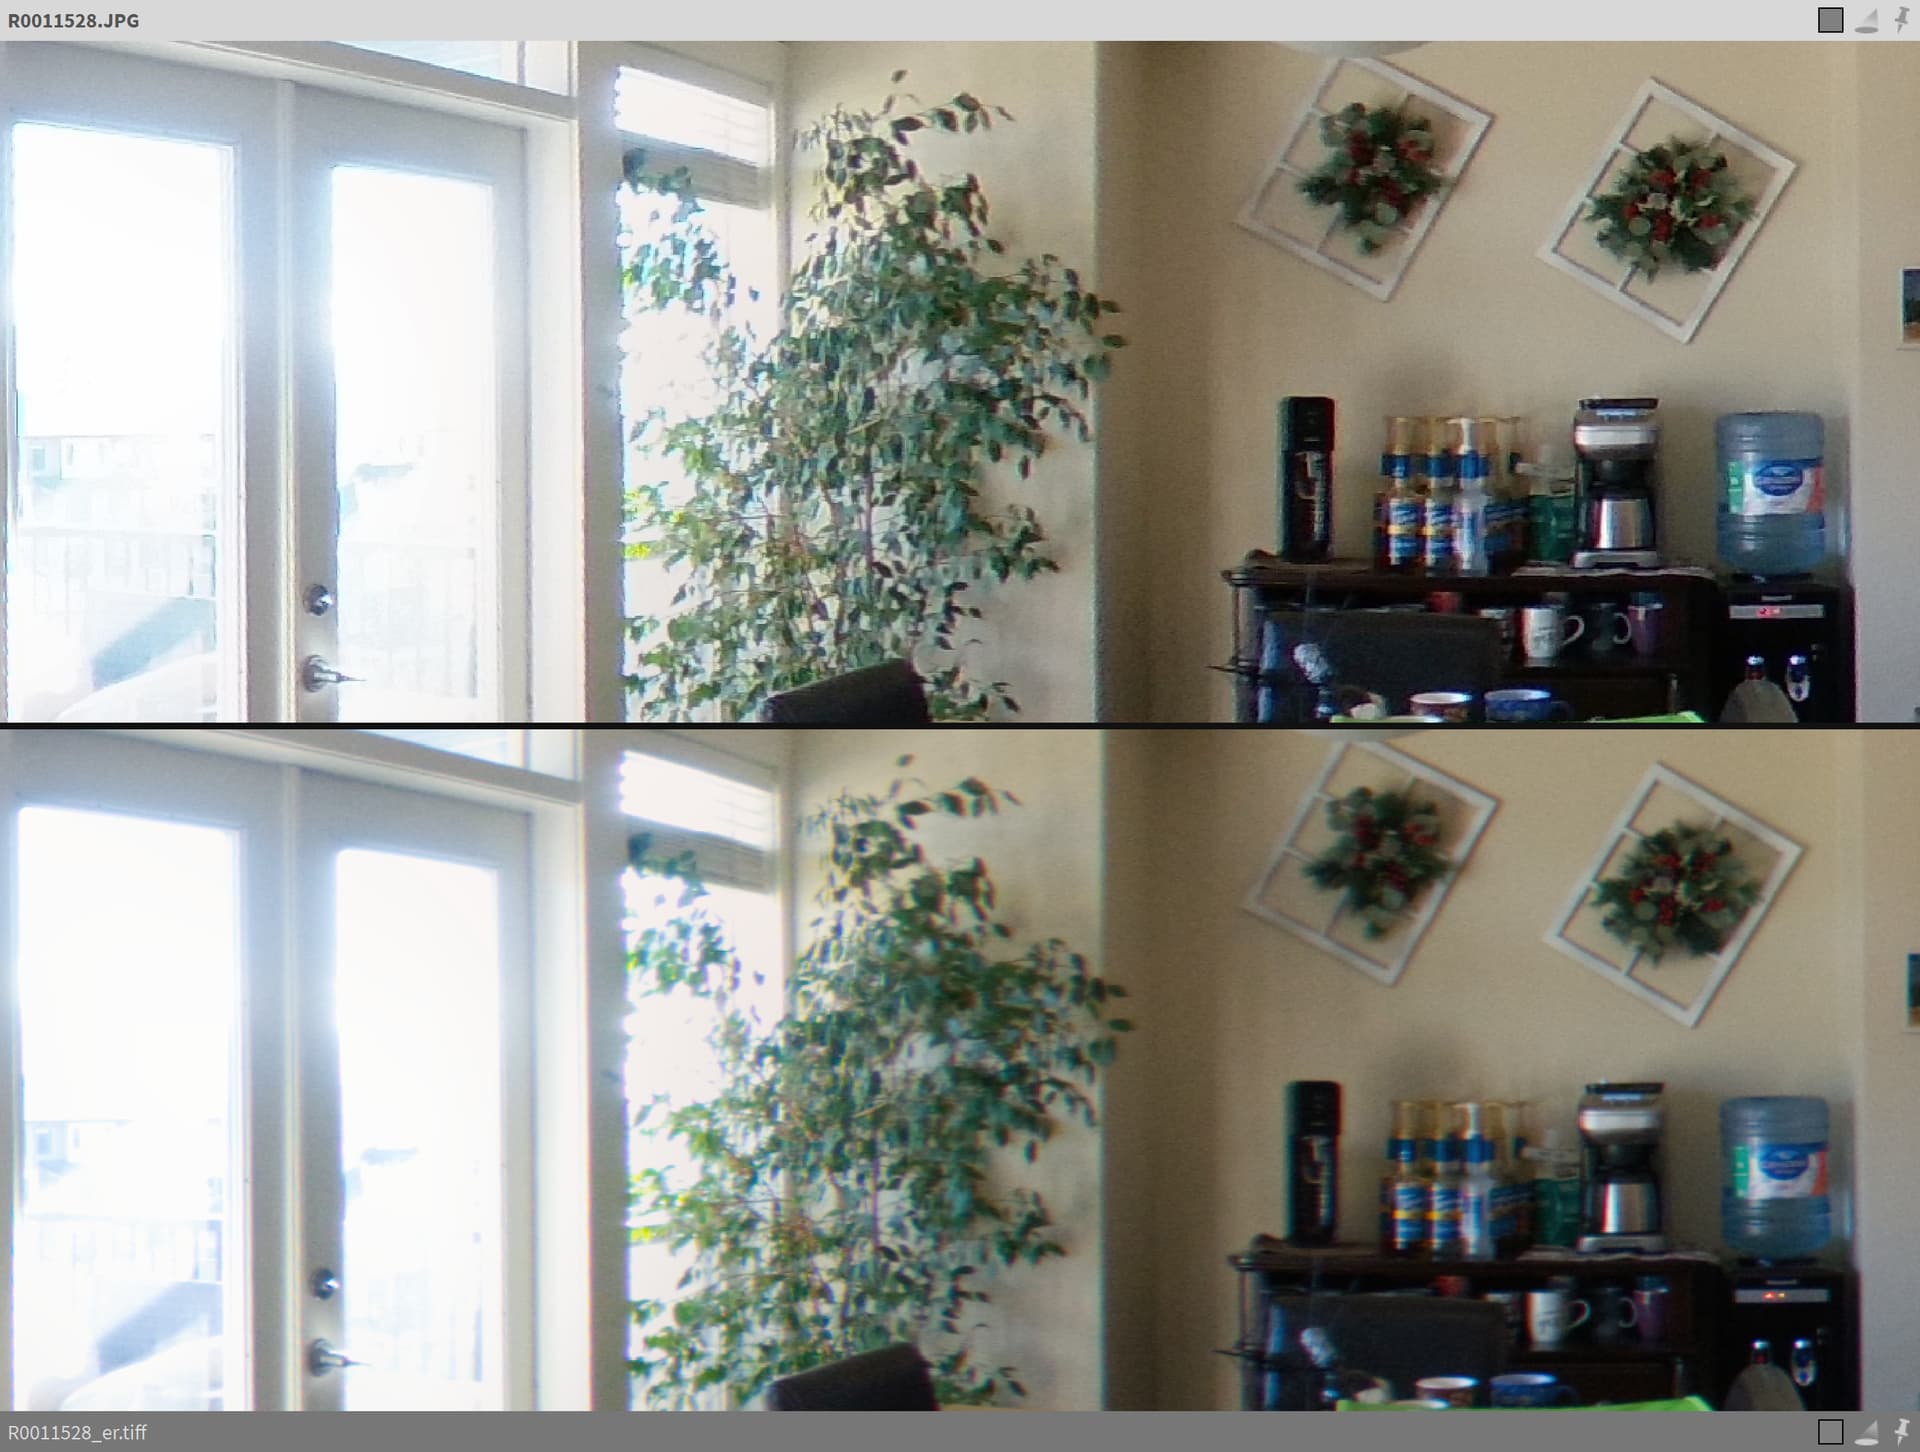
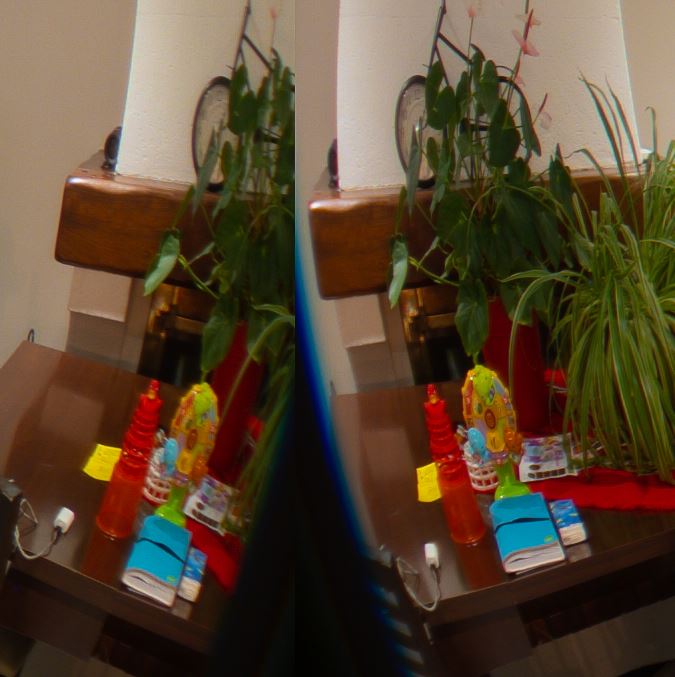
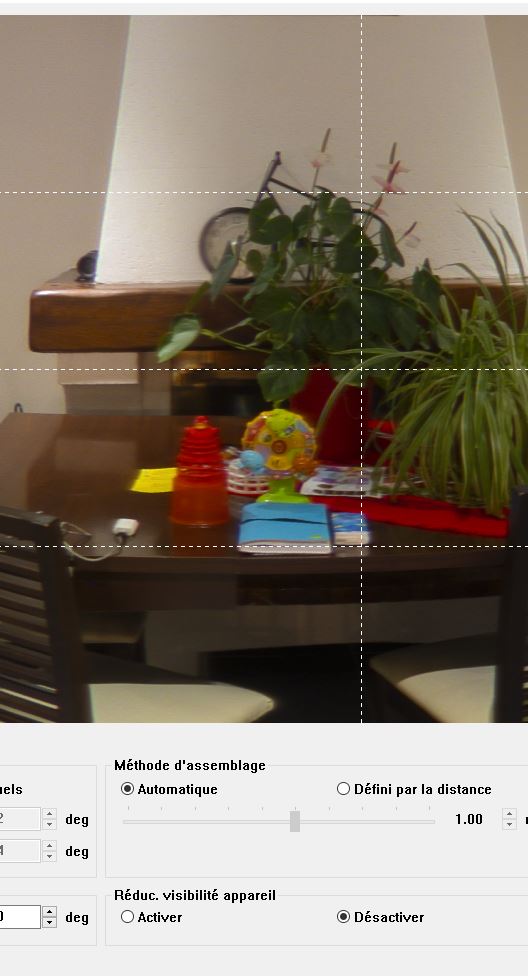
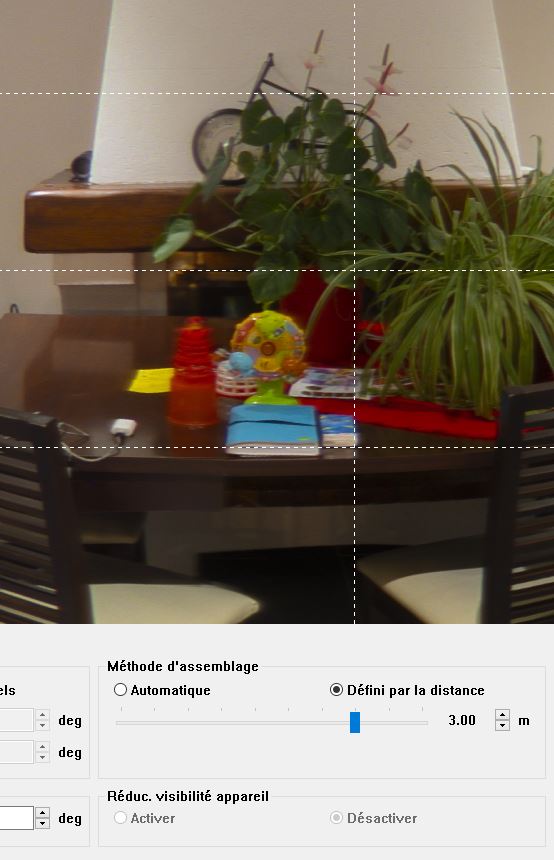
  1. Adjust the centerpoint of the image as you like, and click ‘OK’ to expot. ↓

*You can also drag images directly onto the desktop shortcut.↓

*You can import multiple files at once by dragging files. ↓

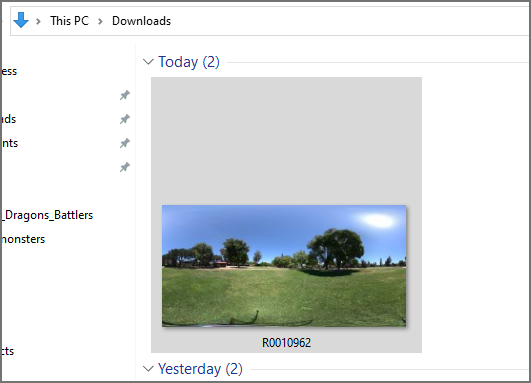
Export by batch processing. ↓

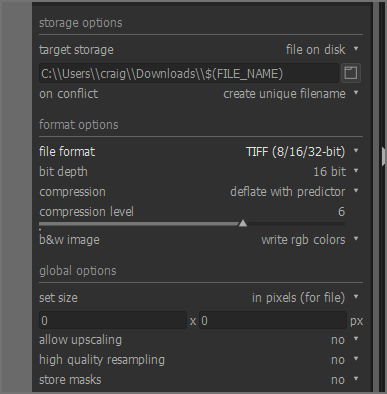
*You can choose saving a file as “Overwrite image file” or saving it as a separate file from Setting menu.

Unchecking the checkbox adds “_er” to the end of the file name for saving it as a separate file.

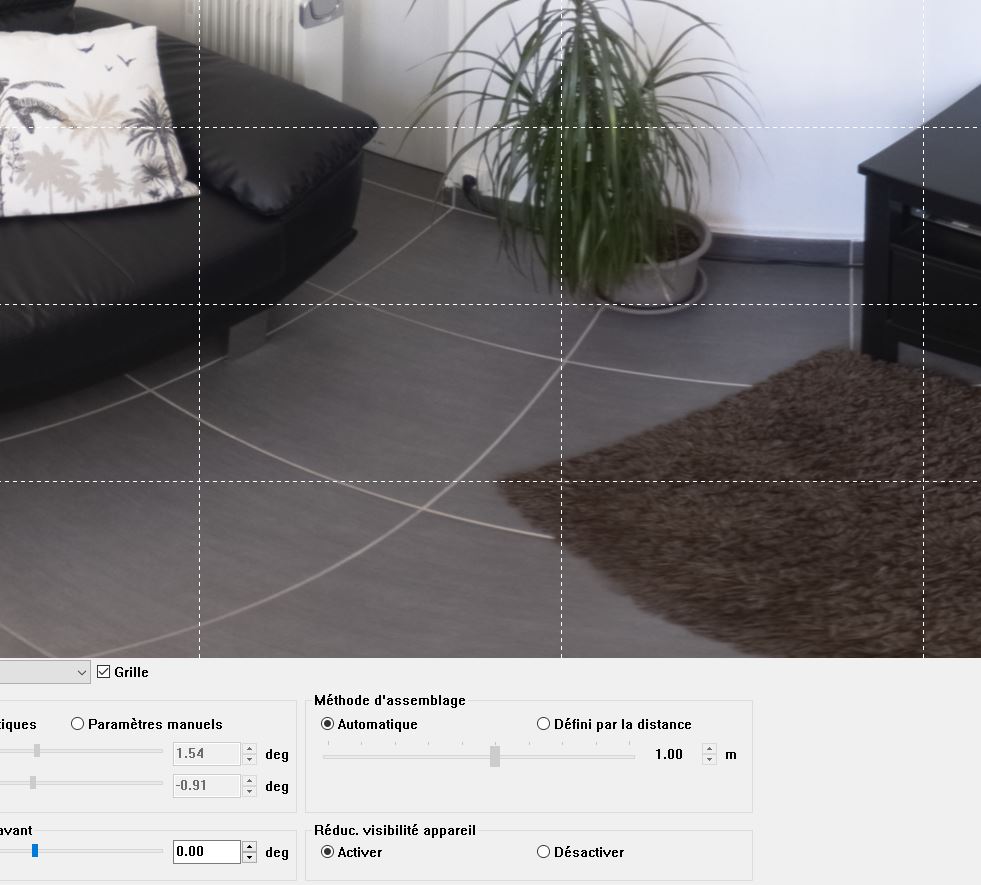
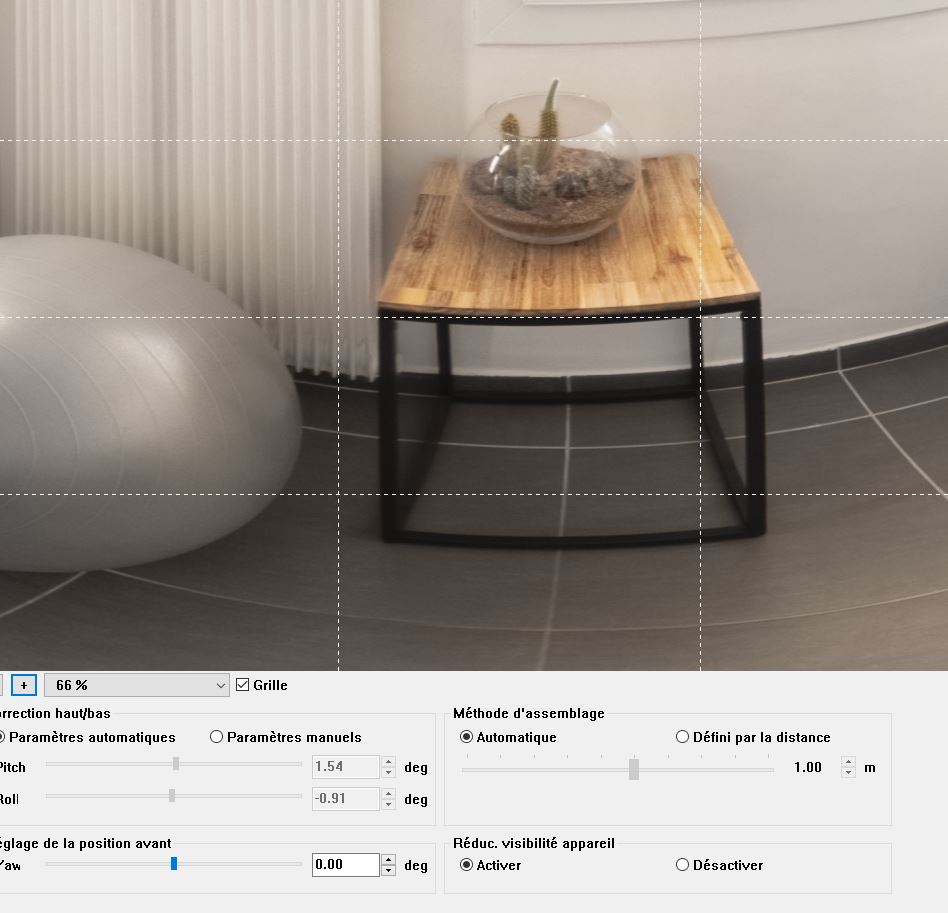
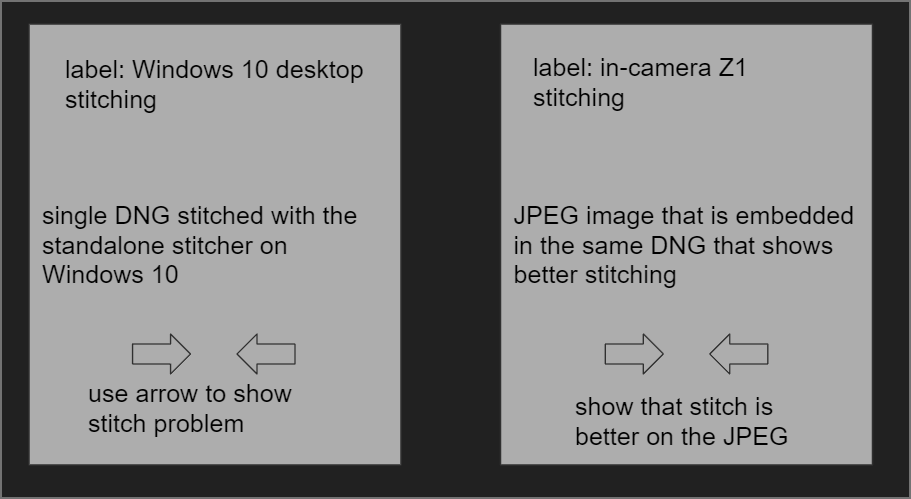
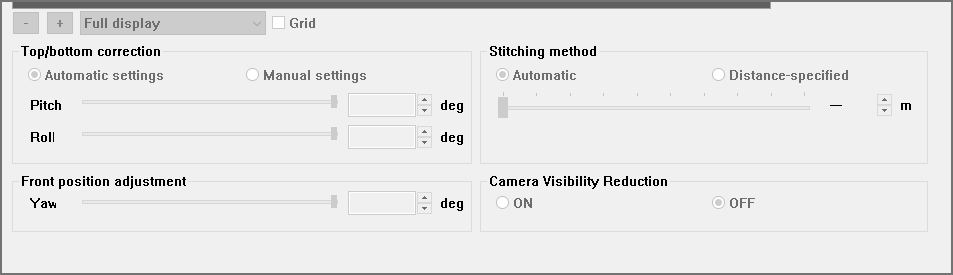
Things to watch out for:

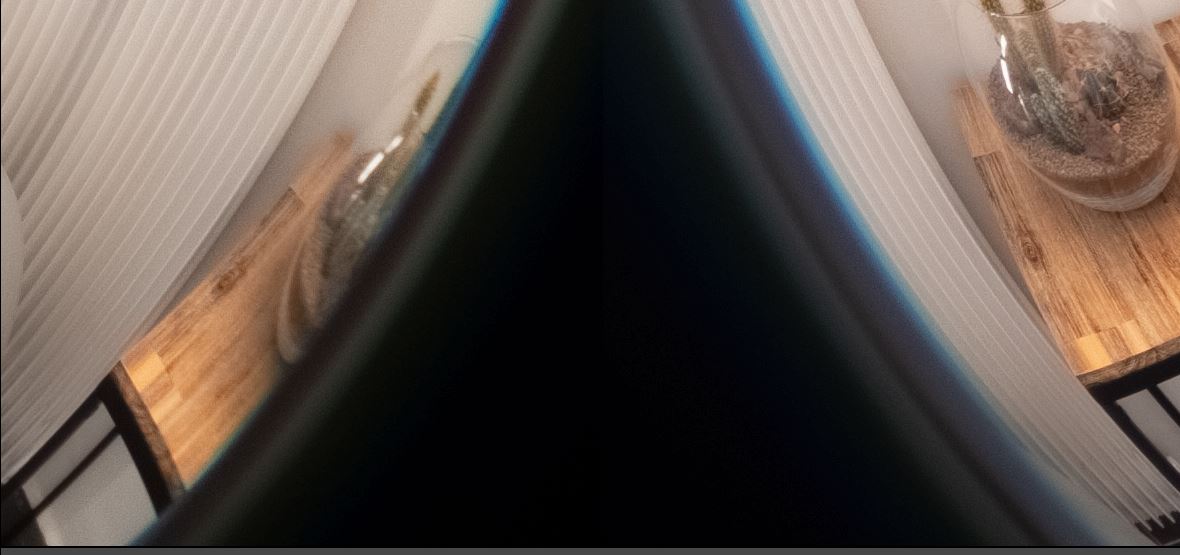
Please be sure to take the following precautions in order to get the same beautiful results as you would directly from your THETA Z1.

Click here for details on how to use RICOH THETA Stitcher!

Photo by Sam Rohn

Post from RICOH THETA. - Spherical Image - RICOH THETA

Caution:

– Please use images taken with THETA Z1

– The file format that can be processed is a Dual Fisheye JPEG / TIFF file. TIFF only supports 8-bit or 16-bit RGB.

– The image size that can be processed is 7296 x 3648. If you set ‘HDR Join’ in Lightroom Classic, uncheck the ‘Auto Align’ checkbox.

– We recommend placing JPEG / TIFF files in the same folder as the original DNG files, or make a new folder in the parent directory.


Oppkey Test

image

image

image

Open DNG in darktable (free software)

Export as 16 bit TIFF

image

Exported TIFF still in dual-fisheye

Stitch TIFF File

Confirm Stitch

image

Test with FSPViewer (free viewing software)

Download Free Stitcher

1 Like

On PC it took the new stitcher OVER 2 MINUTES to load a batch of 40 images!!! That is just to load them into the app and get to the settings screen.

That’s inexcusable on my Alienware gaming rig with SSD. I’m going back to the old stitcher with the standalone workaround that takes 4 seconds if I can find a download of the previous version. Anyone have a link?

Has anyone else had a problem with the stitching accuracy of the new standalone stitcher for PC? In-camera stitching is perfect with jpg but the PC stitcher causes excessive blur along the stitch lines. I own 2 Theta Z1s and have tested it on both. I have compared the in-camera stitching to PC stitching side by side on the same photo and the PC stitcher produces noticeably blurry stitch lines. I can only assume it must be that the stitcher is calibrated incorrectly.

If others are having the same issue this needs to be a priority fix for Ricoh.

Stitch line runs thru center of the following images.

Top: In-camera jpg stitch
Bottom: PC Theta stitcher (auto setting, camera visibility reduction off)

Hello, thanks for your post, I was looking for someone with the same issue because I was going crazy trying to isolate the cause of this blur along the stitch lines with my Z1.

1 Like

Are you removing chromatic aberration on the dual-fisheye DNG image prior to stitching?

Hello Craig, thank you for your reply, indeed, I am removing chromatic abberation in Lightroom classic prior to stitching.

I have tried this with two different Z1 cameras and the result is the same: there is a blurry zone along the stitched area independently of which camera I use.

I have found out that the blur is actually present in the stitcher preview, and I have found that the blur zone seems to match the areas from the image taken from the FRONT lens, where they meet the image from the back lens (the latter being clear).

The photos were taken with the DualFisheye Raw plugin (HDR_DNG 9):
I have also found that a potential cause might be that the image taken from the FRONT lens is of lesser quality near the edge: therefore it could be that where it (the image from the front lens) meets the BACK image for stitching, its lesser quality (blur and color bleed) takes priority over the image from the back lens and is then baked in the stitched result.

I have added 4 screenshots:
_2 from Lightroom, Original DNG.jgp and Original DNG_1.jpeg to which I only applied Raised exposure and chromatic abberation (and you can see a bit of color bleed also on the table from the photo with the cactus bowl in the fisheye image from the FRONT lens on the left side)
_2 after complete processing inside a virtual tour viewer Result.jpg and Result_1.jpg where you can see the blur corresponding to where the images are “super imposed” by the stitching, even though the image from the BACK lens was clean.

I have also tried the DFE plugin (HDR-DNG 9)
(and I have been able to replicate the blur issue with every single mode from the DFE plugin as well)
_The screenshots are labelled “_2” and are from LRCC, then the stitcher preview in automatic distance, then in manual distance to either unblur the red duckling or the clock.

So here the issue is slightly different, maybe bcause I used the DFE and not the DualFisheye RAW plugin. However it still converges at the Ricoh Theta Stitcher Plugin generating a blurry area at the seam. (that is if I controlled all the other variables well enough).

It seems that if I go for manual distance inside the stitcher preview, either the closer or farther objects are not well stitched horizontaly, meaning that somehow the stitcher must find a way to make all the objects at every distance (in depth) match on the horizontal axis of the image… and maybe that is where the issue appears in how it tries to match, or maybe it is that the control points are managed in a way that generates blur beause of the rules by which they are matched, I do not have the technical knowledge to determine that…

I hope someone finds the cause for that because my business relies on this camera and the workflow associated with the stitcher and possibly the DFE or DFE RAW plugins, as must be the case for many people.


The in-camera jpg stitching doesn’t seem to produce a soft or blurry stitch line and seems to be working normally. I know that the PC Theta Stitcher uses (for some unknown reason) a different stitching algorithm and I have found the app to be buggy and sluggish ever since the update to standalone.

Since my business also relies on the Z1, and shooting jpg is simply not an option, I have started using PTGui to stich my images until Recoh acknowledges the issue and releases a fix.

Do you have another example similar to the one below? The ideal test will show in-camera stitching side-by-side with Windows desktop standalone stitching error. When we showed the manager the image below, @jcasman had some challenges explaining the problem

Example data that will be easier for RICOH manager to understand.

Can you provide these image files:

  • DNG image unstitched
  • JPG image from the DNG
  • stitched image from the desktop application with the problem

in a separate text file, include:

  • version of Windows 10
  • version of stitcher app
  • firmware version of Z1
  • description or screenshot of the settings of the stitcher used for the stitch

Example:

Or, you can post the info above in this forum when you post the links

load up onto the cloud and send us the links

Actions

  1. @jcasman and craig obtain problem overview descriptions
  2. obtain 3 image files files that can be used for analysis (JPEG embedded in DNG, unstitched DNG, stitched DNG with standalone Windows app)
  3. jcasman and craig attempt to replicate problems
  4. we will then send the following to RICOH
    a. problem description from community member
    b. results of tests by jcasman and craig
    c. same image files so that RICOH can replicate the test
1 Like

Yes the next time I encounter the problem I will upload all the info. To be honest, it’s rare that I shoot a single dng/jpg in the course of my work. I shoot mostly interiors and so mostly use bracketing.

Have you noticed the speed reduction in the windows 10 stitcher since the upgrade to standalone? Do you know what causes this?

Was the previous example a RAW with HDR Rendering (internally produced in the camera)? Or, was it a bracketed shot that you combined with third-party software?

We reviewed this discussion thread with a manager at RICOH. I believe that @jcasman and I get help to get the images and results to the RICOH engineers for testing. To fix the problem, the engineers will first need to be able to replicate the problem.

I’ll also try and work with @jcasman to replicate the problem ourselves.

It was a single dng that I converted to tif with no adjustments and stitched. I’ll try replicating it with both my Z1 cameras and see if the issue pops up again. I’m not sure which camera I used in that example.

thanks for the explanation. Jesse and I will try and replicate the problem ourselves in parallel.

Stitcher need Can be used from the command line!Want to add this feature.

1 Like

Please put the process and error message that occurred when you tried to use the stitcher from the command line

I use code below :
start “C:\…\RICOH THETA Stitcher.exe” “C:\…\XXXX.jpg”
can open the stitcher and load the photo , but can not do the stitch before click the “start” button .
need use cmd and automation , without manual operation.

the stitcher can not work on mac ,test for bigSur. after dorp the jpg file on app ,it close .