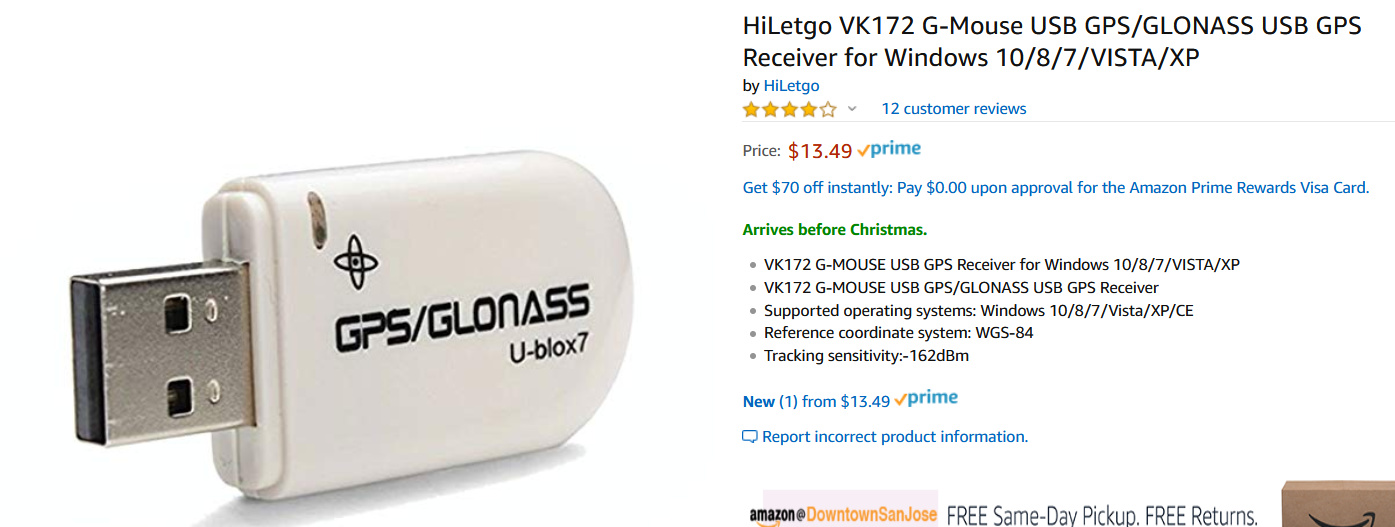
Part 1 - GPS Project Overview and Required Hardware - GPS and USB
Part 2 - Install Serial Communication Library into RICOH THETA
Part 3 - GPS Plug-in Source Code Walkthrough
This is a machine translation of a Japanese article by KA-2. The original article is here.
Note that I will translate the Japanese in the images after I publish this article. Please check back for updates to this article.
Give permissions to plugins using Vysor via wifi
At the end of “Introduction” this work will be unnecessary if the matter “One large point attention (unresolved matter) …” is resolved. Since it is necessary work at the present time, I will write down.
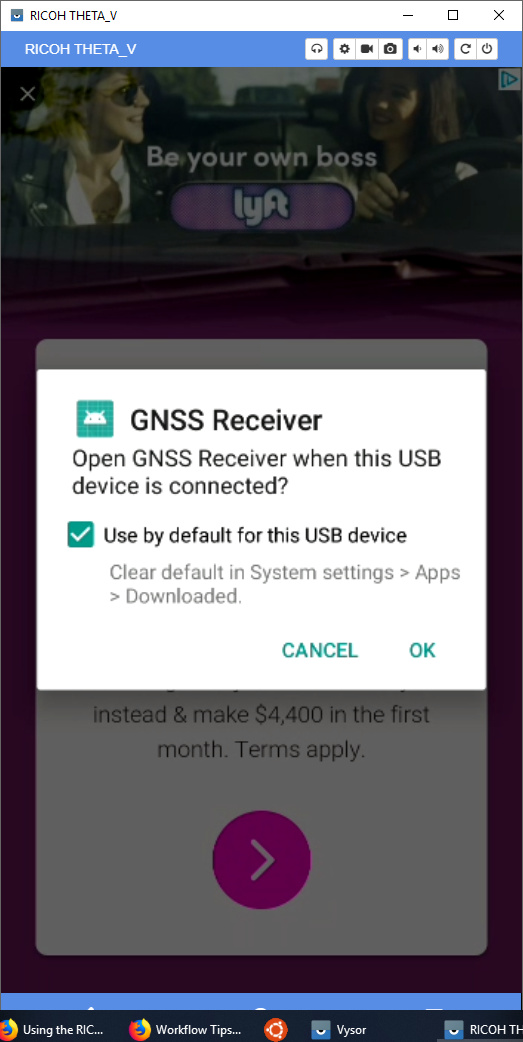
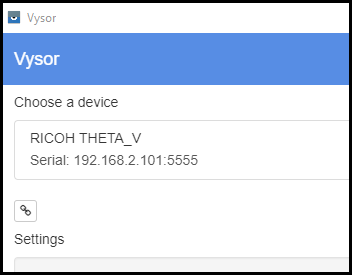
In order to give permission to the USB device connected to the THETA plug-in created, please insert USB device into THETA V with Vysor enabled via wifi.
Then the following dialog will be displayed on Vysor, so check “Use by default for this USB device” ON, and press the dialog OK button.
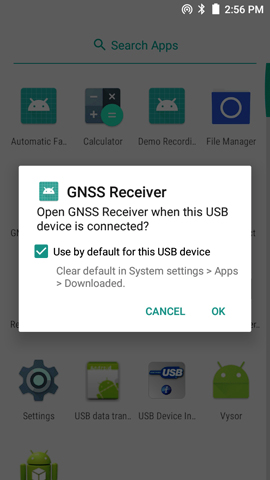
After you do the above operation you can use this plugin without visiting permissions.
Permission is OK once you give it once, but you do not have permission when turning on the power from the device connection (or the power off with the device connected) while turning off the complete power supply (long press the power button to end THETA V) It will be recognized. In that case, you can use it normally by pulling out the device from the USB connector once.
Permission is still given in the sleep state (short pressing the power button to end THETA V). The power supply to the USB device is continued.
Please be careful as it is somewhat confusing behavior.
Starting and closing the plugin
As mentioned above, although it departs from the method of THETA plug-in, I activate plug-in with OTG.
When it is started with OTG, the lighting state of the LED is not the target (the LED which is not being operated from the plug-in is still lit). However, since you can recognize that the plug-in is running, please long press and hold the mode button to terminate the plug-in once, then start the plug-in again with the regular procedure.
The following explanation will be explained when the plug-in is operated in the regular procedure.
(Either way, there is not much problem in use, but …)
Display of positioning status (including device connection status)
In this plug-in, the color of the wireless lamp makes it possible to determine the positioning status (including device connection status).

It is in a state where magenta is not able to measure the position, and green is in the state where it can be measured. Normally you will see either of these displays.
It also displays the connection status of GPS / GNSS receivers and errors and so on.
Yellow indicates a state where no permission is given to the plug-in or a poor connection, and red indicates a state in which the plug-in is started without connecting the device.
How to show and display single shooting, interval shooting (start / stop)
In this plug-in, it is possible to distinguish whether “1 movie shooting” or “interval shooting” can be shot with “movie recording lamp”, or “Interval shooting is stopped or running” in “shooting mode lamp Live” .
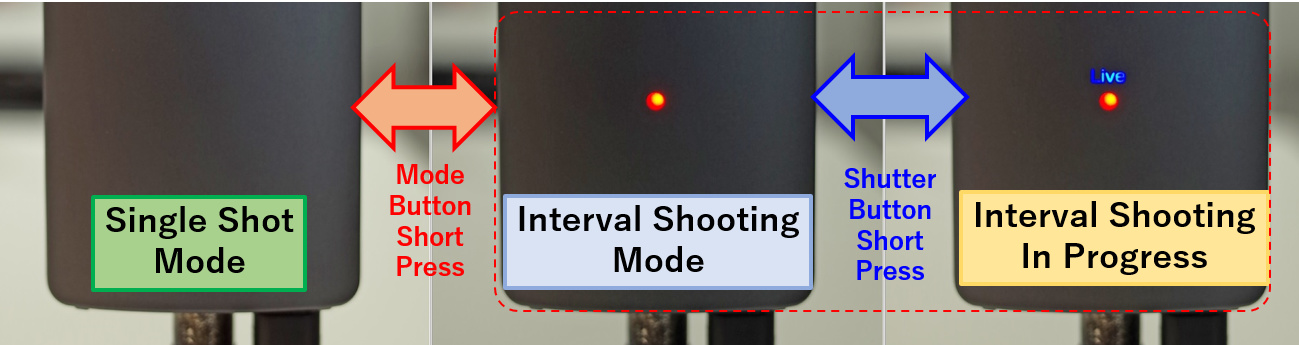
- How to shoot a
single image You can shoot a single image by pressing the shutter button with “Movie recording lamp” turned off.
By pressing the Mode button for a short time, you can shift to “Interval Shootable state”. - How to shoot in interval When
“shutter button” is pressed while “movie recording lamp” is lit, “shooting mode lamp Live” lights and interval shooting starts. If you press the shutter button during the interval shooting operation, “Live” will go out and the interval shooting will stop.
Regardless of the interval shooting status, pressing the Mode button for a short time allows you to switch to “single shootable status”.
One point, I will introduce useful shooting topics in the plug-in.
THETA V / SC / S has a convenient function called " My setting ". By using this function, you can remember shooting settings such as the shooting mode and exposure compensation value when the THETA V is turned on. This function is useful when taking pictures without connecting smartphones.
This function is also effective when using this plugin (because it is taking pictures using the web API from the plugin).
How to utilize image data Various
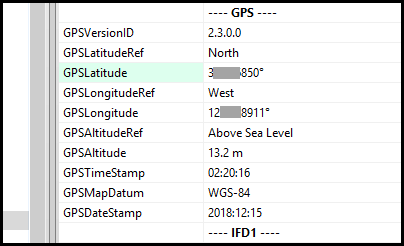
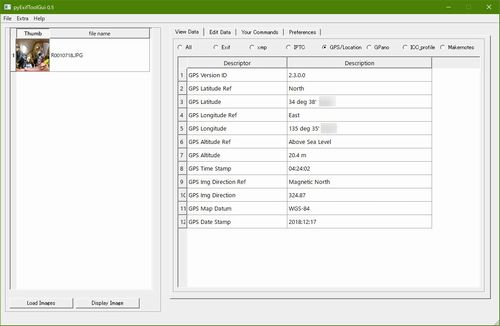
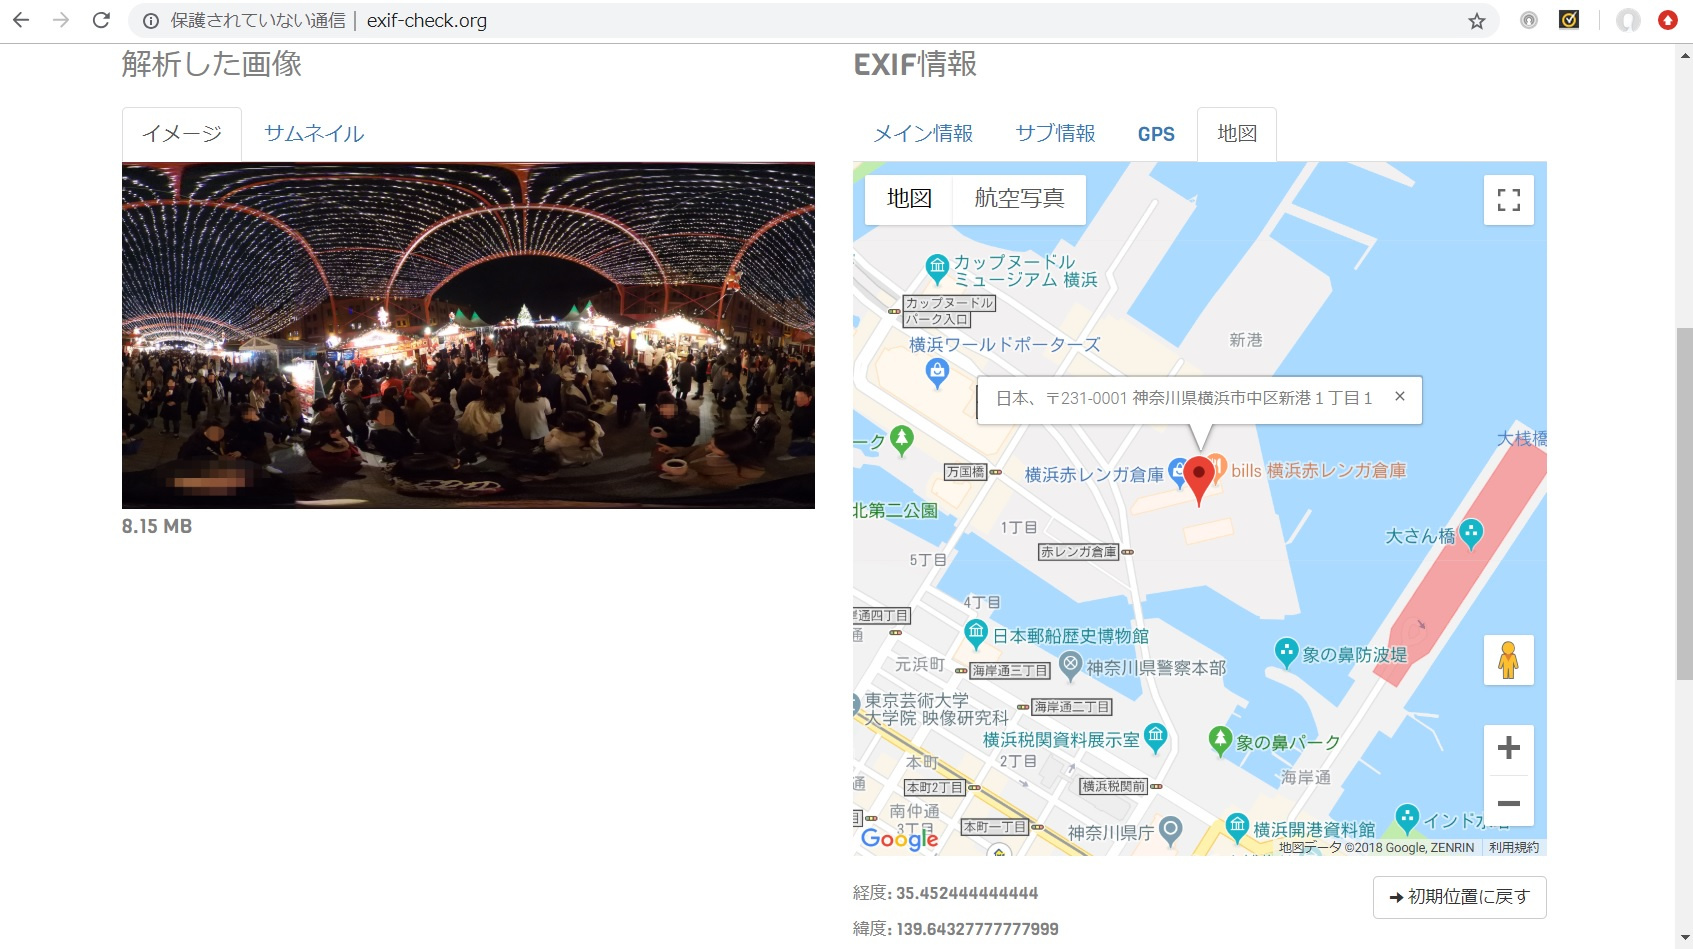
Example of confirming position information of one piece of data
Various applications, regardless of personal computer or smartphone, correspond to image data with position information.
The following display is also possible on this website .
Application example of location information of large amount of data obtained by interval shooting
I tried walking around the Minato Mirai area at night by interval shooting using this plug-in. I shot 540 images in about 35 minutes of shooting.
There are various applications that can utilize such a large amount of data, this time, after capturing all the data on the Android smartphone, I tried drawing the trajectory with the application called PhtoMap .
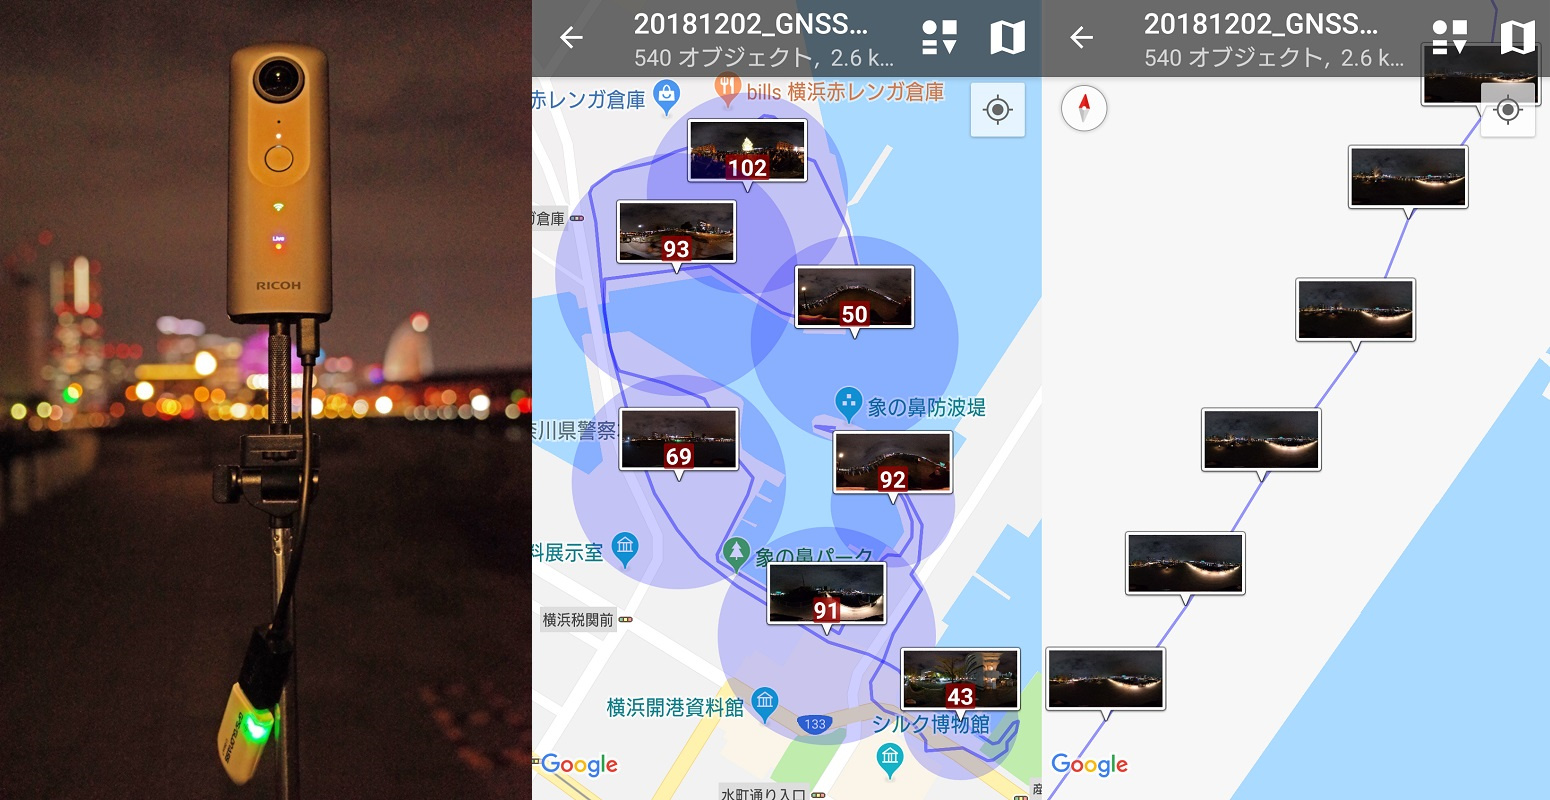
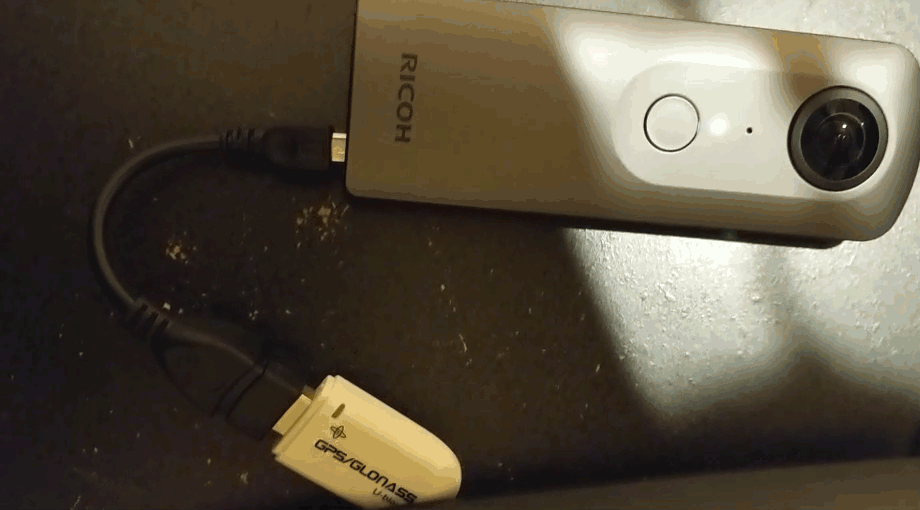
The leftmost figure is the figure at the time when interval shooting started. To attach the GPS / GNSS receiver to the USB connector, we use the extension adapter TE-1 between the main unit and the self-shooting stick .
The center is the whole image of the locus we walked this time. If it is a bird’s-eye view, the picture becomes “summary display”, but if you enlarge it like the far right, you can see that the photos correspond one by one to the trajectory drawn from the position information of the photo.
In addition, since it was taken at night, I set the ISO sensitivity priority in the above My setting and kept fixed at ISO 800 so as to secure image quality to some extent while keeping the blur. An example of the captured image is as follows. You can see that THETA is suitable for a casual 360 ° shooting in a dark place.
It is a shot sample taken during GPS / GNSS plug-in interval shooting - Spherical Image - RICOH THETA
Qiita does not display the embedded tag of theta 360. So paste the shot image with THETA + editing application for THETA with Little Planet converted projection system image.
You can also display with the same projection system as you can see the above link in the browser!

Positioning log
In the explanation of the source code, I will summarize how to handle the positioning log, which saved the raw data of the NMEA 0183 format received from the GPS / GNSS receiver, which was described as “Function that can only be used by developers”.
How to retrieve files
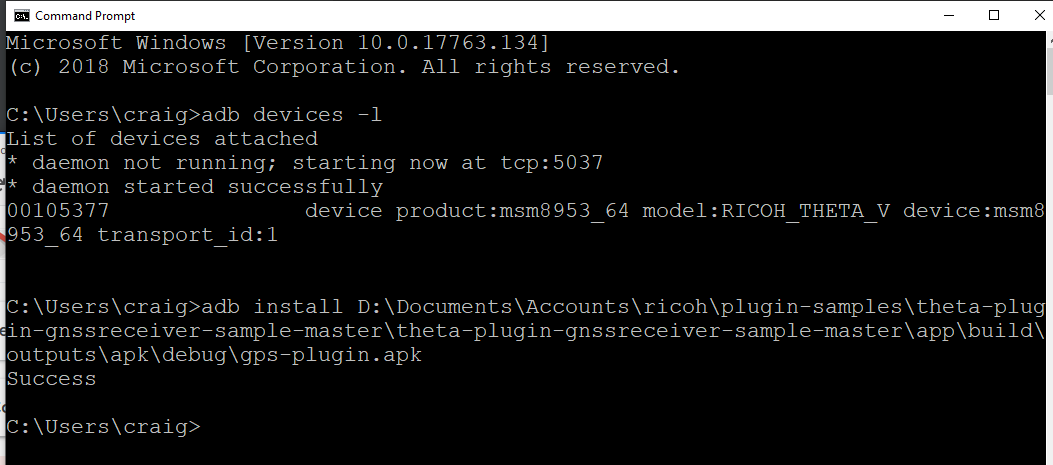
You can also see the file in the application area by clicking “Device File Explorer” in the lower right corner of Android Studio.
data -> data -> com.theta 360. Plugin name -> files The raw data received from the GPS / GNSS receiver under the folder is saved.
Click here to select the menu “Save As …” which appears when you right-click on the file, and you can take out it to your computer when you perform various operations.

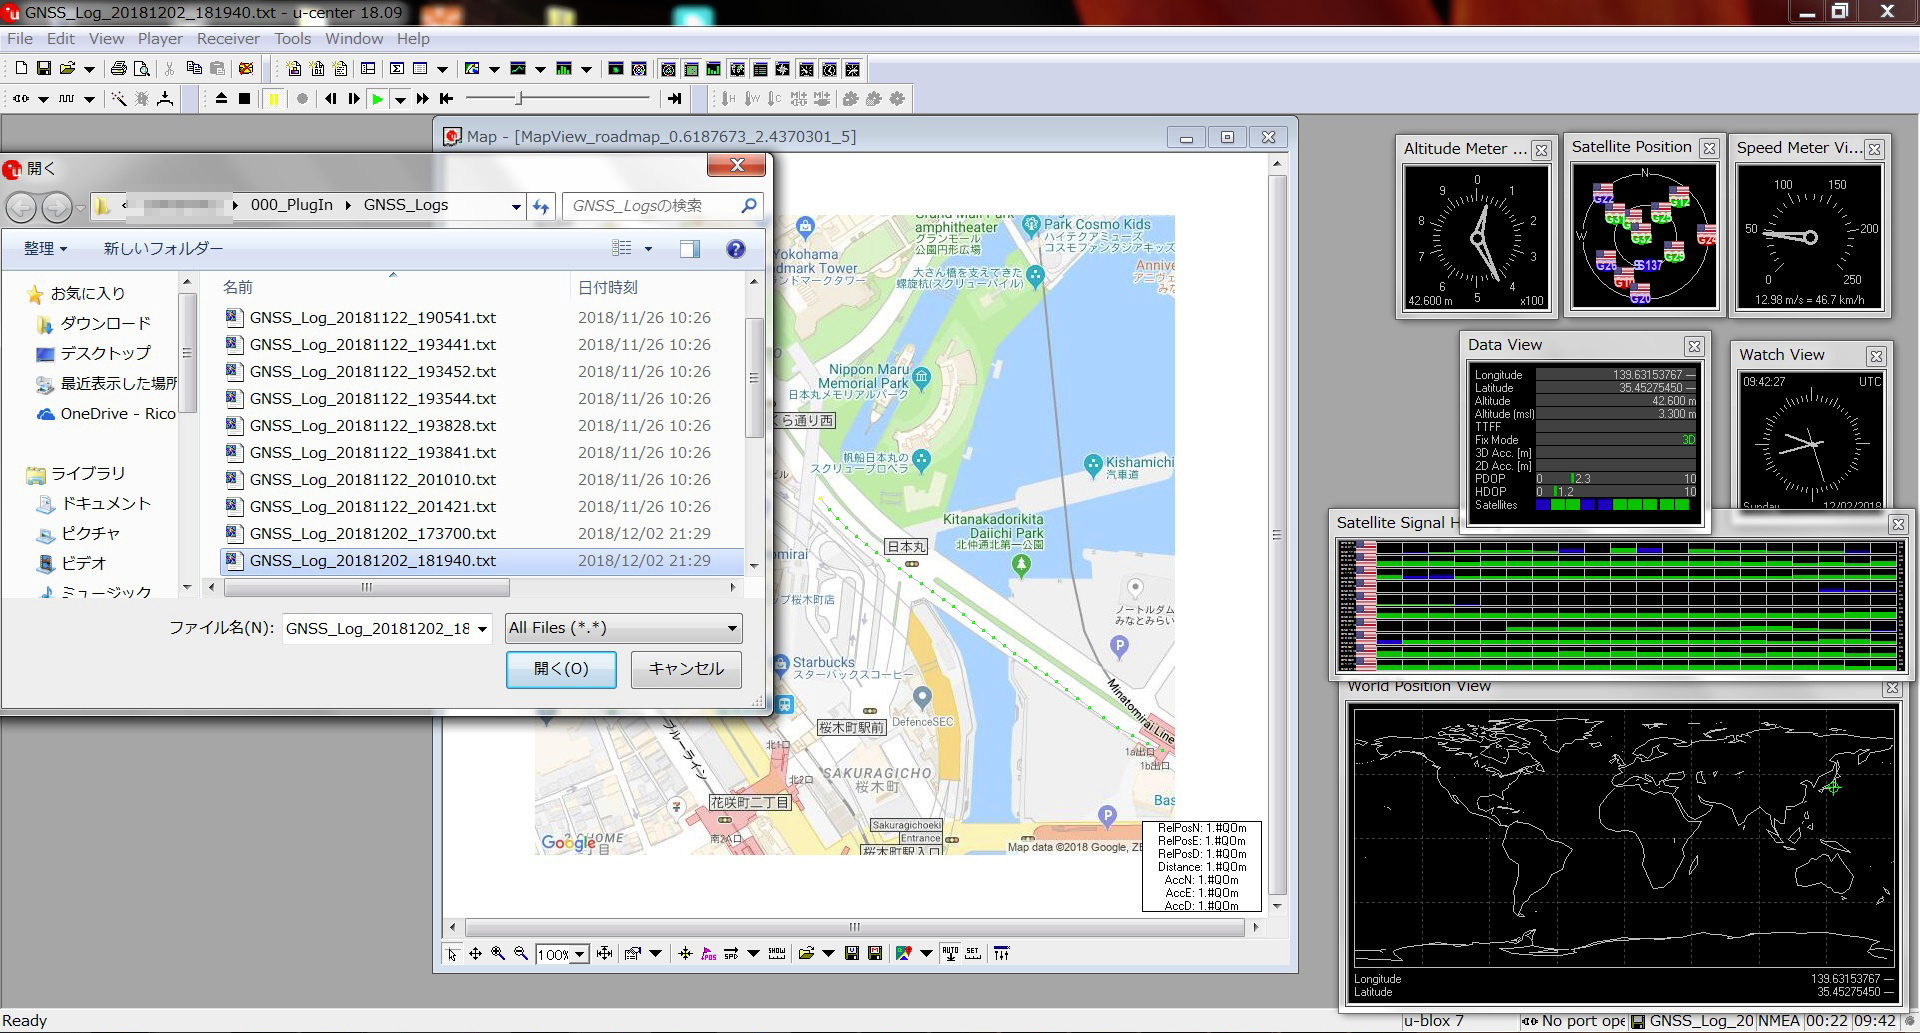
Utilization of positioning log (example of free tool of u-blox company)
The result obtained by u-blox 's tool " u - center " provided free of charge is as follows. You can play at various speeds and change the scale of the map. You can visually check various information such as supplementary state of the satellite which changes everyday.
Use positioning logs from other applications
The log above is a log acquired without “shooting” with THETA V in the state of activating this plug-in on the car’s dashboard (with or without shooting) it’s finished).
Use positioning logs from other applications
The log above is a log acquired without “shooting” with THETA V in the state of activating this plug-in on the car’s dashboard (with or without shooting) it’s finished).

Such logs can also be converted to kml format to draw a locus on Google map, or it can be a software input to attach positioning data to images without positioning data.
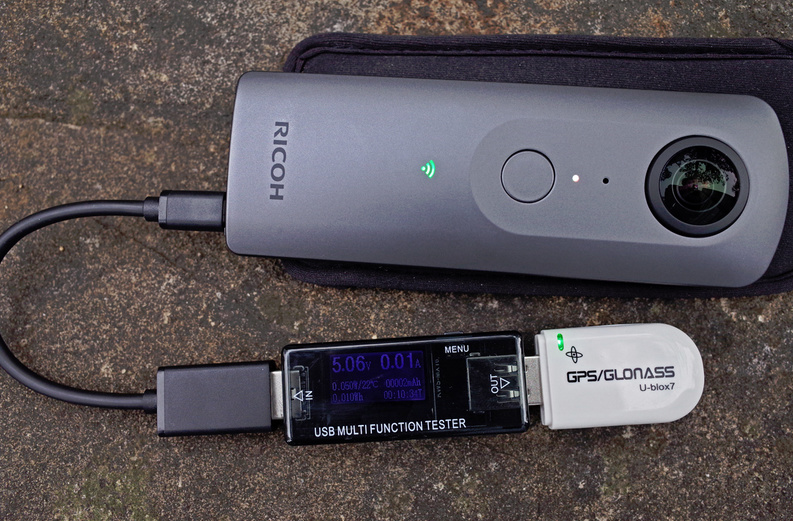
Impact of power supply to connected equipment
Although measurement with a simple tool, the current supplied from the USB port to the GPS / GNSS receiver was about 10 mA irrespective of the satellite radio reception state (rarely the display may be 0.02 A, Basic 0.01 A is displayed).
In nighttime shooting experiments, after taking 540 shots for 35 minutes, even after acquiring the positioning log for about 40 minutes, the battery level was slightly low.
When I ran the running test at room temperature indoors, I was able to take 1609 shots with an operation of 1 hour 55 minutes.
Even though it says THETA V powers GPS / GNSS receivers, it seems that there will be no significant impact on usage time and number of shootable pictures.
Summary
I think that you can see that serial communication using the USB Host function can be performed by using the library published for the Android smartphone application.
When serial communication is possible, it will be able to cooperate with inexpensive microcomputer boards including not only off-the-shelf items like this case but also famous arduino in the world of electronic work. It is also possible to extend various sensors and motors as if arms and feet grew from THETA. Will not the fingers of the electronic work cluster start to move?
However, there is a problem that there is no way to give permissions to plugins unless you use Vysor. If we do not settle this, we will not be able to enjoy the benefits of plug-ins that we made because of the general public, so we will investigate and consider whether there are any measures inside the company.
From the viewpoint of adding functions to the GPS / GNSS plug-in created this time, the following items can be considered.
- You can change the settings of interval shooting (shooting interval, number of shots) with web UI
- Make the positioning log downloadable from the web UI (It may be tough on the iPhone browser)
- You can set various GPS / GNSS receivers with web UI (also serve as write application)
- It is not essential for my setting function to work, but it may be good to be able to set shooting with webUI
I think it is possible to think elsewhere, but I would appreciate it if you can try customization based on this plugin as needed.
Also, although I described each source code in the explanation of the source code …
I think that it is better to prepare a bit more about how to write code and program structure.