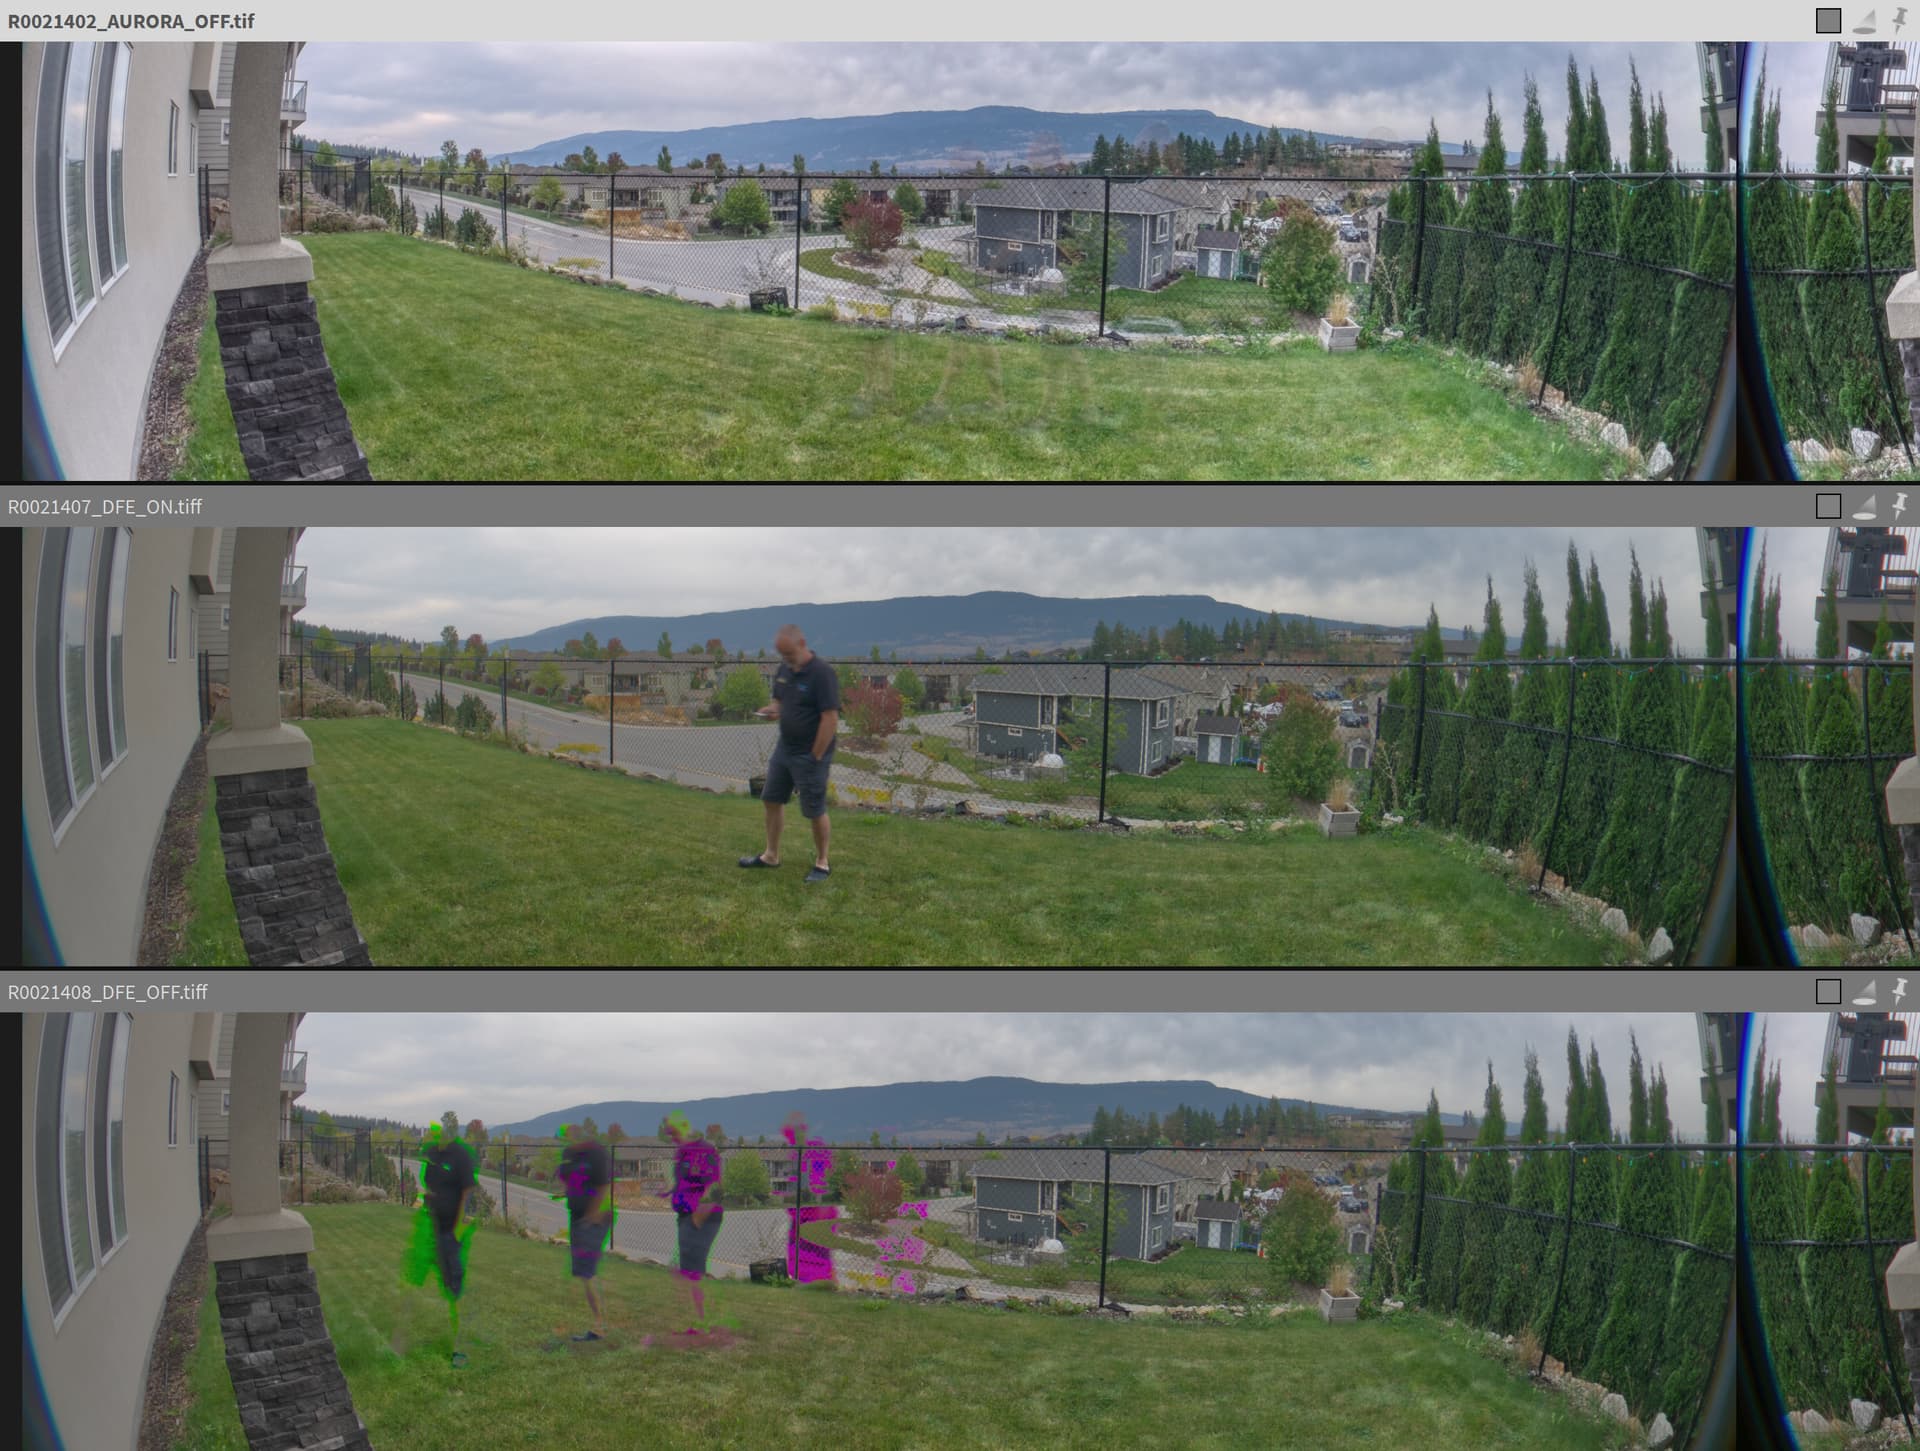
People in a scene can be hard to deal with if you are shooting a space you can’t control like a busy hotel lobby or outdoor public space, often resulting in artifacts when multiple bracketed images are merged to create the HDR. Below is a test I performed in my backyard using the Theta Z1.
All 3 test images were created from 9 brackets and processed using different methods.
I walked across the yard at the same speed for each test.
I’ve zoomed in on the areas with movement.
DNG brackets merged in PC using AuroraHDR with NO DEGHOSTING applied.
DualFisheye in-camera DNG_HDR with motion detection ON.
DualFisheye in-camera DNG_HDR with motion detection OFF.
Since I focus on virtual tours for businesses, it’s essential that I minimize the number of people in the shots without having to deeply edit each photo, and I find AuroraHDR’s result much more acceptable to clients who would rather showcase the space than the people in it. If a client pays for the editing, it’s also far easier to remove translucent objects from an image than opaque ones. This is of course very specific to my type of clients, but I thought the side by side comparison might be useful if your looking for a particular effect.
It’s worth noting that these are outdoor shots at short shutter speeds. At the longer shutter speeds necessary for indoor shots, people walking thru a shot are usually completely erased from the final image with no editing using AuroraHDR.
A good use for DFE_DNG with motion detection ON like in photo 2 is outdoor images with objects that move subtly like trees, water, flags etc to essentially freeze all motion in the shot. AuroraHDR’s deghosting correction causes too many artifacts with 360 images to be useful in every situation I’ve tested, so I didn’t include it in this example, and the DualFisheye motion detection is quite good. The editing required to remove people from an outdoor shot is also a lot more forgiving.
Hello,
Since walking people may be in different positions in different moments, I’d take 2 or 3 HDR shots a few seconds apart. This way someone in position A in shot 1 may move to position B in shot 2.
Later on I open those shots as layers in Affinity Photo, Gimp or Photoshop and add masks to hide or reveal parts of each shots so there’s no one visible in the final shot.
Yeah definitely doing a layered composite is an option when the client is willing to pay for it. It can be a great way to create the illusion of an empty room, but I’m always hesitant to tell a client I can guarantee it will work.
Most of my clients would like my work to be done with a minimum of disruption to their guests and there’s always that one guy sitting in a lobby for an hour in the same chair lol. Because of that, when a client needs an empty room I usually see if the shoot can be done at a time when I can have control of the space. It’s not always an option tho if for instance they want the shots in daylight.
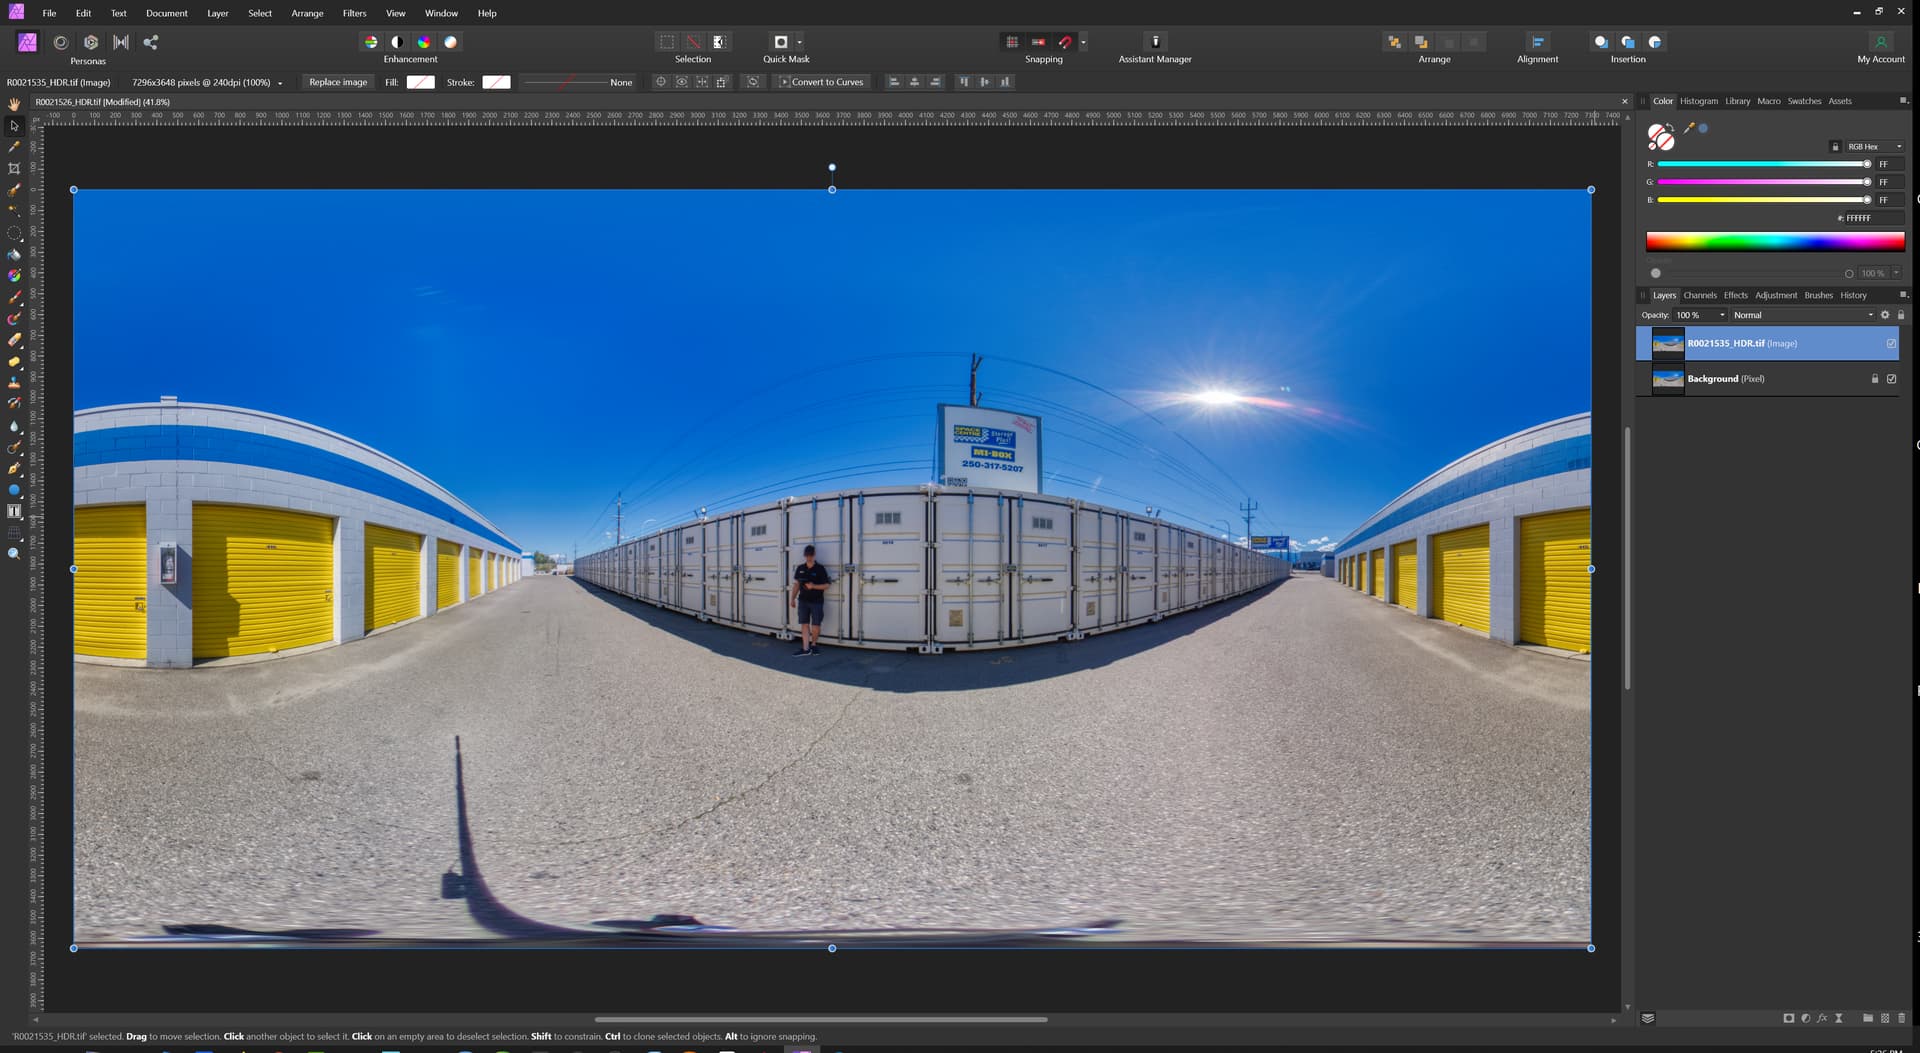
I’m shooting a tour for a self storage facility soon where I won’t have the chance to hide for some shots down the long rows of storage lockers. I’ll have to use the layered composite method mentioned by gerlos to brush myself out of the HDR photos so I’ll post some example pics and the workflow I used.
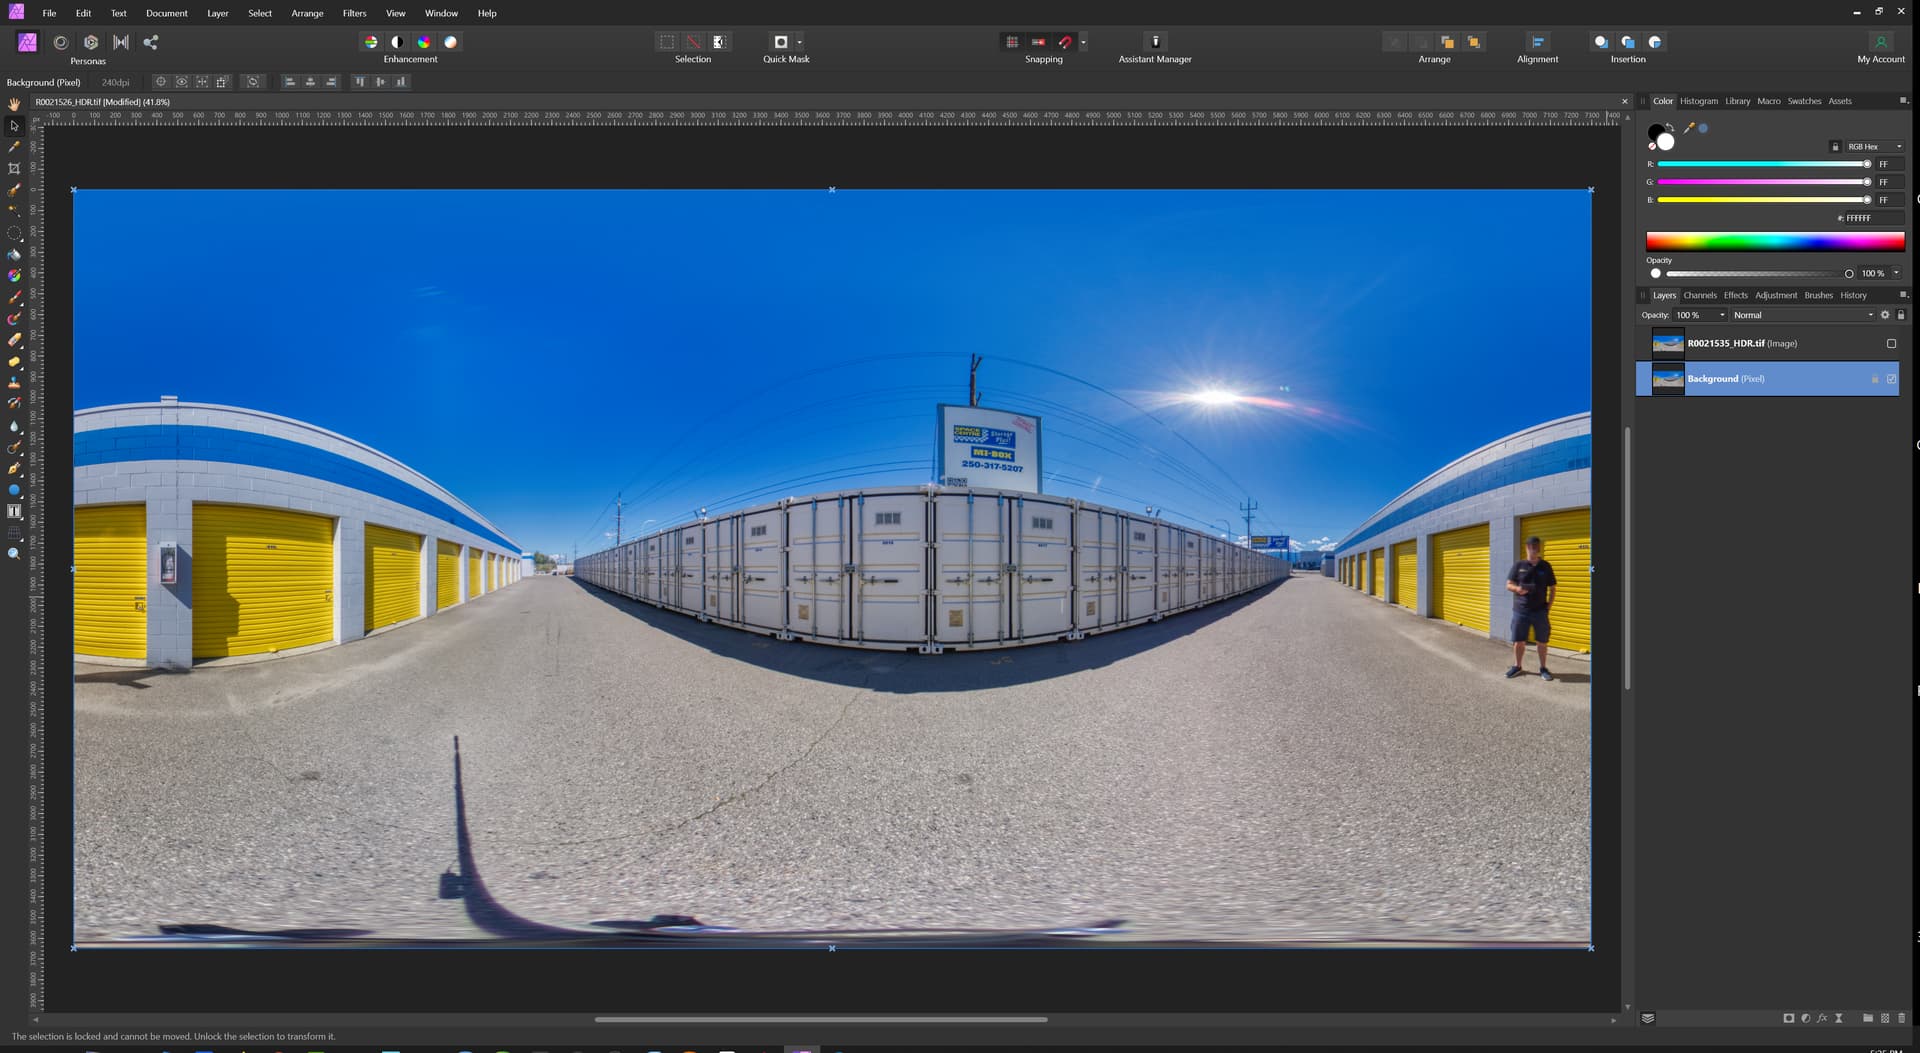
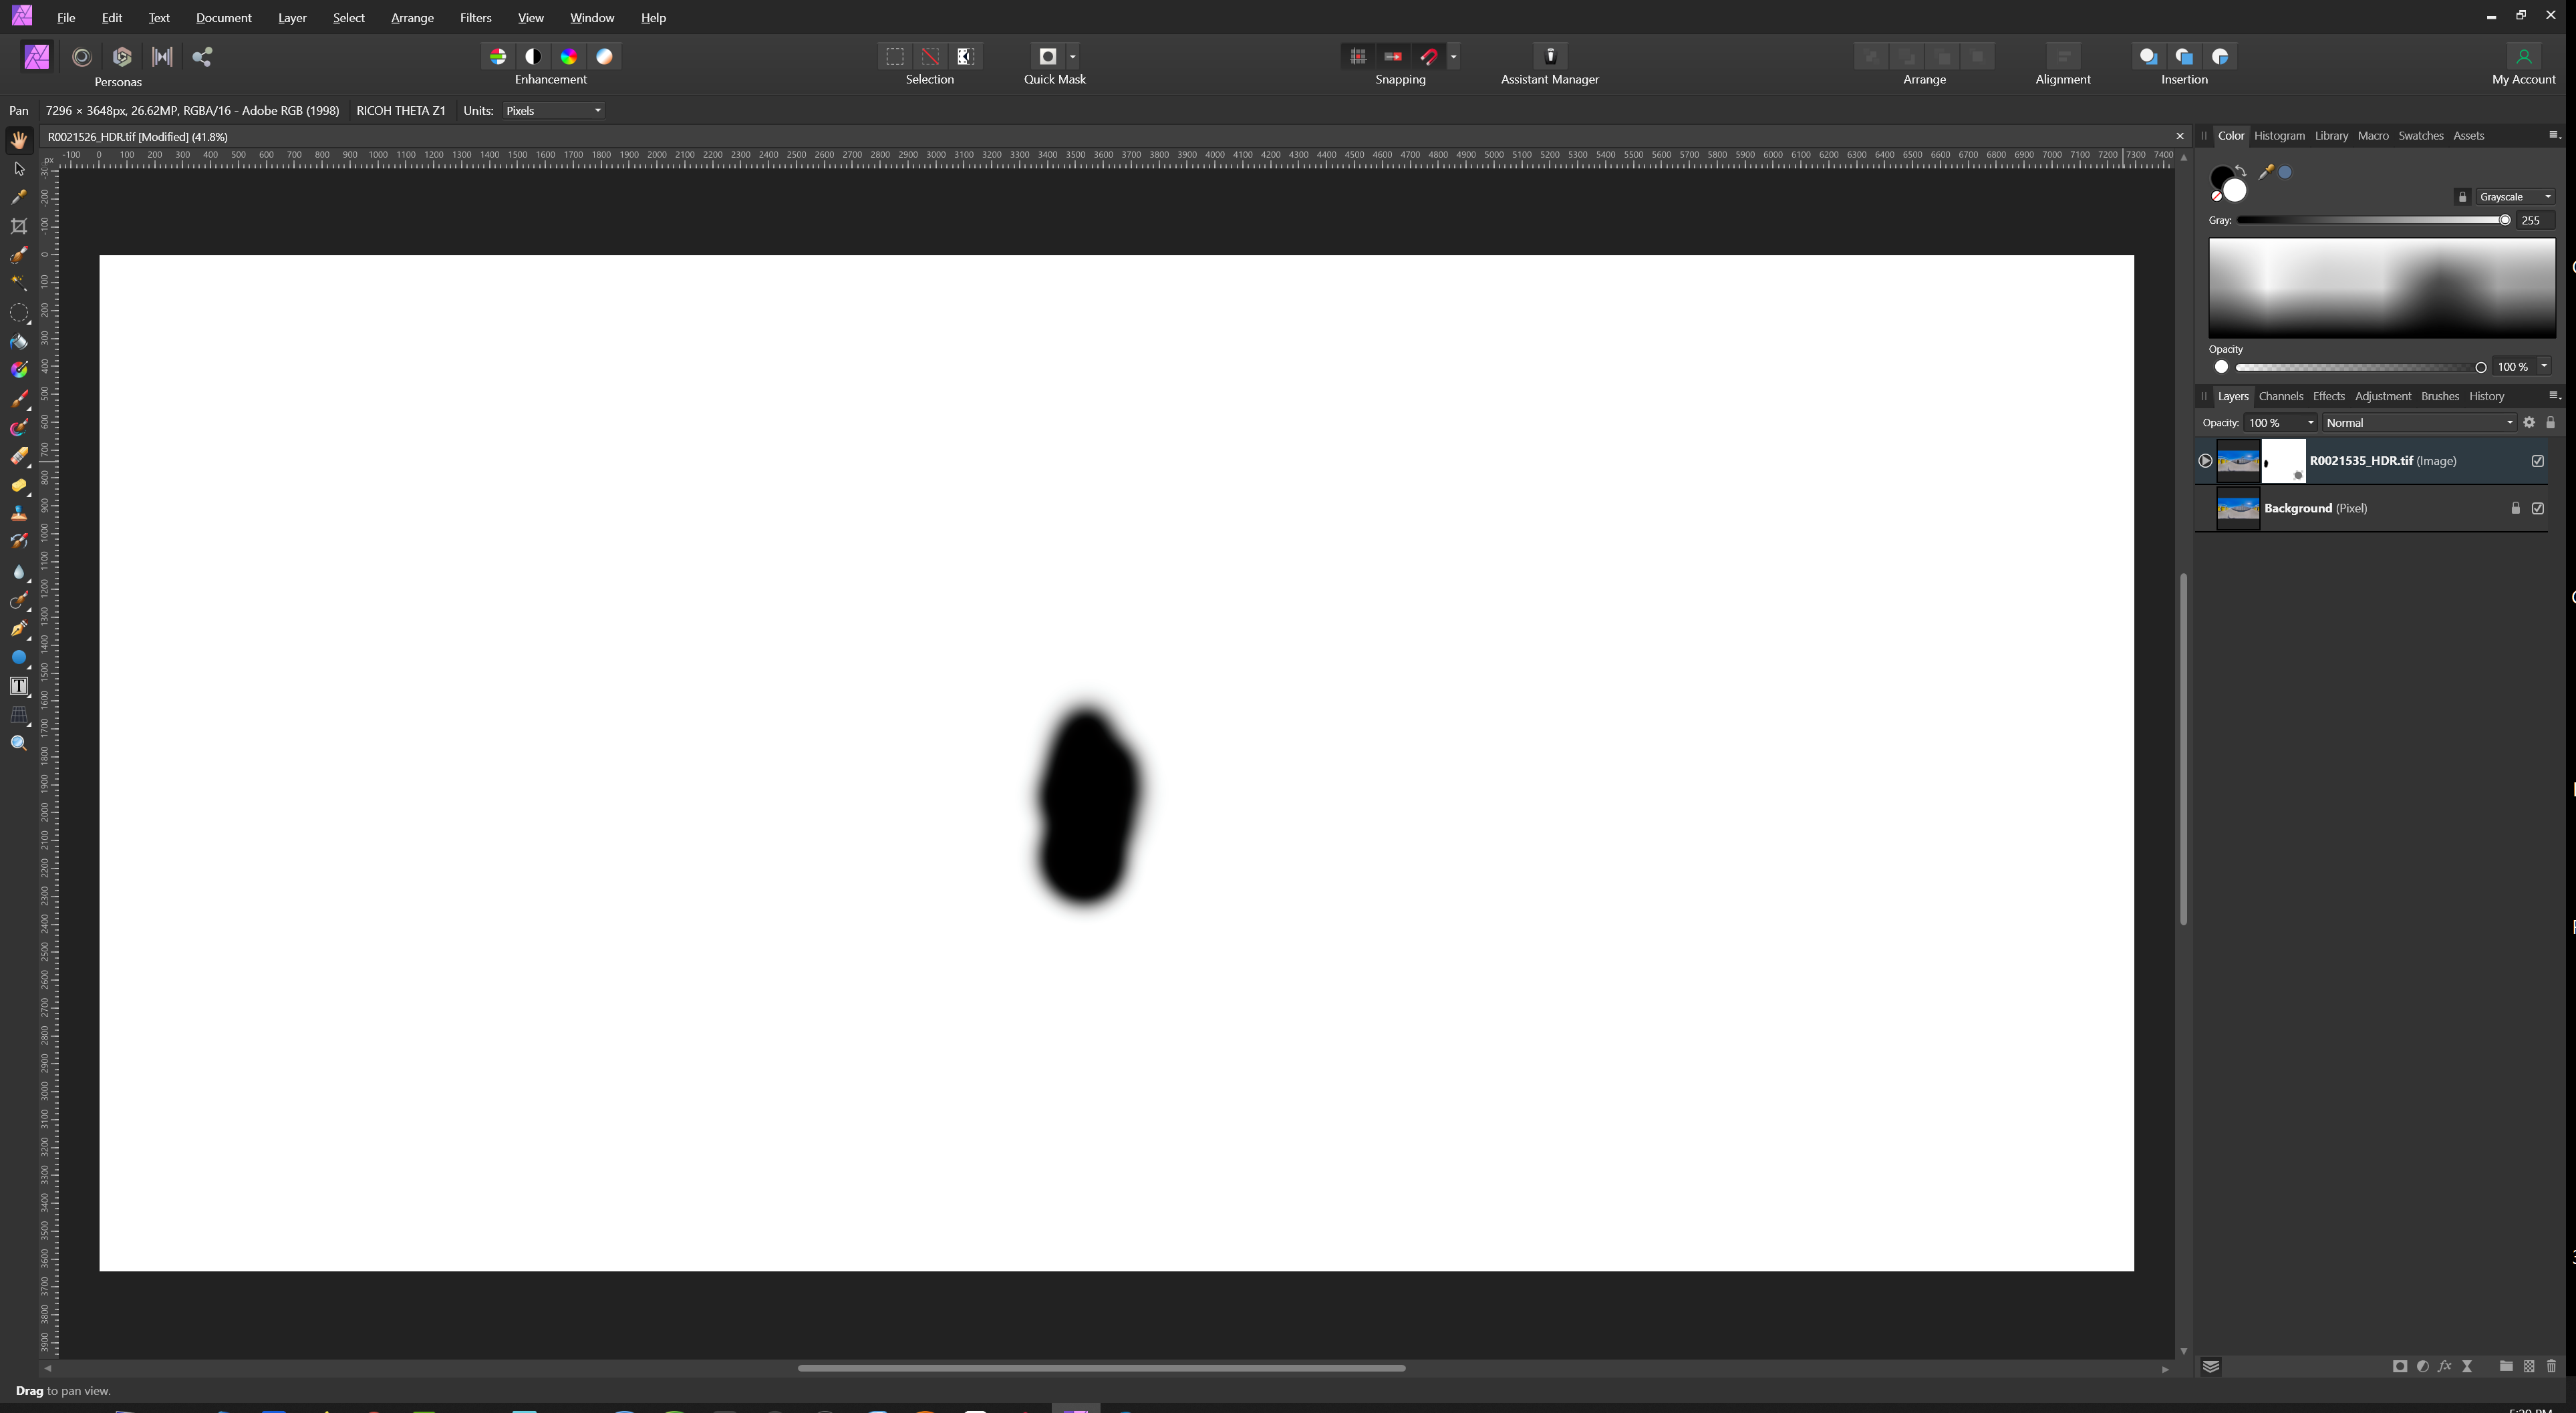
OK so without turning this into a complete photo editing tutorial I’ll just briefly go over the steps I took to create a clean image when I couldn’t be out of frame. Each image is an HDR using 9 brackets captured with DFE and merged in AuroraHDR using the same settings. That’s important because the 2 images MUST be identical except for my position. I ended up needing to do this 4 times on my latest gig.
After importing the images as aligned layers, I simply created a white (reveal) mask on the top layer and, with the mask selected, used a soft black brush over my body to mask myself out of the image.