This article was originally published in Japanese by @yomura_ on the Qiita blogging site.
Introduction
Hello This is RICHO’s @yomura_
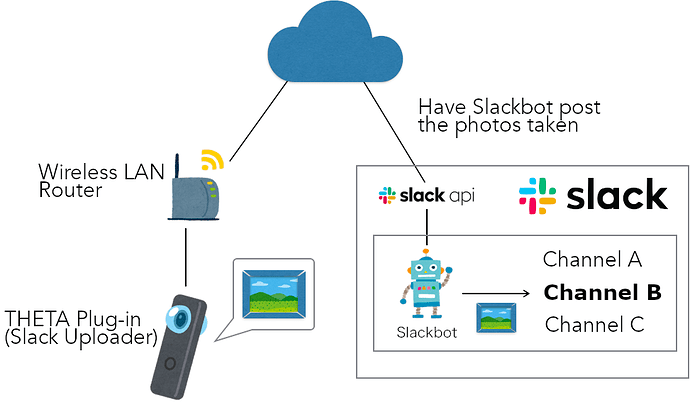
I thought it would be nice to share photos taken with RICOH THETA more easily. So I built a plug-in to upload photos taken with RICOH THETA V to Slack on the fly.
Slack publishes many APIs such as sending message.
This time, the purpose is to upload an image file, so let’s try this files.upload API.
Once the image file is uploaded, Slackbot will post the image to the specified channel.
About RICOH THETA plug-in
If you are not familiar with THETA plug-ins please look here.
If you are interested, please follow us on Twitter and participate in the THETA Plug-in Developer Community (theta360.guide developer community).
Steps for Posting to Slack
Preparation is necessary, but posting is easy 3 steps.
- Push the wireless button and set to Client Mode
Manual: RICOH THETA V - User Guide
Video: How to Use the Wireless LAN Client Mode - YouTube
-
Long press the Mode button and start the plug-in
-
Press the shutter button → Post the image to the designated Slack channel!
Implementation
Since the official SDK is provided, that will be the base, and only the part that uses the Slack API was added.
The sample source code for this plug-in is published on GitHub
Request Format
This time, a POST request was sent using HTTP client library OkHttp3.
It becomes accessible by adding one line in build.gradle app and then doing a build. (3.13.1 is the latest version at the time this was written.)
build.gradle

dependencies {
    ...
    ...
    implementation 'com.squareup.okhttp3:okhttp:3.13.1'
}
Request format was sent with multipart/form-data.
Request in multipart/form-data format uses OkHttp’s MultipartBody class.
The string that is the boundary of transmission data was generated from the current time.
final String boundary = String.valueOf(System.currentTimeMillis());

RequestBody requestBody = new MultipartBody.Builder(boundary)
                              .setType(MultipartBody.FORM)
                              ....
Argument of Request
This time, data was inputted for the following arguments.
| Argument Name | Explanation |
|---|---|
| file | Image File |
| token | Slackbot token that allows posting images |
| channels | Slack Channel Name |
| filename | Image filename |
| filetype | Image data format |
| initial_comment | Comment when Slackbot is posting |
| title | Image title |
Get File
Images taken with THETA are stored in external storage, so it is necessary to obtain the DCIM directory as shown below.
final String dcim = Environment.getExternalStoragePublicDirectory(Environment.DIRECTORY_DCIM).getPath();
File file = new File(dcim + fileName);
Get Channel Name
Using the Slack app, right click the channel name and select “get link” to copy the string below. The string after messages/ is the channel name.
https://{workspacename}.slack.com/messages/{channelname}
Doing It All Together
In summery, this is what the sending requests part of the process looks like.
UploadTask.java
private String postToSlackbot() {

    //  SlackAPI’s URL
    final String apiUrl = "https://slack.com/api/files.upload";
    // The Slack channel you're posting to
    final String slackChannel = "write your channel ID here"
    // Slackbot token
    final String slackBotToken = "write your slackbot token here"

    // Get file
    final String dcim = Environment.getExternalStoragePublicDirectory(Environment.DIRECTORY_DCIM).getPath();
    File file = new File(dcim + this.fileName);

    // HTTP client
    OkHttpClient client = new OkHttpClient.Builder()
            .connectTimeout(30, TimeUnit.SECONDS)
            .writeTimeout(60, TimeUnit.SECONDS)
            .readTimeout(60, TimeUnit.SECONDS)
            .build();

    // Request body
    final String timestamp = getDateString();
    final String boundary = String.valueOf(System.currentTimeMillis());
    RequestBody requestBody = new MultipartBody.Builder(boundary)
            .setType(MultipartBody.FORM)
            .addFormDataPart(
                    "file",
                    fileName,
                    RequestBody.create(MediaType.parse("image/jpeg"), file)
            )
            .addFormDataPart("token", slackBotToken)
            .addFormDataPart("channels", slackChannel)
            .addFormDataPart("filename", "IMG_" + timestamp + ".jpg")
            .addFormDataPart("filetype", "jpg")
            .addFormDataPart("initial_comment", “The image was uploaded from THETA V SlackUploader.”)
            .addFormDataPart("title", "IMG_" + timestamp + ".jpg")
            .build();

    // Request
    Request request = new Request.Builder()
            .url(apiUrl)
            .post(requestBody)
            .build();

    Call call = client.newCall(request);
    String result = null;

    try {
        // Get response
        Response response = call.execute();
        ResponseBody body = response.body();
        if (body != null) {
            result = body.string();
        }
    } catch (IOException e) {
        e.printStackTrace();
    }
    return result;
}
After this, create a task class for asynchronous processing referring to TakePictureTask.java provided in the SDK in advance, and call the previous processing from doInBackground.
UploadTask.java
@Override
protected String doInBackground(Void... params) {
    String result = postToSlackbot();
    return result;
}
Assigning Buttons
With this plug-in, the camera Shutter button is assigned to “shoot and upload to Slack," and the Mode button is assigned to “switch channels."
MainActivity.java
@Override
public void onKeyDown(int keyCode, KeyEvent event) {
    if (keyCode == KeyReceiver.KEYCODE_CAMERA) {
        new TakePictureTask(mTakePictureTaskCallback).execute();  // shoot and upload
    } else if (keyCode == KeyReceiver.KEYCODE_MEDIA_RECORD) {
        changeDestination();  // switch channels
    }
}
I attempted to add a voice function so that one can know which channel the current post was when you swith to it, but it was not possible to have the built-in Text-to-speech engine of THETA V to speak in Japanese.
This article introduces in detail how to have the THETA talk.
Making the THETA talk (article is in Japanese)
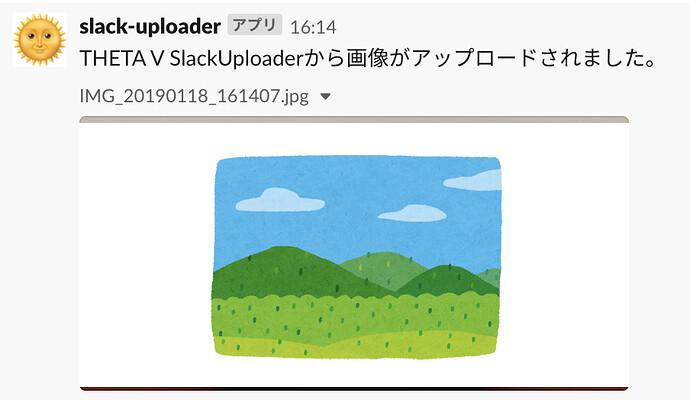
When the Shutter button is pressed, the image can be uploaded like here. (Using a fake image here.)
Conclusion
This is still at a rough stage, but images can be posted to Slack directly from your THETA!
Whether using Slack privately or as a team at work, photos taken with THETA can be shared as an easy substitute for a memo.
Right now, the Slackbot token and destination are hard-coded, so it would be nice to be able to set it from a WebUI.
The below article shows details about WebUI.
Creating a WebUI for Your THETA Plug-in

