This is how to get the current options and setting the options on your camera. It will return to you the state of an option like which filter it has on, or which capture mode it’s on. You can also set a filter on your camera. I’m using insomnia as my api tester, on a windows laptop and will be using the options section from the RICOH THETA api github
https://github.com/ricohapi/theta-api-specs/tree/main/theta-web-api-v2.1#options
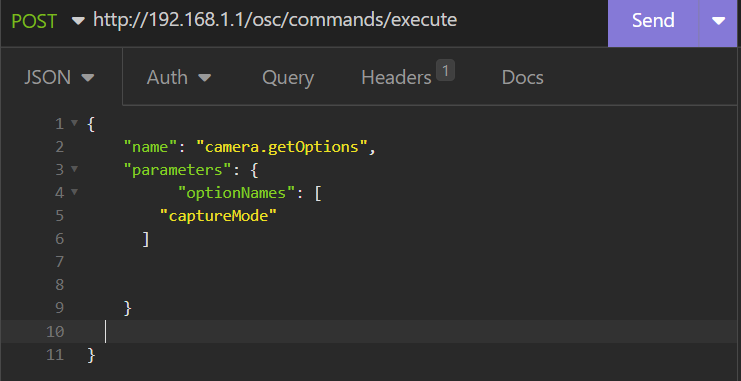
How to get the Capture Mode of the Camera:
Steps:
- Create a new Request
- Rename it to something like “Get Option Capture Mode”
- Change the Request type to POST
- Enter the API command: http://192.168.1.1/osc/commands/execute
- Change the Body type to JSON
- In the Headers Section Make sure you insert the correct
Content-Typewhich is:application/json;charset=utf-8

- Inside the JSON Body make sure you set the
nametocamera.getOptionsand add aparametersJSON object with an Array ofoptionNamesas shown in the screenshot below. Another example of thegetOptionscommand is linked in the API Docs here
https://github.com/ricohapi/theta-api-specs/blob/main/theta-web-api-v2.1/commands/camera.get_options.md
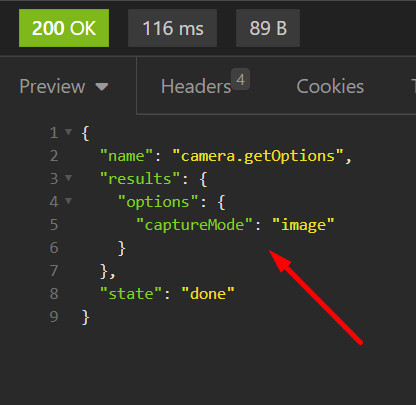
- When you send the command you should get your response to the right! In my case my capture mode is in
image
Curl Example Below:

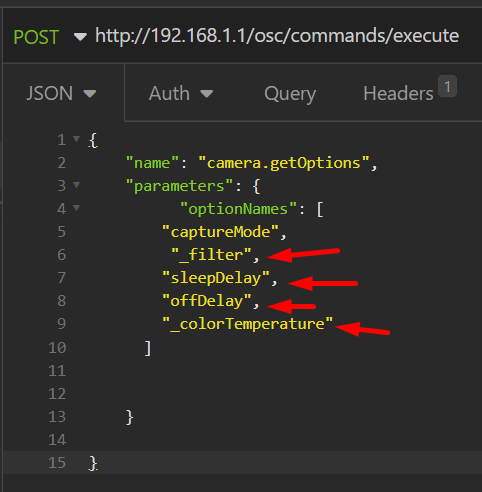
How to add more Options?
Add in more strings with commas as shown below for more options like _filter, sleepDelay, offDelay, _colorTemperature
More options can be found in the API link
https://github.com/ricohapi/theta-api-specs/tree/main/theta-web-api-v2.1#options
How to get a list of files?
Steps:
- Create a new Request
- Rename it to something like “Get List Files”
- Change the Request type to POST
- Enter the API command: http://192.168.1.1/osc/commands/execute
- Change the Body type to JSON
- In the Headers Section Make sure you insert the correct Content-Type which is:
application/json;charset=utf-8 - Inside the JSON Body make sure you set the
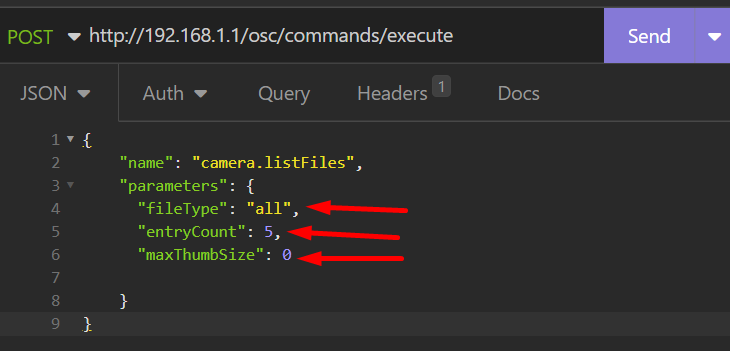
nametocamera.listFilesand inside theparametersobject add in the required parameters which arefileType, entryCount,andmaxThumbsize. The screenshot below shows the parameters. All the options that are required DO NOT show as optional in the API docs here https://github.com/ricohapi/theta-api-specs/blob/main/theta-web-api-v2.1/commands/camera.list_files.md
Request
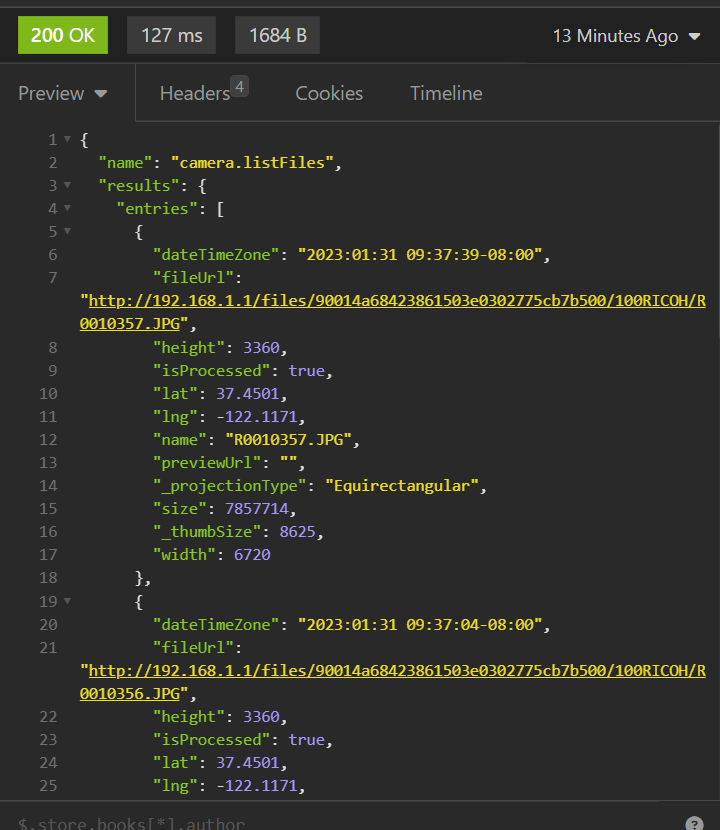
Response
How to make a video with the API!
The general steps that are going to be taken for this is we are going to:
- Set the Capture Mode of the camera to Video
- Start the Video with an API command
- Stop the Video with an API command
- Check the latest file of the Camera
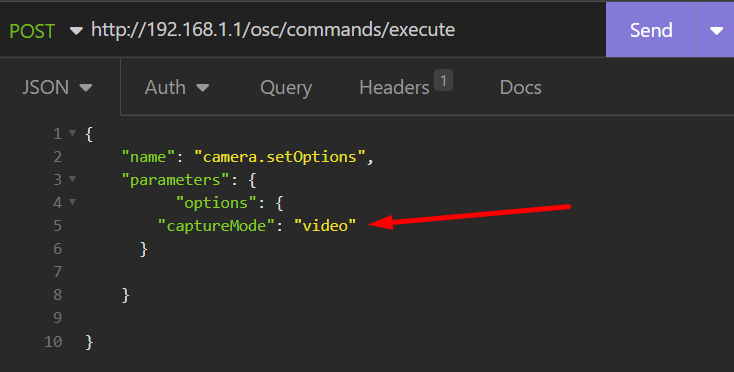
The Screenshot above shows setting the option of captureMode to video
Steps:
- Create a new Request
- Rename it to something like “Set Capture Mode to Video”
- Change the Request type to POST
- Enter the API command: http://192.168.1.1/osc/commands/execute
- Change the Body type to JSON
- In the Headers Section Make sure you insert the correct Content-Type which is:
application/json;charset=utf-8 - Inside the JSON body as shown in the screenshot above you want to set
nametocamera.setOptionsand add the parameters calledoptionswhich is a JSON object and insideoptionsyou want to addcaptureModewhile setting it tovideo. This is the link tocaptureModein the API https://github.com/ricohapi/theta-api-specs/blob/main/theta-web-api-v2.1/options/capture_mode.md#capturemode - Lastly Send the command
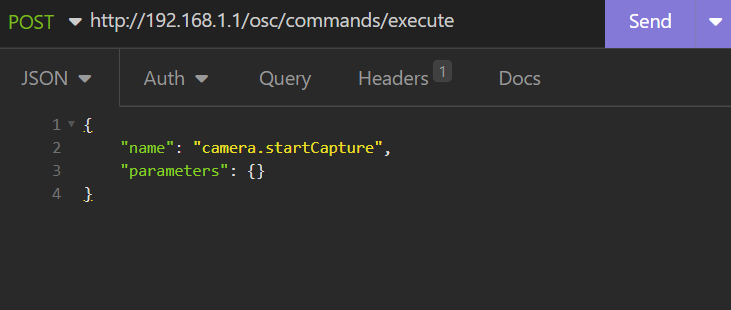
Now that the Capture mode is in Video we can startCapture. Below is an example of the startCapture command.
- Create a new Request
- Rename it to something like “Start Video”
- Change the Request type to POST
- Enter the API command: http://192.168.1.1/osc/commands/execute
- Change the Body type to JSON
- In the Headers Section Make sure you insert the correct Content-Type which is:
application/json;charset=utf-8 - Inside JSON body you want to add the command
nameascamera.startCaptureand you can leave parameters empty or exclude it as show in the above screenshot forstartCapture - For Stop you can Duplicate the “Start Video” Request, rename it to “Stop Video” and change the command
nametocamera.stopCaptureas shown in the screenshot below
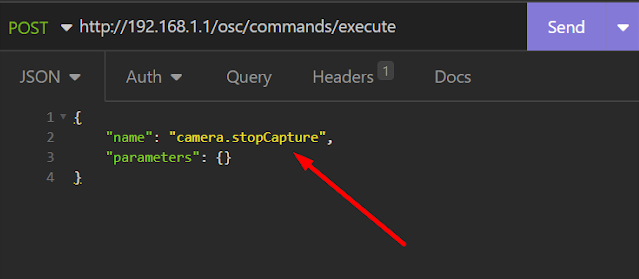

Now that your camera capture mode is in video and we have the Start and Stop commands you are set up and can start your video by sending in the Start video command. When you send the Stop command you should be getting a response of the fileUrls of the video you have taken.
startCapture API Link -
stopCapture API Link -