Neutral Density Solution For Most Theta Cameras

I have been thinking about this for a little while and decided to finally make it happen. If you ever want to shoot 360 bracketed HDRs, especially outdoors in bright sunlight, your options are pretty limited as far as beating the brightness of the sun. Someone already makes a little nub that goes over the lenses with a small piece of ND filter on it, but it creates a circle frame around most the image, and if you have sun-spot reflections off other surfaces, this is not good for business.

Pretty much what I have done here, is create a closing shell system (glues shut when fully finished) that goes right up to the edge of most Theta cameras (S, SC, SC2, V). before gluing the 2 halves together, you just cut out some ND filter film of your choice light emission, glue it loosely around the inner edges of the shell, and put a small piece of soft thin foam at the bottom, do this on both halves, glue it together, and that’s it! The whole thing just slips over the camera, edge to edge, with zero light leaks and zero frame obstruction. I will eventually be selling completed kits of these at different stops, but if you guys want a 3D printable file to build it yourself, I’d be happy to share.

DOWNLOAD
For those that want to experiment with the shells, modify them to your liking, or just print them yourself for free, I uploaded this version for free download on Thingiverse:

2 Likes

This is cool. As I’m not an experienced photographer, I did not know what an ND filter was. I read the article below after I saw your post.

https://www.bhphotovideo.com/explora/photography/hands-on-review/a-guide-to-neutral-density-filters

Do you have any shots of the unit with the neutral density filter attached?

Feel free to post comparison pictures taken with the THETA with and without the filter. You may need to upload the picture to theta360.com and then share the link here.

1 Like

@girbilcannon Looks pretty interesting! There have been some approaches to building ND filters posted in the forum in the past, but not very complete. Would love to see how far you go with this.

Thanks for posting that old topic again. I had forgot about those early experiments. Did you ever manage to use an ND filter on your THETA in the bright New Mexico sun?

I remember you hiked to the top of a mountain with a Manfrotto monopod.

The solution by @girbilcannon looks like the best ever. I’d love to see the differences in the pictures.

I’m waiting to get some more ND film in to get test shots with the shell attached, but there are actually shots online of what others have done with the ND filter film that show similar results. I’m just trying to take the same concept but correct the flaws with other solutions out there. I will defintely get some once i get that film in and finish constructing the prototype.

2 Likes

oh yeah those are some of the concepts I am trying to correct with my design. The all around bag method workds, but the excess stapled material can show up in the final stitch and can have light leaks in the bottom. And with the slip on cap design of the other, it works great with the exception of it blocking highlight hotspots from reflections on other surfaces, which could be detrimental if you are replicating set lighting and using a sun scrim to diffuse the harsh light but still have little pings coming off something like the cstand.

I feel that by making the shell match the body shape of the camera closing off all gaps/excess materials, you will have a much better final result with less preparation and post work.

1 Like

This makes good sense to me. Please let me know when you make progress. Pretty interesting project!

1 Like

I uploaded the file to thingiverse for any DIY 3D printers out there. It will only be up for as long as I am still working on the prototype.

1 Like

Found it - Theta Neutral Density Case Shells (v1) by whitecrow1 - Thingiverse Nice description. I wish I had a 3D printer to try it out. Oh… I might have a buddy who does… Hmm.

2 Likes

search for 3d printing service on Google and just go to a shop near you. It’s kind of like how you went to Kinko’s long ago when you didn’t have a copy machine or laser printer at home.

I had the prototype printed at Shapeways with basic versatile black material. It was a bit costly (like $35 after shipping), but Their basic materials are VERY strong and flexible. As the 3D file describes there is a little bit of an issue with how thin the keys are, but if you use their “print anyway” option, it will come missing some keys which aren’t needed for final construction anyways.

1 Like

also for those who want to know, the other 2 items needed to finish the build for you DIYers…these are what I ended up buying and am still waiting for:

LEE FILTERS 211 SHEET .9 NEUTRAL DENSITY SHEET
Sponge Neoprene Stripping W/Adhesive 1/2in Wide X 1/4in Thick

1 Like

When you start selling it, are you going to have a version for the Z1?

I am still waiting to receive some of the materials to finish the prototype for the other cameras. Once I finish constructing and testing that, I will start using base measurements to build shell for the Z1, but before I print a prototype for it, I will need to get my hands on a physical one so I can verify the exact measurements. After that, prototyping and testing for it should go a lot faster. But yes, there will eventually be one that fits the Z1.

2 Likes

UPDATE MID OCTOBER:
I got all the materials in to build the prototype and it was a VERY dirty build (what prototype isn’t?). The primary focus of this prototype was fitting, mounting solutions, and film layer density.

THE FILM (THETA V)
I got the film and it’s the darkest possible stuff I could find at only 3 stops light subtraction. before I even mounted the film to the shell, I just stapled some pieces together (like done by someone else on here. I did 1 layer, 2, layers, and 3, layers. I raised the shutter to it’s max with ISO at it’s lowest (ISO-64, 1/25000) just to see how the brightest of brights with the sun and its reflections would handle. 2 Layers of film work perfect at sunset or sunrise hours when it’s not as intense, but 3 layers would be optimal for getting it down to a dim little circle. (This image is ISO-64 Shutter 1/25000 with 1 layer of film…3 stop reduction at sunset)

THE FILM (THETA S/SC)
These cameras are only capable of getting down shutter speed of 1/8000, which is VERY slow if you think about it…1/3 the speed of the V or Z1. 2 layers of film didn’t do much, I bumped it to 3, and it reduced about 9 stops. It was alright, but in the end, I feel that 3 layers on those 2 cameras would be best. Any more than that, and no matter what your settings are, it will be dark and any colors from reflections or haze will be lost. So be sure to shoot a full bracket range without the filter as well.
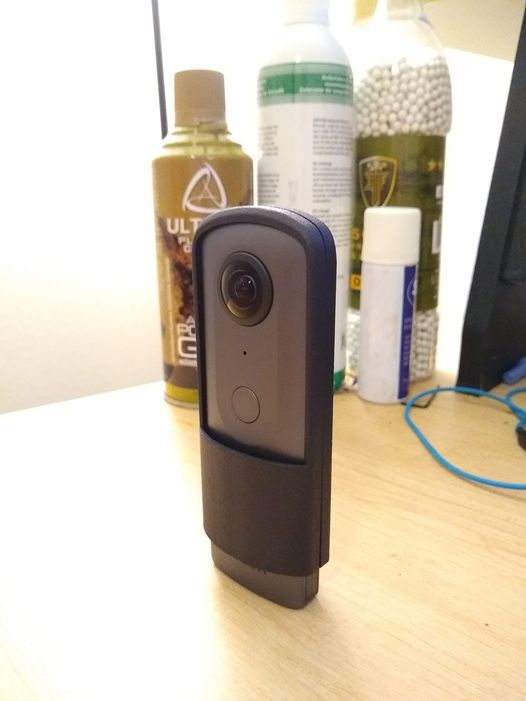
THE FIT
I just kind of taped the 2 shells together with 2 layers of film hotglued into each side (gross I know). It was very unpleasant to look at obviously but it did give me some insight on my tolerances. I gave it about an extra 1mm breathing room already, but with glue and 2 layers already, it could barely fit the camera in there (had to use a lot of force). So If I’m going to get this to fit smoothly, I am going to have to give it about 3-4mm tolerance on each side. As far as the bottom foam goes, 1/4" was WAAAAAY too thick. I tried trimming it in half with a blade, but just ended up pealing it out. I will definitely have to get 1/16" of a softer foam to prevent light leaks (trust me, light leaks are bad).

MOUNTING SOLUTIONS
I really did not think this through when I first designed it, and all I had on me was super glue and hot glue. The super glue takes forever for the film to adhere to the shell and I didn’t have anything to clamp it with. The hot glue is way too thick and gets everywhere. My end solution will be to create a shell insert with a convex curve to fit the inner shape of the shell halves. this way I can lay the film down on top of it, add a thin layer of silicone around the shell edge, and press it down onto the insert, which should mold all the edges to the correct shape and the glue can take it’s time to dry. I can repeat this for 3 layers much faster and cleaner than doing it by hand.

But anyways, That’s about it for the update. If anybody has any suggestions or ideas, please do tell. =)

2 Likes

@girbilcannon Did you ever finish this? I’d love to purchase one from you if so!

2 Likes

Sorry I never actually got back to this project because I had bigger fish to fry. HOWEVER, I have much better tools for product development now and should be able to get back to this soon. I know it’s been a while, but I haven’t dropped the project.

4 Likes

@girbilcannon and @Danny_Behar I’m curious, do you use the plug-in for shooting 360 bracketed HDRI images? I hear that it is “famous” within the VFX community. Wondering if you use it or have heard about it.

It looks like the HDRI plug-in only works with the Z1.

image

I tried to find the source code so they could recompile for the V.

I’m not sure if the plug-in will install on the V or not.