This article was originally published by @3215 in Japanese.
Hello, this is Ricoh’s @3215.
RICOH THETA V runs on an Android-based OS. You can expand the functionality of the camera by installing Android applications. We call these applications THETA plug-ins. We also offer infrastructure for development and distribution of plug-ins.
This article shows you how to implement a web UI for THETA plugins.
More information on THETA plug-ins is available here.
What is Web UI
Depending on the function of the THETA plug-in, in many cases, it is desirable for users to be able to configure the camera shooting settings and the accounts of linked external services.
Since the RICOH THETA V does not have a screen, you can not use layouts and screen transitions like ordinary Android applications. Therefore, in the Developer Guide of the THETA plugin, it explains that
you can provide a Web UI for your plug-in by setting up a Web server.
The following plug-ins enable configuration settings with this web UI technique:
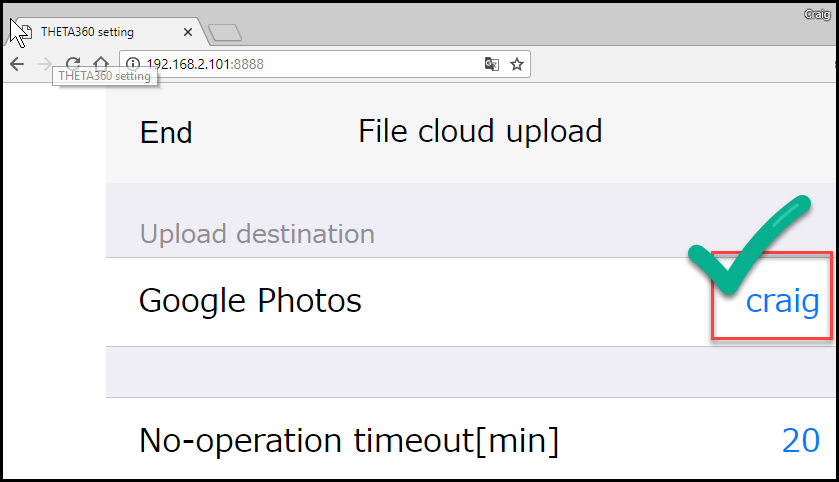
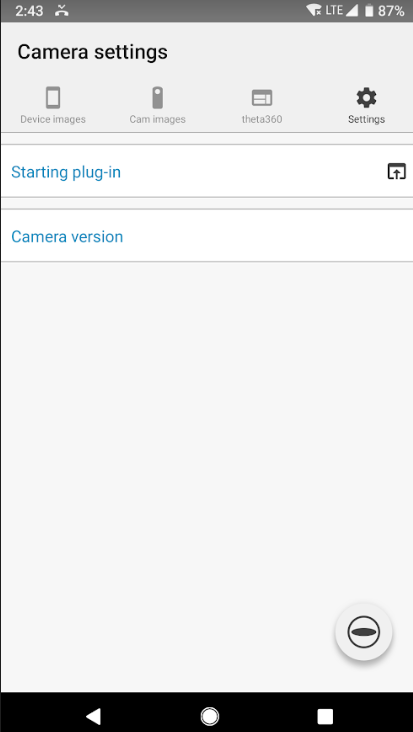
If the plug-in is running, you can access the Web UI from the camera settings of the smartphone
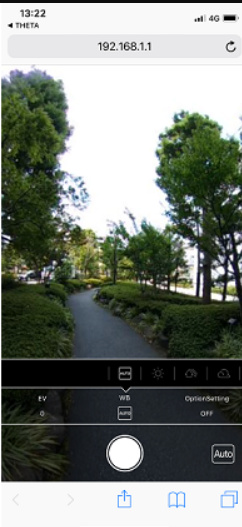
RICOH THETA application. You can also access web UI settings with a web browser by entering the URL directly.

I will show you how to implement a simple Web UI.
If you already know what you want to implement, you can jump to the official plug-in source code.
Import THETA Plug-in SDK
First of all, refer to the following article and import the project of Plug-in SDK into Android Studio and confirm that it works.
How to Use RICOH THETA Plug-in SDK
Please change package names and plugin display names as necessary.
You can change the display name of the plugin with app_name in res/values/strings.xml.
Enable Wi-Fi for THETA even during USB connection
In order to check the Web UI, you need to access THETA via Wi-Fi. However, if you connect the USB cable to the THETA, Wi-Fi will be invalid. It is inconvenient because you cannot check the Web UI while running your plug-in with Android Studio.
How to activate THETA’s Wi-Fi during USB connection (Scroll down to the section on Enable Wi-Fi when using adb)
Enable Web UI
From the plug-in screen of the RICOH THETA application of the smart phone from the Developer Guide We will be able to open the Web UI.
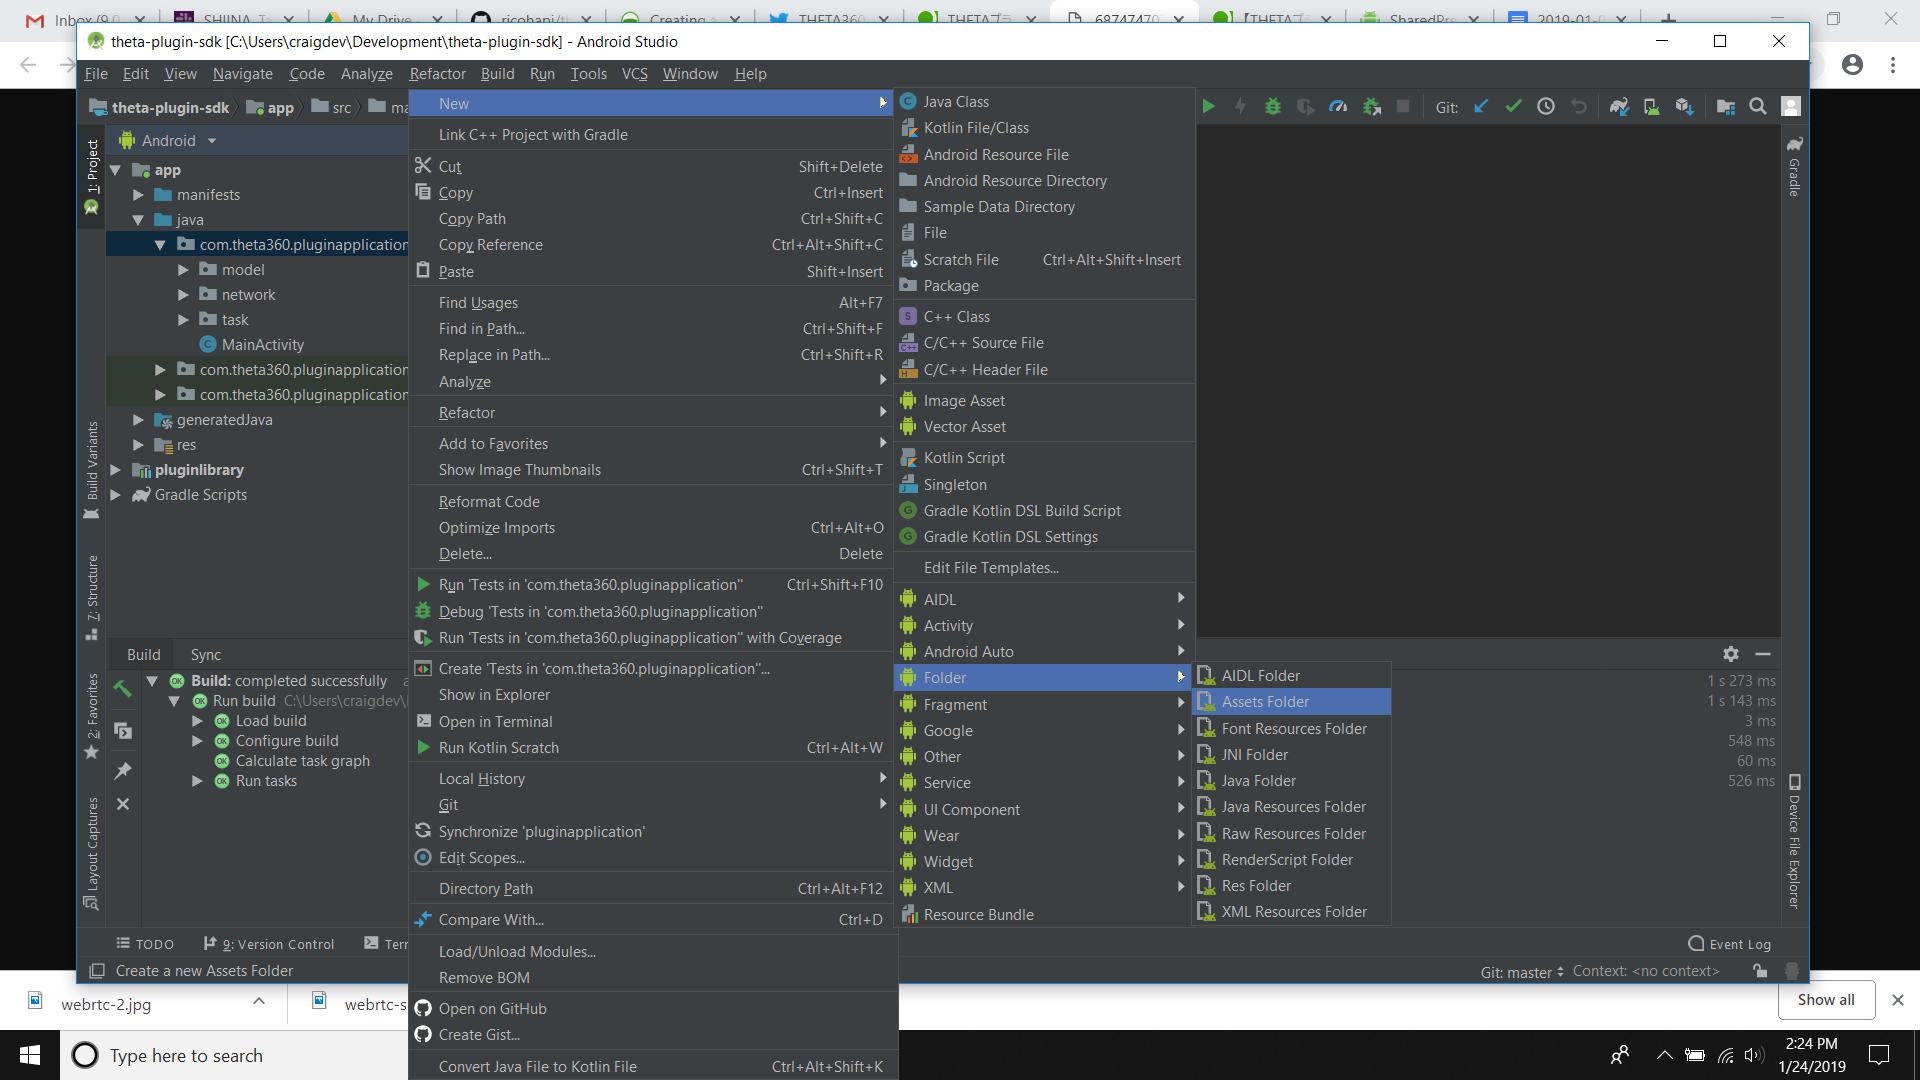
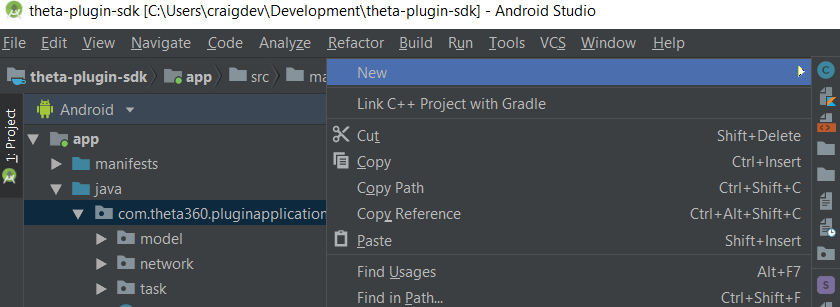
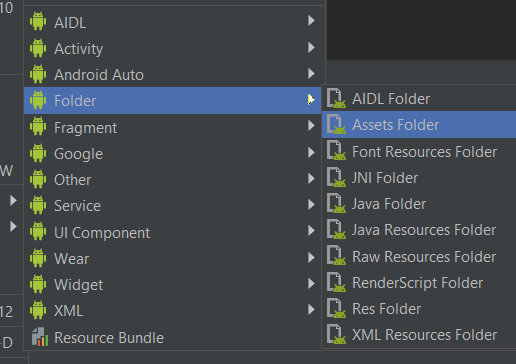
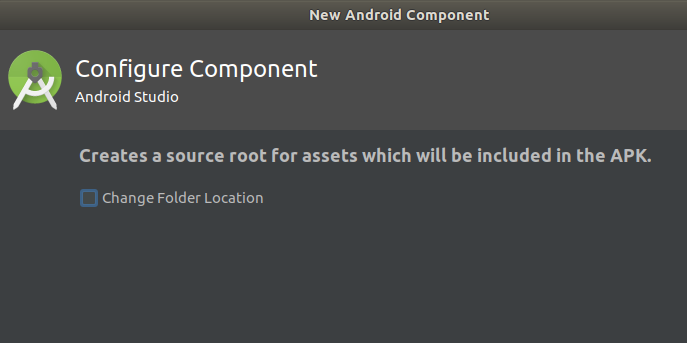
First, create an assets folder from [right click] → [new] → [folder] → [Assets folder].
Once the folder is created, create the settings.json file.
settings.json contains the following.
{
  "webServer": true
}
If you connect the smartphone and THETA via Wi-Fi, run the project in Android Studio, and if the right side of “Plug-in being activated” is displayed with a link on the plug-in screen of the RICOH THETA application as follows, it is OK .
Create HTML file and place it in assets
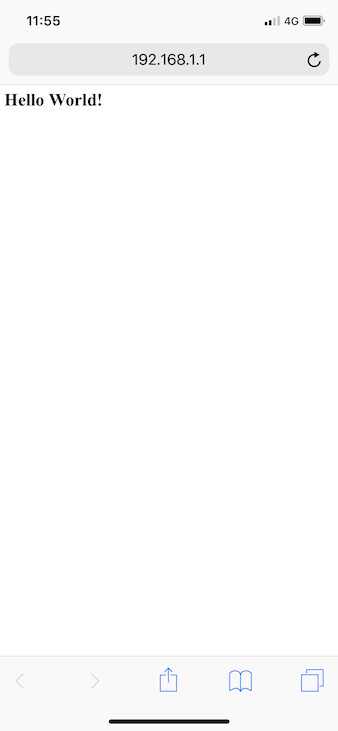
Create index.html just to display" Hello World! "And create it under the assets folder.
<html>
  <head>
    <title>Web UI Simple</title>
  </head>
  <body>
    <h1>
      Hello World!
    </h1>
  </body>
</html>
Implement the web server
This time we will implement the web server using NanoHttpd library.
Add the following to dependencies in app build.gradle.
implementation 'org.nanohttpd:nanohttpd-webserver:2.3.1'
We will create a class that inherits NanoHTTPD and implement it by overriding methods as necessary.
At a minimum, we will implement the following two points.
- Specify
8888forportin the constructor - Override the
serve()method to implement handling for incoming requests
If you can set up a web server that will always return index.html regardless of the request, with MainActivity it looks like the following.
public class MainActivity extends PluginActivity {

  private Context context;
  private WebServer webServer;
  .....

  @Override
  protected void onCreate(Bundle savedInstanceState) {
    .....

    this.context = getApplicationContext();
    this.webServer = new WebServer(this.context);
    try {
      this.webServer.start();
    } catch (IOException e) {
      e.printStackTrace();
    }
    .....

  }
  .....

  protected void onDestroy() {
    super.onDestroy();
    if (this.webServer != null) {
      this.webServer.stop();
    }
  }
  .....

  private class WebServer extends NanoHTTPD {

    private static final int PORT = 8888;
    private Context context;

    public WebServer(Context context) {
      super(PORT);
      this.context = context;
    }

    @Override
    public Response serve(IHTTPSession session) {
      AssetManager assetManager = context.getAssets();
      InputStream is = null;
      try {
        is = assetManager.open("index.html");  // このInputStreamはNanoHTTPD側でcloseしてくれる
        return newChunkedResponse(Status.OK, "text/html", is);
      } catch (IOException e ) {
        e.printStackTrace();
        return newFixedLengthResponse(Status.INTERNAL_ERROR, "text/plain", e.getMessage());
      }
    }

  }

}
When you start the plugin and access the Web UI, the contents of index.html is displayed.
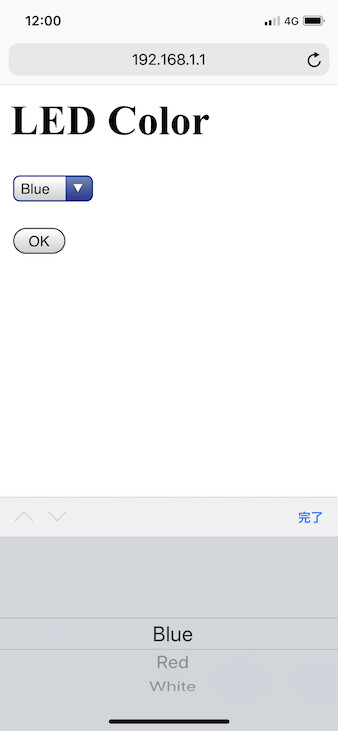
Enable to set LED lamp color from Web UI
Since the basic implementation of the Web UI has been done so far, we will only extend the implementation of index.html and the Web server.
This time I tried to be able to set the color of the LED lamp of THETA from Web UI.
- Since error handling is omitted, please be careful when diverted.
The outline of the implementation is as follows.
- Implement the configuration screen as
form - Blue (default), red, white selectable with
selectpart - Change the color of the LED lamp by pressing the
OKbutton (LED lamp? How to change the color
here) - The color of the LED lamp is saved in
SharedPreferences - Use the template engine (Mustache) to display the currently selected color as an initial value
Summary
I introduced the basic implementation method of Web UI and tried to change the color of THETA LED lamp from THETA plugin 's Web UI.
However, since this sample has only minimal implementation, it has become a hard to see UI.
In order to make it easy to see from the smartphone, you need to apply css.
By using JavaScript, it is also possible to create a more complex Web UI.
Also, if the setting value is large, you should use SQLite instead of SharedPreferences.
If you want to know these methods, please refer to
official plug-in source code.
Those interested in THETA plug-in development, please register with the partner program!
Please note that THETA serial number applied at the time of registration will not be subject to manufacturer support.
Sample code
package com.theta360.pluginapplication;

import android.content.Context;
import android.content.SharedPreferences;
import android.content.res.AssetManager;
import android.os.Bundle;
import android.preference.PreferenceManager;
import android.view.KeyEvent;
import com.samskivert.mustache.Mustache;
import com.theta360.pluginapplication.task.TakePictureTask;
import com.theta360.pluginapplication.task.TakePictureTask.Callback;
import com.theta360.pluginlibrary.activity.PluginActivity;
import com.theta360.pluginlibrary.callback.KeyCallback;
import com.theta360.pluginlibrary.receiver.KeyReceiver;
import com.theta360.pluginlibrary.values.LedColor;
import com.theta360.pluginlibrary.values.LedTarget;
import fi.iki.elonen.NanoHTTPD;
import fi.iki.elonen.NanoHTTPD.Response.Status;
import java.io.IOException;
import java.io.InputStream;
import java.io.InputStreamReader;
import java.io.OutputStream;
import java.io.OutputStreamWriter;
import java.io.Reader;
import java.io.Writer;
import java.util.HashMap;
import java.util.List;
import java.util.Map;

public class MainActivity extends PluginActivity {

  private Context context;
  private WebServer webServer;
  private static final String PREFERENCE_KEY_COLOR = "color";

  private TakePictureTask.Callback mTakePictureTaskCallback = new Callback() {
    @Override
    public void onTakePicture(String fileUrl) {

    }
  };

  @Override
  protected void onCreate(Bundle savedInstanceState) {
    super.onCreate(savedInstanceState);
    setContentView(R.layout.activity_main);

    this.context = getApplicationContext();
    notificationLedBlink(LedTarget.LED3, this.loadLedColor(), 1000);
    this.webServer = new WebServer(this.context);
    try {
      this.webServer.start();
    } catch (IOException e) {
      e.printStackTrace();
    }

    // Set enable to close by pluginlibrary, If you set false, please call close() after finishing your end processing.
    setAutoClose(true);
    // Set a callback when a button operation event is acquired.
    setKeyCallback(new KeyCallback() {
      @Override
      public void onKeyDown(int keyCode, KeyEvent event) {
        if (keyCode == KeyReceiver.KEYCODE_CAMERA) {
          /*
           * To take a static picture, use the takePicture method.
           * You can receive a fileUrl of the static picture in the callback.
           */
          new TakePictureTask(mTakePictureTaskCallback).execute();
        }
      }

      @Override
      public void onKeyUp(int keyCode, KeyEvent event) {
        /**
         * You can control the LED of the camera.
         * It is possible to change the way of lighting, the cycle of blinking, the color of light emission.
         * Light emitting color can be changed only LED3.
         */
//         notificationLedBlink(LedTarget.LED3, LedColor.BLUE, 1000);
      }

      @Override
      public void onKeyLongPress(int keyCode, KeyEvent event) {

      }
    });
  }

  @Override
  protected void onResume() {
    super.onResume();
  }

  @Override
  protected void onPause() {
    // Do end processing
    close();

    super.onPause();
  }

  protected void onDestroy() {
    super.onDestroy();
    if (this.webServer != null) {
      this.webServer.stop();
    }
  }

  private void saveLedColor(LedColor ledColor) {
    SharedPreferences data = PreferenceManager.getDefaultSharedPreferences(context);
    SharedPreferences.Editor editor = data.edit();
    editor.putString(PREFERENCE_KEY_COLOR, ledColor.toString());
    editor.apply();
  }

  private LedColor loadLedColor() {
    SharedPreferences data = PreferenceManager.getDefaultSharedPreferences(context);
    String savedColor = data.getString(PREFERENCE_KEY_COLOR, LedColor.BLUE.toString());
    return LedColor.getValue(savedColor);
  }

  private class WebServer extends NanoHTTPD {

    private static final int PORT = 8888;
    private Context context;
    private static final String INDEX_TEMPLATE_FILE_NAME = "index_template.html";
    private static final String INDEX_OUTPUT_FILE_NAME = "index_out.html";
    private static final String HTML_SELECTOR_ID_COLOR = "color";

    public WebServer(Context context) {
      super(PORT);
      this.context = context;
    }

    @Override
    public Response serve(IHTTPSession session) {
      Method method = session.getMethod();
      String uri = session.getUri();
      switch (method) {
        case GET:
          return this.serveFile(uri);
        case POST:
          Map<String, List<String>> parameters = this.parseBodyParameters(session);
          this.updatePreferences(uri, parameters);
          return this.serveFile(uri);
        default:
          return newFixedLengthResponse(Status.METHOD_NOT_ALLOWED, "text/plain",
              "Method [" + method + "] is not allowed.");
      }
    }

    private Response serveFile(String uri) {
      switch (uri) {
        case "/":
          return this.newHtmlResponse(this.generateIndexHtmlContext(), INDEX_TEMPLATE_FILE_NAME, INDEX_OUTPUT_FILE_NAME);
        default:
          return newFixedLengthResponse(Status.NOT_FOUND, "text/plain", "URI [" + uri + "] is not found.");
      }
    }

    private Response newHtmlResponse(Map<String, Object> data, String templateFileName, String outFileName) {
      AssetManager assetManager = context.getAssets();
      try(InputStreamReader template = new InputStreamReader(assetManager.open(templateFileName));
          OutputStreamWriter output = new OutputStreamWriter(openFileOutput(outFileName, Context.MODE_PRIVATE))) {
        Mustache.compiler().compile(template).execute(data, output);
        return newChunkedResponse(Status.OK, "text/html", openFileInput(outFileName));
      } catch (IOException e) {
        e.printStackTrace();
        return newFixedLengthResponse(Status.INTERNAL_ERROR, "text/plain", e.getMessage());
      }
    }

    private Map<String, List<String>> parseBodyParameters(IHTTPSession session) {
      Map<String, String> tmpRequestFile = new HashMap<>();
      try {
        session.parseBody(tmpRequestFile);
      } catch (IOException e) {
        e.printStackTrace();
      } catch (ResponseException e) {
        e.printStackTrace();
      }
      return session.getParameters();
    }

    private void updatePreferences(String uri, Map<String, List<String>> parameters) {
      if(parameters == null) return;

      switch (uri) {
        case "/":
          this.updateLedColor(parameters);
          return;
        default:
          return;
      }
    }

    private void updateLedColor(Map<String, List<String>> parameters) {
      if (parameters.get(HTML_SELECTOR_ID_COLOR) == null || parameters.get(HTML_SELECTOR_ID_COLOR).isEmpty()) {
        return;
      }
      String color = parameters.get(HTML_SELECTOR_ID_COLOR).get(0);
      LedColor ledColor = LedColor.getValue(color);
      notificationLedBlink(LedTarget.LED3, ledColor, 1000);
      saveLedColor(ledColor);
    }

    private Map<String, Object> generateIndexHtmlContext() {
      Map<String, Object> context = new HashMap<>();
      context.putAll(this.generateLedColorContext());
      return context;
    }

    private Map<String, Object> generateLedColorContext() {
      Map<String, Object> ledContext = new HashMap<>();
      LedColor ledColor = loadLedColor();
      switch (ledColor) {
        case BLUE:
          ledContext.put("isBlue", true);
          break;
        case RED:
          ledContext.put("isRed", true);
          break;
        case WHITE:
          ledContext.put("isWhite", true);
          break;
        default:
          ledContext.put("isBlue", true);
      }
      return ledContext;
    }

  }

}
<html>
  <head>
    <meta http-equiv="Content-Type" content="text/html" charset="UTF-8">
    <title>Web UI Simple</title>
  </head>
  <body>
    <form action="/" method="post" id="form_id">
      <div id="settings_box">
        <h1>
          <label>LED Color</label>
        </h1>
        <p>
          <select id="color" name="color">
            <option value="blue" {{#isBlue}}selected{{/isBlue}}>Blue</option>
            <option value="red" {{#isRed}}selected{{/isRed}}>Red</option>
            <option value="white" {{#isWhite}}selected{{/isWhite}}>White</option>
          </select>
        </p>
      </div>
      <div id="submit_button_box">
        <button id="submit_button" type="submit" name="action" value="send">OK</button>
      </div>
    </form>
  </body>
</html>
Additional Information from Community
Tested with client mode.
Using port 8888 on assigned IP.
in build.gradle
implementation 'org.nanohttpd:nanohttpd-webserver:2.3.1'
implementation 'com.samskivert:jmustache:1.14'
works from desktop browser.
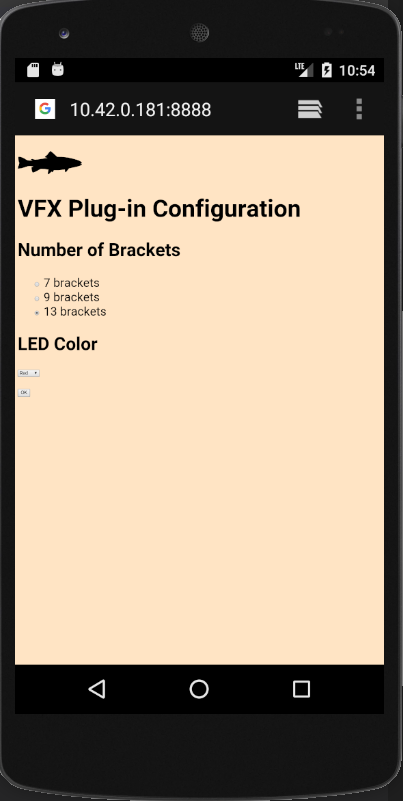
works from mobile.
Contribute to this Tutorial
We are in the process of making this tutorial more flexible so that the tutorial can be used with a wide variety of plug-ins.
The GitHub repo for the code is here:
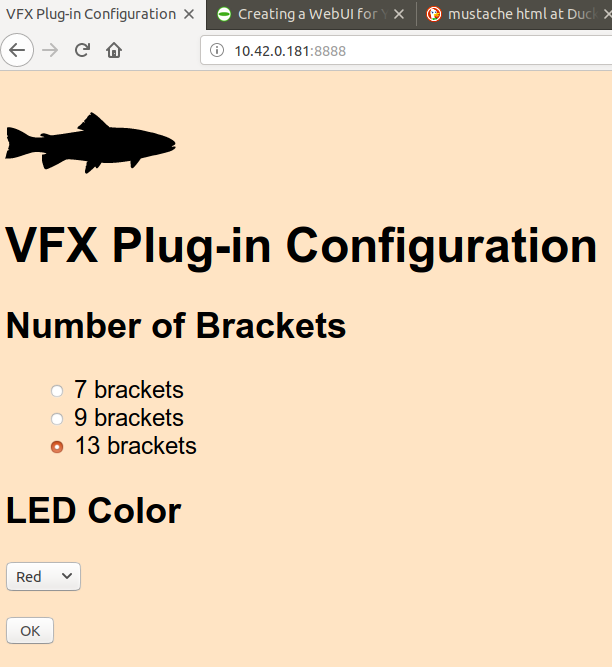
Status of internal tests
- modified web page with SVG embedded image
- added radio buttons on web page and can send data back to plug-in
- plug-in receives new parameter and saves it to persistent storage
- data received from web page controls camera function
- persistent storage of configuration survives plug-in on/off and also camera power off
If you know how to do any of the following, please post here.
| Issue | Description |
|---|---|
| official mobile app not sending correct URL for configuration | mobile app sets URL as 192.168.1.x/plugin It will work on 192.168.1.1:8888 |
| web directory structure unclear | do not know where to save images, external css files, or js files |
Development Workflow
On Linux, I’m able to use adb (the run button on Android Studio) and Wi-Fi over client mode at the same time. This means that I can leave the THETA connected with USB during the code editing process and then test the web server configuration using Ethernet from the same workstation. This technique will also work if your computer is connected to the router using Wi-Fi. In my setup, I make my Linux computer a Wi-Fi hotspot and connect the THETA to my Linux computer using Wi-Fi.
Documentation Needed
move to MarkDown in MkDocs format - Once we figure out how to modify the code to make it more flexible or at least document the code, we should move the document into MarkDown on GitHub to make it easier to collaborate. Anyone can create a /doc/ sub-directory on the existing repo and start organizing the MarkDown.
Template HTML Themes
- examples with external image, css, javascript, font
- UI flow improvements
Template Functionality
Task. Define template apps.
Image Settings
- exposure
- take picture
- shutter speed
- resolution
- stitching
Client Mode Configuration
- set access point
https://developers.theta360.com/en/docs/v2.1/api_reference/commands/camera._set_access_point.html - set username and password for digest authentication
https://developers.theta360.com/en/docs/v2.1/api_reference/options/_password.html
https://developers.theta360.com/en/docs/v2.1/api_reference/options/_username.html
Video
- bitrate encoding
- resolution
- length
- spatial audio or single channel
- lighting
Streaming
- resolution
- bitrate