RICOH THETA cameras can show a 360° live preview of a scene using the camera.getLivePreview API.
Most camera models support this API, including the SC2, Z1, V, and S.
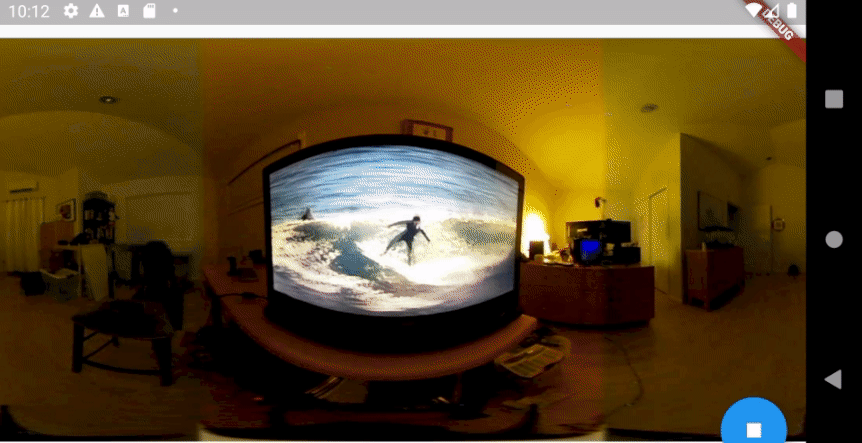
The example below shows the SC2 connected to an Android mobile phone with Wi-Fi.
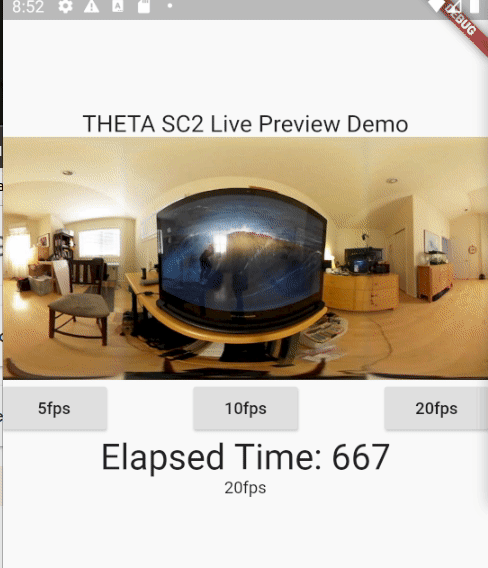
The example shows the SC2 on a tripod with the rear lens pointed at my laptop, which is playing a video to simulate an action scene in my office.
Steps to use RICOH THETA livePreview
- start motionJPEG stream
- inspect stream and identify start and stop of each frame
- process frame. One of:
- save frame to local storage
- display frame on mobile screen or desktop monitor
Equipment Used in this Tutorial
- RICOH THETA Z1 with firmware 2.00.1
- RICOH THETA SC2 with firmware 1.64
- Dart 2.14
- Dart http package 0.13.3 for SC2 examples
- Dart HttpClient from dart:io for Z1
I do not recommend you use Dart in production. I am using Dart for testing as it is easier for me to test the camera API on both iOS and Android as well as run tests locally on Windows, Linux, Mac, Raspberry Pi, Jetson Nano and other platforms. I expect that people developing production apps are using Kotlin and Swift and will implement the HTTP POST commands and data parsing examples in the best language for their project.
Accessing MotionJPEG Stream
The Dart implementation of http doesn’t work well with the Z1. The HttpClient implementation doesn’t work with the SC2 in my tests. If you can get it to work, please post.
| model | http package | dart:io HttpClient |
|---|---|---|
| Z1 | does not work. frame stops | works |
| SC2 | works | does not work. connection closes |
To keep this article short, I’ll focus in the Z1. However, the same tests will work with the SC2 using the http package, which I’ll cover in future articles.
Most MotionJPEG video streams for IP cameras assume that you are sending a GET request to the IP camera. This won’t work with the RICOH THETA. You need to send a POST command and then manage the response as a stream.
As we need to send a POST command to the camera, let’s test that first.
Test POST with Z1
The simplest POST command is state.
import 'dart:io';

void main() async {
  Uri apiUrl = Uri.parse('http://192.168.1.1/osc/state');
  var client = HttpClient();
  var request = await client.postUrl(apiUrl)
    ..headers.contentType = ContentType.json;
  var response = await request.close();
  response.listen((data) {
    print(data);
  });
}
The response is in bytes and displayed as a list of integers between 0 and 255.
dart .\test_1_basic_post_state.dart
[123, 34, 102, 105, 110, 103, 101, 114, 112, 114, 105, 110, 116, 34, 58, 34, 70, 73, 71, 95, 48, 48, 48, 54, 34, 44, 34, 115, 116, 97, 116, 101, 34, 58, 123, 34, 95, 97, 112, 105, 86, 101, 114, 115, 105, 111, 110, 34, 58, 50, 44, 34, 98, 97, 116, 116, 101, 114, 121, 76, 101, 118, 101
Convert Bytes to String
For humans to read the bytes, Dart has String.fromCharCodes
import 'dart:io';

void main() async {
  Uri apiUrl = Uri.parse('http://192.168.1.1/osc/state');

  var client = HttpClient();

  var request = await client.postUrl(apiUrl)
    ..headers.contentType = ContentType.json;
  var response = await request.close();
  response.listen((data) {
    // print(data);
    print(String.fromCharCodes(data));
  });
}
The response is now human-readable.
{"fingerprint":"FIG_0006","state":{"_apiVersion":2,"batteryLevel":1.0,"_batteryState":"charged","_cameraError":[],"_captureStatus":"idle","_capturedPictures":0,"_compositeShootingElapsedTime":0,"_function":"normal","_latestFileUrl":"",
Now that we’ve verified that we can send the camera a post command and listen for a response, let’s try a slightly more complex POST command with a body.
Test POST with body
The contents of the body starts as a Dart map. I then convert it to JSON for transmission to the camera.
import 'dart:convert';
import 'dart:io';

void main() async {
  Uri apiUrl = Uri.parse('http://192.168.1.1/osc/commands/execute');
  var client = HttpClient();
  Map<String, String> body = {'name': 'camera.takePicture'};
  var request = await client.postUrl(apiUrl)
    ..headers.contentType = ContentType("application", "json", charset: "utf-8")
    ..persistentConnection = true;
  request.headers.set('Connection', 'Keep-Alive');
  request.write(jsonEncode(body));
  var response = await request.close();
  print('status code: ${response.statusCode}');
  print(response.headers);
  response.listen((data) {
    print(String.fromCharCodes(data));
  });
}
This is the response.
content-type: application/json; charset=utf-8
connection: Keep-Alive
x-content-type-options: nosniff
content-length: 93

{"id":"1024","name":"camera.takePicture","progress":{"completion":0.00},"state":"inProgress"}
At this point, we can now send a POST request with body to the camera. We can also listen for the response as a stream.
Next, let’s test the livePreview data stream.
Acquire livePreview Stream
As we’re already set up to receive a stream of bytes, all we need to do is change the body to camera.getLivePreview.
import 'dart:convert';
import 'dart:io';

void main() async {
  Uri apiUrl = Uri.parse('http://192.168.1.1/osc/commands/execute');
  var client = HttpClient();
  Map<String, String> body = {'name': 'camera.getLivePreview'};
  var request = await client.postUrl(apiUrl)
    ..headers.contentType = ContentType("application", "json", charset: "utf-8")
    ..write(jsonEncode(body));
  var response = await request.close();
  response.listen((List<int> data) {
    print(data);
  });
}
We now have a stream of bytes that goes on forever. Press CTRL-C to stop the program.
...
, 49, 40, 162, 138, 162, 69, 237, 73, 75, 73, 64, 5, 20, 81, 64, 5, 20, 81, 64, 5, 20, 81, 64, 5, 20, 81, 64, 5, 20, 81, 64, 5, 20, 81, 64, 5, 45, 37, 45, 0, 37, 20, 81, 64, 5, 20, 81, 64, 5,
20, 81, 64, 5, 20, 81, 64, 5, 20, 81, 64, 5, 20, 81, 64, 5, 20^CTerminate batch job (Y/N)? y
Congratulations
You’ve just completed the first step in getting a motionJPEG stream from the RICOH THETA. Congratulations! In the next article, I’ll show you how to parse the stream to extract the frames. Each frame starts with 0xff 0xd8 and ends with 0xff 0xd9.